No matter how careful you drive, your disc brake rotors will eventually wear out. The pads usually go first, and you may be able to change your pads once without changing the disc rotors, but it is unlikely that you will be able to change the pads twice before the rotors are worn out.
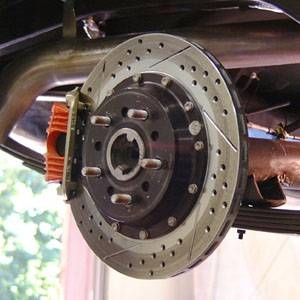
You can tell if they need replaced by running your finger over them. If you feel grooves in them that run all the way around the rotor, then the pads have been digging into them, and they will need to be replaced or turned --machined until they are smooth again.
Jack the car up, and place it on stands. Never work on a car supported only by a jack, since it could give out, possibly crushing you. If you are working on the front end of the car, set the emergency brake. If the rear end will be jacked up, leave the emergency brake off, since it could get in the way of removing the rotors. Always put the car either in park, for an automatic transmission, or first gear, for a manual transmission, before jacking it up.
Use a tire iron or a socket wrench to remove the lug nuts and slide the wheels off. Set them aside for the time being. Take a look at the braking system. The brake calipers will be right there, surrounding the rotor. Place a clamp around the caliper, and tighten it as far as it will go. The caliper is now compressed and is ready to be removed. You can take the clamp off for now, since the caliper is locked into the closed position.
On the back of the caliper will be two or more bolts, which you may have to feel for with your fingers to find. Use your socket wrench to remove them, and store them in a safe place. The caliper is now free to be removed. Slide it off, and set it on the floor, being careful not to disturb the brake line that will still be connected to it.
Examine the front of the brake rotor. You will see a single screw connecting it to the wheel hub. Using a screwdriver, remove the screw, and set it aside. Pull the brake rotor off, being careful not to drop it, since it is somewhat heavy. Slide the new rotor into place, and put the screw back in to hold it on.
Slide a brake caliper resetting tool into the caliper to free it once more and to calibrate it to where it needs to be. It can now be slid back over the brake rotor, and screwed into place using the bolts you removed earlier. Tighten them as far as they will go by hand. The rotors are now changed, and the wheels can be put back on. Screw the lug nuts on with the tire iron, turning them as far as you can, and lower the car to the ground using the jack.