Alternators produce electricity while your engine is running in order to charge your battery and the electrical equipment in your car. Modern alternators are capable of producing substantial current (amperes) when needed, but the voltage is regulated to around 12 volts. The voltage regulator adjusts a small field current that connects to your ignition system, battery and alternator rotor windings. The alternator field current is substantially lower than the current output the alternator produces while operating. For example, the alternator may produce 50 to 70 amperes during operation, but the field current may only be a couple of amperes. The best part of testing your alternator field current is you don’t need to turn on your engine.
Insert the key into your car’s ignition switch. Leave it in the “off” position”. You do not need to start your car’s engine to test the alternator field current.
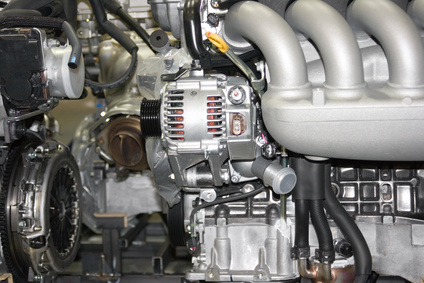
Open your car’s hood and secure it. You need to access the alternator to test the field current.
Test the alternator for magnetism. Use a metal screwdriver and place the metal end very near the bolt on the alternator pulley. It’s on the front of the alternator and the alternator belt goes round the pulley. The end of the screwdriver is not drawn towards the bolt as there isn’t any electrical magnetism.
Turn the ignition key to the “on” position, but do not start your car. The dashboard warning lights lights illuminate and the voltage regulator is activated.
Repeat the test using the screwdriver. Place the metal end of the screwdriver near to the nut on the alternator pulley. You find a strong magnetic force immediately pulls the screwdriver towards it, even if the screwdriver is a reasonable distance away, if there is alternator field current. This means the alternator is operating correctly. If the screwdriver isn’t pulled towards the nut on the pulley, your alternator or voltage may not be working correctly so complete the steps in Section 2.
Turn the ignition key back to the “off” position. Remove the plastic plug on the end of the wire harness that connects to the regulator on top or nearby the alternator. The plug has four colored wires: blue, red, brown and black.
Cut a 2-inch strip of thin wire using a knife. Wire used to connect speakers, or a low voltage light is suitable. Remove ¼ inch of the plastic coating off both ends of the wire strip using wire strippers. Insert one end of the wire strip into the connector slot of the red wire on the plastic plug. Insert the opposite end into the connector slot of the blue wire. You have bypassed the voltage regulator so you can test for field current.
Repeat the magnetism test as in Section 1. Turn the ignition key to the “on” position so the dashboard lights illuminate, but do not start your car’s engine. Place the metal end of the screwdriver near the nut on the alternator pulley. The magnetic force pulls the screwdriver to the nut, if the alternator is operating correctly and there’s a field current. If it doesn’t pull the screwdriver to the nut the alternator isn’t operating correctly so you need to get it checked professionally.
Check the wire harness using a voltmeter. Slide the prong on the end of the red wire from the voltmeter into the slot on the harness plug where the blue wire is attached. Slide the prong on the end of the black wire from the voltmeter into the slot where the brown wire is attached. The voltmeter reads between 3 to 12 volts, if the wiring is fine. If there’s no reading, get the harness checked professionally as it may be the reason there’s no field current when the harness is connected to the regulator.
Remove the strip of wire from the plug on the end of the harness. Turn off the ignition key. Replace the plug into the voltage regulator. Close the hood of your car.