Speedy Auto > Car Tech > 4x4 > Engine

Dodge 440 Engine Rebuild - 4Wheel & Off-Road Magazine

Dodge 440 Engine Rebuild - Mopar Muscle dodge 440 Engine Rebuild headers Photo 9370310

If big is good, then bigger is better. That's what we thought when we decided to rebuild our 440 Dodge block, instead of slapping in a 360 from a junkyard just to get down the road. While these big-block beasts haven't been produced since 1978, there are still plenty of them running strong in trucks, cars, motorhomes, and a few Jeeps. While a small-block swap would have been quicker and cheaper, it wouldn't have produced the torque and horsepower we needed, so a stock style rebuild was in order. Why stock? For our application it was simple; stock is simply the most reliable and durable way to go. We didn't need fancy high-rise manifolds and lumpy cams, and living in California we have this nasty problem with the emissions inspectors. They mandate stock or approved items on the engine to pass inspection, even though it may sniff dead clean at the tailpipe. We felt that 440 cubes of big-block power was more than enough, and knew that a slight rebore and a RV type of cam could help the engine breathe well enough to satisfy us-for now at least. Our engine had melted two pistons before we owned it, due to an overheating problem blamed on the radiator. Already taken apart and shoved into boxes, cans, and crates, the remains were left out in the rain to rot, which is why we got a good deal on the basket case.

With parts in hand, we went down to our friends at Coast Motor Supply in Canoga Park, California. Coast has been building engines for years, and specializes in fleets and companies that require reliable rebuilt engines. We discussed our project with the owner, Owen Carter, and came up with a plan to do all the machine work and show the process along the way. What we did was stick to the original design idea of the engine without too many hoorah parts for reliability. Upgrades are good, but sometimes compromise the end result. Here's what we came up with for a torque-devil 440 engine.

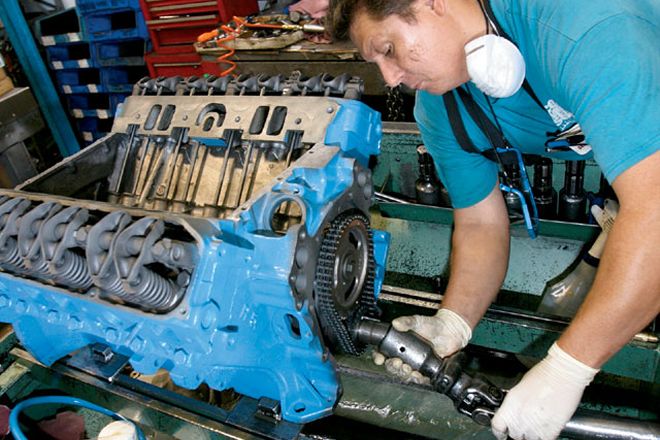
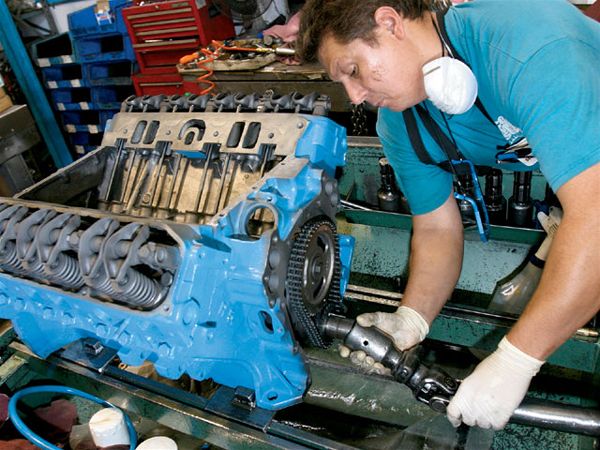
PhotosView Slideshow 1. As with any rebuild, the old engine needs to be torn down, with obvious faults such as broken cranks noted on the work order. Our 440 chrysler had been torn down years before and basket-cased (literally in baskets) so parts were missing, sketchy, and quite rusty. Coast motor supply strips the normal cores and keeps all the associated parts together when doing a rebuild. 2. Greasy blocks and heads with caked-on crap clean up better than new when put through the tumbler. This cleaning method is environmentally pleasant compared to the old caustic lye baths of yesteryear, and the new way makes for a sparkling starting point. 3. Important items like heads and blocks are Magnafluxed to check for cracks. Magnafluxing consists of an electromagnet and iron powder, which collects in cracks when the power is applied. This can save time and trouble on a rebuild and should always be done to ensure that your block is solid. 4. After they are checked for cracks, the heads are milled flat for perfect sealing on the block, which also gets a crew cut. Careful attention to intake and exhaust surfaces as well as the assembly angles ensures that the intake manifold fits the heads and block once they are all put together. A poor deck and mill job will leave gaps, which results in a leaking pile. 5. With the valve guides checked and replaced and spring seats attended to, the valve seats get the cutter. Standard three-angle valve cuts ensure the best flow for the gases to pass by, while providing optimum valve-sealing capability and heat transfer. 6. The original valves in many engines can be reused as we did with a simple face job and new guides. Coast Motor Supply inspects each valve to make sure they are well within spec before reusing them. New valve springs, retainers, and locks are used for reliability since those can be affected by heat very easily. PhotosView Slideshow 7. Not every machine shop has its own crank grinding machine, but Coast does enough volume to warrant it. Grinding your own cranks also allows for tighter tolerances and better quality control over the finished product. Our crank cleaned up at .010 on both the main journals and the rods journals. 8. Boring a 440 block is usually kept to 0.030 oversize on later manufacturer blocks, as the wall thickness can be a bit thin. We went 0.040 for a bit more displacement, while making sure there was plenty of meat in the walls. 9. Final honing is critical to a quality rebuild, while many other machine shops simply stop at boring the cylinders. The proper crosshatch pattern left by a good hone job is critical in seating the rings in the bore for a quick break-in and smoke-free performance. 10. All the rods get resized by a rod refinishing machine that makes the big end perfectly round and true. The caps are slightly milled, then bolted together and bored, and checked for perfect size. 11. The new hypereutectic 0.030 oversized Sealed Power pistons are pressed onto the rod with the pins. After a final cleaning the new rings get installed and laid aside for assembly in the block. 12. Once all the old parts are cleaned, checked, decked, and finished, the assembly can begin. The first parts back in are the cam bearings, pressed in with an installer. While it may seem primitive, this is the best way to seat the bearings firmly. The block and heads also get painted, and all freeze plugs and pipe plugs are sealed and installed. 13. Coast Motor Supply always checks and double-checks all of the parts, applications, and every spec before assembling an engine. One builder is assigned to each project, and their name goes on the final build. This creates the quality and craftsmanship from a proper engine rebuild. 14. Main bearings are carefully fitted into the block and caps. With the bearings dry, the reground crank is installed and checked with Plastigage to measure the clearance of the bearing shells. If something is wrong, this is where it will be found. If the specs are met, the bearings are lubed, the seals are installed and reassembled. 15. Proper torquing of the main bearing caps is critical to longevity. The bolts are clean and lightly lubed, and a three-stage torque sequence is used to tighten the bolts. Once tight, the crank is spun by hand to ensure the proper feel. Engine building is both an art and a science, and experience counts. PhotosView Slideshow 16. Lightly lubed bores allow the pistons to slide easily into place. The rod bolts are covered with a condom to prevent marring the crank, and a piston ring compressor squeezes the Sealed Power rings down into shape. 17. Proper Fel-Pro gaskets seal the head to the block and line up the cooling passages between the two. Using top quality components makes for a reliable, trouble-free rebuild, rather than discount-priced parts that may not fit right or last long. It's worth it in the long run to use quality components. 18. Lifters are coated in a break-in lube, and then slid into the bores in the valley. Pushrods slide home and are topped off by the rockers on the shaft with all the appropriate retainers. The timing chain, gears, and cover are also fitted onto the block. 19. Unlike most other rebuild shops, Coast Motor Supply has a run-in fixture for each engine. This machine pumps the assembly with oil, and then spins the crank to lube and break in the components. The engine is left running away on the fixture as oil is pumped through the block, and proper oil flow is noted. This is the critical time when pushrods can be bent or other problems arise. Using this fixture ensures proper lubrication before initial firing of the engine. 20. Coast can supply you with a turnkey engine, but in our case we decided to finish the assembly ourselves. We painted and installed our own tin as well as the intake manifold, and all the little ancillaries needed to make an engine run. 21. The final product may not look like a full-on race-ready power brute, but then again it will be far more reliable than such a build. Stock rebuilds with great attention to detail and proper machining can lead to a reliable and economical engine choice.

Not all 440s are created equal, and while all are good, some are better than others. For instance, early style engines come fitted with forged cranks and a host of other important items aimed at the race crowd. However, for most 4x4 and towing uses these upgrades and improvements aren't critical, but if you have a choice at the same price then go for the good stuff. Here's a few numbers we pulled to show what means what.

PhotosView Slideshow The stamped pad numbers tell a strange story on this block. Located on the left front top of the block, these stamped numbers "9 T 440 E" indicate that this is a 1979 440 with a cast crank. 9T is 1979 (even though it was produced in 1978, it wasn't built or installed until 1979 in an '80 model year motorhome chassis), while the 440 is displacement. The E indicates a cast crank, the only style available at that time. The cast numbers on a block tell you many things. This 4006630-440-4 tells you the block is a 440 from '78, as the date code above it shows as well. The first 440s were built in 1966, and the last came about in 1978, even though they weren't being used in passenger cars. The crankshaft damper on our engine is clearly marked "use with 440 cast crank only," which is what we have on this engine. Even the torque converters are different for the two and must not be interchanged.