
 Fred Williams
Brand Manager, Petersen’s 4Wheel & Off Road
Fred Williams
Brand Manager, Petersen’s 4Wheel & Off Road
Some of you recall when suspension links swept the off-road scene. For the longest time leaf springs were king, and then all of a sudden the link suspension technology seemed to pop up everywhere. Before you knew it, leaf springs were old news and you had to have a link suspension to even consider going off-road. Ok, that’s not true. You can go wheeling with leaf springs—in fact, leaf springs work quite well— but a link suspension has such a high-tech look and offers such a great ability to fine-tune your suspension performance that it really is a step above most leaf suspensions.
Nowadays link suspensions are old news. Lots of garage built wheelers have them, and the art of suspension geometry has really grown and been fine-tuned by many. This isn’t a tech piece about that geometry, but rather the hardware. This is just about the parts to make a good link. What type of material do you want to use? What’s the difference between Heim, flex, and Johnny joints? What’s the best way to assemble everything? Thankfully there is nothing set in stone here—there are lots of right ways to do stuff and a few wrong ways to steer clear of, but that should allow you to develop your own best solution.

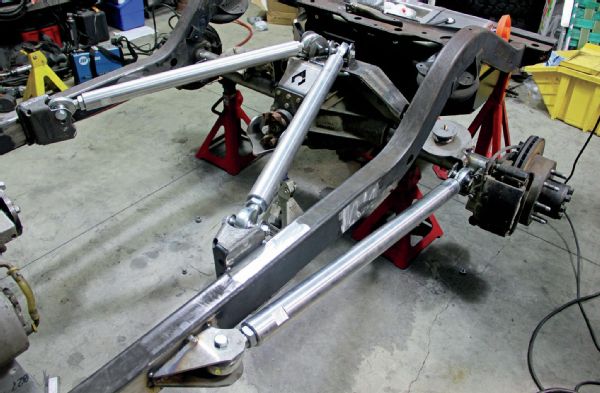
There are many styles of links in a linked suspension, but for this article we’ll concentrate on the basic four-link with two lowers and two uppers, and the three-link with two lowers and one upper. Sometimes the two uppers are triangulated; other times the links are all parallel and a track bar is added to control the lateral movement of the axle. The lower links on a 4x4 need to be the strongest links since they will see the most abuse when smashed into and drug over rock obstacles. Lower links see three forces: the compression and the tension of the axle trying to rotate and a bending force should they land on or hit a trail obstacle. Upper links usually only see compression and tension forces as they keep the axle from rotating. For this reason, upper links can be made of thinner material than lower links, but we would recommend not going thinner than wall tubing of 0.120 inch (1⁄8 inch) on the uppers. Lower links are often found in 2x0.25-wall (1⁄4 inch) and maybe thicker wall if the rig is heavier and abused on rocks.
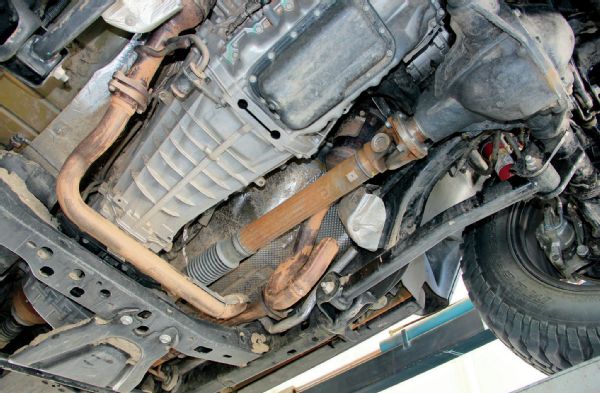
Factory suspension links are pretty basic and boring: a tube link with no adjustment, and a big pressed bushing in the ends. These are great for a road-going 4x4 and work OK for off-road flexing, but as we lift or modify our vehicles these single length links can be too short, or too weak for bashing into rocks.
Most suspension links are made out of steel tubing, and for this we recommend DOM steel tubing, usually round tubing, but we have seen some square tube links. DOM (drawn over mandrel) steel tubing is a forming method that works the material and makes it stronger than standard non-DOM welded seam steel tubing. Remember that your lower links will see the most abuse while your upper links are less likely to get rock rash, so they can be lighter.
Wide Open Design (WOD) offers massive solid 7075-T6 aluminum suspension links made to order in size from 11⁄2 to 21⁄2inches in diameter. These are touted as a memory material because they want to spring back into a straight line should they hit an obstacle. When coupled with 11⁄4-inch shank FK rod ends, these are some very strong suspension links. WOD starts with the solid stock and then cuts them to length and drills and taps the ends for your chosen rod-end shank thread size.
One of the best options for suspension links is heat-treated chromoly because it is very resilient to bending and much tougher against abuse than untreated chromoly or mild steel. Links that are heat-treated start as chromoly tubing and are either threaded or have chromoly bungs welded in the ends before being sent to a special facility where they are hardened. Not many companies offer heat-treated suspension links, but Shaffer’s Offroad will make them for you (expect the price to be higher than a standard mild steel link).
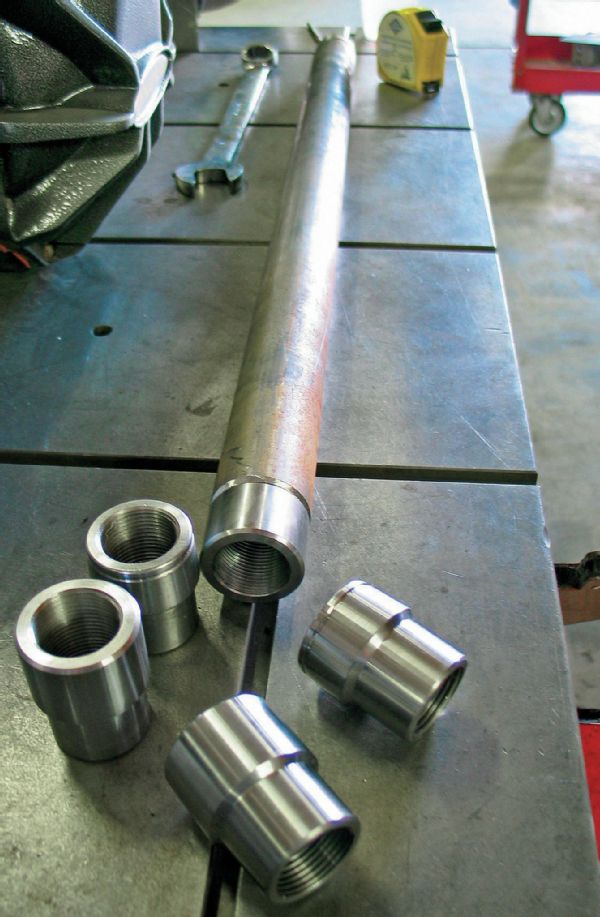
The threads in the ends of the suspension links are either cut right into the tube or come in a bung that is welded into the link end. When welding in the bungs, take care that you don’t get the bung so hot that you distort the threads inside. Threading the tube itself can require a very large tap and is better done on a lathe. If you want either end of the link to be opposite threads, you will either need to buy two taps, or two different bungs (a left hand and a right hand).

There are two schools of thought on threads on the ends of a link suspension. Some folks say you want both ends threaded the same way, usually both right-hand thread, as that is the most common (right-hand threads are the same as a normal bolt: righty tighty, lefty loosey). This argument is based on the fact that if your jam nuts should come loose the link will not lengthen or shorten and is effectively locked at a length. However, if you want to adjust the length of the link you need to pull one end from its mount on either the frame or axle.
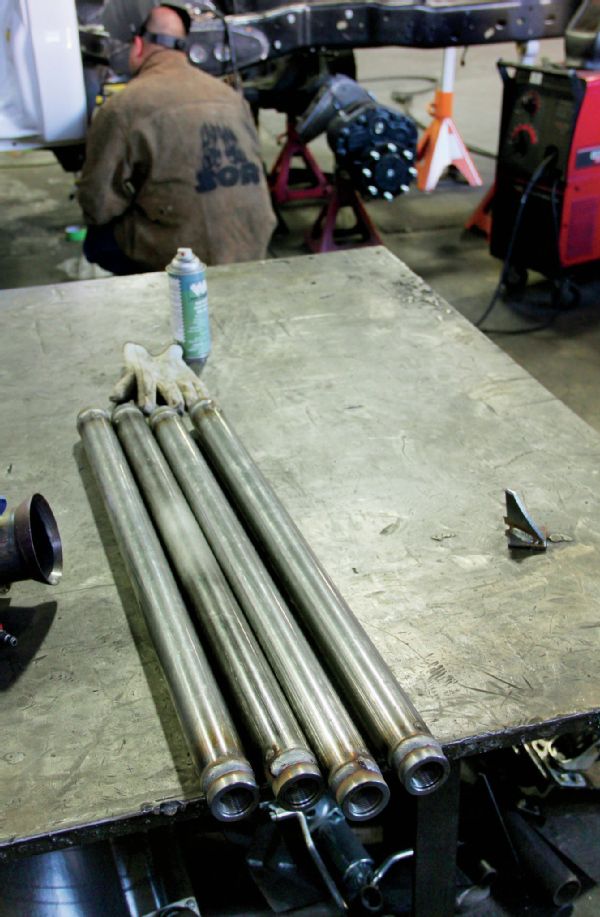
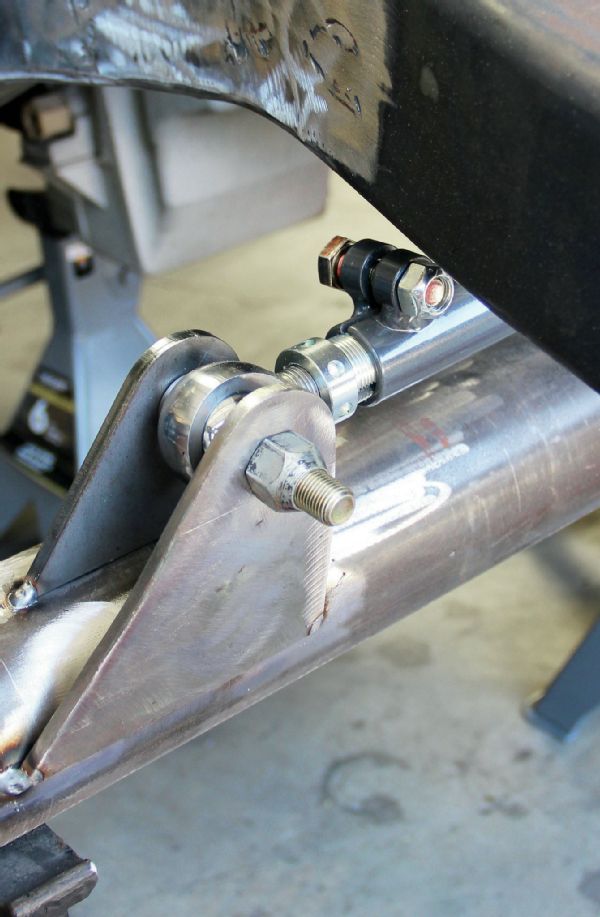
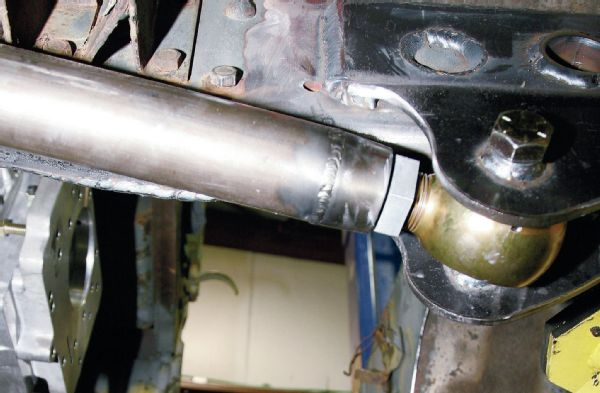
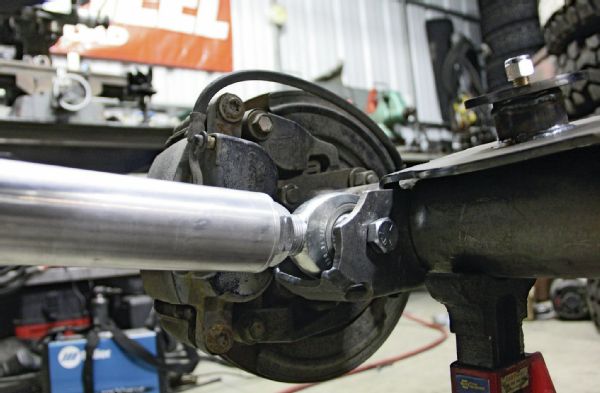
When you run a link with left- and right-hand threads you can easily adjust the link length right on the vehicle because it will screw in or out of both ends at the same time. Just loosen the jam nuts and turn the link. However, if the jam nuts should work loose (as can happen when you bash them against rocks) the link can start to walk longer or shorter, and this is bad. It can throw your suspension out of alignment and bind shocks and driveshafts if not caught. The rule of thumb for any direction thread is to keep those jam nuts tight. Note the small groove in the end of the link (arrow). This designates the end as left-hand thread, and most weld-in bungs also have this warning groove cut in them as a reminder for easier use.
The flat spot on some links is so you can use a large wrench to turn the link and adjust it on the vehicle. You can also hold the link from turning while tightening down your jam nuts.
Another option for ease of link adjustability is a Synergy Double Adjuster Sleeve. This small threaded sleeve goes inside the link, and the rod end screws into it. When the clamping bolts are loosened the length of the entire link can be adjusted by turning just one large threaded adjuster sleeve.
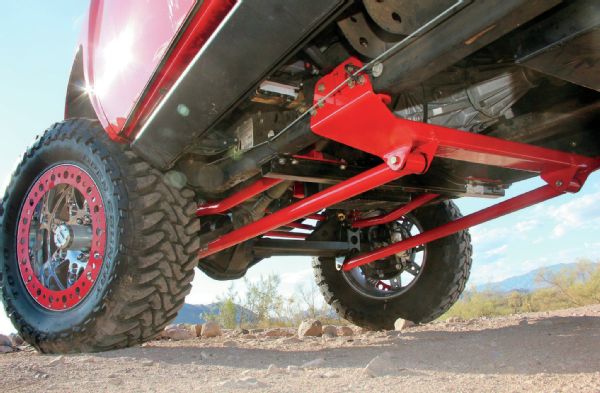
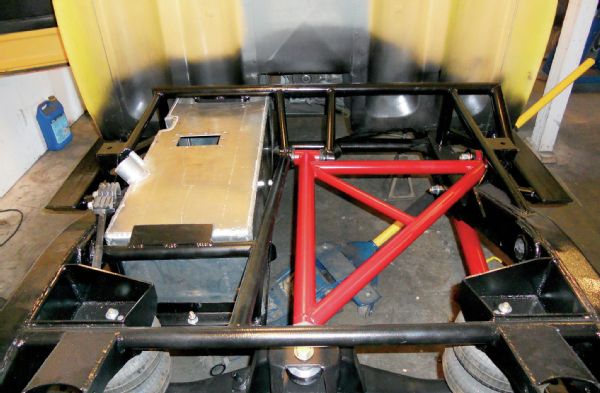
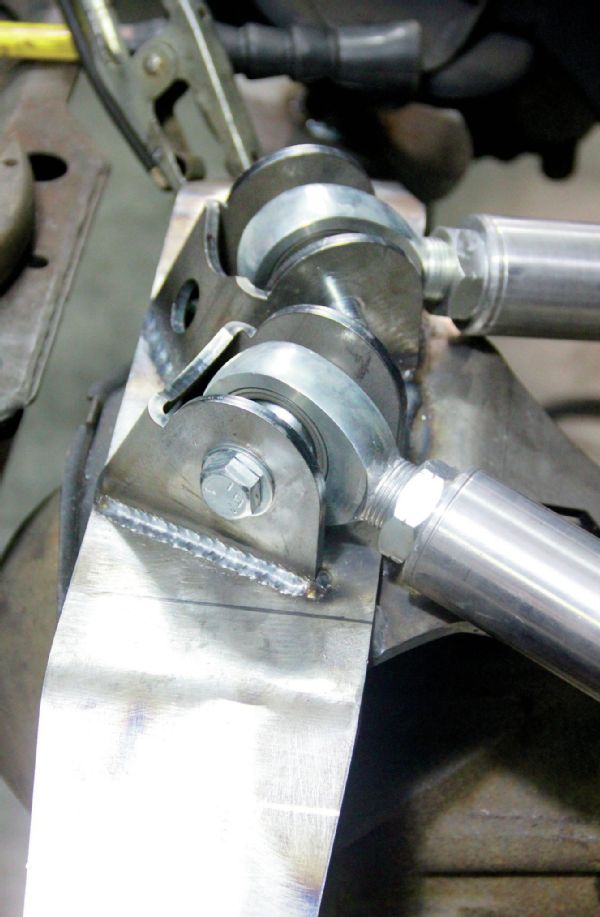
Not every suspension link needs a high-dollar Heim or rod end at the mounting ends. These lower links on a truck built by Randy Ellis Design use bushings at the ends for simplicity and because the suspension geometry has been set up such that the axle doesn’t need super-flexy joints. You can find plenty of bushing options at Daystar and Energy Suspension. Note how the upper links have a slight bend in them to clear the framerail at full compression.
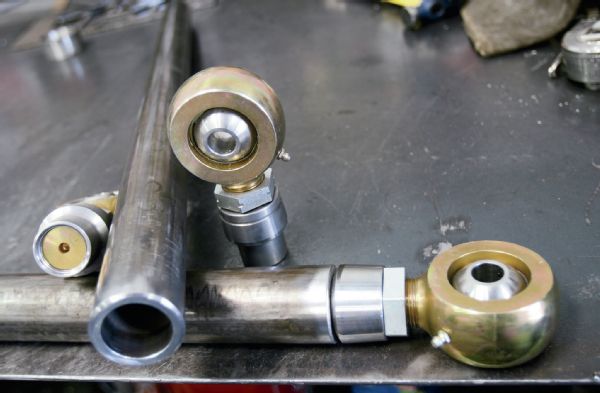
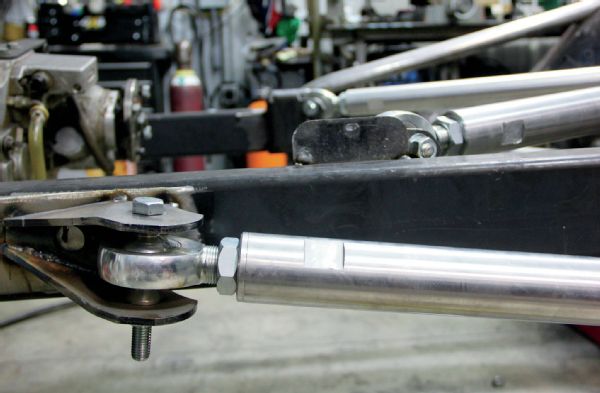
The flexible joint at the end of your link can come in many different styles and sizes (and prices). Heim joints, or spherical rod ends, are the top tier of joints. We have used many different brands of Heim joints, from FK to QA1 to EMF. The rod ends thread into the end of link. The rod ends are the part of the link that allows the axle to twist and not bind. Most of the time you will want to add high misalignment spacers to the rod ends so that the suspension can twist. Some are designed for abusive environments such as racing but need replaced when many miles of off-road use make them loose.
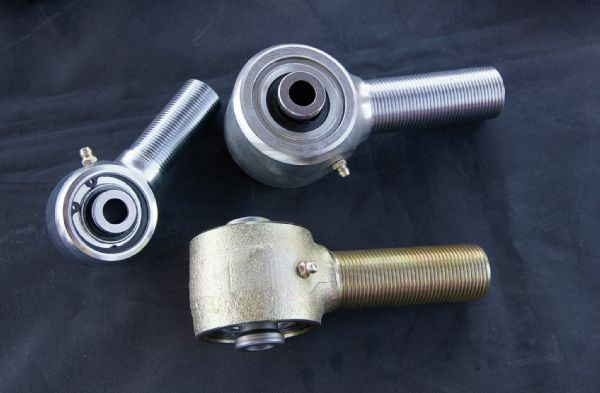
Another common link end is a Johnny joint, or flex joint. There are a lot of different versions of this joint but most involve a polyurethane liner, with an inner ball and a steel outer body. As an added benefit, Johnny joints are rebuildable after years of use. Currie originated this design and still offers a variety of sizes and material grades, from forged to billet machined versions. Many suspension companies offer a similar design in their lift kits, such as BDS Suspension’s flex joint. These types of joints are perfect for a street-driven trail rig that needs some noise damping between the axle and the frame.
Jam nuts are just one way of keeping your suspension links tight. Jam nuts are threaded onto the threaded shank of your suspension joint before it is screwed into your link. Once the joint is set to length you spin the jam nut up to the end of the link and jam it tight. This keeps the threads from working loose.
It is important that you show as little thread of your rod end shank as possible. At the very least you want the same amount of threads inside the link as the diameter of the rod end shank, but in most cases you want most of the threads inside. This means proper measuring of your links before so you don’t need as much adjustment. In a perfect world you’ll have just one thread showing and then jam the nut up against the link end with the majority of threads in the link.