Easy 07-09 JK Lift - Home Schooled - Jp Magazine

Easy '07-'09 Jeep Wrangler JK Lift - Home Schooled John Cappa Former Editor, Four Wheeler easy 07 To 09 Jk Lift disassembly Photo 11752184 
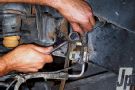
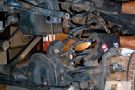
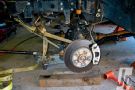
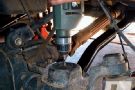
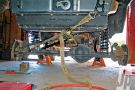
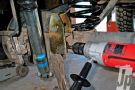
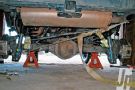
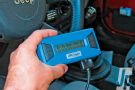
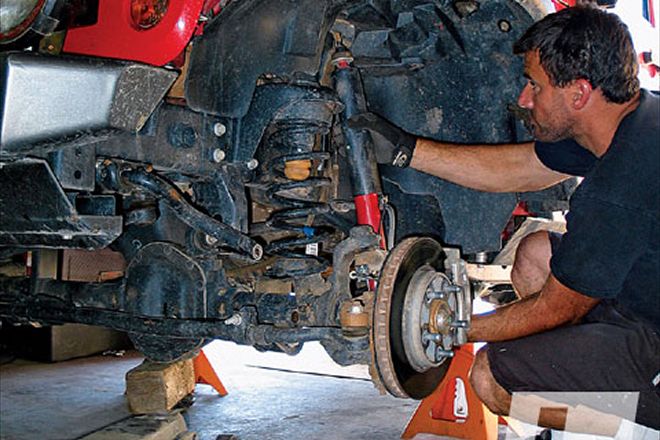
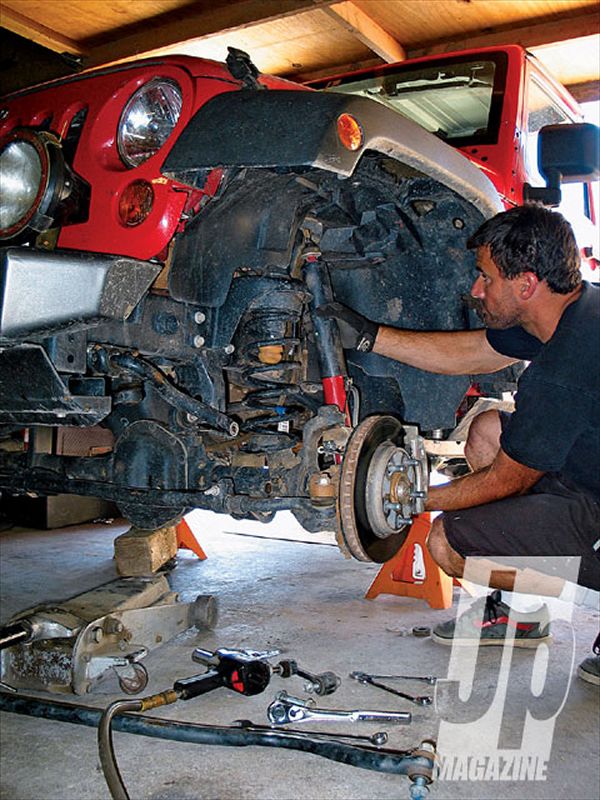
Dust off all your odd-ball metric wrenches and sockets. The JK has lots of 19mm, 18mm, and 16mm suspension hardware. With the Jeep's frame safely sitting on jackstands you can begin disassembly. Loosen all suspension link and track bar hardware as well.

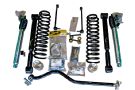
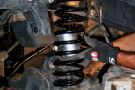
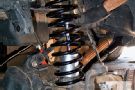
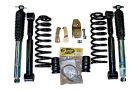
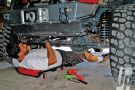
Thanks to larger wheelwells and better suspension geometry, it's not difficult to fit up to 35-inch tires on your '07-'09 Wrangler. The needed 3 inches of lift can be installed in a weekend by one person in a garage or driveway with common handtools, and even quicker if you have a competent helper that isn't too busy drinking all of your beer. Based on its simplicity and performance we selected the Black Diamond 3-inch lift with optional lower control arms and mono-tube shocks. This relatively inexpensive kit provides equal or better performance than many kits that cost several times as much. Very detailed instructions are included with the lift kit, so here are some of our tips and tricks to make your install go smoother.

PhotosView Slideshow We like to start with the front since there are typically more components that need attention. Read through the instructions ahead of time, then layout and familiarize yourself with the parts. Pre-assemble and grease the bushings and install all zerk fittings. The optional front lower control arms should be adjusted to 23 1/4 inches. To create some slack to allow for full suspension droop with the new lift you'll need to weasel about 1 inch of the ABS line through each of the knuckle grommets. We also installed the brake line extensions to keep them from being overextended during the lift install. Use a floor jack to support the axle. Once the shocks and sway bar links are removed you can twist out the front coils from their mounts and pull them forward from the bottom. If you are installing the optional lower control arms you'll need to nip off a small bit of material from the arm mounts on the axle. This can be done with an angle grinder, die grinder, or even a file. Not much material is removed. We used a ratchet strap connected to the front bumper to help locate the axle forward while installing the Rock Runner lower control arms. It's easiest if you install the frame end first. Do not tighten the hardware just yet. Mark the centers of the front coil seats and drill them with a 17/64 inch bit. Then thread them with the included self-tapping bolts. It makes final assembly much easier. Load the aluminum bumpstop extensions into the coils. Hold them up and out of the way while you install the coils into the buckets top first. Now you can install and tighten the self-tapping bolts, securing the bumpstop extensions to the coil spring seats. Adjust the front track bar so that the centers of the mounting holes are 327/8 inches apart. Once again, the ratchet strap came in handy to locate the axle for the installation of the track bar. With the front end complete we slapped on the new 35x12.50R17 BFG Mud Terrain KM2 tires mounted on American Expedition Vehicles (AEV) 17X8.5 argent finish Pintler beadlocks. These AEV wheels are JK Wrangler specific and feature 4.7 inches of backspacing for proper tire clearance. Just like the front end, we assembled and laid out the rear suspension components ahead of time. The rear control arms are adjusted to 197/8 inches prior to installation. The rear of the Jeep is supported under the frame with jackstands and the floorjack is used to locate and support the axle before disassembly. Don't forget to loosen all suspension links and track bar hardware. You'll need to work some slack into the rear ABS lines and install the rear brake line extensions. The included new sway bar extensions are installed here in the rear, and the original rear sway bar links are reused on the front end. New bumpstops, coils, shocks, and optional control arms replace the factory units. Leave the suspension hardware loose. It will be tightened later once the Jeep is sitting on its tires. The factory track bar mount needs to be drilled for an additional bolt. Locate the bracket with the original track bar mounting bolt and use a clamp or vise grips to hold the bracket in place before removing the bolt and drilling the 1/2-inch hole. We once again used a large ratchet strap to pull the axle into place so the factory track bar could be re-installed in the new bracket. Don't fully tighten the track bar hardware just yet. Now, with the Jeep sitting on its tires you can tighten all of the suspension link and track bar hardware to the proper specification. All lower link bolts, rear upper link bolts, and track bar bolts should be tightened to 130 lb-ft. The smaller front suspension upper arm bolts should be tightened to 80 lb-ft. The e-brake cables need a little rerouting to keep them from binding at full droop. We added a small clamp on the passenger side cable to keep it from damaging an axle sensor that's mounted close by. With the lift all done we plugged in an Explorer Pro Comp Accu Pro electronic calibration tool. It only takes a minute or two and the unit allows you to reprogram the Jeep computer for tire size and gear ratio changes. It can also clear diagnostic trouble codes.

How's It Work?
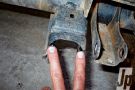
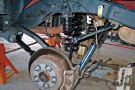
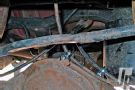
In the beginning we were extremely reluctant to change the awesome original suspension of our Wrangler. Overall, we've been really happy with the soft controlled ride of the 3-inch Black Diamond lift kit and Superide Select monotube shocks by Bilstein. The kit clears the 35-inch tires easily and performs well at high and low speeds. At full articulation we do have some slight rubbing on the pinch seams just in front of the rear tires. But it's nothing a small bit of trimming can't cure. On the road there is zero drivetrain vibration, zero bumpsteer, and the ESP stability control system still works flawlessly with the lift and bigger tires. No alignment was required; however we needed to adjust the drag link to center the steering wheel. For us, the factory 4.10 gears and 35-inch tire combo works out pretty well with the manual transmission. The engine revs less at high speeds now and we can pull most grades in Fifth gear. Sixth has become kind of a deep overdrive. Only occasionally do we need to drop to Fourth gear on grades with strong headwinds. At this point we have no plans to swap out the ring and pinions for more seat of the pants power. It's just not really needed. The lift and tires did hurt fuel mileage, though. The added wind and rolling resistance has caused our fuel economy to drop a little more than 1 mpg. We've gone from an on- and off-road average of 15.9 mpg stock, to 14.6 mpg with the lift and tires. If fuel economy becomes more of a concern in the future we may consider dropping the Jeep an inch and swap to some 33-34-ish sized tires. But driving less aggressively would make a bigger difference in fuel economy.