You say you want your pre runner to handle the bumps better, so you’re looking at a set of big name shocks. That’s all well and good, but know that you’ll still have to put in some tuning time to get them to work well for your application. Most good shock manufactures will get your basic information such as what truck you have, what suspension system you have and how you will be driving, and build you a shock to those specs and their experience. They’ll get you close, but they’re not magicians. You’ll need to do some work yourself to get the most out of them.
In this piece, we’ll try to give you as much information as possible on how shocks work, what they can do and how they do it. But first, some shock history.
We’re pretty sure that the evolution of off-road shocks started the day after the first person tried to go fast off-road in their stock pickup. It was probably quickly apparent that the OE shocks were not up to the challenge of harsh off-road abuse.
The invention of gas charged shocks, with a separator piston to keep the oil and gas separate, was a revolution. The nitrogen-infused Bilstein mono-tube shock was one of the only “off-road” shocks to be had in those early days and nearly everybody ran them. The main benefit of a gas charged shock is that they help prevent cavitation and foaming of the oil in the shock, which creates a loss of dampening called fade. These new shocks allowed off-road vehicles to travel faster for a longer period of time, and provided the driver with a better ride quality and the confidence needed to charge into the most challenging and desolate terrain imaginable.
On the most basic level, off-road vehicles today still use this basic shock platform and nearly every off road vehicle is plagued with the same question that arose on day one; how long and how fast can you travel before you start to experience the inevitable “Shock Fade”.
There have been many solutions to combat fade. The first was multiple shocks. With frame technology advancing and speeds increasing, racers started adding multiple nitrogen shocks to each corner of the vehicle to help dampen the rough terrain. The thought was 2-3 “softer” shocks were better than one hard one. Shocks also just got larger. This increase in size enabled two things to happen, one is that there was more fluid inside them so fade became less of a problem, and two they were able to have more stroke which translated into more travel.
Which was a good start, as with the progression of off-road racing from desert to short course, the bumps and jumps got bigger. So as the vehicles got faster and heavier, and suspension design evolved and wheel travel increased, the question of how well the shock worked in various situations came forward. One size did not fit all.
Another shock evolution was needed and we now have externally adjustable shocks (clickers) to change the dampening nearly on the fly. Known as bypass adjusters, these clickers control the flow of oil that “bypass” the shock piston. Most manufactures indicate compression bypass adjusters with blue and rebound bypass adjusters with red anodizing.
Then there are coil over shocks, which as the term implies, places the spring over the shock. This does two things; one it reduces weight and two, allowed for increased wheel travel via suspension design that stand-alone coils couldn’t match. Position Sensitive shocks, more commonly known as Bypass Shocks, actively change the dampening at different points in the suspension travel, thus adding dampening as the stroke increases. And a recent innovation, secondary dampers or active bump stops, aid in ride quality and durability of suspension components.
And all of these options mentioned are available in different diameters and stroke lengths to accommodate just about every suspension design imaginable. Which is part of the problem when it comes time to “tune” your shocks: they’re may be too many options unless you have a handle on what’s going on inside those shocks.
So let’s first take a look at what these new shocks do and how they do it.
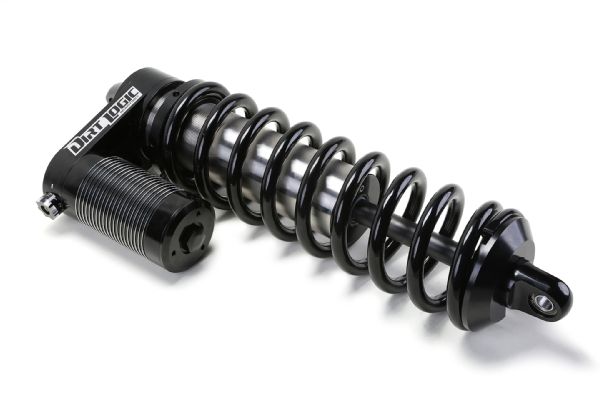
The first shock we will look at is a coil-over application. They can be used as the main suspension component for pre runners, especially up front, though many serious off-road race vehicles will use this style of shock in conjunction with a bypass shock. Coil Over Shock – Is a damper shrouded by a coil spring (though it can have one or more springs). The coil over shock is typically a Nitrogen gas charged mono tube shock. Most performance coil over shocks have an external-reservoir to increase oil volume. Coil over shocks can be fine tuned to most applications by changing the shim stack on the piston. Coil overs come in many different diameters and lengths, though the most common sizes are 2.0 to 3.0-inches in diameter, with a 6 to 18-inch stroke.
When the diameter of the shock is increased, the diameter of the shock piston is increased as well, which can increase the amount of effective dampening available from that shock. When working with larger or heavier vehicles, it is important to pick the proper size shock to accommodate the amount of dampening needed.
Bypass Shocks - This type of shock is designed to be a position sensitive, which means it has multiple damping zones in one shock. Depending on the bypass tube configuration, it can have as little as 1 or up to 8 different damping zones. With the availability of these damping zones, you can make finite adjustments and “tune” the shock and/or chassis to the specific terrain you are driving on. The premise of the Bypass Shock is exactly what it sounds like; the bypass tubes allow oil to flow around the shock piston. Having multiple tubes at different heights on the shock body will give you multiple dampening zones for Compression and Rebound. Once the shock piston passes one bypass tube, the dampening then changes to the next effective bypass tube.
The bypass tube adjusters determine the amount of oil that passes through the shim stack on the piston. The bypass adjusters offer adjustments from free flow (No dampening) to zero flow through the bypass tube (All oil must pass through shim stack) as the shock is compressed or extended. You can adjust Compression and Rebound externally on the bypass shock. The compression tubes are usually indicated with blue anodized components and the rebound circuits are anodized in red.
Bypass shocks are available in diameters from 2.0 to 4.5-inches depending on manufacture, and stroke lengths range from 6 to 20+ -inches. When the bypass shocks are used in conjunction with a coil over, it can increase the shocks longevity by spreading the damping force needed to control the vehicle between the coil over shock and bypass shock. This keeps heat buildup to a minimum in each shock, which means less fade. And just like the coil over, the shim stack in the bypass shock can be configured for different applications.
The next piece to the puzzle is the bump stop. While they may have been a solid rubber afterthought in the past, today’s active bump stops are an important suspension component in their own right. Sure, bump stops help prevent suspension damage, but they can also be used as a secondary shock. There are many different bump stops available, everything from simple Urethane bottom out bumpers to trick hydraulic air shocks.
Most high-end off-road vehicles are equipped with the Hydraulic Air Shocks. Available in 2 to 2.5-inch diameters and stroke lengths in 2 to 4-inches, these hydraulic bump stops are very effective in slowing the suspension down in the last few inches of wheel travel to prevent a hard bottoming out. Hydraulic bump stops are fully tunable, and have a large diameter shaft to create spring rate by compressing the air volume in the bump stop housing. The air pressure can be adjusted to effectively change the spring rate when being compressed. Hydraulic bump stops have a shim stacks and pistons, just like regular shocks, and thus can be tuned for different compression and rebound rates.
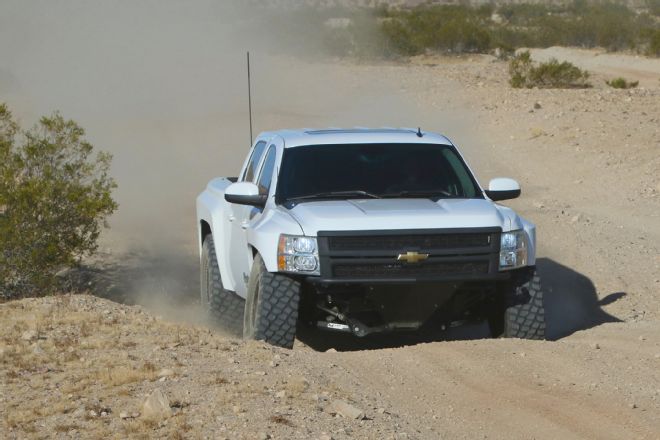
Now that we have covered the basic shock components, we can talk about what it means to tune them. Each vehicle and off-road discipline has its own characteristics that tuners aim for. For instance, a daily-driven pre runner is going to require different characteristics than a Trophy Truck just as a Trophy Truck is going to be different than an Ultra4 rig. Since most of us have pre runners, we will talk about tuning the vehicles we have, not the vehicles we wish we had (like a Trophy Truck or an Ultra4 rig).
The pre runner is one of the harder vehicles to set up because it is usually our daily driver. It has to be comfortable to drink our coffee on the way to work, to pick up groceries or drop off the kids at school, yet still be able to pre run a racecourse or just to hit the trails hard on the weekend.
For a daily driver, we are going to be more concerned with our Low Speed Compression and Low Speed Rebound. The average pre runner has 14-inches of usable travel in the front and 15-inches in the rear. When driving around on the streets you may be surprised know that most vehicles only use about 3-inches of that travel.
Typically, most of us will be using our truck for 90% on-road and 10% off-road. That means that the “daily driver” setup is really a bit of a compromise with most of us wanting it to be on the side of soft around town and harder when we go off-road. Understanding what the vehicle is doing is half the battle so here is some of the terminology to help you decipher what your vehicle is telling you.
Compression - Is the upward movement of the suspension towards the chassis, or the direction the suspension/ shock travels in relation to the impact of the bump or obstacle the vehicle has traveled over. Compression is a variable depending on vehicle speed and size of object the vehicle has traveled over.
Rebound - Is the downward direction the suspension travels after the compression stroke, or the direction the suspension extends/ travels away from the chassis. Rebound is constant force determined by the stored energy of the suspension components at full compression / bump. If the rebound is too fast, it can push the vehicle up into the air, commonly called bucking.
Full Bump - Is the suspension fully compressed towards the chassis, It’s also known as “Bottoming out”
Full Droop - Is when the suspension is fully extended away from the chassis.
Low Speed Compression - Is the compression force commonly associated with body roll and brake dive. Low speed impacts are smooth and gradual compression movement.
High Speed Compression - Is the compression force commonly associate with hitting a sharp edge like a pothole, rain rut, rock or any other object that causes the suspension to compress quickly. High-speed impacts are sharp / fast compression impacts.
Low Speed Rebound - Is the rebound force associated with body roll and acceleration, weight-transfer either front to back, or cornering forces left to right. It’s a smooth or gradual movement.
High Speed Rebound - Is the rebound force associated with how quick the suspension can extend to absorb the next impact. And is commonly associated with bucking.
Body Roll - Is the movement of the chassis under cornering left to right motion.
Dive - Is the force on the front of a vehicle while braking or slowing down.
Squat - Is the compression force on the rear of a 2wd or 4wd vehicle under acceleration.
Shock Stroke - Is the distance the shock can compress and or extend.
Wheel Travel - Is the overall amount the wheel and tire can move from Full Bump to Full Droop. Wheel travel is different from Shock Stroke. (Typically shocks are mounted inboard and on an angle, which creates a motion ratio. Shock stroke x motion ratio = Total Wheel Travel)
With those basic terms under you belt, it is time to drive you vehicle and try to connect the term to the feel in the seat of your vehicle. There are a few more things to pay attention to while driving your truck. Being able to differentiate the front and the rear suspension while driving can be challenging. If your suspension is way off it can be easy, but the closer and better it gets, the harder it can be to tell if it is the front or rear giving you the negative feedback.
You can sometimes separate the front from the rear this way, if you feel it in the floor boards it is likely the front suspension, if you feel it in the back rest/bottom of your seat, it is probably the rear suspension. Also getting into the passenger seat and having someone drive your truck can give you a different perspective of how well your vehicle is actually working.
Simple things like tuning with a full tank of gas vs an empty tank can make a big difference or changing tire pressures can make the difference of your truck bucking and not. Using video cameras is a great way to record the vehicle in rough terrain to see if you are near bottoming out, or if your rebound is so slow that the tires are not dropping out after hitting a bump. Having someone film you as you go through the whoops or sticking some GoPros beneath your truck and aiming them at the shocks can be a huge help in deciding the next move when tuning your suspension.
Again, take notes on EVERY change you make! We know that we sound redundant, but when you have made 3-4 changes and it was better before you started messing with it, by having the “before” numbers you can put it back to where you started and try again.
First, determine and write down your current settings so you can have some sort of baseline to put them back to if things get confusing. And they will. Find an area that you can test your truck on, somewhere with small to large bumps or whoops and slowly increase your speed until you are comfortable with the ride. Being consistent with line choice and speed is key. You want to be able to replicate your test run time after time to see if the changes you are making are helping or hindering.
If you have bypass shocks, turn the compression all the way in and drive the truck. Then open the adjusters all they way out to soften the suspension just to feel the difference. Do the same exercise with the rebound circuits. This will give you a chance to feel the difference of the compression when it’s too stiff and too soft and with the rebound too slow/fast. It will help with future changes to the suspension knowing the difference in the sensations.
For coil overs, determine which spring weight is currently in-place and how much pre-load is on that spring. There are several online spring rate calculators that calculate the proper rate needed for a given vehicle and having the proper spring rate for the vehicle is a large portion of the puzzle. It is most critical in the daily driver, as most stock trucks will run a single coil spring per side in the front and leaf springs in the rear.
While many companies make some fine coil springs, one limiting factor is the availability of “performance” leaf springs. While the production leafs are pretty good nowadays, it’s always preferable to have a custom set built to accommodate ride height options, spring rate and the weight of the specific vehicle. Deaver is a good choice as they have a lot of knowledge and have been doing leaf springs forever.
Once the correct vehicle spring rate and ride height has been set, it’s a matter of making slow corrections on the clickers, preferably one click at a time, and then going back out. As stated, we all want to have a comfortable ride on the street and still have enough damping when in the dirt to prevent the truck from bottoming out, but it takes time and patience to get your truck to work well everywhere you drive. Only change one click at a time and then note where they are, and go back out on the street or whoops to see if that change helped or hurt.
So, say you hit the trail and have adjusted what clickers you have everyway they can be, but it just doesn’t react the way you want it too. You may have to go inside the shocks and change the shim stack to get what you need. Taking a shock apart and making changes to the shim stack may seem like a huge endeavor, but it’s really not that bad, and may be the only way you’ll get the ride your looking for. A good tuner will work with you on how you drive and what you want the truck to do and then suggest changes to achieve that feeling.
So first, let’s get some “inside information” on the basic pieces that are inside a shock, and how they relate to one another.
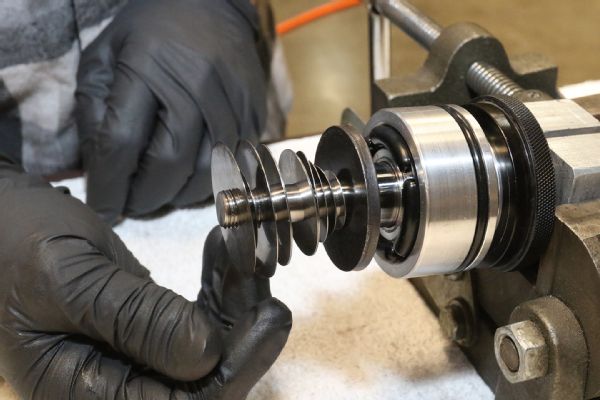
Shim Stack - A stack of flexible metal washers stacked on top of each other designed to flex when the shock is extended or compressed. Shims can range from .008” to .020” in thickness and .800” to 2.500” in diameter. Shims are used to create the damping forces, both in compression and rebound.
Shock Piston - Shock piston designs can vary from manufacture to manufacture, but they are typically designed with a compression side and rebound side. They have multiple oil ports used to control the flow of oil in conjunction with shim stacks. The compression ports are typically larger than the rebound ports.
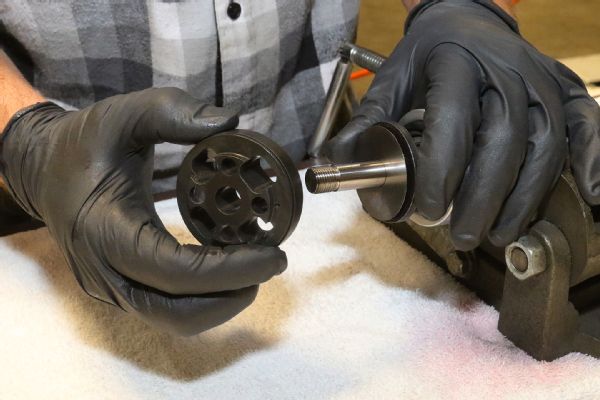
Bleed hole - The bleed hole is located on the shock piston and can vary in size depending on application. The bleed holes are used to allow oil to pass freely from one side of the piston to the other will out restriction. They can be .050 to .100-inches in size and there can be more than 1 bleed depending on the application.
For street driving conditions, the size of the bleed hole on the piston is very important. The bleed hole is part of the Low Speed Compression and Low Speed Rebound circuits, which control the brake dive and body roll. You want there to be just enough free bleed to allow the suspension to move easily when being driven on road; too much though and it can be an unsettling sensation when driving at highway speeds. It will feel similar to driving with low tire pressures and can even cause motion sickness in some people. So, there is a fine line of too soft vs. too stiff. It will take some trial and error to get it dialed in just right to your truck and driving style.
Next step to is tune is the High Speed Compression. You will notice the High Speed Compression when hitting potholes, expansion joints on the freeway for bridges/ over passes and on cracked or old asphalt. It is important to address this as 90% of your driving experience is on road. It’s easy to tell when you have too much High Speed Compression as every pothole or bump in the road will jar the vehicle (and you).
To handle big bumps, you want to build compression fairly quickly, known as ramping up (and this would be considered a progressive compression stack) as the quicker shock compress’s the more damping the shock will displace. To achieve this, thinner shims near the face of the compression side of the piston and increase the thickness as we move down the stack. This allows the “Face Shim” to flex first before engaging the next shim below it.
Depending on how fast the shock compresses will dictate how much the shims will flex. By adding the thicker shims near the bottom, the shock will need more force to flex these shims, which causes the resistance in the shock. These shims can be stacked in many different configurations and the shims can range from .008 to .020-inch thick. So with that information you can start to play with the valve stack and tune out the harsh impact by changing the thickness of the shims.
Rebound is a bit tougher to understand and feel. It is easy when it is way too fast and it almost lifts the vehicle up after you hit a large bump, but under normal driving conditions you probably won’t even notice it is happening. We will talk a little about low speed Rebound and High Speed Rebound.
The low speed rebound helps to control the body roll and weight transfer under acceleration and the high speed rebound is what allows the suspension to drop out and be ready for the next impact. When you have the free bleed set correctly you will only really need to focus on the high speed rebound. While driving, you will most likely feel the low speed rebound/free bleed. When you are in the dirt the high speed rebound is what you will most likely feel.
Rebound should be set as quick as possible without upsetting the chassis and or prevent bucking/kicking after hitting a bump. It is important to have the tire return to the ground as quick as possible to regain traction and control. If the rebound is too slow, the tire can hang in the air and cause you to bottom out on the next bumps because it was not able to extend or droop out to effectively to absorb that next bump. It is most common on whoop sections the first 1 or 2 whoops are good then the 3 whoop on it causes the truck to buck/kick up into the air because the suspension was not able to extend quick enough to be ready for the next whoop.
This is one of the easiest ways to test your rebound and see if you need more or less. It also helps to have a buddy video tape or take pictures of the vehicle going through the whoop section. This will allow you to analyze what the vehicle is actually doing. It is important to have just enough rebound to prevent the vehicle from bucking.
So in short the sooner the tire can make contact with the ground the sooner you can gain control and the sooner you can put the power to the ground. When setting rebound from front to the rear of the truck, you will want a little quicker rebound in the front and slightly slower in the rear. This can help cheat the unbalanced weight distribution of a standard pickup truck when going through rough terrain.
The last step of our pre runner tune is the Compression stack for off road use as the last piece to complete the ultimate pre runner setup is with the High Speed Compression for off-roading. This is where we decide how quickly it will ramp up and how much dampening we want in the shock for off-roading. This is a tough one for most people because we all want our trucks to blitz the whoops like a trophy truck, but the reality is our truck is just a stock-framed pre runner. So, the decision must be made about how hard you want to push the truck before we find its limitations. We know that we won’t be putting in a 1000 hard miles on it, which means you can run a little extra compression dampening and not have to worry about cooking the shocks.
On that note, it’s also important to keep up on the service of your shocks. Just like your engine, the oil and seals wear so it is important to have your shocks serviced on a regular interval to keep them in good working condition.
Suspension tuning has been known as a “black art” for a long time and those who are good at it usually have a long time invested, so just know that tuning your trucks suspension will be a trial and error thing. It may take 2 or 10 times to get the suspension set close to the way you like it, but once you do it’ll make your off-road time more enjoyable.
Having your pre runner able to take jumps and whoops takes a lot of things coming together at the same time, and proper shock tuning is a huge part of that puzzle.
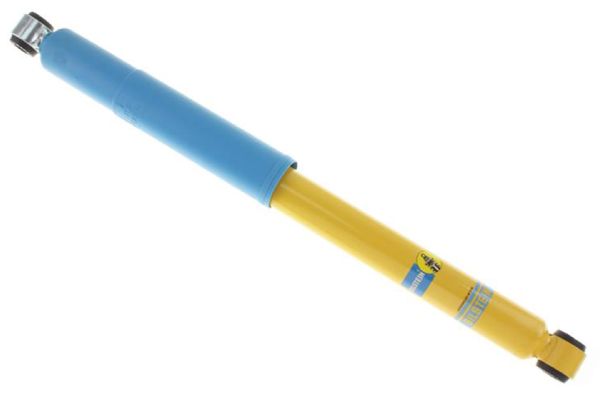
The shock that helped to ignite a revolution: the Nitrogen-charged Bilstein monotube. These shocks were on every buggy and Class 5 racecar back when real off-road suspension technology was just getting started.
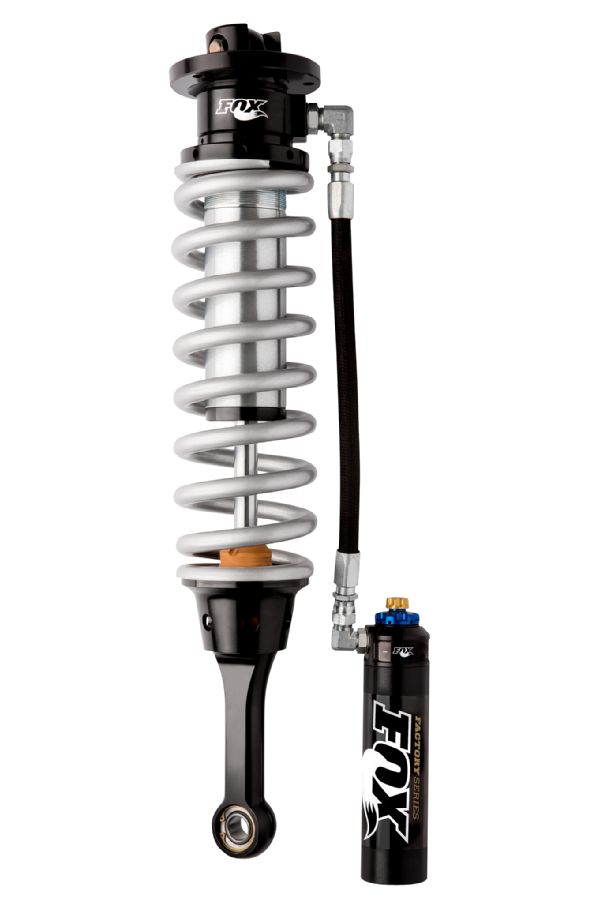
This reservoir-equipped coil over shock features both high speed and low speed compression adjustment.
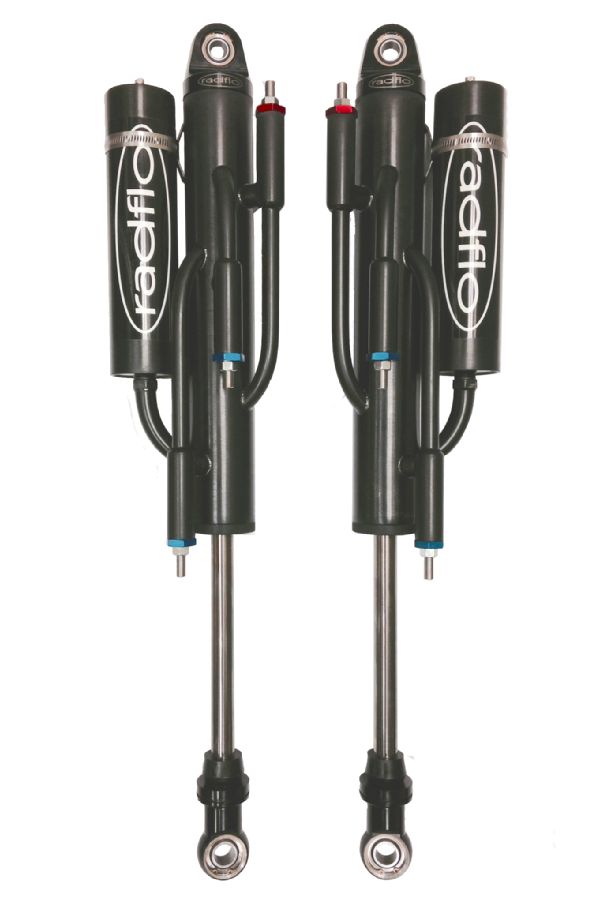
Bypass shocks have compression and rebound tubes that can change the dampening prior to the piston moving past that tube. They can have as few as one or up to 8 different damping zones.
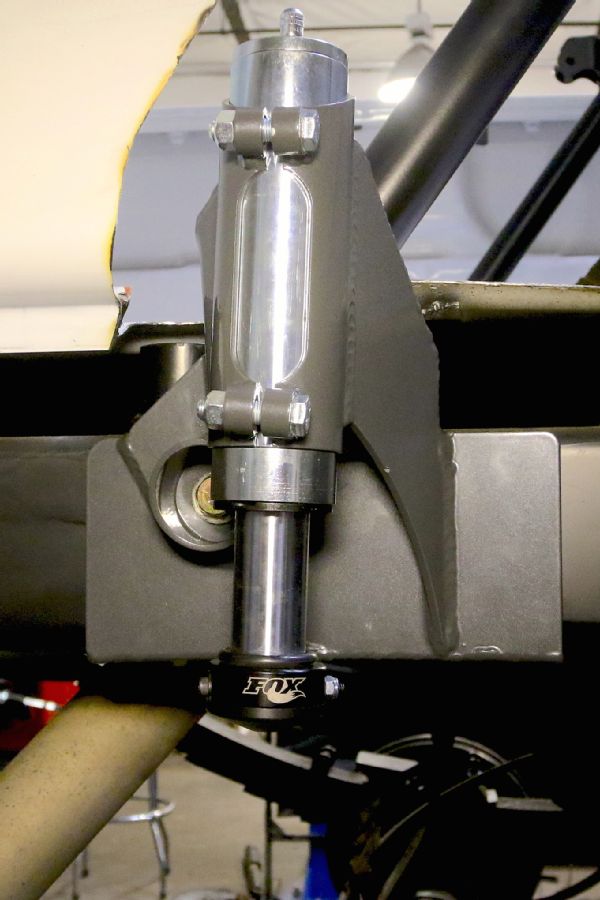
A relatively new concept are hydraulic/air bump stops. These stops not only protect suspension components during hard hits, they can be tuned in and of themselves. The large diameter shaft adds strength and surface area for the internal air/fluid.
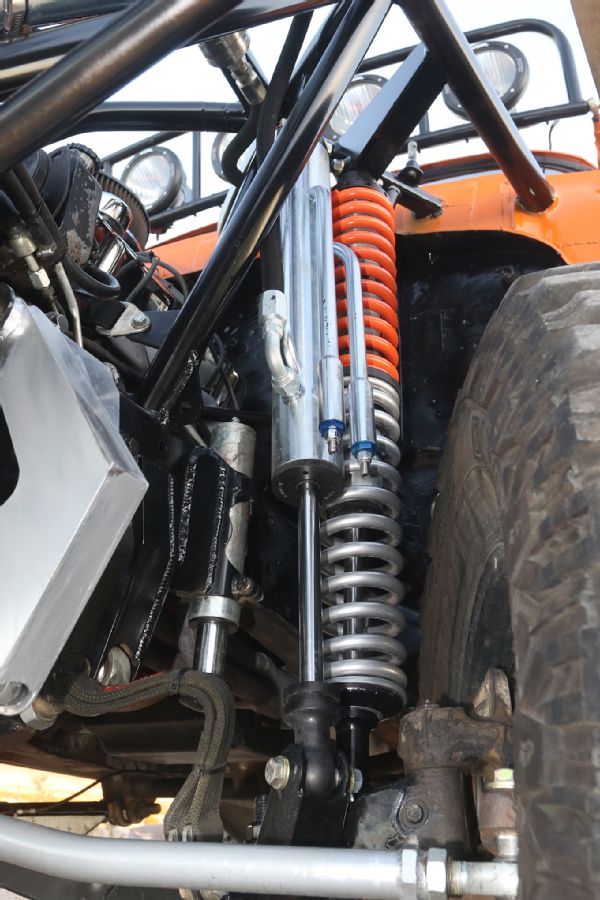
Most serious off road vehicles will run a combination of a coilover and a bypass shock on the front end.
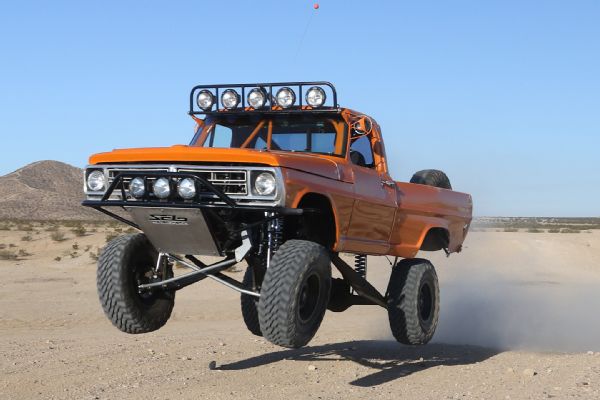
Now this is what we call full droop! Note that this vintage Ford F-100 runs a wishbone style front suspension rather than the modern A-arm style. It still uses two shocks per side though.
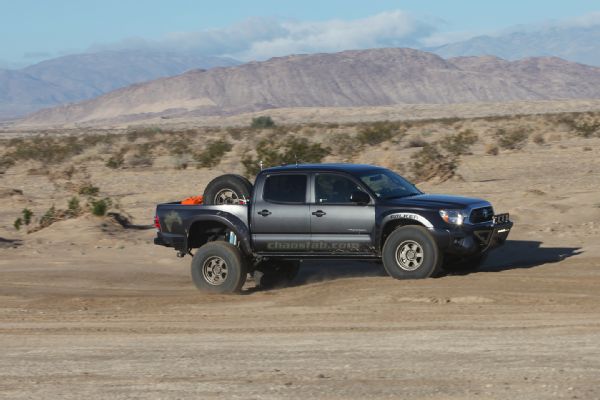
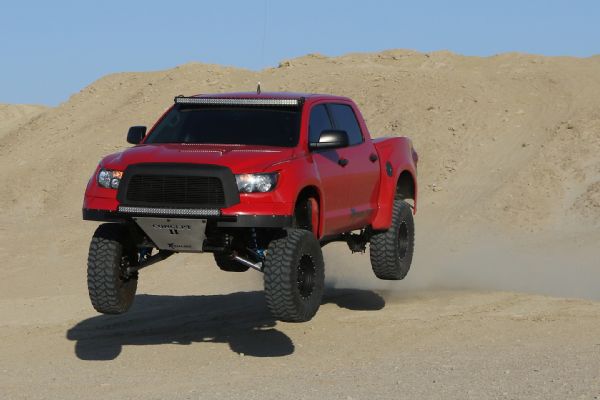
Here is where shock tuning can be tricky. In this shot, as this Toyota is going through this whoop section, it’s utilizing compression on the front end, but rebound on the rear, all at the same time.
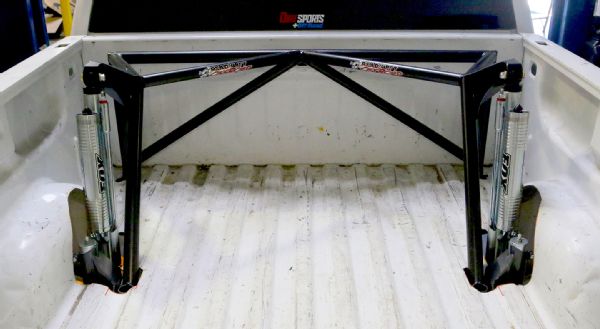
In an effort to gain wheel travel, this truck has an in-bed cage with long bypass shocks. Note that this truck is equipped with leaf springs.
Some coilover shocks have the reservoir mounted to the body. These are typically used on a rear suspension application.
Here is the compression shim stack. The shims are of different thicknesses and diameters depending upon the desired rate.
This is the shock piston. Note that there are bleed holes that allow the fluid to pass the shim stack. The size of the bleed holes will determine the initial softness of the shocks stroke.
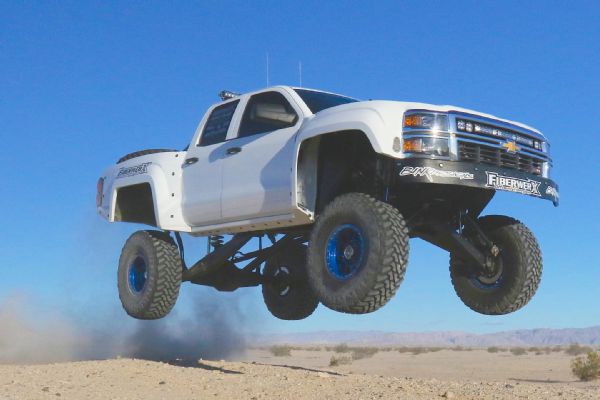
When you have your suspension tuned perfectly, landing from jumps like this won’t be a problem.