 Christian Hazel
Brand Manager, Four Wheeler
Christian Hazel
Brand Manager, Four Wheeler
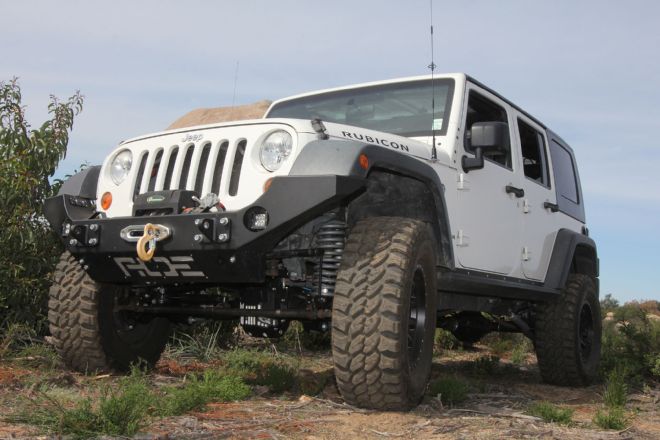
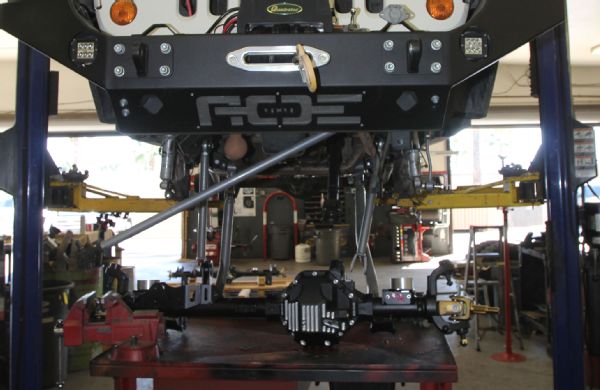
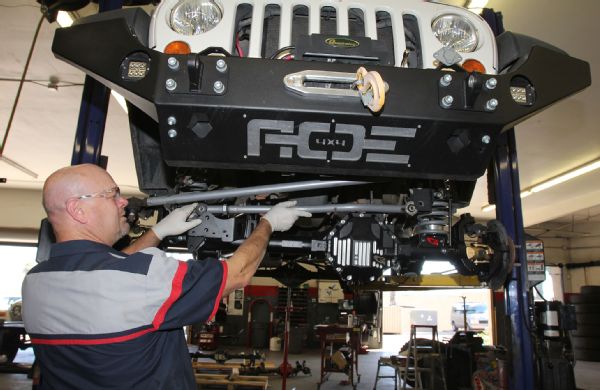
We covered the buildup of a pair of G2’s new Core 44 axle assemblies for a JK Wrangler in the story, Hardcore Bolt-In JK Axles. Now it’s time to find out what it takes to install them in a Wrangler. We dragged our 2007 Wrangler Unlimited Rubicon project vehicle to our local 4 Wheel Parts in San Marcos, California, where ace technician Steve Chamberlain dotted every “i” and crossed every “t” to highlight the correct way to install a pair of crate axles in your Jeep Wrangler. Keep in mind, to lower cost to the consumer, G2 offers its crate axles without steering knuckles, backing plates, or brakes. It’s a very common practice, especially for crate axles designed for TJ and JK Wranglers. These factory parts are reused on the new axle assemblies, so installation isn’t quite as simple as opening the crate, connecting your control arms, and hooking up your brake lines. Still, it is a relatively easy weekend job that the average enthusiast can complete in his or her driveway. So check out the tips, tricks, and correct way to plunk a pair of G2 Core 44s under your Jeep JK Wrangler.

You can look at the axle installation as an opportunity to address other problems. In our case, rotating the rear pinion to work with our CV rear driveshaft and Rubicon Express long-arm suspension caused the rear springs to bow and make contact with the rear track bar. The G2 Core 44 rear axle features offset rear coil spring pads to move the bottom of the spring farther forward away from the track bar. They’re also welded on at a slightly different angle for use in vehicles that have the rear pinion rotated upwards for a CV driveshaft.
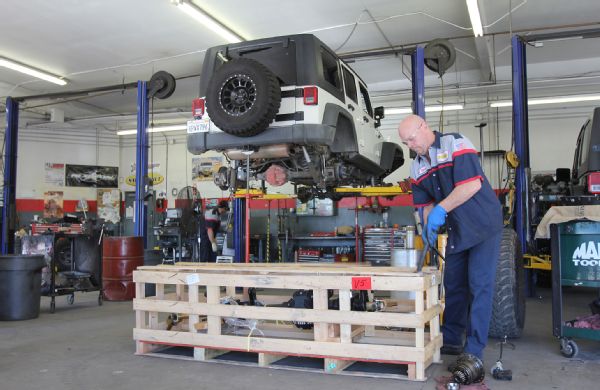
Technician Rick Chamberlain has been spinning wrenches on 4x4s for a long, long time. Our local 4 Wheel Parts facility is located in San Marcos, California, so we had our Core 44 axles shipped straight to this shop for our installation. As soon as the truck unloaded them, Chamberlain got to dismantling the sturdy shipping crates.
You have to pull the factory ’shafts to get the backing plates and steering knuckles out, so with our 2007 Wrangler Unlimited Rubicon safely on the rack and the tires removed, Chamberlain drained the gear lube out of the factory axles.
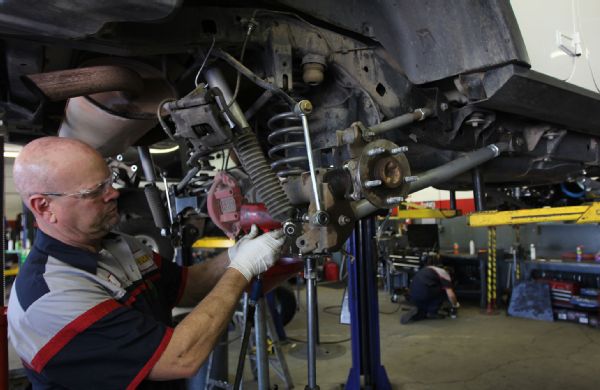
We won’t walk you through every step, but after disconnecting the drag link, tie rod, steering stabilizer, and swaybar links, and hanging the calipers up and out of the way, Chamberlain removed the three unitbearing retaining bolts from the back of the steering knuckle and then the nut holding the stub shaft to the unitbearing. A little penetrating lube and a few wraps from a brass hammer are normally enough to dislodge the shaft from the hub. If you’re in the East Coast or rust belt, up that list to 3 or 4 cans of penetrating lube, a huge honkin’ hammer, and a sailor’s sea chest of profanity. If you’ve purchased new unitbearings, you don’t need to separate the stock stubs since the whole assembly can be removed at the same time. Also, if the stub won’t pop out of its bore in the hub, you can remove the whole thing and try to press it out in a shop press or vise.
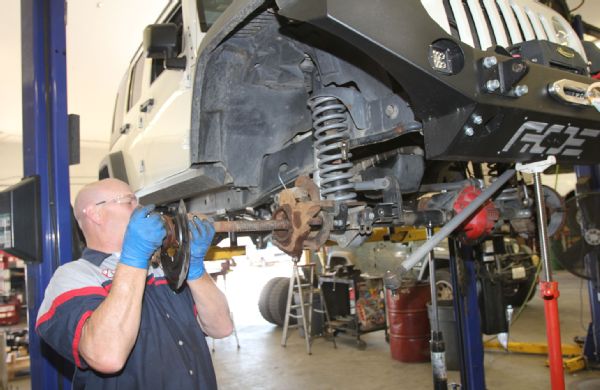
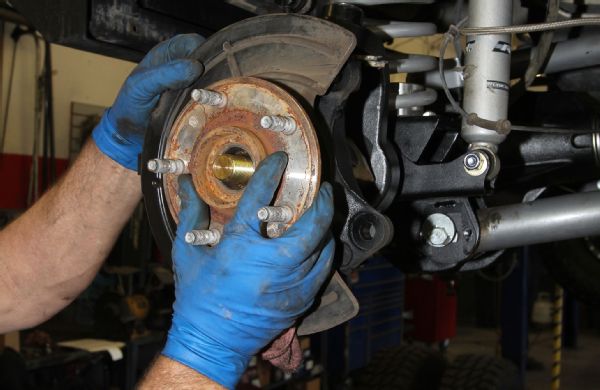
With the stubs loose in their bores Chamberelain removed the axleshaft and hub, set the unitbearing aside for installation with the new G2 ’shafts, and then removed the cotter pins from the ball joint nuts.
Chamberlain removed the upper ball joint nut and loosened the lower leaving a few threads engaged to prevent the knuckle from falling to the ground. He gave the knuckle a few good wraps with a heavy sledge on the top and bottom to free the knuckle from the ball joints. Then, the lower nut can be taken off and the knuckle removed from the housing.
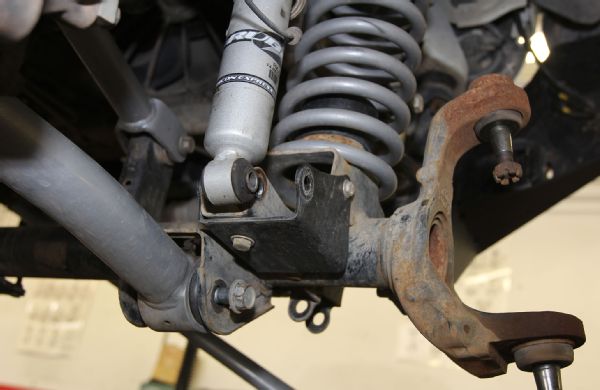
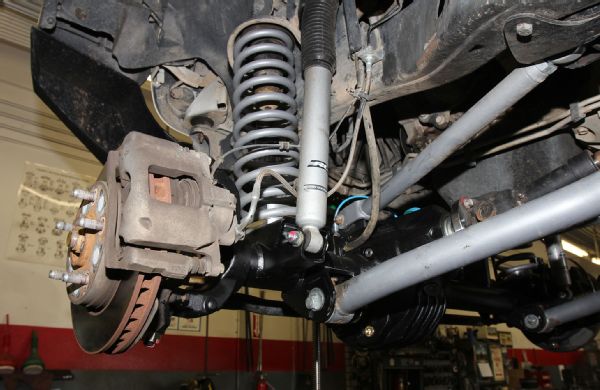
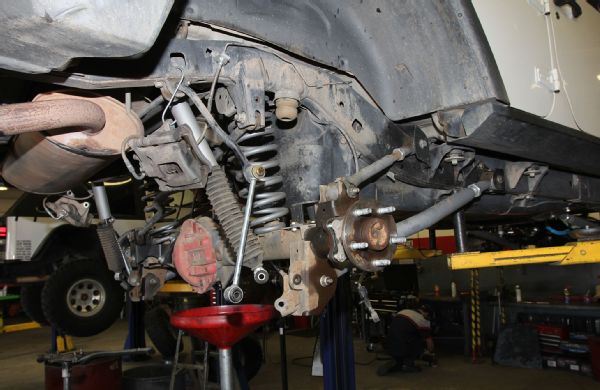
With the axleshafts out, Chamberlain removed the front shocks and loosened the control arm and track bar bolts. Notice the Rubicon Express shock relocation bracket that is not required with the Core 44 axle assembly since the G2 brackets place the shock further outboard.
You probably don’t have a lift in your garage to lower the axle on, but if you’re doing this at home, a floor jack should be placed under the axle to support its weight before the control arm bolts are removed.
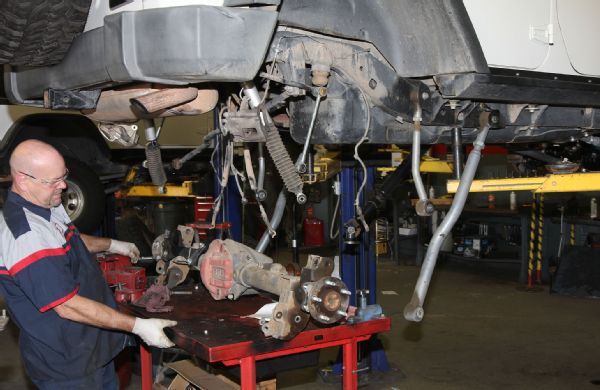
With the factory Dana 44 axle out of the way and promptly listed for sale online, the new Core 44 can be positioned under the vehicle. Again, if you’re working in your garage or on your driveway, a pair of hydraulic floor jacks will be your best friend here.

Line up the coil springs onto their retainers and raise the axle until you can line up the lower control arms with their mounts and insert the bolts. Then wrangle in the uppers. Don’t cinch anything down until you have the suspension sitting on its tires under its own weight.
One more reminder on the front coil springs is that you want to make sure the end of the coil is firmly seated in the retaining bore before you place any compression on the spring. It’s a lot easier to get it right the first time before the control arm or track bar bolts go in.
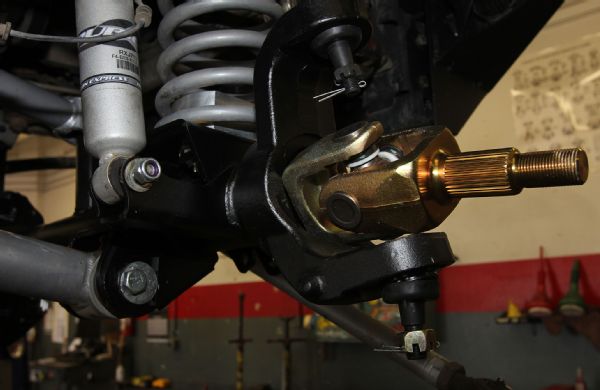
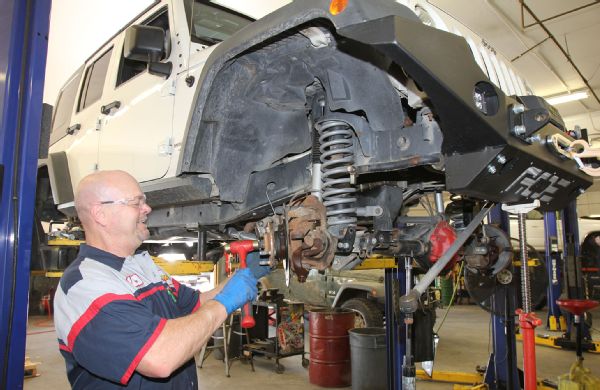
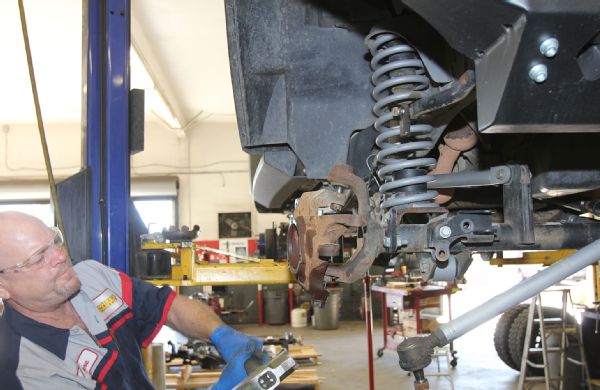
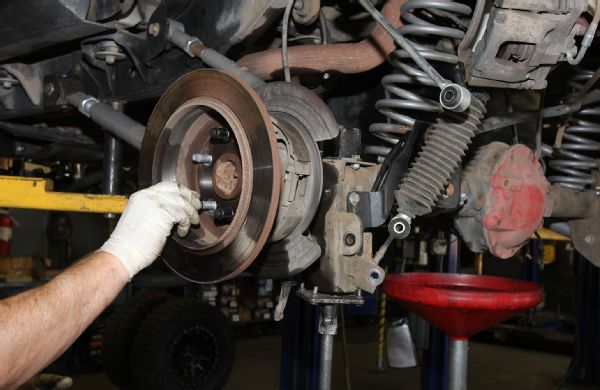
Chamberlain installed our shocks and then prepared to install the steering knuckles. The chromoly G2 Placer Gold axleshafts were pulled just to make the knuckle installation a bit easier.
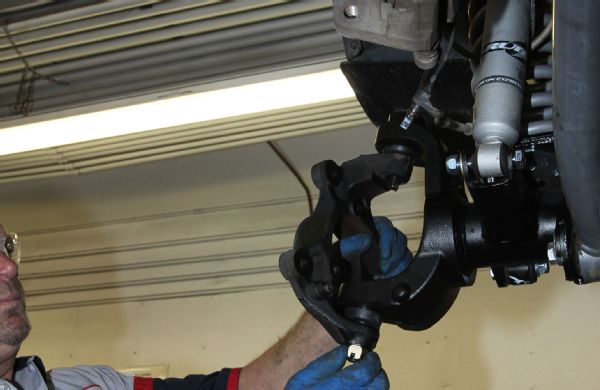
To make a nicer finished product, Chamberlain cleaned our factory knuckles and shot them with a coating of semi-gloss black spray paint to match the housing. He then installed the knuckle onto the ball joints and torqued the nuts to factory specs.
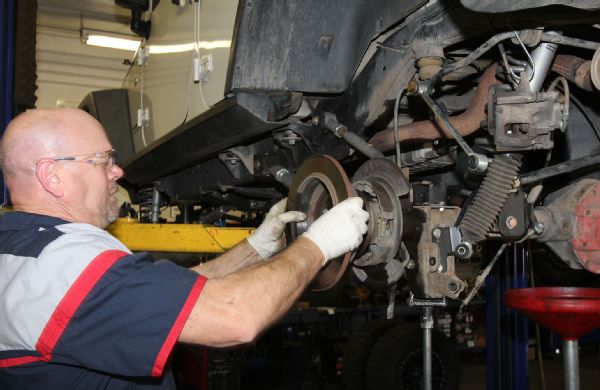
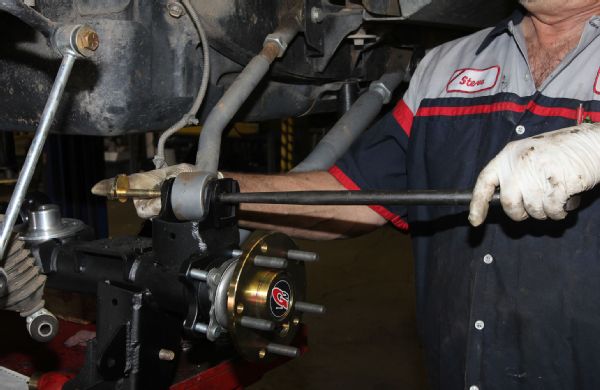
With the knuckles all torqued down, the G2 axleshafts were reinstalled, being careful not to nick the inner axle seals.
The unitbearings can go back on the factory knuckles. Guide the stub shaft through the hub bore and thread the factory hub nut onto the stub shaft finger tight. Apply some anti-seize lube to the three factory unitbearing bolts and thread them in finger-tight.
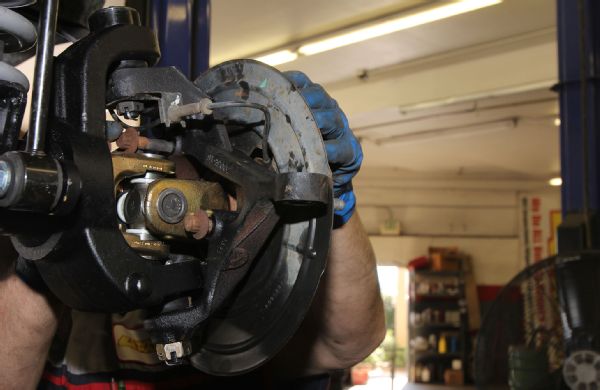
Tighten the three unitbearing bolts incrementally, making sure the unitbearing centers in the knuckle bore. Once the hub is seated on the knuckle, bust out the torque wrench and cinch the bolts down to factory spec. Then, tighten the stub shaft bolt.
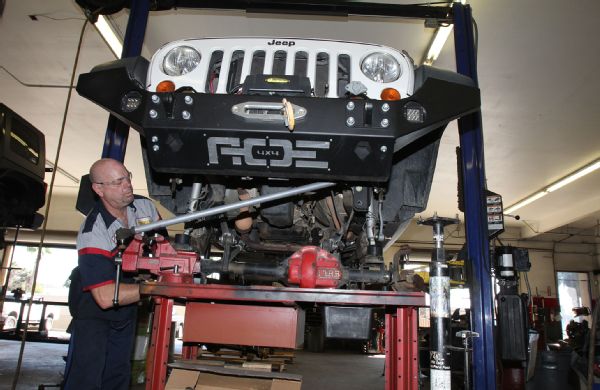
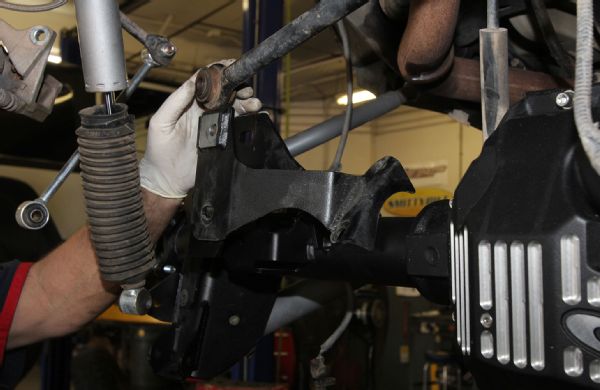
Chamberlain then turned his attention to our steering linkages. Since our vehicle was equipped with a Rubicon Express long-arm suspension and Rubicon Express High Steer kit that places the drag link above the steering knuckle, our install was a bit different than a factory vehicle. In the end, we were able to utilize existing holes in the G2 Core 44 brackets to get our drag link and track bar angles parallel. If they’re not parallel, you’ll have bump steer and other quirky handling issues.
Chamberlain reinstalled our rotors, calipers, driveshaft, and installed the air line for the front ARB Air Locker. More on that in a bit.
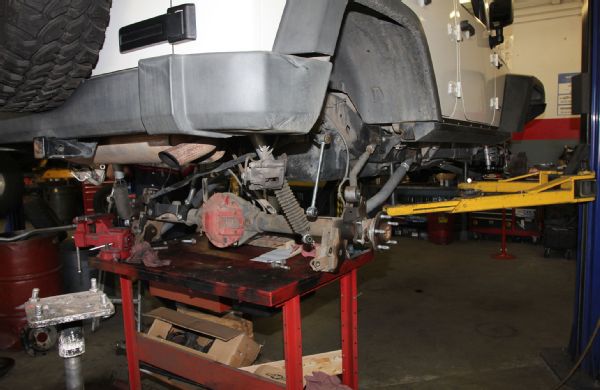
With the front installation wrapped up, Chamberlain started the rear disassembly, removing the calipers and hanging them safely out of the way, setting aside the rotors, and disconnecting the rear swaybar links and shocks.
Sharp eyes will notice the rear backing plates and caliper mounts are already removed. Here’s how you do it.
The factory axleshaft seals are a tight fit in the housing end bores and require a bit of force to remove. With the four backing plate bolts removed, Chamberlain fashions a slide hammer to pull the axleshaft by flipping the brake rotor and installing a few lug nuts finger tight to hold it on.
A couple solid “thunks” and the axleshaft will pull out just enough to clear the seal from its bore. The shaft can then be removed the rest of the way and the rotor taken off the studs.
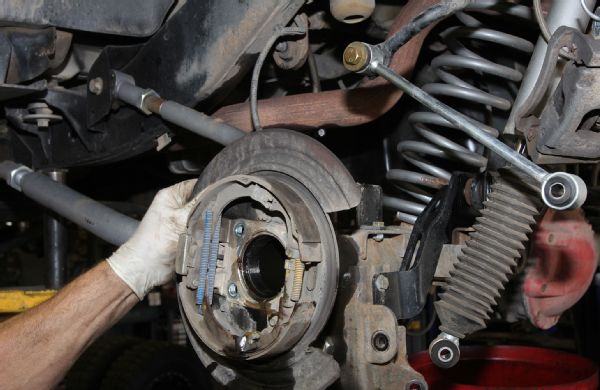
With the rear axleshaft clear, the backing plate housing the e-brake assembly and caliper mount can be removed and set aside for use on the new Core 44 housing.
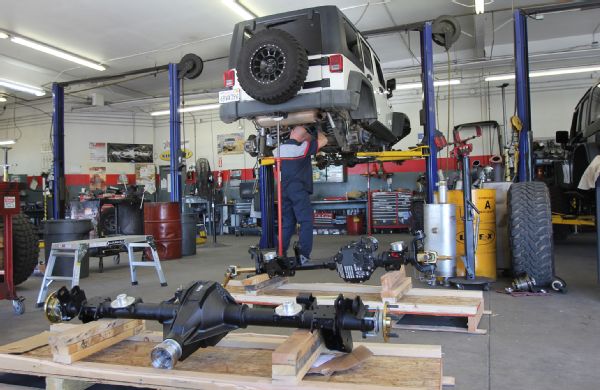
Like the front, Chamberlain loosened all the control arm and track bar bolts before setting the axle down on a cart. Again, if you’re working at home, a pair of hydraulic floor jacks work best to release the pressure on the mounting bolts. With the axle secure, the bolts can be removed and the factory axle moved out of place.
The rear Rubicon Dana 44 axle is a pretty good unit, but with bigger, 35-spline Placer Gold chromoly axleshafts, a beefier housing and axletubes, 5.13 gears, and an ARB Air Locker, our new G2 Core 44 is much better.
The new Core 44 rear axle is positioned under the vehicle and wiggled around until the lower control arm bolts can be slipped in place. Again, leave the hardware loose until the vehicle is sitting on its own weight so the bushings aren’t tweaked at ride height.
Like the front, the rear uses cam bolts to more easily dial in the pinion angle and alignment.
A little help from an alignment bar and the upper control arm bolts can be inserted.
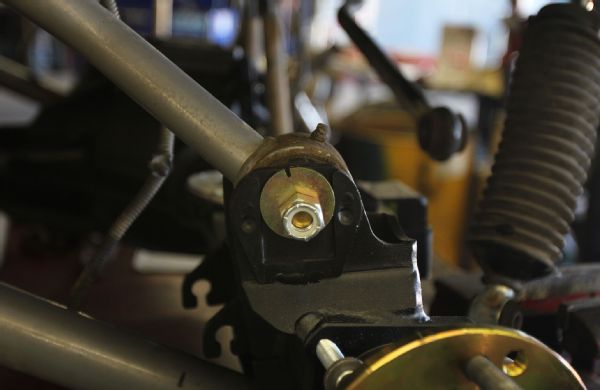
The new axle track bar bracket is a lot beefier than the stock part. Drop the axle far enough to get the track bar into position and then raise it until the bolt holes align with the track bar end. Then, insert the track bar mounting bolt.
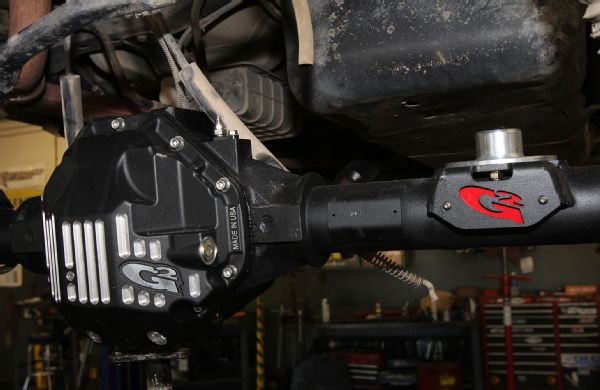
Check out the bolt-on billet coil spring retainers, beefy G2 diff cover, and that sweet, sweet “Made in USA” label. Much of the G2 Core 44 is made in the USA including the housing, axleshafts, diff covers, and more. We like that.
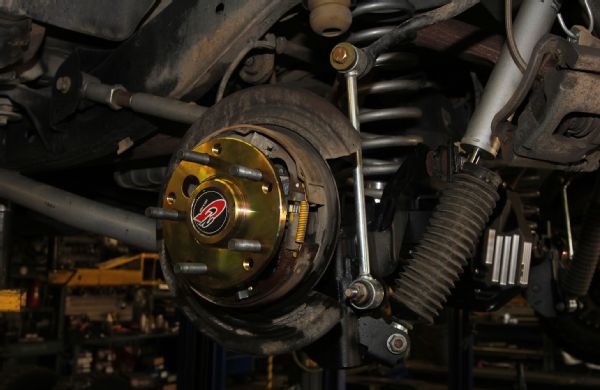
The backing plates go on the Core 44 housing in the reverse order as they came off the factory housing. Pull the G2 Placer Gold axleshafts, install the backing plates onto the studs, and then reinstall the axleshafts and fastening the mounting nuts. It’s a good idea to make sure the new axle seal is slightly lubed to prevent it from chafing during install.

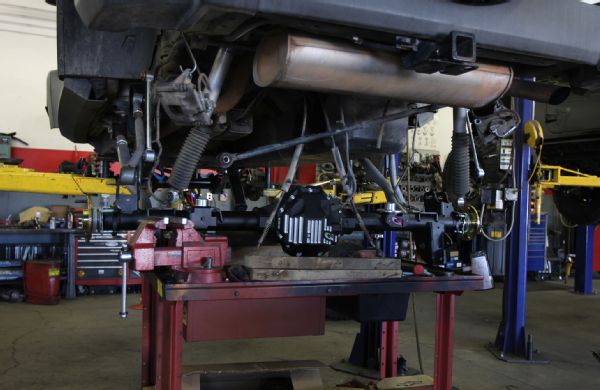
Chamberlain ran air lines for the rear ARB Air Locker and wrapped up the rest of the install by bolting up the driveshaft, rotors, calipers, swaybar end links, and all the other sundry odds and ends.

Our ARB Air Locker included switches for the lockers and compressor, but it’s been our experience one of the best upgrades you can make to your JK Wrangler is a sPOD and Source System to control your electronic additions. In our case, we went with the standard six-switch system with red rockers so our night-time visibility wouldn’t be impaired.
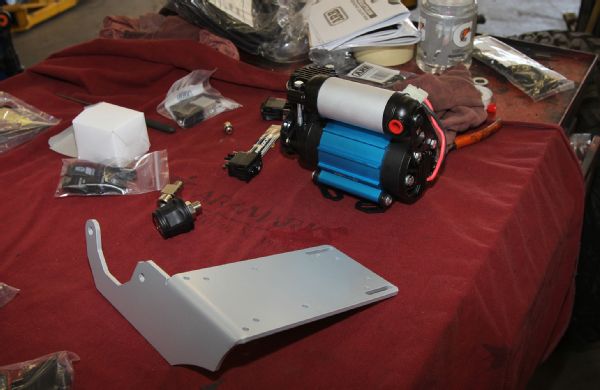
Before he installed the sPOD, Chamberlain ordered a Synergy compressor mount and wrapped up the ARB Air Locker installation. The Synergy bracket bolts to the brake booster master cylinder mounts and provides a clean, accessible spot to mount your ARB Air Compressor.
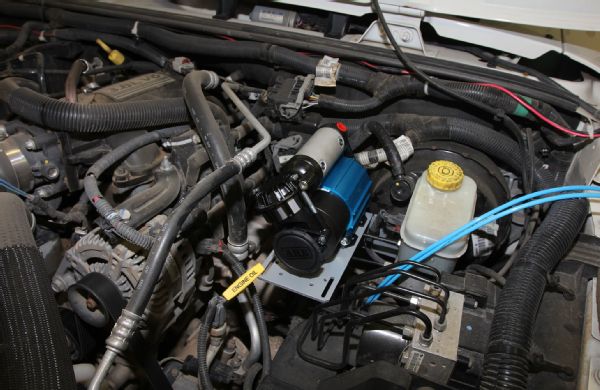
Chamberlain has several of these installations under his belt and quickly oriented our compressor housing in the most advantageous location to provide access to the solenoids and prevent any air line rubbing or chafing.
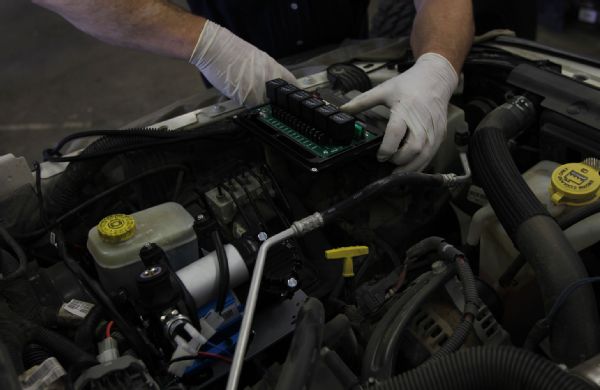
The Source box was then bolted in place. We love how well the sPOD cleans up the underhood wiring and simplifies accessory installation with modern vehicles’ CAN bus and dainty electrical systems. Just mount the Source box under the hook, follow the directions to tie into the battery and key-on power system, and route the rocker panel inside the cabin. Then you just hook your accessories straight into the source system – no relays or other headaches to worry about. We did have to install our ARB solenoids, but we used the sPOD switches to activate the compressor, front, and rear locker.
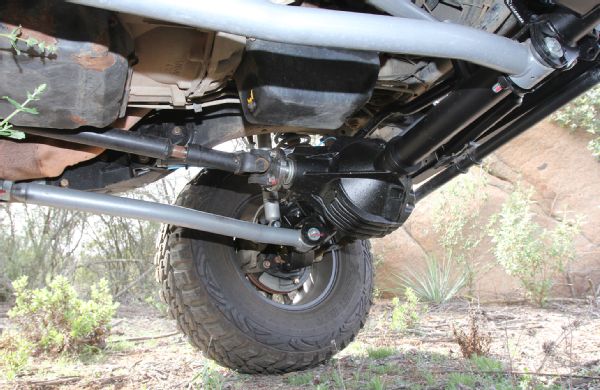
Check out the paint pen on every mounting bolt. We can’t say enough about the quality of Chamberlain’s install job. Out in the bush our rear spring clang was gone and the 5.13s really help our 3.8L pull grades without incessantly downshifting. Also, notice the nice smooth radius on the bottom of the diff housing. No snags for rocks and other trail obstacles.
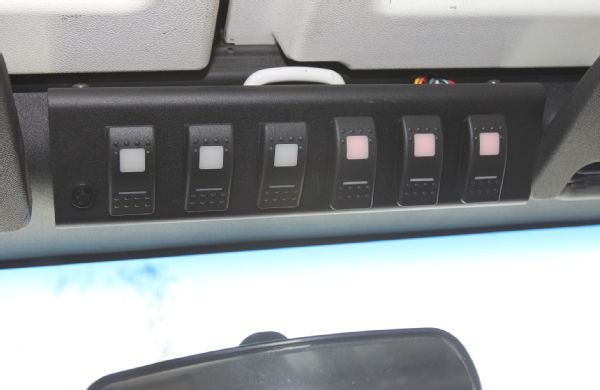
We utilized the last three rockers in our sPOD for the ARB compressor, front locker, and rear locker. We’ll be adding some off-road lighting in the near future, so it’ll simply be a matter of mounting our lights and running the positive and negative leads to the Source box under the hood. All the positive and negative terminals in the Source box are labeled (1-6) so selecting which rocker activates which circuit is super-simple.
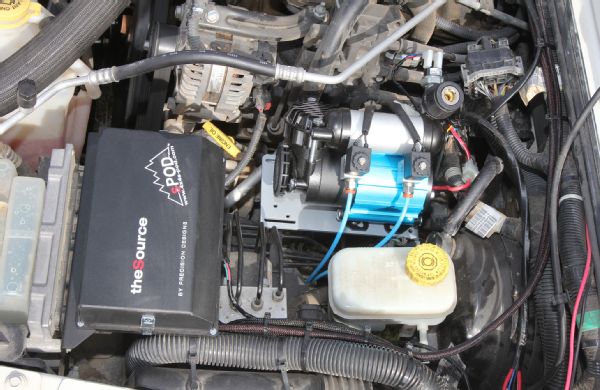
The finished underhood installation is totally sanitary. Notice our air chuck on top of the ARB compressor for airing up tires in the field. The little ARB compressor may be tiny, but it packs a ton of performance with a 100 percent duty cycle.
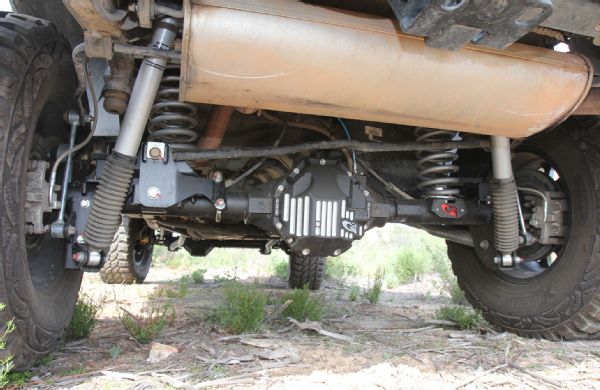
Chamberlain utilized the Rubicon Express rear track bar bracket that came with our Rubicon Express long-arm suspension. It worked perfectly with the G2 Core 44 brackets and fit the rear axletubes.