
 Pete Trasborg
Brand Manager, Jp
Pete Trasborg
Brand Manager, Jp
A long, long time ago, in a galaxy far, far away, a little birdy whispered a mind- blowing thought in our ear. Let’s just call the birdy “Mike.” Here’s what Mike said: “What if I showed you a way to build an NP242 to be as strong as a full-bore aftermarket-equipped NP231?” Needless to say, our imaginations were captured.
So our little birdy Mike went on to weave this yarn of a stew made from Jeep NP242 parts mixed with some HMMWV (or Hummer) NP242 parts and maybe an aftermarket part or two. The end result would be a wide-chained ’case with all the ranges of a Jeep T-case (the Hummer’s is four-wheel drive only) and an optional cooler.
Well, that sounded good to us.
We ran out and found a Hummer T-case. OK, maybe we only walked out. Of course, right around the time we did that, all of our other Jeeps died, leaving us with only the ’98 Cherokee equipped with the NP242. So, we couldn’t very well pull that one apart. As so often happens when one is Jeep-poor, as soon as we got one of the others back together, the Cherokee would die. It’s a vicious cycle that many of you likely know. Pretty soon we found ourselves with an offer on the Hummer T-case we couldn’t refuse, and on its way it went. However, we still had dreams of 242HDs in our heads.
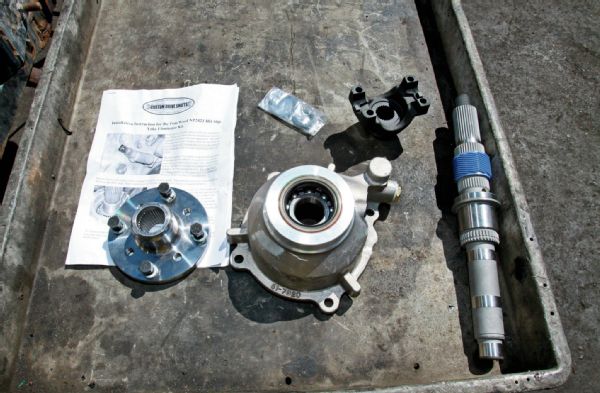 The Tom Wood’s kit comes with a new mainshaft, of course, but it also includes a drive flange, nuts, and good instructions. Most of your existing hardware will be reused. Since we were upgrading the strength of the T-case output, we decided that now would be a good time to bump up the strength of the driveshaft. For that, we opted to upgrade from 1310 to 1350-series U-joints. The HD output kit is shorter than the regular hack-n-tap kit, so one way or the other, we were going to need driveshaft modifications. The yoke in the upper right is the replacement U-bolt style yoke for our Dana 44 rear.
There are other issues with that swap, but the biggest upside was this: The H1 ’case has a 32-spline output. The Jeep ’case? A measly 27-splines. All the other NP242 slip yoke eliminator kits on the market were just hack-n-taps. Until recently, there was no way to get a 32-spline output on a Jeep NP242 without tearing the H1 T-case apart. But then, the front input of the H1 is usually 32-splines, rather than the Jeep’s 23 splines. You can see how it might become a time-consuming proposition. As you all know, more splines means it is almost always stronger, and in our heavy XJ with large tires, we wanted all the assurance we could have.
Enter Tom Wood’s Custom Drive Shafts. The company finally got enough interest in an HD (32 spline) replacement output for the NP242 that it decided to build one.
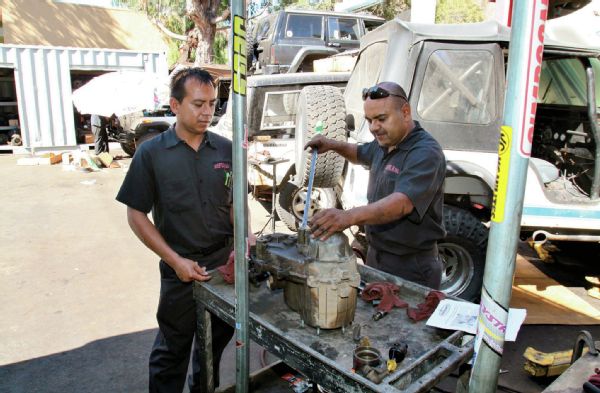
So, we got our hands on one of the first kits, and enlisted the skilled techs at Jeeps R Us in Laguna Hills, California, to help us install it. They hadn’t seen one before, so it would be fun for all of us to check out, and it would save us cleaning our hands every three seconds to shoot pictures. Plus, the shop and the guys that work at it know their stuff, so this was sure to be a slam-dunk with their help (OK, OK, they were tripping over us and our camera the whole day). So we went down there to see how it all came apart—and went back together.
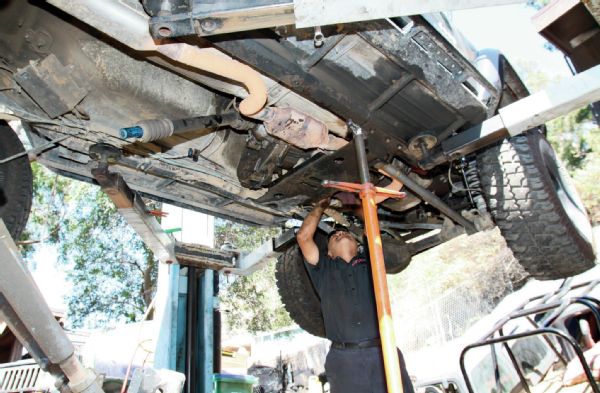 While it is possible to do this install by leaving the T-case in the Jeep, we opted to pull the entire thing out of the Jeep for this install. However, we have TnT Custom’s coil conversion on this Jeep so that makes removal a little more difficult. The belly skid comes apart in several sections, so the thought was that if we just pulled the rear portion, there would be enough space to work.
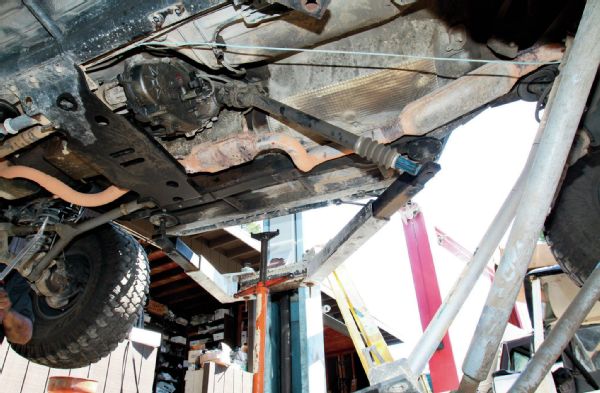 Well, it freed up more space but still not quite enough. Also notice how our rear driveshaft separated at full droop. That’s probably not a good thing. Maybe we shouldn’t be trusted with a tape measure.
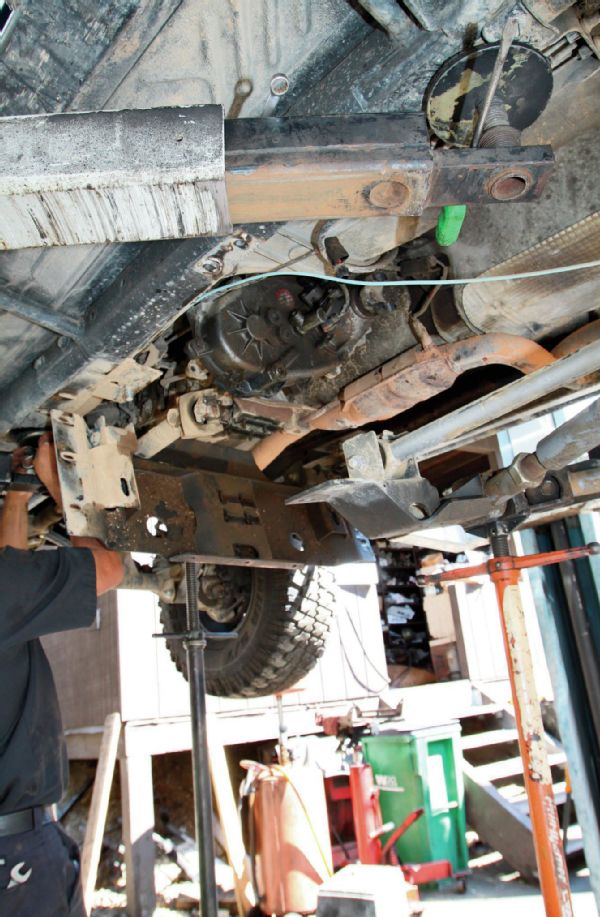 Unfortunately, dropping the rear section of the skidplate wasn’t enough. We had to drop the front section to provide enough room to work and for access to the rest of the T-case. Make sure to support the drivetrain properly before you do this part or you will get a face full of transmission.
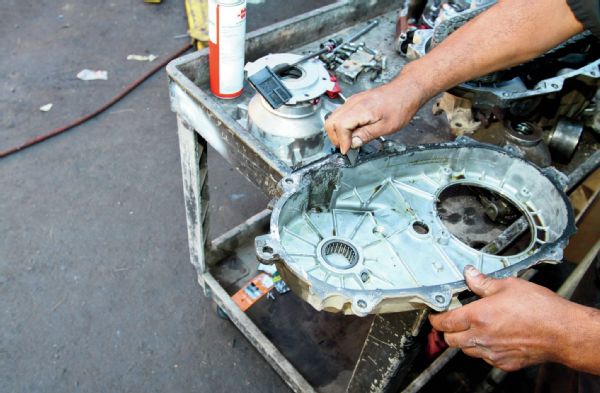
 Here, the ’case is out, and the first step is to remove the tailshaft housing. Once all the bolts are out, you can gently pry on the housing. Since we used the super glue of sealants— Permatex’s Right Stuff—“gently” wasn’t happening. Notice the 3-foot-long pry bar.
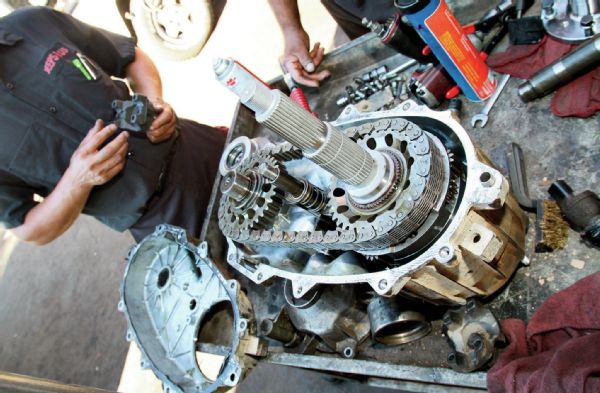
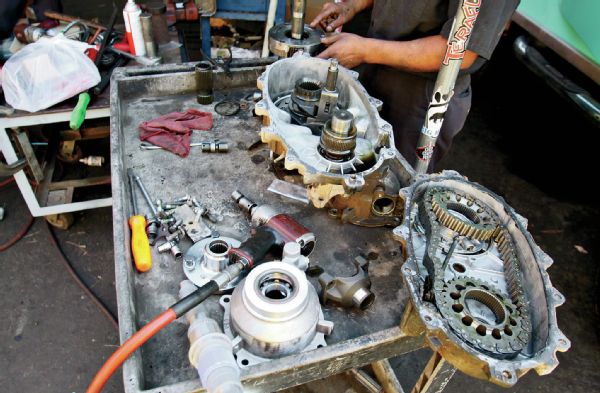 For disassembly of the main case, it is more of the same. Remove all the bolts, and prying as gently as you can, separate the ’case halves. Once you’ve done that, you can lift the chain and gears straight up off the front and rear output shafts. Then it is time to pull the old mainshaft.
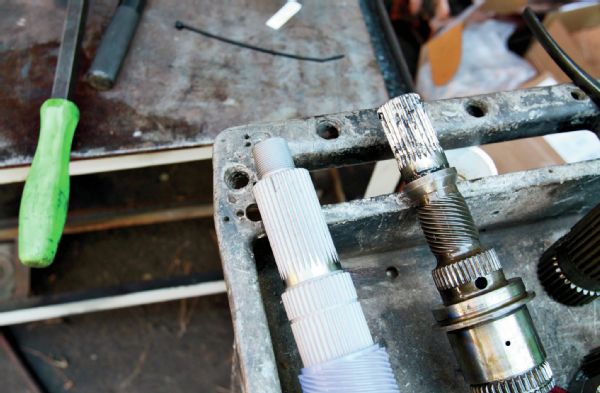 Here you can see the 1.172-inch-diameter, 27-spline old shaft on the right next to the new 1.375-inch-diameter shaft to the left. Also readily apparent is how much shorter the new shaft is than the old one. The length should open this ’case up to a lot more Wrangler guys with stock wheelbases.
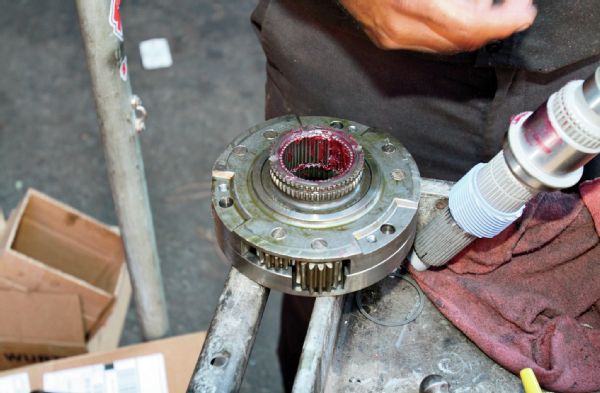 This is never fun. Unlike the NP231, the NP242 uses non-caged needle bearings on the planetary gearset. That means it is always a “fun” game to get them to stay on while putting the shaft back in the planetary set. Here, high-tack red grease was used to keep ’em in.
 Make sure everything else goes together smoothly. If you’ve got a tighter ’case, you will have to pay some attention to make sure you are lowering the gears (with the chain attached) down onto the shafts pretty close to, if not perfectly, square.
 Once everything is ready to go, it’s time for the Right Stuff. These chain-driven, NP-series ’cases don’t need as many seals as the older Dana/Spicer stuff did. So, as long as you’ve got the case halves sealed with decent silicone, you are good to go. Be careful to not put too much in there, though, as if it spooges out of the crack inside the case, it could gum up a lot of stuff.
 Once the T-case is in the vehicle and everything bolted back down, we measured for a new driveshaft. Since it seemed our old one was too short, we measured at both ride height and full droop.
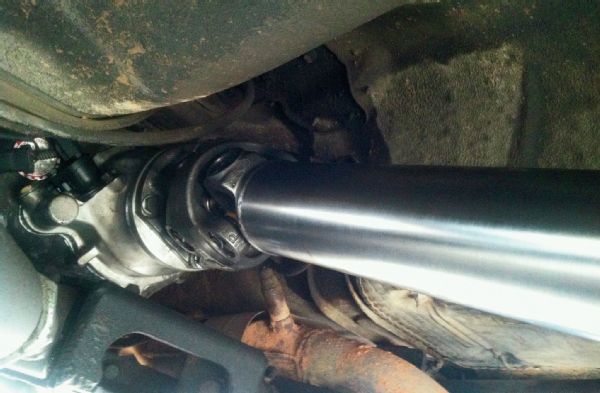 This 1350-equipped driveshaft from Tom Wood’s Custom Drive Shafts is a work of art. With a 1350-series greasable CV at one end and a 1350 yellow seal U-joint at the other, we never have to worry about water crossings again. Ours was finished in clear, but you can have them in black as well.
NP242
The NP242 may be the most versatile T-case ever installed in a Jeep. It has 2WD, full-time 4WD, part-time 4WD, and 4WD low range. The four ranges, with a decent low range of 2.72:1, make it great in all kinds of terrains.