
 David Freiburger
Contributor
Photographers:
Ed Fortson
David Freiburger
Contributor
Photographers:
Ed Fortson
You'd think small-block Chevys came in Jeeps from the factory, but people swap with way more than just Jeeps and Chevys these days. Hardcore 'wheelers are concocting all-new ways to come up with the ultimate purpose-built rigs-there are more tasty parts, more custom-building talent, and more gnarly need than ever.
This issue's special drivetrain section proves it with tons of overkill: You'll see the latest gear splitters, crawler boxes, max-beef drivetrain parts, and even old Mopar musclecar axles for Toyotas. It's all boffo trick, opening up tons of powertrain possibilities. Multiply the number of today's available axles times the number of transfer cases, crawler boxes, trannies, adapters, and engines, and you can see that potential drivetrain combos are in the thousands. Get creative, and even a small-block Jeep swap becomes a one-off custom job.
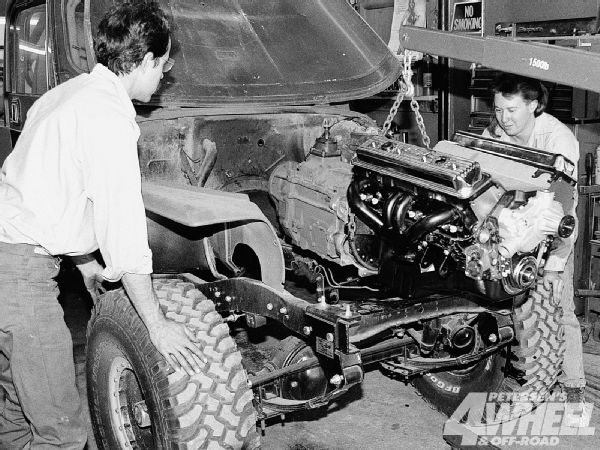
And this story will give you the drivetrain-placement considerations required when dropping any drivetrain into any 4x4. The example? A small-block Jeep built by Joel Snyder and Joe Schaff at Stage West. It's a standard swap made complicated by a Scrambler/CJ-6 long wheelbase, a short pre-'72 front clip, an NV4500 trans, and a 4-to-1 Crawler box. By installing all these components at once, Stage West shows that you can gain the best performance by considering the engine/trans/'case combo as a whole. Sure, most swaps involve changing just one member of the drivetrain combo, like a new tranny onto an existing engine. Even so, look at the big picture-if the new trans is longer than the old one, do you move the transfer case rearward or bump the engine forward? Any swap is an opportunity to place the components to your advantage. Once we give you an overview of the parts Stage West used, we'll outline your drivetrain-placement concerns in five categories.
Fore And Aft
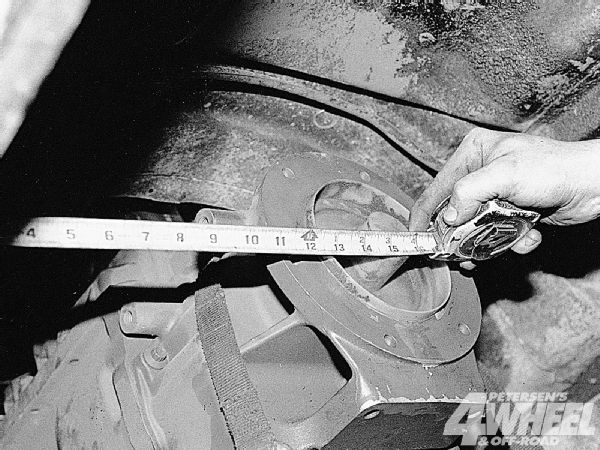
Driveshaft length: On short-wheelbase vehicles, the problem is getting the transfer case far enough forward that the rear driveshaft is not too short. Generally, fullsize trucks with short trannies or tall lifts have the opposite problem: The front driveshaft is too short. In either case, you may be able to move the engine/trans/transfer case fore or aft to cure driveshaft-length problems.
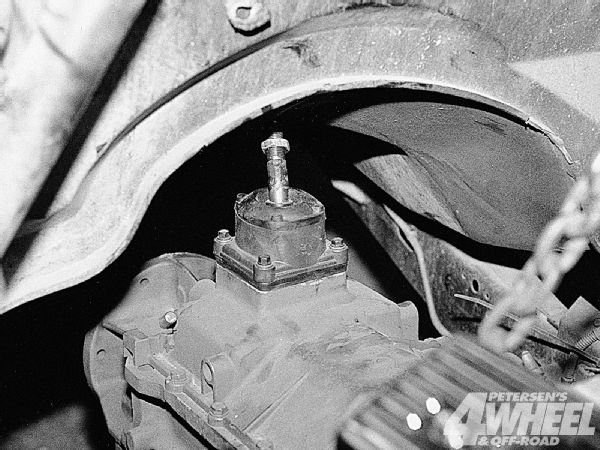
 Front-axle clearance
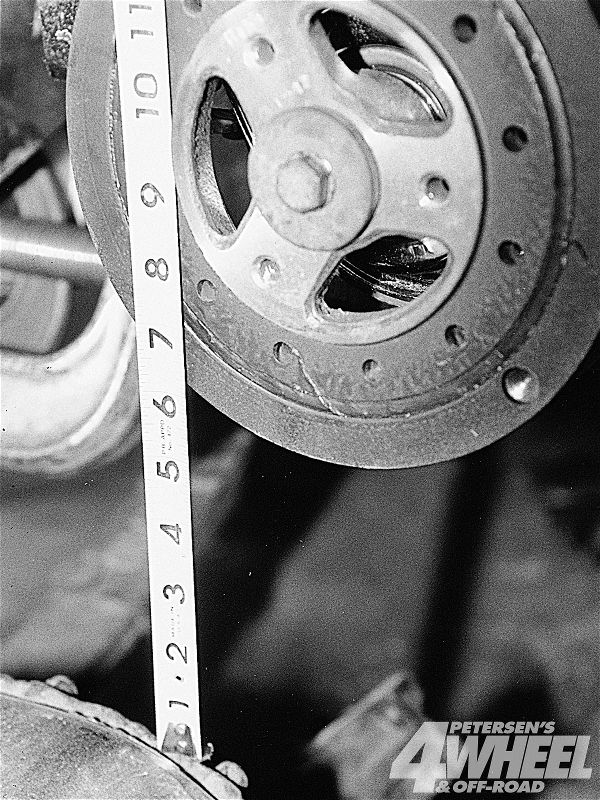
Front-axle clearance: Unless you have a very tall lift, very stiff suspension, or IFS, it's likely that the front axlehousing will move upward far enough to hit the oil pan or possibly the vibration damper and pulley. Careful analysis of suspension action versus clearance to the engine is crucial; if the engine can't move rearward, can you move the axle forward?
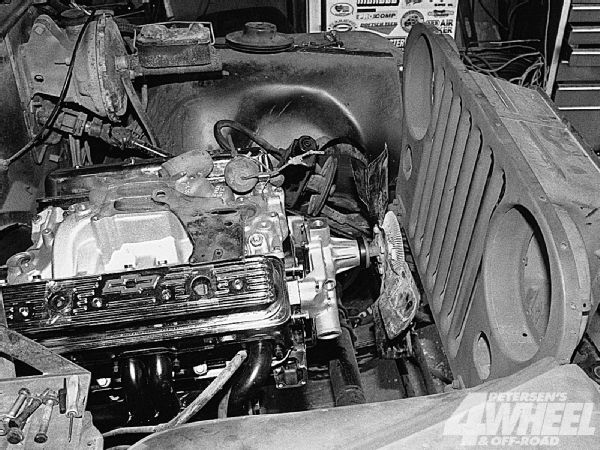
Radiator-to-fan clearance: You want at least 1 inch from the fan blades to the radiator to prevent contact during frame flex. In our case, a short-style water pump helped gain about 1 inch of clearance versus the '69-and-later long style, as did trimming the stock radiator support from the military M38 A1 grille, cutting out the back of the headlight buckets, and spacing the lights forward so the radiator could be moved forward. If all else fails, electric fans can be the savior.
 radiator-to-fan clearance
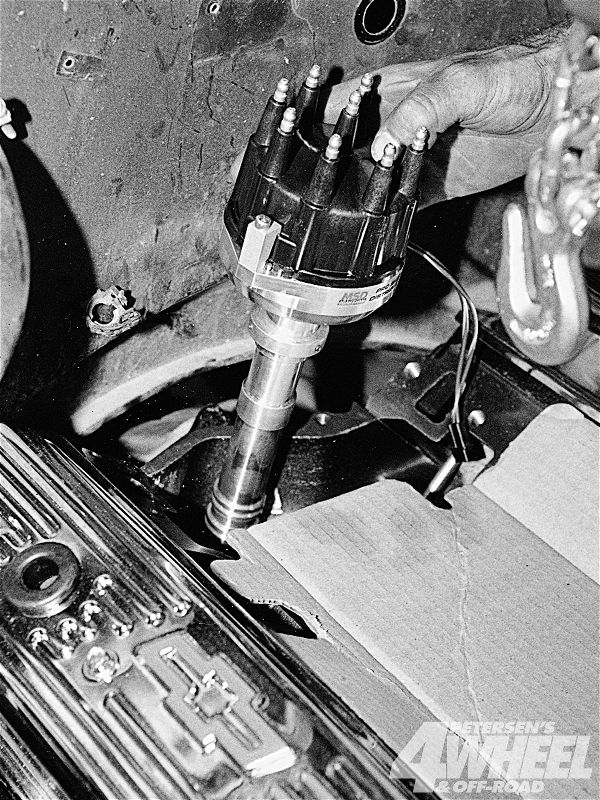
Distributor-to-firewall clearance: As you move the engine aft, a rear-mounted distributor is always the first obstacle. Firewall bashing is an option, but for Chevys, MSD's PN 8570 small-diameter distributor can help. It's 7/8 inch shorter and 3/8 inch smaller in diameter than conventional non-HEI distributors. Keep in mind that frame flex can push the firewall into the cap and crack it, so at least 1/2 inch clearance is best.
 Distributor-to-firewall clearance
Shifter location: If the engine is far rearward and the tranny is long, or if you have an Advance Adapters Ranger Overdrive between the engine and trans, the shifter can get pushed too far rearward. Bending the stick is an easy answer, but even the base of the shifter may get close to the seat or console. With an automatic, an aftermarket cable shifter is the solution.
Clutch linkage: Some swappers wish to use the stock mechanical clutch linkage and position the engine so it will line up. We'd say that's a bad compromise considering the other issues with engine placement. If the mechanical linkage won't line up, use a hydraulic clutch-it's better for twisty trails, anyway.
Weight bias: This is rarely considered, but it can help in hillclimbs to put weight on the front end by moving the engine forward, especially with a light V-6. Conversely, mud trucks often want more rearward weight, and place the drivetrain farther back to load the rear wheels.
The Combo:
PhotosView SlideshowUp And Down
Driveshaft angle: Mounting the drivetrain lower in the frame helps cure extreme driveshaft angles caused by lots of lift or suspension travel; the closer the transfer case outputs are to being inline with the axles, the less severe the driveshaft angles.
 Driveshaft angle
Ground clearance: Even though lowering the drivetrain fixes driveshaft problems, it reduces ground clearance. This is especially true at the transfer case crossmember, but keep in mind that less severe driveshaft angles also mean a greater length of the driveshafts are closer to the ground. For this reason, we like to keep the drivetrain as high as practical.
Clearance to axle: As discussed in the "Fore and Aft" section, front-axle interference with the engine is also an issue. The higher you can mount the engine, the less of a concern this is.
Center of gravity: One disadvantage of mounting the engine high is that the 4x4's center of gravity is increased, thereby raising the possibility of rollover. However, given the 1- to 3-inch margin of up and down engine placement, we don't get too concerned about it.
Tunnel clearance: Your biggest limitation to raising the drivetrain will be the transmission tunnel; don't forget to leave room for linkage, bolt access, and frame flex.
 Tunnel clearance
Side To Side
Driveshaft angle: Most swappers prefer to have the rear transfer case output inline with the rear axle. Depending on your vehicle and the components used, that may not necessarily mean that the engine is centered in the chassis. Also, there may be other factors that prevent you from putting the rear output inline with the rear-axle pinion. In that case, the answer is either to get the rear axle custom-made to compensate, or to run the driveshaft crooked-that is, at an angle to the rearend as viewed from the top or bottom. Contrary to popular belief, it is possible to prevent the driveshaft from vibrating under this condition. See "All About Driveshaft Angles" (Sept. '97) or call Six States Distributors for help.
 Driveshaft angle
Front driveshaft clearance: It's common to have the front driveshaft on passenger-side-output applications smack either the trans-pan rail (on automatics) or the starter during full-suspension compression. If you can move the drivetrain to the driver side and let the driveshaft slope sideways a bit to the axle, it can help. Small-diameter driveshafts also help.
Steering-column clearance: It's common to see an engine offset a bit to the passenger side to clear the steering column. If this is absolutely required, it can be somewhat beneficial to run a 'case with driver-side offset. That way, the front-axle pumpkin will also be on the driver side; therefore, engine offset to the passenger side will help clear both the steering column and the front pumpkin. In the more common application with a passenger-side 'case output, it may be beneficial to leave the engine centered or offset a bit to the driver side to clear the pumpkin, then solve any steering-column interference with Borgeson U-joints to move the column out of the way.
Tilt!
Side-to-side: The engine may be tilted in the chassis as viewed from the side or as viewed from the front although we couldn't think of any reason you'd want it tilted side-to-side as viewed from the front. Stage West used a level across the valvecovers to square the 350 in the frame.
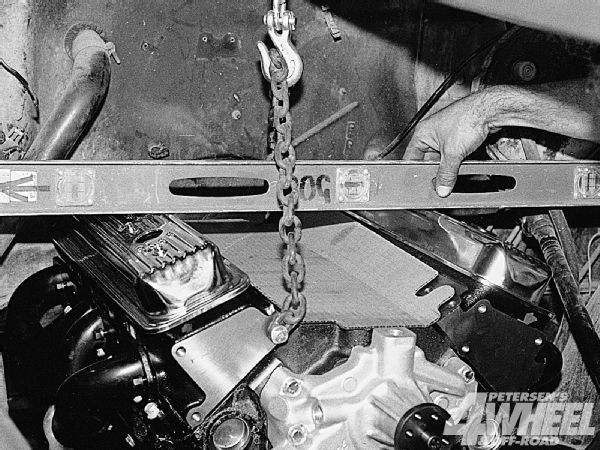 Side-to-side
Nose-to-tail: Tilting the drivetrain so it's a bit down at the rear output can often help solve problems with the rear driveshaft, but keep in mind that every degree of downward tilt at the rear 'case output equals a degree of upward tilt on the front output. Unless you have fulltime four-wheel drive, the front driveshaft rarely spins at high speeds, so the compromise to benefit rear-shaft angles may be worth it. However, lowering the rear of the drivetrain also reduces clearance at the 'case crossmember. It may also cause clearance problems with the distributor to the firewall or the bottom of the fan to the radiator.
PhotosView Slideshow


