Fatal Angle Tom Woods JK Wrangler Driveshafts - Jp Magazine

If you own a JK, you're going to want to lift it. And when you do, you're going to be thinking about how much lift, long arms or stock, which wheels, and how much tire. What you're probably not thinking about, and you really should be, is what you're going to do about the driveshafts.

2008 Jeep Wrangler Jk Driveshaft Upgrade installed Shaft Photo 33244032

The '07-'10 Jeep Wranglers come with constant velocity (CV) joints at both ends of the rear driveshaft and at the transfer-case end of the front shaft. These work fine at stock angles, but when you lift your Jeep, the driveline angle increases, often beyond what the CV joint was designed to operate within. It's only a matter of time before the boot on the CV joint rips because of the increased angle or contact with trail obstacles, releasing the grease and causing the CV joint to burn up.

This situation is extremely common on lifts of three inches or more, especially on the rear of two-door Wranglers. On four-door Wranglers, the rear shaft is longer so it can tolerate a bit more lift before reaching a fatal angle. But here's another factor that affects all JKs-if you disconnect the front sway bar for maximum suspension travel, the large-diameter front driveshaft will hit the exhaust, ripping the slip-joint boot.

2008 Jeep Wrangler Jk Driveshaft Upgrade comparison Photo 33243987 
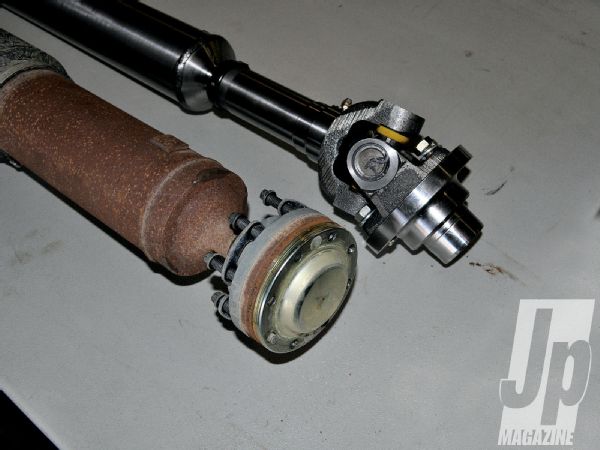
The factory CV joints in the driveshaft just can't compete with a double-cardan for strength, trail durability, or the angles within which they can operate. Shown are the new Tom Wood's rear driveshaft with the 1350 joint and flange (top), and the stock, pitiful rubber-bootie CV joint (bottom).

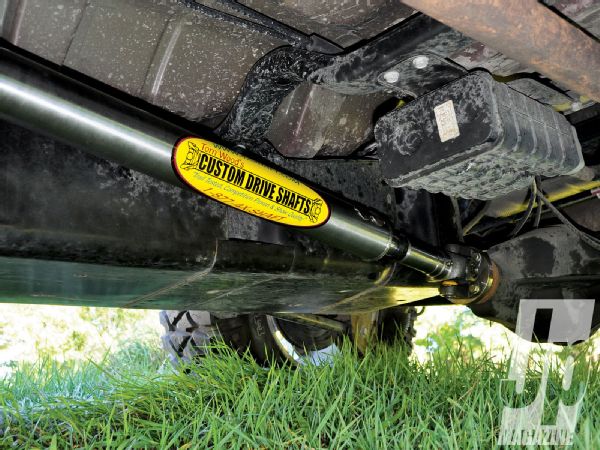
Here's the upgrade you should be drooling over right along with your shiny new wheels and knobby mud terrains: a set of double-cardan shafts from Tom Wood's Custom Drive Shafts. The double-cardan joint can handle greater angles than the factory CV joint, and when the pinion is positioned properly, will eliminate driveline vibration you may not even have realized you had.

We replaced the factory shafts in an '08 JK with a 31/2-inch Nth Degree lift after about 7,000 miles of use. We had banged up the front shaft on the exhaust tube and were starting to get more and more vibrations from the rear. The new shafts from Tom Wood's delivered a smoother running driveline at 70 mph than we had even before the lift and larger tires. Installing the new shafts is pretty straightforward. We went to Unlimited Offroad Centers in Fenton, Michigan, where Justin Whalen gave us some trade tips as he installed the new driveshafts.

PhotosView Slideshow Tom Wood's offers driveshafts for the JK using both 1310 and super-beefy 1-ton 1350 joints. The 1310s (left) generally are strong enough in most applications. But if you have huge tires, a lot of horsepower (swapped-in V-8), or are just really hard on equipment, you should opt for the 1350s. We went with 1310s in the front and 1350s in the rear. We also chose the Tom Wood's extreme-duty rear shaft, which is made from 3-inch diameter, 0.120-wall steel (compared to 0.083-wall standard tubing). The thicker tubing allows the driveshaft to take a ding or two in the rocks.
The front driveshaft has several issues. In addition to a CV joint at the transfer case that will fail at increased angles, the large tube contacts the exhaust system at full suspension droop. ... ...The Tom Wood's front driveshaft is a made from a 2-inch diameter tube that alleviates interference issues.
PhotosView Slideshow The flanges that are made for the axles and transfer case are a big advantage of a Tom Wood's driveshaft for JKs. Instead of using adapters, the company machines new flanges from billet steel. These are extremely strong and they haven't been welded;  welding can create distortion. These short flanges utilize less expensive, commonly available parts and keep the U-joint centerline close to the pinion bearing for minimal stress loading.
Use an 8mm socket to unbolt the factory driveshafts from the axle and transfer-case flanges. These have a thread locking compound on them, so you'll be there a long time if you're not using power tools. Justin Whalen of Unlimited Offroad Centers finds that a few thousand miles is usually enough to seize the driveshafts to the flanges, so once the bolts are loosened, use a plastic or brass mallet to break the shafts free.
Removing the axle flanges is the only somewhat difficult part of this swap. An impact wrench with a 11/4-inch socket is used to remove the pinion nut. You can do this with a breaker bar, but will have to keep the axleshafts from spinning and it will take a lot of gusto to break the nut free. Then you'll need a three-finger gear puller to free the flange from the pinion shaft.
PhotosView Slideshow JKs left the factory with two possible thread pitches on the transfer case rear-output shaft. Tom Wood's supplies both nuts with a new rear driveshaft. Use the one that matches the thread pitch on the shaft, slide the flange on, and use thread locking compound on the output shaft threads. Torque the nut to 180 lb-ft.
At the differentials, there is one more element that you need to be concerned with. The pinion assembly uses a crush sleeve to preload the bearings in the housing. Wood says you have to apply 200 lb-ft or more to the nut to mess up the crush sleeve, which will lead to bearing and other issues. He says to install the nut with a 15/16-inch thin-wall socket, use a thread locking compound and torque it to 180 lb-ft. You'll be just fine.
With the flanges installed on the axles and transfer case, the shafts bolt in using the hardware provided. Use thread locking compound on these bolts as well. To avoid vibrations, shafts with a double-cardan joint need to have zero angle at the axle flange. The front isn't critical, but use adjustable-length upper and lower control arms or cam bolts at the rear to remove any angle at ride height.