Rock Crawler Front Axle Build - 4-Wheel & Off-Road Magazine

Rock Crawler Front Axle Build - Amateur Axle Fred Williams Brand Manager, Petersen’s 4Wheel & Off Road homebuilt Front Axle front Axle Measure Photo 11482941

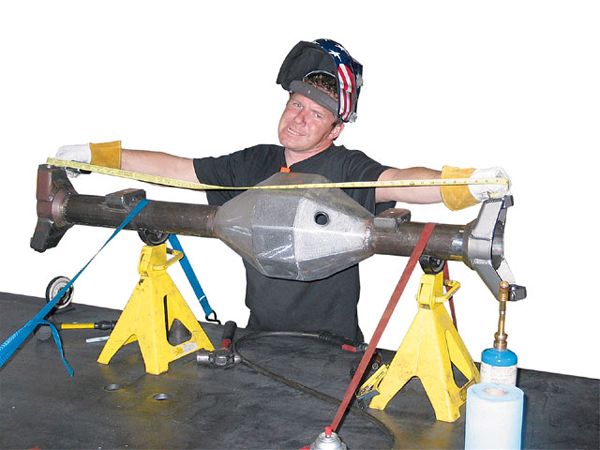
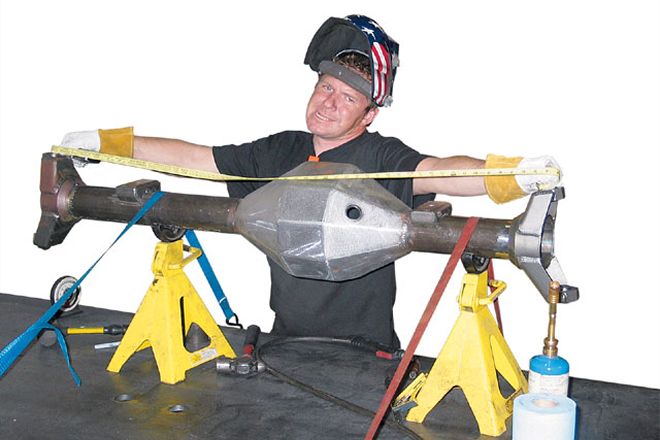
When We Heard That building an axle could now be done at home with nothing more than a metal saw, a grinder, a welder, and basic handtools, we had our doubts. In fact we still have our doubts and we've already done it! Wheelers have been narrowing axles for ages, but now you can buy the parts to build a trick lightweight axle with tough internals perfect for four-wheeling. Not only are the parts sent via UPS, but the buildup can be done at home over a weekend. This isn't a project for everyone, but if you've laid some quality welding beads in the past and if you're qualified to use a tape measure then you should consider this an option for your next trail machine. In fact it was pretty easy, and that's what has us stumped the most.

We noticed a lot of competition rockcrawlers running the new Spider-9 axles from Spidertrax. We found that the lighter weight, ease of assembly (and disassembly if need be), and ground clearance of the True Hi 9 centersections were all motivations to use these axles instead of the tried-and-true Dana 60. Many of the Hi 9 attributes are equal to or stronger than the average high-pinion Dana 60. Of course most of these competitors are running lightweight buggies, so we were weary of stuffing one under something heavy like a fully armored V-8 Jeep or a fullsize truck, but the owners of Spidertrax and Hi 9 were up for the challenge, especially with the new Spider-9 housing outfitted with 31/2-inch-diameter by 1/4-inch-wall axletubes. Check out what we came up with, all by ourselves.

PhotosView Slideshow 1. Our goal was to build a front axle at home. Luckily our home has a Miller welder, a Milwaukee chop saw, and a toolbox filled with wrenches, pliers, and hammers, and we know many of yours do too. Our calls to Spidertrax and True Hi 9 resulted in a bench full of parts including a Hi 9 third member fitted with 5.38 gears and an ARB Air Locker, a fabricated Spider-9 housing, and the Spidertrax Ultimate 60 knuckle kit. 2. The first step to the build is figuring out how wide an axle you want and the pinion offset. We decided to mimic a Ford high-pinion Dana 60 and shot for 691/4 inches from wheel mount to wheel mount, and we wanted to mount leaf springs at 31 inches on center, and this resulted in our pinion being about 6 inches offset from the center of the axle. Luckily Spidertrax has both an online measurement calculator and great telephone service and helped us determine where to cut the axletube so that they had the proper knuckle engagement and overall width. 3. Attaching the inner "C" for the knuckle is the biggest step in the entire buildup. If not done properly, the steering geometry will be incorrect. In professional shops these inner Cs are pressed on with thousands of pounds of pressure, but we were able to pound the Spidertrax part on after just barely cleaning the tube with a sanding disk. Heating the inner C slightly with a small propane torch helped, as did a heavy hammer. 4. We like about 3 to 5 degrees of positive caster. This means that at ride height the top of the C is leaned back 3 to 5 degrees. Any more than 10 degrees is excessive and less than 2 is not enough. The True Hi 9 should not have a pinion angle raised over 5 degrees up from level as that could inhibit the oiling. We decided to go with 4 degrees of positive caster and 4 degrees of pinion angle; this will allow us to rock the pinion down if need be, resulting in more caster. The camber is determined by the press fit of the inner C on the tube, though we can adjust it slightly when welding. 5. A proper axle shop usually has a fixture that turns the housing so the welder can continuously weld. All we had was a set of jackstands and our buddy Frank the Tank who was once again cleaning out the fridge while we worked. The solution was to first tack the C in four separate points around the tube, then crank up the welder to the proper setting and burn it in with short 11/2-inch beads on opposite sides, rotating the axle so we spread the heat out around the tube. 6. The outer knuckles use two spherical ball-and-race joints instead of standard ball joints or kingpins found in most factory axles, but are still rated at 16,000 pounds of axial load per knuckle so they should have no problem supporting a heavy trail rig. At the same time they are strong they are also light, weighing 21/2 times less than a factory Dana 60 knuckle since they are fabricated out of steel rather than heavy cast iron. 7. Between the ball and race and the knuckle there are various shim spacers allowing for a tight fit and future tightening of the joint should wear occur. An alignment prybar and a heavy dead-blow hammer are useful in assembling the knuckles and aligning the joints for the shoulder bolts to hold everything together. 8. The axle seals are available with a double seal and simply press into the axletube. What is neat is that they can be used with axleshafts from 27- to 35-spline sizes. We packed grease between the two seals and tapped them into place before locking them in with a set screw. 9. Though Hi 9 originally designed its axle for circle-track racing, the current owners of Hi 9 realized that the axle is perfect for the off-road market since it moves the pinion up more than an inch higher than a high-pinion Dana 60. What makes these third members unique is that custom reverse-cut gears were made specifically for Hi 9 in America by Richmond Gear, and yet it can be bolted into any standard Ford 9-inch housing. In addition, two thrust blocks (aka load bolts) are added so that their tips are a miniscule distance from the back of the ring gear. In the unlikely event that the ring gear should deflect under severe load, these will keep it from flexing. PhotosView Slideshow 10. All these gear-supporting features make the Hi 9 equal to, or stronger than, a factory high-pinion Dana 60 even though the ring gear and 9-inch ARB Air Locker are slightly smaller than the Dana 60. Since the 9-inch pinion has more offset from the center line of the ring gear, it also has more tooth contact, meaning all the torque is spread over more teeth compared to a Dana 60. Meanwhile the teeth of the Hi 9 gears are as large or larger than a Dana 60, depending on gear ratio. 11. We routed the copper air line for the ARB Air Locker within the special nodular-iron Hi 9 third member, and Hi 9 recommended running it below the ring gear so as not to interfere with the oiling of the high pinion. Since the Hi 9 uses special gears, it is delivered set up and ready to bolt in, again making this build considerably easier than a Dana axle that must have the gears professionally installed. We also used a forged 1350 yoke for a Daytona-style pinion support from Randy's Ring & Pinion, which added additional strength. 12. Spidertrax offers custom 300M heat-treated chromoly axleshafts that have removable high-angle 4340 yokes. Since we are using a 35-spline Air Locker, we could also have built the housing to fit factory Dana 60 axleshafts to save money, or to carry as spares, though some special machining might have been needed to align the inner seals. We assembled the axle with a set of CTM 300M heat-treated chromoly Dana 60 U-joints. Custom shafts will require a short wait. Note the six-bolt high-steer arms that are also keyed into the knuckle for added strength. 13. We've long been proponents of replacing unit bearings with rebuildable spindle-hub conversions for longevity. But one thing we noticed about unit bearings is just how clean and easy they are to work with should you need to replace a broken axleshaft. The Spidertrax Ultimate 60 knuckles (which can be installed on any 3- or 31/2-inch axletube, by the way) use a Ford Super Duty unit bearing, which is available redrilled to 5-on-51/2, 6-on-51/2, and 8-on-61/2 bolt patterns. 14. Whoops, don't forget to put the third member in before you put the axles and unit bearings in, though it may be easiest to install the third member after the axle is under your 4x4 because it adds most of the weight to your axle. Speaking of weight, a similarly built Spider-9 with Hi 9 weighs roughly 400 pounds. Compared to our high-pinion Dana 60 of equal size and big kingpin knuckles and brakes weighing 560 pounds, that is a serious savings in the unsprung-weight category. 15. Another weight savings aspect of the Spider-9 are these custom 14x3/8-inch rotors and aluminum hats. Ultra lightweight cross-drilled versions are also available as well as thicker custom rotors for heavy vehicles. The jury is still out on whether the 3/8-inch rotors will be enough for a street-driven fullsize truck, but we'll let you know what we find out. 16. Since the axle uses Ford unit bearings there are two choices for locking the axles to the unit bearings. Spidertrax offers these always-locked 4340 chromoly drive flanges with bling blue anodized aluminum caps, or standard selectable locking hubs can be installed. 17. The brake kit from Spidertrax includes Wilwood Dynalite billet four-piston calipers and Polymatrix pads. The combination of large-diameter rotors and multi pistons works great with 40-inch tires on rock-racing buggies, and Spidertrax claims a 23-percent increase in braking versus a standard 113/8-inch rotor. The caliper stand must also be welded to the knuckle but it will clear under a 17-inch wheel. Smaller brakes are available for 16-inch wheels. 18. In addition to the light weight, the 1-ton axleshafts, the high pinion, and the strong gears, the Hi 9/Spider-9 axles also have great steering angles when outfitted with their Ultimate 60 knuckles. The combination of Spidertrax axleshafts and knuckles results in an amazing 50 degrees of steering, while the average Dana 60 is lucky to reach 45. Plus Spidertrax offers an astronomical Ultimate 1550 knuckle that uses big 1550 steering U-joints to reach an unheard-of 60 degrees of steering. Of course this much steering angle can be dangerous on the street, and nearly impossible to utilize with a standard 4x4 frame since the tires will be hitting the suspension at full lock, but if you're building a buggy it should definitely be considered.