Trail Welding a Broken Driveshaft - Premier Power Welders - 4Wheel Off Road Magazine

Ultimate Field Fix - How To Repair A Broken Drive Shaft On The Trail ultimate Fix lead Photo 9219423

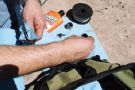
Wheeling is not without risks, and the harder we push it, the more risks we take. Trail breakage is the most common problem we face in the field, but if you know how to fix the carnage then you can keepwheeling and not waste the day on the side of the trail. Naturally, you should carry any common spare parts that might disrupt your trail ride, as well as the critical chemicals to make things right. Proper tools and the knowledge to use them are just as important, as well as specialty stuff like a Hi-Lift Jack and a snatch strap. But most important is the ingenuity of using what you and your trail buds have to make that special fix that steps outside the bounds of what you brought along.

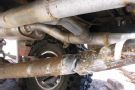
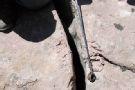
Our recent trip to Moab had us driving the 2005 Ultimate Adventure Chevy on the Green Day trail out at Area BFE. As with almost any trip we loaded up most of our critical trail tools and supplies and set out with a small group to open a new section of trail. Halfway through the trail we came to a 4-foot ledge with a notch in the center, just right for clearing our low-hanging rear driveshaft as we climbed the cliff. Unfortunately, we were 1 inch off to the right, and our driveshaft hit the rock and dented, resulting in a sausage-looking twist to the tube that luckily stayed together but hindered further trail time.

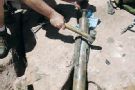
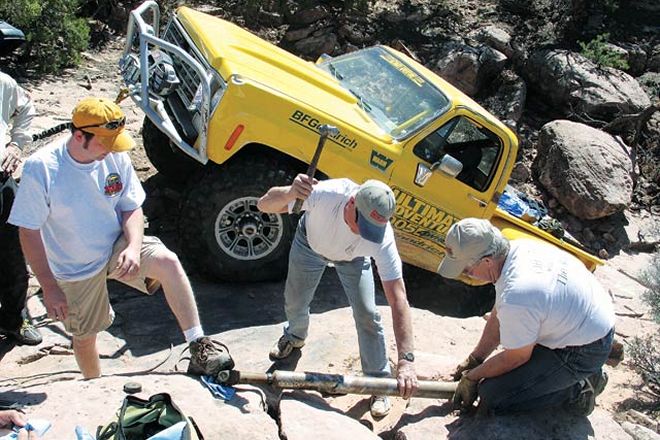
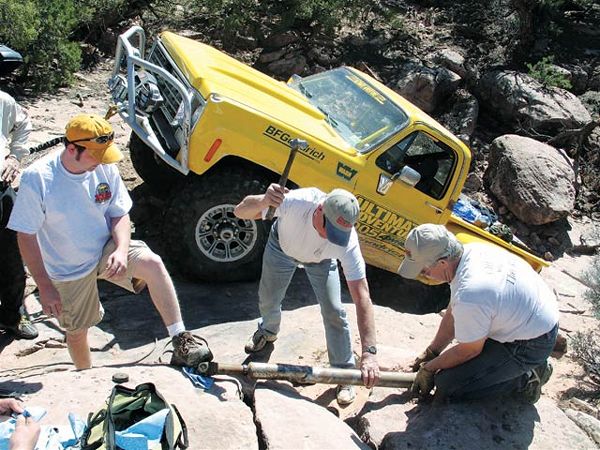
This wasn't our first driveshaft breakage--nor will it be the last--but we sure didn't have a spare, and the big oddball size and length meant no one else did either. We could have left the truck, walked the 20 miles back to town with the shaft and have a shop retube it, but what fun would that be? We decided to do what we like best, a trail fix with what resources we had, which was next to nothing. The only way to save the shaft was to weld it together with some bracing. We had two batteries and plenty of welding rod so we could weld it. Jumper cables would be welding leads, and we had all the tools to remove the shaft, but what about steel to brace it? We had little on board, but the front bumper could be hacksawed apart if needed.

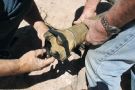
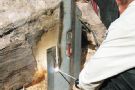
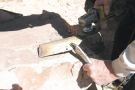
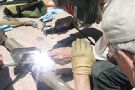
As luck would have it, Pat Gremillion of Premier Power Welder and Pull-Pal was a few vehicles ahead of us. The call had gone out on the CB for scrap steel for our predicament, without so much as a call back about old well pipe, fence posts, scrap exhaust tubes, or the like. Ready to hacksaw off our front bumper for material, Pat came happily dancing down the trail with the shovel end of his Pull-Pal trail anchor, which happens to be made of 4130 chromoly heat-treated steel, and would easily strengthen the driveshaft for further use. While not the cheapest fix (like welding our junk wrenches together for a scab patch), the plate was the steel we needed. Pat broke out his onboard Premier Power Welder on his Bronco to merrily slice and dice the Pull-Pal plate, then weld our driveshaft back together with it. Ingenuity is what it took for this trail fix, and Pat and his crew jumped in and had us back wheeling before we could break out the jumper cables. Check out the photos for details of what went right.

PhotosView Slideshow Pat Gremillion from Premier Power Welder and Pull-Pal turned his Bronco around and fired up his underhood welder before we could even remove the driveshaft. He hooked the winch of the Bronco to our Ultimate Adventure Chevy so we could safely remove the rear driveshaft without the truck rolling off the cliff and over us. Banging a driveshaft against a sharp edge results in this damage, or worse. Notice the spiral shiny marks around the shaft? That's where the rock rubbed and eventually dented the tube. Once dented, the strength is gone and the tube can twist into the sausage ends seen here. Luckily we stopped before a complete separation occurred. After pulling the U-bolt straps and bolts off, we taped the caps on the joint so as not to lose them in the dirt when the beating and welding started. Another option is to carefully remove the loose caps and put them in a safe place without disturbing the needle bearings in the cap. We should have used that method in the first place. Pat used his spare Pull-Pal-winch anchor plate to cut sections of bracing for the driveshaft. The plate is made from heat-treated 4130 chromoly steel, and would be more than strong enough for this usage. Pat cranked up the Premier Power Welder to slice and dice strips from the plate which would cover the twisted section of the driveshaft. Mike Cox from Sam's Off Road plugged the Makita grinder into the Premier Power Welder box, since it supplies 115 volts DC for power tools. Because Pat cut the plate vertically, most of the slag falls off the back side, so Mike didn't have to spend all day cleaning the plates up. Meanwhile, Doug McBirney and Jim Bailey wailed on the driveshaft to get it reasonably straight for the patching process. While we shielded our eyes from the arc's rosy glow, Pat tack-welded the straps on a corner at a time. Scott Frary from Eaton/ Detroit Locker pulled a C-clamp out of his Jeep, which made it easy to keep the plates in place for welding. Pat tried to space the plates evenly for the best driveshaft balance possible. The heat-treated steel of the Pull-Pal plate makes it a bit stiff to work with, but careful tacking and beating made it work. The heat from the welder makes the steel mellow out around the area being welded, so that section can be molded to the shaft with a hammer and clamped down again for a final weld. As luck would have it, all the beating and welding dislodged a U-joint cap. Of course, the cap and needles all rolled down a deep crack between the rocks as well. Our super-duper $3.99 CarQuest extendable magnet we bought that morning on a whim came in real handy, and extracted the cap and all of the needle bearings from the depths of the boulder canyon. Scott Frary volunteered to clean each individual needle as well as the cap, and lube them with extra grease pushed out of the slip-joint yoke. We thought about using suntan spooge for grease, but figured the real thing was better since we had it. We're happy to report that the shaft allowed us to finish the trail and drive home at 60 mph, with only a slight vibration on acceleration and more noticeable vibration on deceleration.