Teraflex Rear Disc-Brake Kit - 4Wheel & Off-Road Magazine

Teraflex Rear Disc-Brake Kit - All-Inclusive Brakes Jerrod Jones Former Editor, Off Road

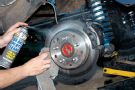
Brakes are one of the most important systems on your 4x4 and need to be built with overkill in mind. More important than being able to accelerate fast, climb a rock face, or jump a dune, you eed to be able to stop your metal slingshot before you accidentally run over a family of jackalopes. And if you're reading this magazine and own a Jeep, then we're going to assume that you might have slightly larger than average tires. Needless to say, we're guessing that your braking performance isn't much better than a freight train, and that you need to get some better stoppers on your Jeep fast. But before you run out and drop a cool C-note on Drunken Dan's one-size-fits-all disc retrofit kit, remember two important things. First, many calipers take different amounts of brake fluid to compress the pistons, something which no universal kit will account for. Second, it is not OK to get rid of your emergency/parking brake.

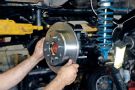
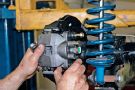
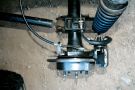
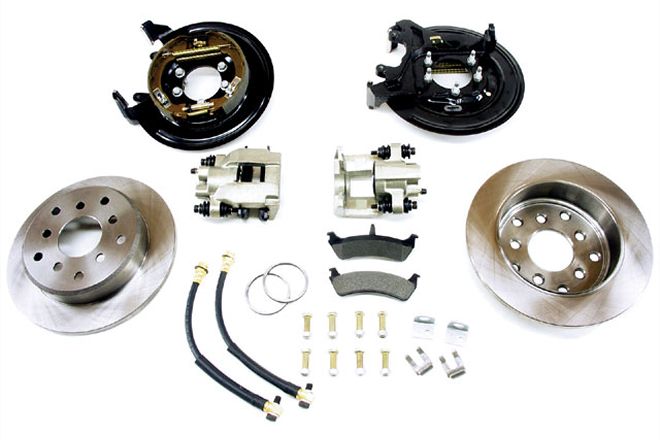
We really like Teraflex's disc-brake kit that puts some good grabbing disc brakes in the rear, with a secondary drum-brake emergency/parking brake hidden inside the hat of each one-piece rotor. They can be ordered for any newer rear Jeep axle or axle with "big" Ford housing ends, and for less than $500 (our wallets like that).

teraflex Brakes kit Photo 9299328

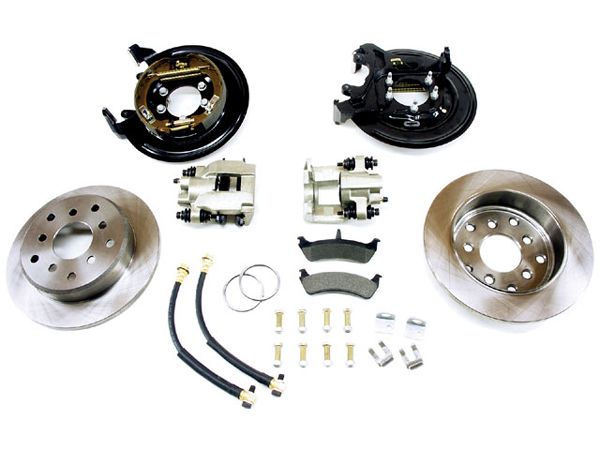
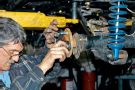
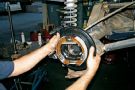
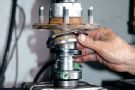
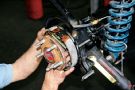
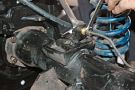
The Teraflex disc brake comes with new backing plates/caliper supports with drum-brake shoes already mounted and ready to go. A solid rotor handles the main stopping duties with pressure from a single-piston caliper. New brake pull cables are also included, along with a bearing spacer. The only things you'll need to buy are new bearings and axle seals. Since we were doing this brake kit on a Dana 44 rear axle, we used Set 10 Timken bearings and 9912 National Seal seals.

Who: Teraflex
What It Is: Rear disc-brake kit with incorporated drum-style parking brake
What It Comes With: Calipers, rotors, backing plate with drum shoes, brake hoses, hardware, brake cables for drum brakes
How Much It'll Set You Back: Under $500

PhotosView Slideshow 1. At South Bay Truck, we had Mike Long dismantle the old inadequate brakes and pull out the axles after loosening all four T-bolts and moving the retainer plate. Sometimes the axleshafts can be a bit stuck, and something like a slide hammer can be useful for popping them out. 2. The backing plate doubles as a caliper support and has the drum shoes already installed and ready to go. Well, not totally ready. Between both brake shoes on the bottom there is a brake adjuster that you'll have to set correctly using the rotor after the axleshaft is back in. For now, just set the backing plate on the four T-bolts, as the axleshaft's retainer plate has to slide onto these four bolts as well. 3. Unfortunately, unless you have a bearing press, you'll have to outsource a bit of work. We went to South Bay Truck to have them press off our original bearings and seals. The supplied Teraflex bearing spacer (being held by the thumb) will have to go on before a new bearing is pressed back on. 4. Though this kit is very simple and easy to install, there is one tricky step. The bearing spacer does not sit snugly on the axleshaft and will have to be held in place on the bearing as the bolts are tightened holding the backing plate and bearing retainer plate. This is much easier said than done, by the way. Remember that you also have to spin the axleshaft to get the access hole in the flange to line up with each bolt so you can tighten the nuts (while remembering to keep holding the bearing spacer in place for the entire time). 5. Once the axles are in and the bolts are tightened, you should be able to slide that solid rotor right on. This is the time to adjust the brake adjuster on the brake shoes to get the snuggest fit possible between the shoes and the rotor without creating drag. 6. Teraflex provides new rubber brake lines and clips to install them. Since we pinched off the single brake line coming down from the body, we only had minimal fluid leakage. The supplied brake hoses have the correct fittings on the end and go on using a 5/8-inch box wrench on the new brake hose and a 3/8-inch brake box wrench on the hard line end. 7. With the brake shoes properly adjusted and the rotors on, we slipped the new brake calipers onto the rotors and threaded the slider bolts into the backing plates. Always remember to have the bleeder screw up when mounting the caliper. The green plug is in the hole for the brake-hose banjo bolt to keep debris out during shipping. 8. Lastly, we installed the parking-brake cable, which snapped into the factory places on our Jeep with perfection. It's these last little things like brake cables that make all the difference between a kit that is a pain in the butt and one that includes what you need. 9. Teraflex's rear disc kit needed a bit more adjustment of the parking-brake shoe when we tried it out, but otherwise worked well once we broke in the rear rotor and pads. Remember to use brake cleaner or soap and water to clean any oils (including finger oils) off the rotor and brake pads for the best possible performance.