When it comes to building a vehicle from scratch, there are certain things that are important, and certain things that have to be done in a set order. Of utmost importance is that it is comfortable to drive. Unless you're building an out-and-out show car, you have to be as comfortable behind the wheel as possible. This means the interior has to be ergonomically planned out from the get-go. The seating position has to be comfortable, and the pedals have to be a comfortable position from the floor and easy to reach. Likewise, the steering wheel must be comfortable to use. Are the shifter and all the switches accessible with a seatbelt on? All this will depend on your height and size, and should be adjustable, if possible, if anyone else is to drive the vehicle.
While appearance is a large part of what we do, ergonomics in the cockpit is vitally important if you plan to drive any serious distance. Having determined the best position for the steering wheel, and hence the column in last month's issue, the next order of business was to install a brake and clutch pedal that met our parameters — to work properly, have sufficient travel, look good, be the ideal height from the floor, and be in the best position side-to-side.
The first three points were easily sorted, as we opted to use a universal through-firewall brake and clutch pedal assembly from Kugel Komponents, with their round pedal pads. The fourth point was easily solved, as we long ago determined that having the center of the pedal pad 8½ inches from the floor was ideal for us. You may prefer different, so simply measure your daily driver or whatever car feels comfortable to you, and use that measurement. All of which just left the side-to-side positioning remaining.
The ideal position was to have the brake pedal on the right of the column, and the clutch on the left, but we hit a snag. In order to facilitate removal of the valve cover, the booster had to be a certain distance away from the engine on the outside of the firewall. We couldn't change the height as it would mean changing the height of the pedals inside the cab. The swage lines in the firewall also allowed us limited options, unless we removed them and went with a flat firewall, as both the bracket and the booster bolt up to flat surfaces. Given that the position of the booster allowed us to mount the pedal assembly bracket on a flat section of firewall, that was the easiest option, though it meant the pushrod for the booster, and hence the brake pedal, was directly above the steering column.
We could have heated and bent the pedal, but it would have ended up shorter than the clutch pedal, and affected the built-in pedal ratio. Instead, our solution was to take the pedal back to Kugel Komponents and have them weld another pedal farther to the right on the pivot shaft, and then trim the original pedal so the upper section, operating the pushrod, remained. A perfect solution; we now had pedals where we wanted them, they looked good, yet still worked as intended. We should point out that the Kugel pedal assembly is designed to be a universal fit, and in the majority of cases is just that, but it's nice to know they are prepared to make minor modifications if required. Aside from the modified pedal, our assembly works exactly as designed, and works great. Kugel Komponents will shortly be offering offset pedals as an option.
With the pedal assembly mounting process, we cut the holes in the firewall for the master cylinder pushrods, allowing us to move on to the upper end of the brake system, namely a Wilwood dual brake master cylinder, mounted to a 7-inch booster, and Wilwood clutch master cylinder. We also installed Wilwood's recently introduced Combination Proportioning Valve Mounting Bracket Kit, which includes the valve, bracket, hardware, and pre-bent stainless steel lines, making installation both a breeze and appearing professional.
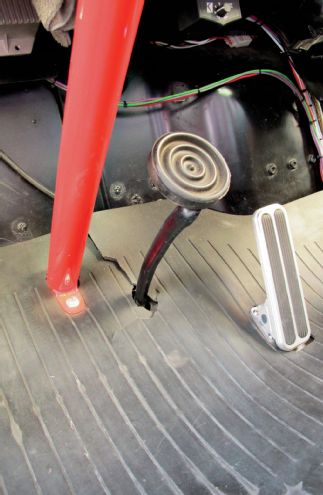
01 The stock steering column passes through the toeboard, but so does the stock brake pedal. We're going to change that and modernize our Effie.
02 Kugel Komponents offers several different styles of pedal assembly, from through-firewall as shown, to 90 degree and even 180 degree. The latter two put the master cylinder inside the cab for a clean underhood appearance. Brake only or brake and clutch assemblies are available. Both pedals pivot on a common shaft, using nylon bushes.
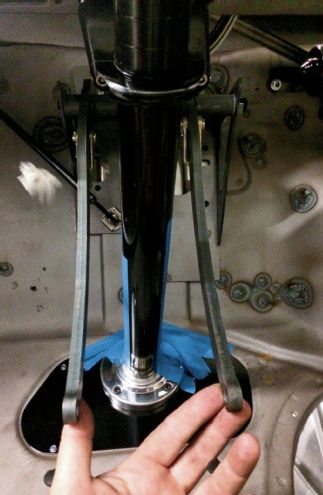
03 Our first mock-up position placed the brake and clutch pedals on either side of the steering column. Ideal, but it placed the booster too close to the engine to enable the valve covers to be removed, and the swage lines in the firewall would make mounting the assembly awkward.
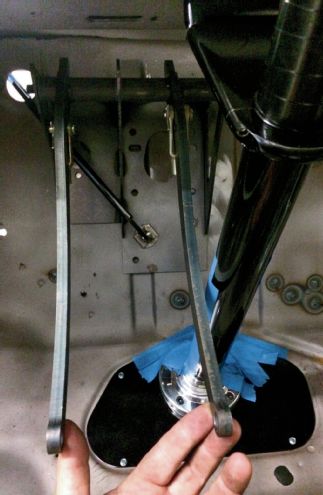
04 We tried mounting the pedals with both on the left of the column, but not only did it look and feel odd, the swage lines in the firewall again made mounting the assembly difficult.
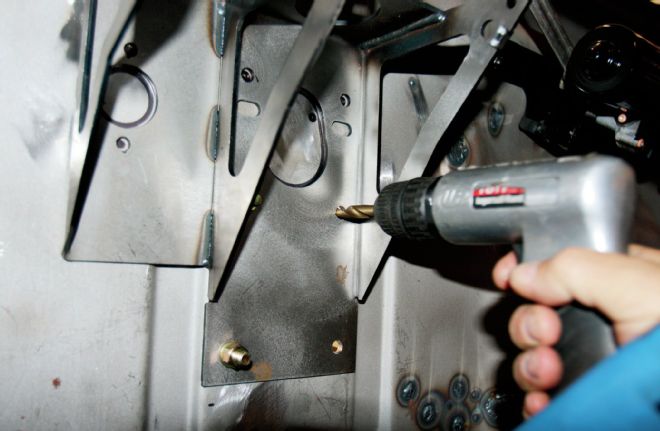
05 The assembly fit perfectly on this flat section of firewall, and the booster also fit here perfectly too, so once the pedal height was determined, we drilled the firewall, using the bracket as a template. We'll show how we overcame the pedal placement problem in a moment.
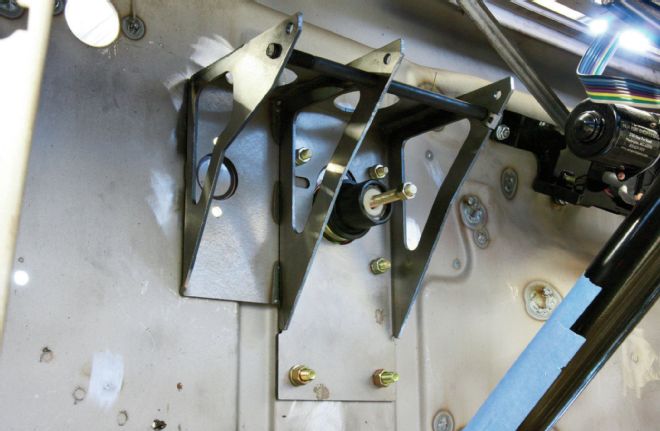
06 The bracket bolted in place, along with the booster. We used hole cutters as close to the size of those in the bracket for the booster and clutch cylinder holes in the firewall. The clutch hole has yet to be cut.
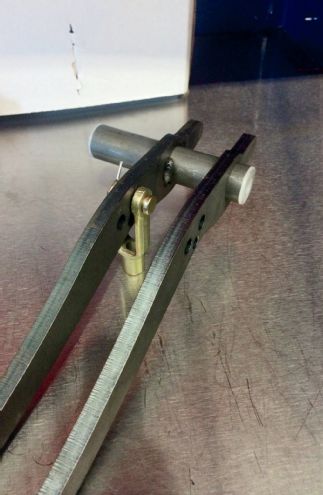
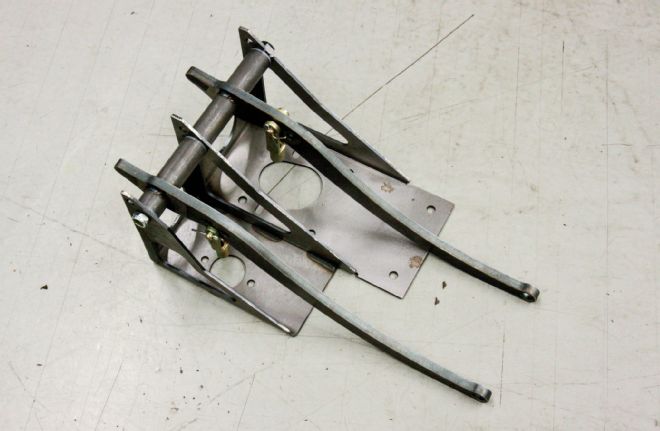
07 The solution to the pedal problem was to use another pedal and weld it further along the shaft, but retain the top section of the original to operate the master cylinder/booster (where the clevis pin is).

08 Kugel Komponents have performed this modification before, and were happy to do it for us. While the pedal bracket is universal, we had to be awkward and want it modified!
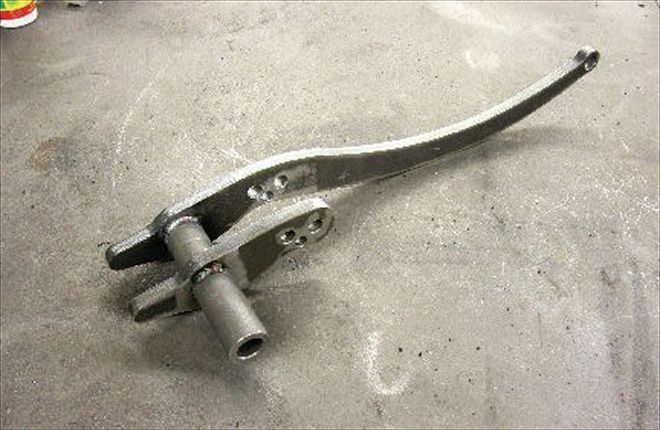
09 Here's the result, with the original pedal modified to leave the upper section. This means the actuating rod aligns with the booster/master cylinder as intended, but our pedal now clears the steering column.
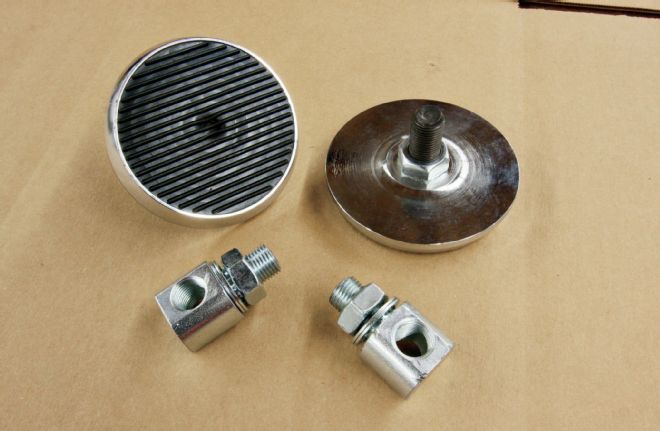
10 Kugel Komponents offers several styles of pedal pad. We opted for this round style, with a ribbed rubber insert. The pedal pad mounts allow the pads to be angled to suit.
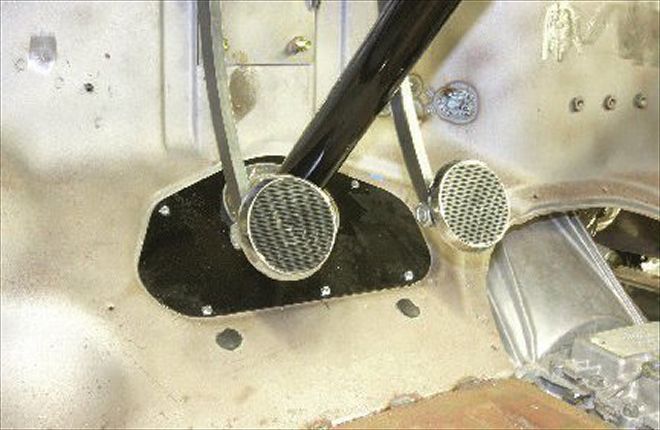
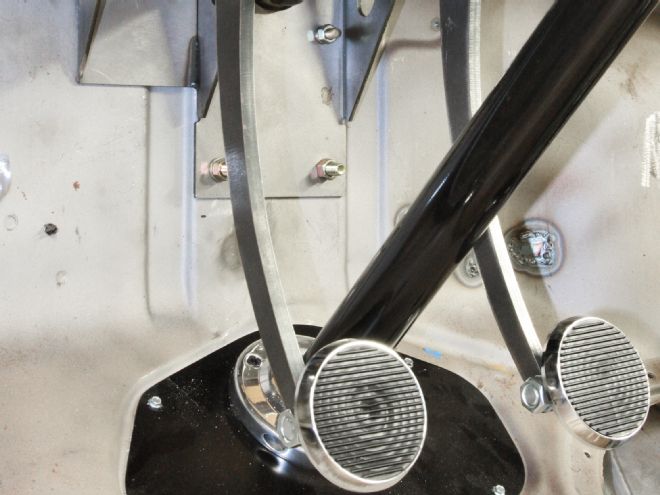
11 An added bonus of the pedal pad mounts is that we can choose between mounting both pads offset to the right of the pedals…
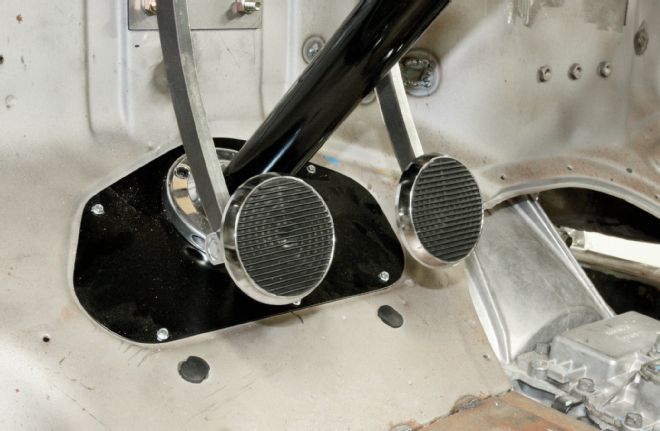
12 …or offset the brake pad to the left, positioning the pads closer together if desired.
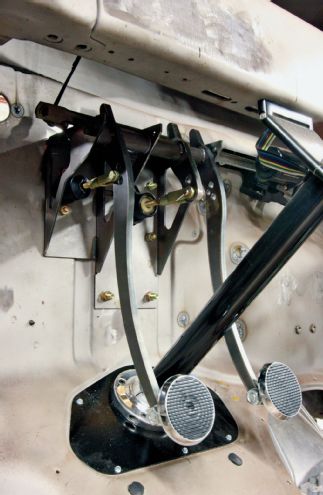
13 The finished assembly; our pedals are now on opposite sides of the column, the brake pushrod still passing through the firewall where we wanted/needed it to be. Note the clutch master cylinder is now in place. The Kugel assembly is designed to accept a mechanical brake light switch on the upper part of the bracket, though we have a pressure switch on the Wilwood proportioning valve.
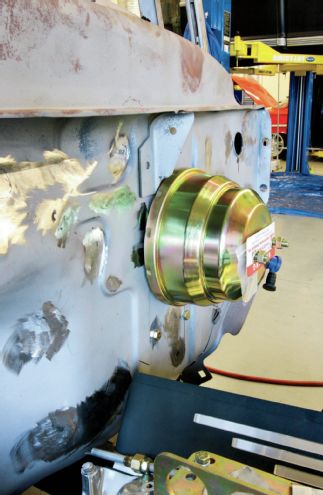
14 We used an 8-inch double-diaphragm booster, also sourced from Kugel Komponents, and part of our pedal assembly location problem was that we wanted to be able to remove the tall valve cover on the Roush small-block Ford with the booster in place to facilitate maintenance in the future. Note a small section of the firewall brace had to be removed for clearance.
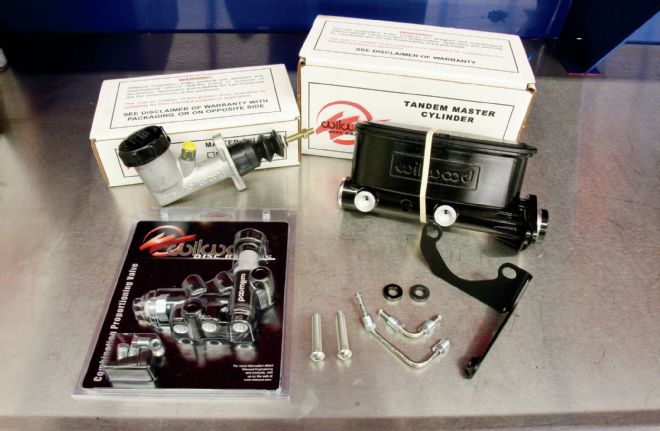
15 As we'll cover in a future installment, we'll be using Wilwood discs at all four corners. We also sourced our master cylinders, proportioning valve and bracket kit from Wilwood. The bracket kit is designed to install their valve on their tandem master cylinder, using pre-bent stainless lines.
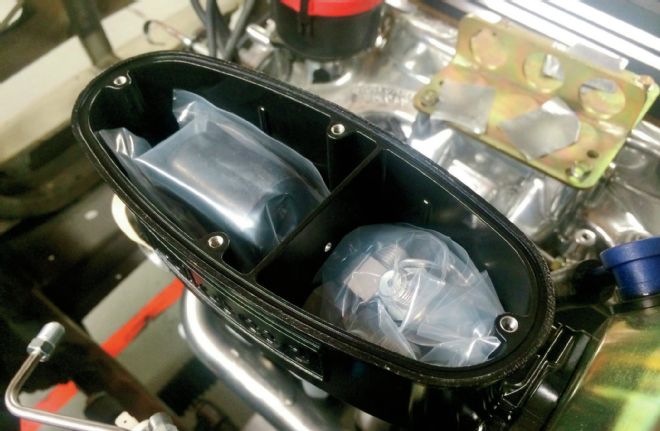
16 After searching through the boxes for the brake pipe fittings and blanking plugs for the dual-sided master cylinder, we discovered that Wilwood ships them inside the master cylinder!
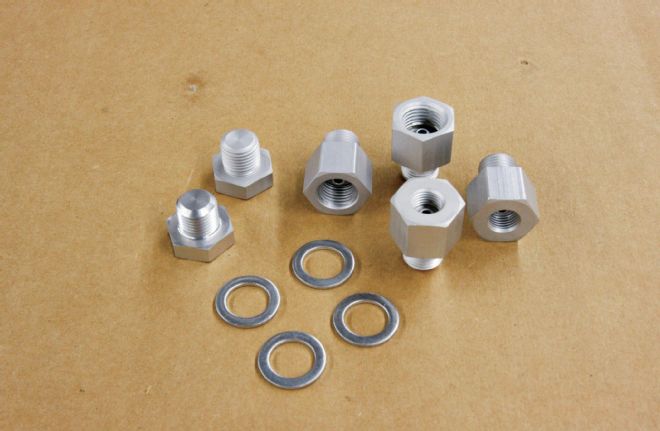
17 A pair of blanking plugs are included so you have the option of plumbing your brake lines from either the left or right side of the cylinder. We used the 1⁄2-20 to 3⁄8-24 fittings to plumb the proportioning valve. Note four crush washers are also included.
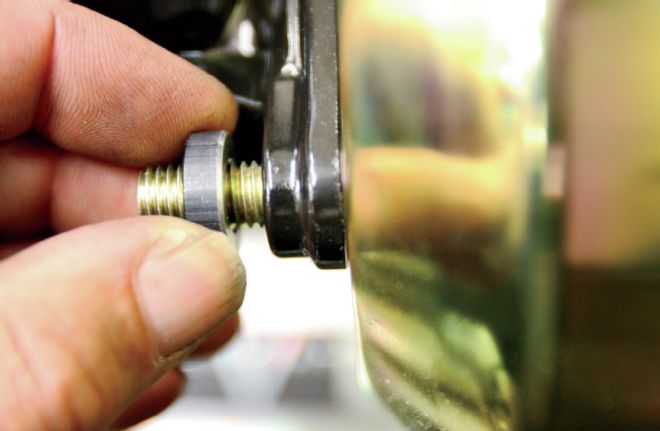
18 We installed the blanking plugs on the engine side of the master cylinder.
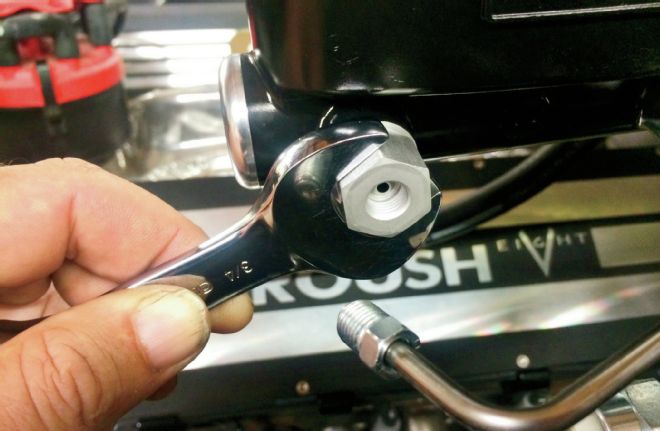
19 The 1⁄2-20 to 3⁄8-24 adapters were installed in the master cylinder before the pre-bent stainless lines were installed.
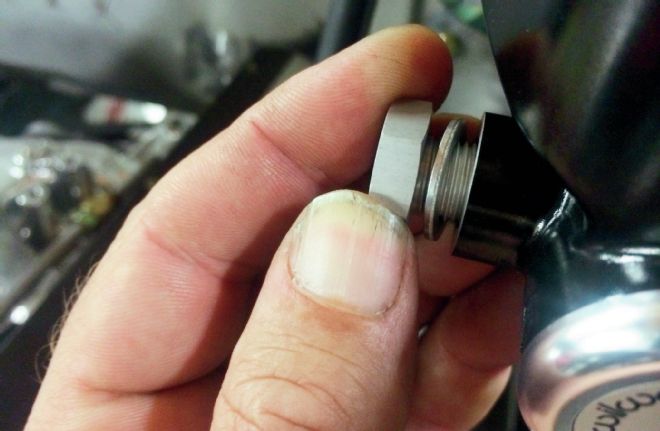
20 Included in the kit are these spacers that have to be installed before the proportioning valve bracket is fitted, to allow it to clear the ribs on the master cylinder body.
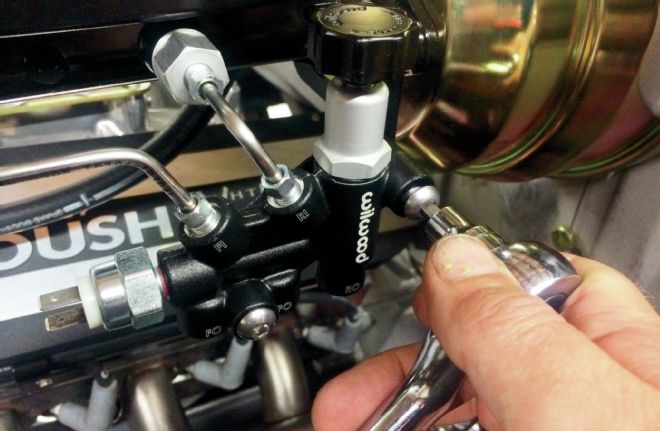
21 Stainless Allen-head bolts are supplied, to mount the valve to the bracket.
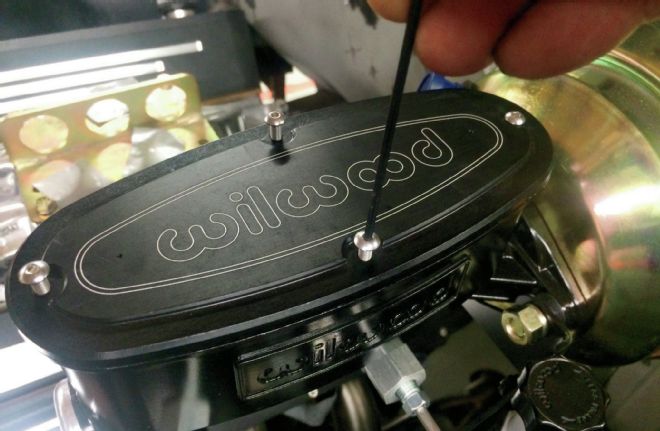
22 More stainless hardware holds the reservoir top in place.
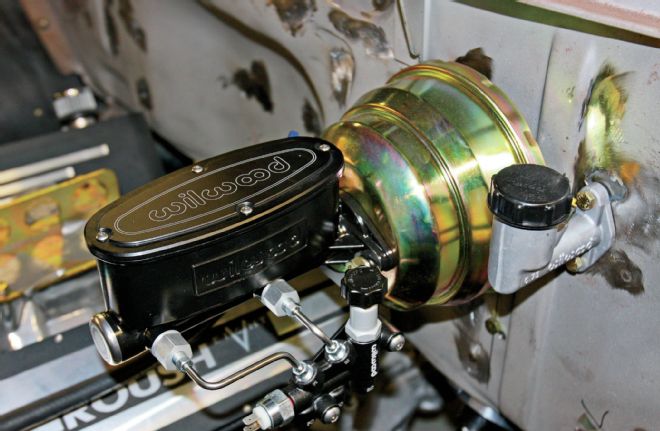
23 The completed installation in the engine bay, including the clutch master cylinder. All that remains now is to install the brakes and plumb the lines. Sounds easy said quickly!