Wild engines, with aluminum everything, mega cubic inches, huge superchargers, three stages of nitrous, and untold horsepower are fascinating, but back in the real world, most of us live with much more modest combos. Stock or near-stock engines have to work well on the street, and that means starting in a variety of weather, not overheating, idling at a reasonable rpm, and working with power accessories.
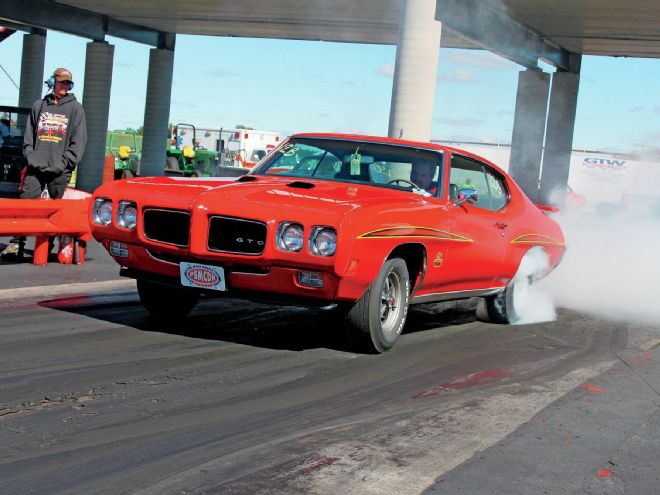
Speaking of power, more is always better, right? The vintage muscle cars have a lot of power in stock form, but what if your prized Pontiac could run like a Pure Stock Drags racer? You might be surprised to find that tuning for the dragstrip works very well on the street, too. It's all about getting the engine to move as much air as possible, and burn fuel efficiently.
Nearly nobody else we know has the depth of experience or consistent results as Dan Jensen, life-long Pontiac guy, founder of the Pure Stock Drags, and full-time restorer and engine builder. We spent some quality time with him to discuss one of his favorite topics – Pontiacs, and how to make them really run.
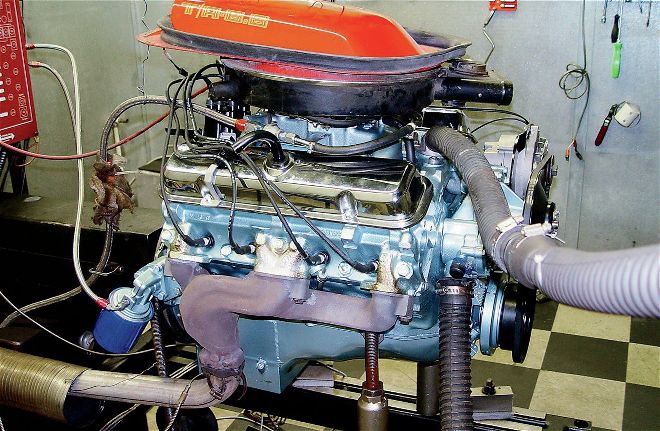 Pontiac specialist Dan Jensen has spent many hours of dyno time studying what does and does not make power on stock and near-stock muscle-car engines.
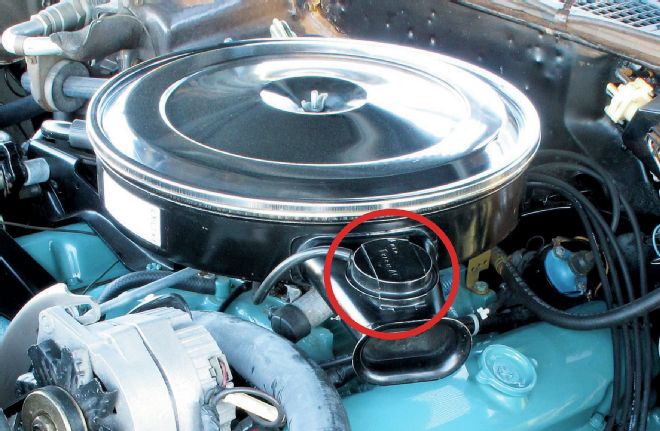 If this easily overlooked servo isn’t working, you could be choking your engine and breathing the hottest air in the engine compartment—both big killers of power. If your primo Poncho runs like a pig, check that pre-heater flap. It should be fully open at normal operating temperature. Some Pure Stock Drags racers disable the system and wire it open to prevent vacuum leaks and other problems.
Breathers may also conceal a big, but almost always overlooked, power robber. Late '60s-and-up Pontiacs had a vacuum-operated system that drew intake air from around the exhaust manifold—the first part to heat up once the engine starts—at cold start, to speed warm-up and prevent carburetor icing during very cold weather. A pre-heater flap built into the breather's snorkel closes off the snorkel opening and instead pulls in air from around the exhaust manifold. Once the engine warms up, a temperature sensor inside the breather sends vacuum to a canister on the snorkel, and the diverter opens the snorkel—if the system is working right. If not, your engine is breathing very hot air, and a lot less than it needs.
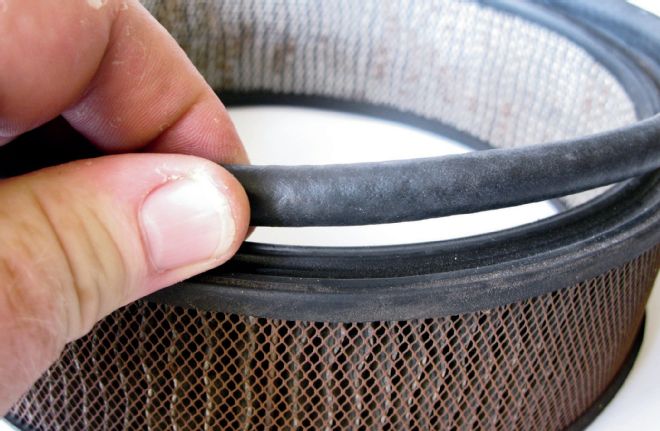
On the topic of air filters, Dan says the dyno results are clear. "We saw no difference between a reusable air filter and a clean, stock paper filter."
Dan's tip: Raising the [breather] lid [as explained] can be good for anywhere from 6 to 10 horsepower on Pontiac V-8 engines.
 If this easily overlooked servo isn’t working, you could be choking your engine and breathing the hottest air in the engine compartment—both big killers of power. If your primo Poncho runs like a pig, check that pre-heater flap. It should be fully open at normal operating temperature. Some Pure Stock Drags racers disable the system and wire it open to prevent vacuum leaks and other problems.
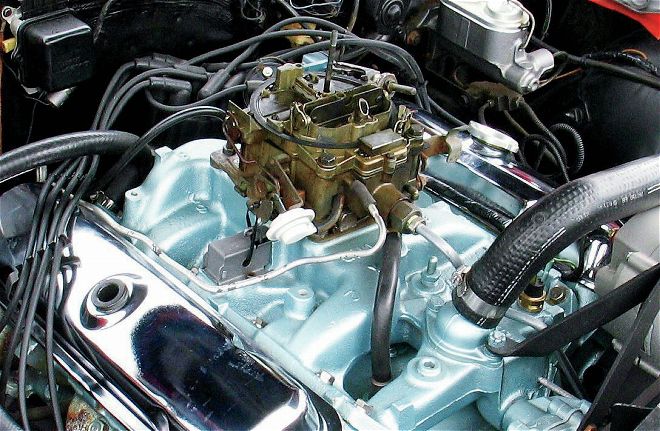 Rochester Quadrajets are plentiful, serviceable, and very tunable. Small primary bores keep high velocity at light throttle, and large secondaries provide plenty of flow when you need big power.
Dan's tip: Smog engines not only had lower compression, but also leaned-out fuel metering in the carb for emissions purposes. Both took a bite out of performance, some of which can be adjusted with a simple rejetting. When tuning your carburetor, start at a 30 numbers difference between the jet and the metering rod for high-compression engines, and 32 numbers difference for low compression.
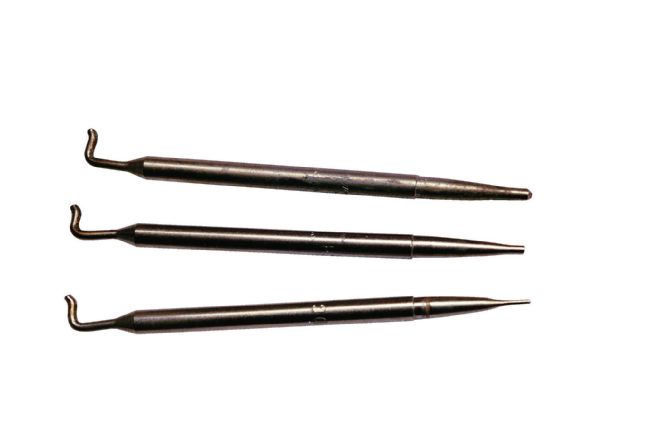
 Tuning the Quadrajet’s primary metering rods affects driveability more than power since the primaries are so small compared to the secondaries. The shorter rods used in ’75-up carbs are not interchangeable with earlier carbs.
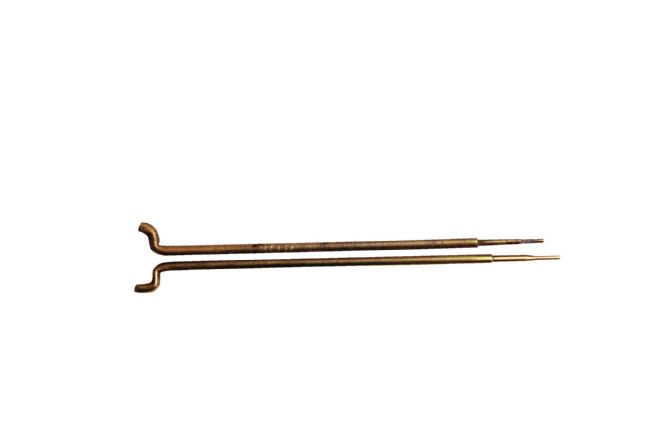
 One of the most critical parts of extracting maximum power from carburetor tuning is the secondary metering rods, which determine fuel delivery under heavy throttle. The taper determines how much fuel gets metered into the engine, and at what point in the opening of the carburetor. Move up or down in size in small steps and track your changes and results in writing.
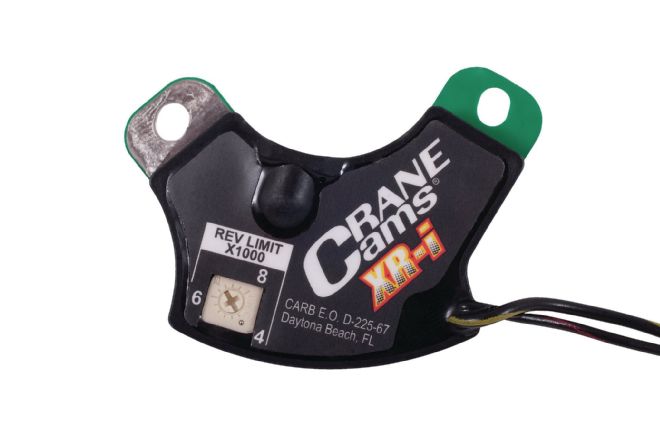
 The Crane XR-I fits completely under the distributor cap; frees you from ever having to change, file, or adjust points again; and costs less than $100. Sound good? It is.
A reliable module eliminates the frequent maintenance and sometimes-iffy performance of points and ensures top performance. "I'm a big fan of the Crane XR-i module with rev control built into it," Dan notes. "It takes the place of points and has an adjustable rev limiter built in. They're only around $70. Other manufacturers' modules have rev limiters, but the Crane is easiest to set, in my opinion."
Dan also uses and recommends Crane's matching PS20 coil. It's a black canister type, so it looks stock.
Dan's tip: Get your ignition system's basics up to speed with new plugs and wires, and use a Crane XR-i module for top performance and driveability. Use its rev limiter to prevent over-revving.
 The Crane XR-I fits completely under the distributor cap; frees you from ever having to change, file, or adjust points again; and costs less than $100. Sound good? It is.
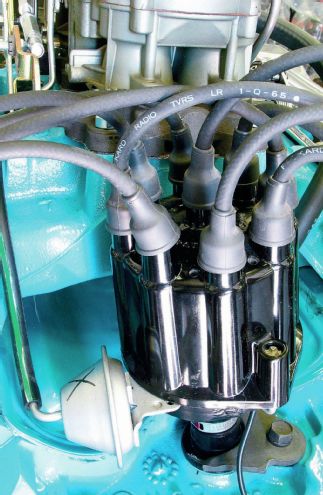
 Engine vacuum is a sure measure of engine efficiency, and not subject to normal manufacturing tolerances that can throw off your tune by quite a bit when you accumulate plus or minus variance on a string of parts like the crank keyway slot, harmonic balancer slot, timing numbers, balancer ring’s actual position, timing pointer hole, and timing pointer hole boss in the block.
"For a high-compression engine with a mild cam, I'd probably want a little more mechanical advance because they can't tolerate as much initial timing as a low-compression engine can. Most 400s [except Ram Air IVs] have 10 degrees of initial timing, but I like around 12 degrees initial timing as a rule of thumb. Pontiac engines seem to like that."
With initial timing set to 12 degrees, and mechanical advance bringing the total to between 36 to 42 degrees by 2,500 rpm, some additional tweaking will get you to your engine's optimum setting.
Dan's Tip: Starting with 12 degrees initial advance, use mechanical advance to bring the total between 36 and 42 degrees total, all in by 2,500 rpm. Try a few degrees plus or minus to see what your engine likes best.
 Engine vacuum is a sure measure of engine efficiency, and not subject to normal manufacturing tolerances that can throw off your tune by quite a bit when you accumulate plus or minus variance on a string of parts like the crank keyway slot, harmonic balancer slot, timing numbers, balancer ring’s actual position, timing pointer hole, and timing pointer hole boss in the block.
You can check it by pulling the spark plug from the No. 1 cylinder (driver-side front) and inserting a small probe to feelthe piston as it rises to top dead center. When the piston is at the top of its travel, the timing pointer should be at 0. If it's anywhere else, you need a new balancer.
Dan's Tip: Ignition timing is critical. Confirming the accuracy of the timing marks on the harmonic balancer is a must for top performance. Top Dead Center (TDC) indicated on the balancer must match actual TDC of the piston.
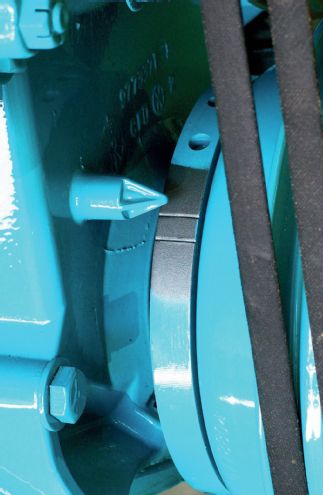 Dan recommends a new harmonic balancer since the outer ring, which has the timing marks, often moves, throwing your timing out even though it appears to be spot-on. Variables about whether 0 degrees as marked on the balancer is actually 0 degrees is another good reason to tune using engine vacuum as the guide.
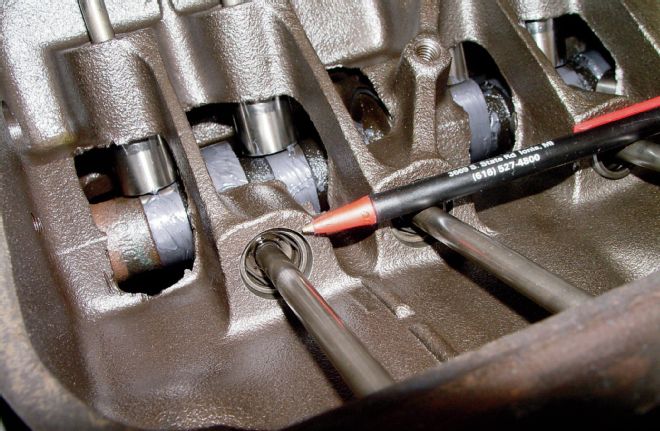 An undesired effect of milling the block and heads over the years is that what was correct pushrod length has now become too long, causing the lifter plunger to bottom out when torqued to factory spec and using stock rocker studs.
Dan says: "Pontiacs use a shouldered rocker stud. The factory setup is to tighten the rocker until it hits that shoulder, then torque the nut to 20 ft-lb. But once you start cutting the heads and deck, doing that can jam that pushrod down into the lifter until it almost bottoms out. You don't want to do that."
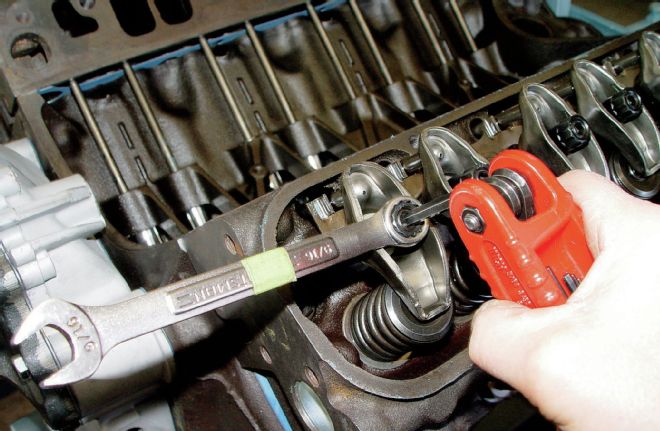
The remedy is simple. "I like using ARP studs, and swapping out the stock rocker nuts for polylocks, or crimp nuts that Chevys and AMCs use. They grip the threads so they stay where you set them and don't back off. I tighten the nut down to zero lash—where all the slop is taken up—then go another half turn." That gets ideal adjustment on every valve, without relying on lifters to create the proper slack.
Dan recommends the customary three-angle valve job, and also finds that going to extremes with polished and neck-down valves are not worth the cost in a street engine.
 Changing the rocker nuts will restore proper setup once again.
Dan's Tip: There's little, if any, room for larger valves on heads with 2.11/1.77-inch valves from the factory. On '73-'74 non-Super Duty heads, there's room to replace the factory 1.66-inch exhaust valve with a 1.77 if you need better top-end breathing, but don't expect huge gains, and understand that this mod is not legal for the Pure Stock Drags.
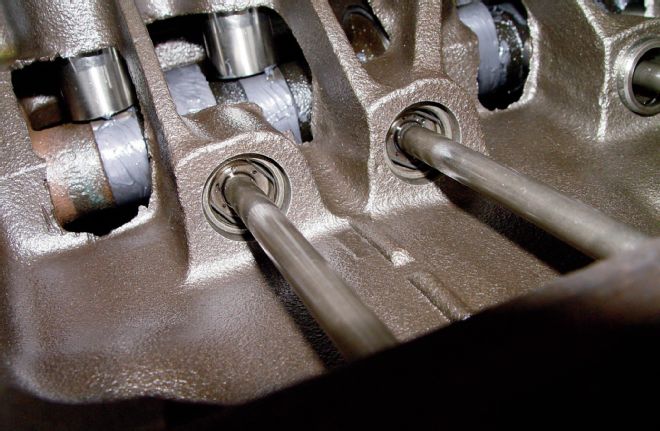
 Crimped or polylock rocker nuts (shown here) with ARP studs do not use the OEM method of seating the rocker pivot on a shoulder machined into the stud. Instead, the rocker finds its own, correct position on the stud by adjusting to zero lash plus half a turn. It is held at the correct lash by a locknut.
"I ran a '69 Firebird Ram Air III—a D-port engine that came with long-branch manifolds—on the dyno. I wanted to start with '69 standard logs, but I didn't have any. All I had was '75-and-up emission logs, which are even worse. I ran those first, then switched to the nice long-branch manifolds. The difference—9 horsepower. That's it. [Pontiac engine engineer] Mac MacKellar told me that he came up with that same 9 horsepower in his dyno tests of the day."
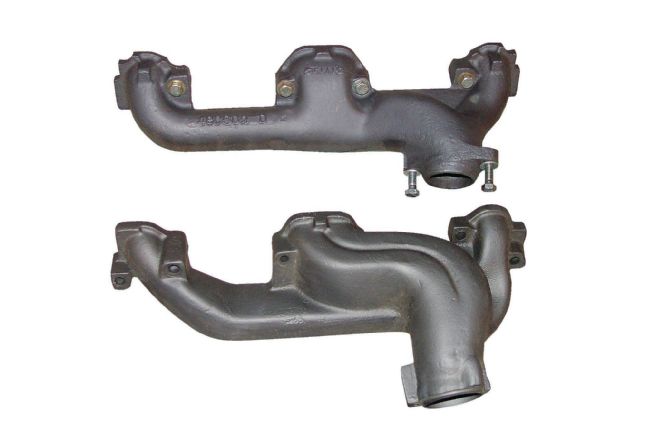 One looks smooth and beautiful, and the other keeps you up at night fretting about backpressure, right? Relax. Dan’s dyno testing shows that even the crappiest exhaust manifold is costing you a max of only 9 horsepower.
Like cam specs, moderation works well on exhaust-pipe diameter. Dan says: "On a 350, 2.25-inch is more than enough. On 400 and up, 2.5-inch works. On 455s, you could go with a 3-inch, but I think that is overkill unless the engine is really modified."
Dan's Tip: An H-pipe or X-style pipe quiet the noise and add a better tone, but as far as power gains, the dyno tests he's been involved in show mixed results. H-pipes and X-style pipes are thought to boost mid-range torque, but Dan can't point to his own dyno tests to confirm it.
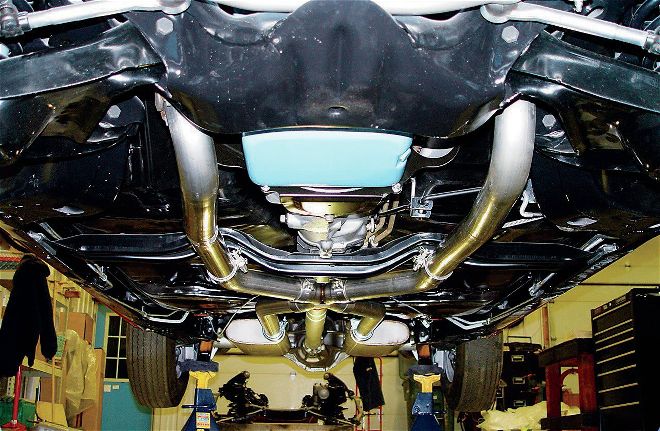 Unless you’re running something really big and trick, 2.5-inch pipe should be plenty. This set is from Pypes.
Dan's Tip: Brad Penn 30W break-in oil works great for protecting the engines at startup, and Valvoline VR1 Racing Oil has superb psi wear protection.
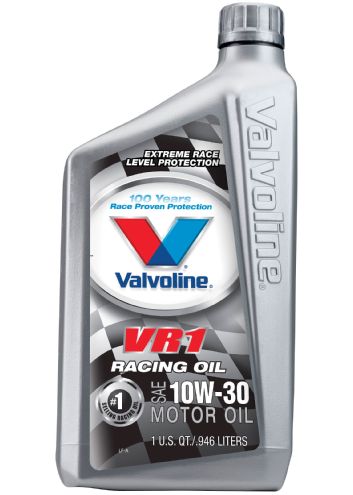 Valvoline VR1 Racing Oil is commonly available in auto-parts stores.