Chopping the top on a 1932 Ford five-window coupe is by no means a novel task. It's been done many times, many ways. So what's so special about this top chop? It's the first time the roof has been cut on a brand-new United Pacific Industries reproduction 1932 five-window body.
In fact, this is literally the first complete body to be released from the United Pacific facility. When Roy Brizio of Roy Brizio Street Rods in South San Francisco, California, told the crew at United Pacific that he was building a special project for Vic Edelbrock Jr. at his shop they hurried up production to provide Roy Brizio Street Rods with their first example of a completely reproduction body, from sheetmetal to wood framing.
As a longtime employee at Roy Brizio Street Rods, I have seen plenty of original Henry bodies come through the door. While having "real steel" makes for good bragging rights, the amount of time it takes simply to repair the damaged, rusted, or poorly modified areas of an original Ford body usually adds quite a bit to the cost of the project. Starting out with brand-new, unmolested sheetmetal is a welcomed break from the usual tedious repairs, and can actually save quite a bit of money in the long run.
As for the quality of the body, both the detail of the panels and the quality of construction are top-notch. The stampings are true to the original and the body lines and reveals are very crisp and well defined. Like the Brookville three-window body, this body uses some overlapped seams where Ford didn't have them, but these can be cut out and butt welded if you're a stickler.
Since Edelbrock Jr. is a classy gentleman (and tall), we agreed on a subtle 2-1/2-inch chop for this particular job. The end result makes for a noticeably sleeker, refined profile, but doesn't have the nasty attitude of a more severe chop. This month we will take a look at the beginning of this chop with the completion appearing next month. As you are reading this, the finished car is being photographed for an upcoming feature here in STREET RODDER. Keep your eyes peeled for the full reveal.
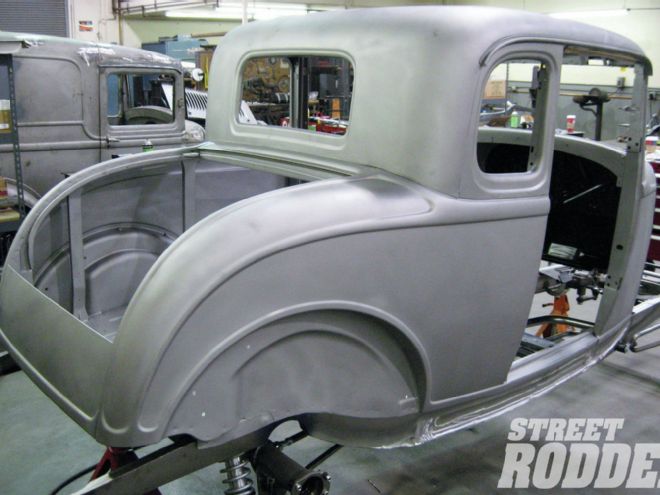
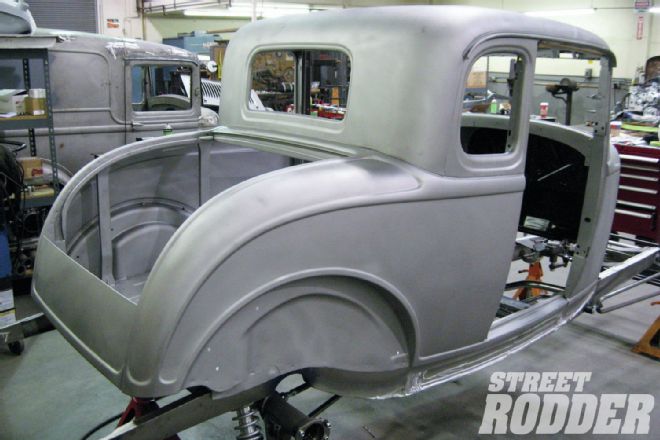 1. The body arrived from Pacific Industries completely assembled and sprayed in black primer. The first thing we did was disassemble everything, remove much of the wood, and send all of the body panels out for bead blasting.
 2. One of the often-overlooked details of a good chop is to adjust the gaps and door alignment before you start. I always prefer to bolt the body to the frame with the firewall and seal in place, and make sure the inner ’jambs have plenty of clearance.
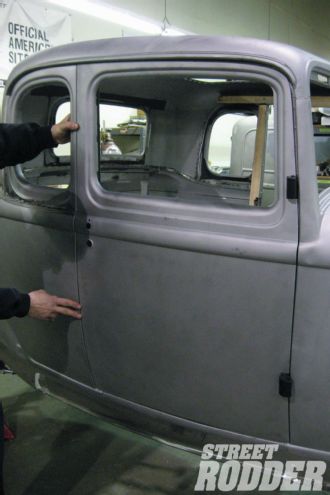
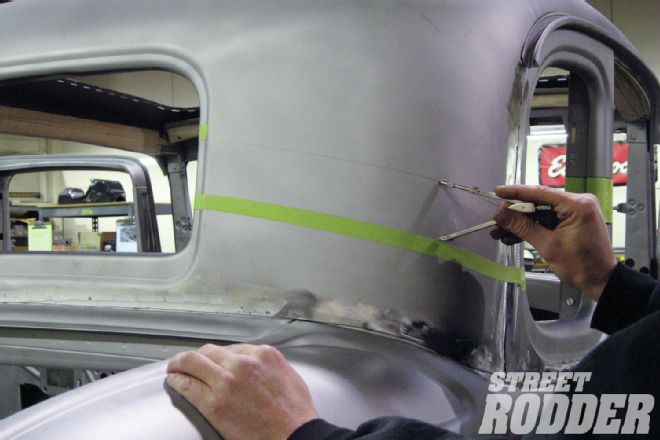
 3. I like to use tape to mark out many of the chop lines. It saves a little time by relieving you from having to mark every single cut, and thick tape remains very straight as you pull it around corners.
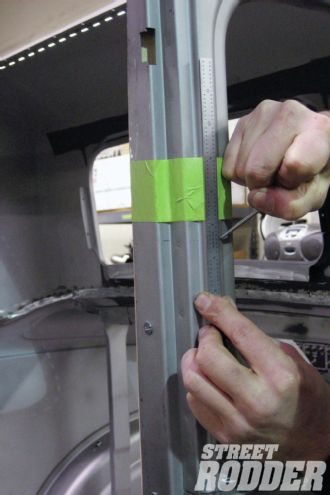
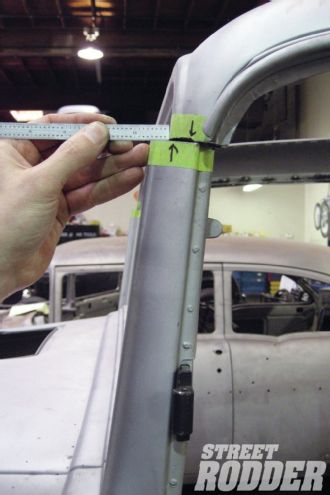
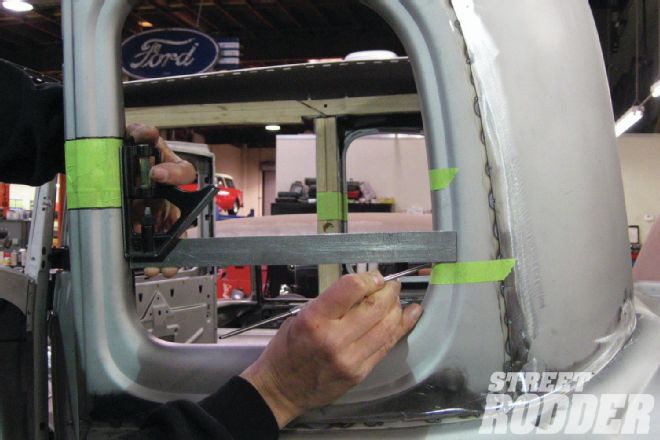 4. Curved areas like the rear of the quarter window openings require precise measurement. With a square ruler, I use the B-pillar as a guide to make sure that the upper cut line at the back of the quarter window is exactly the same distance from the B-pillar as the lower cut line. That way they will meet when the roof is lowered down.
 5. Once these measurements are made, I double check to make sure that the chop lines are exactly 2-1/2 inches apart.
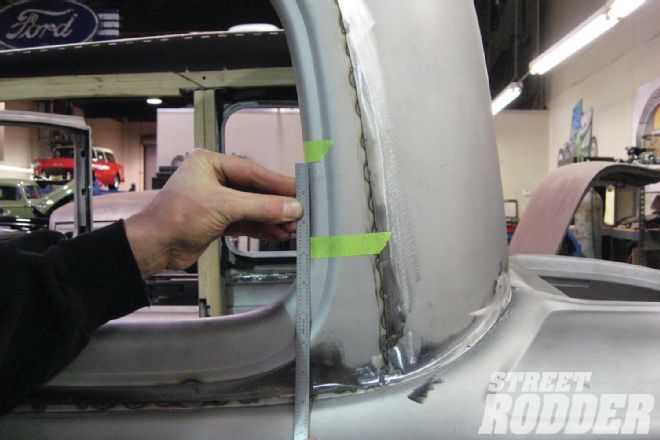
 6. There are many ways to cut around the C-pillar on any ’30s car, but the old-fashioned straight-across cut works just fine on our United Pacific Industries five-window. After drawing the lower line with tape I scribed the upper cut line with a compass set to 2-1/2 inches.
 7. When marking out the A-pillar cuts, I use the same concept as the rear of the quarter windows. You always want to find the point at which the body lines and ’jambs will meet. Fortunately, this usually eliminates the factory weld seam (which is leaded over from the Ford factory).
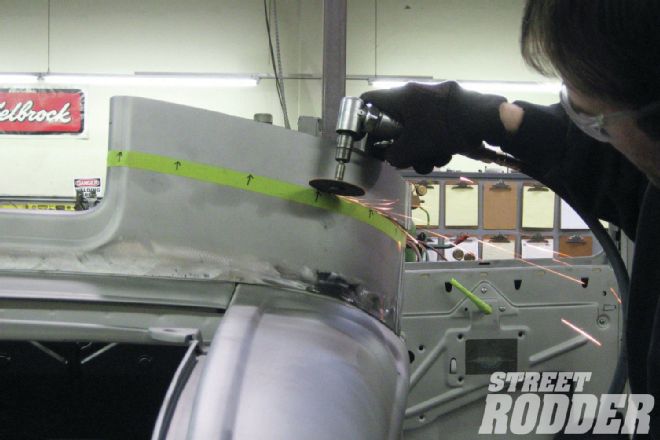
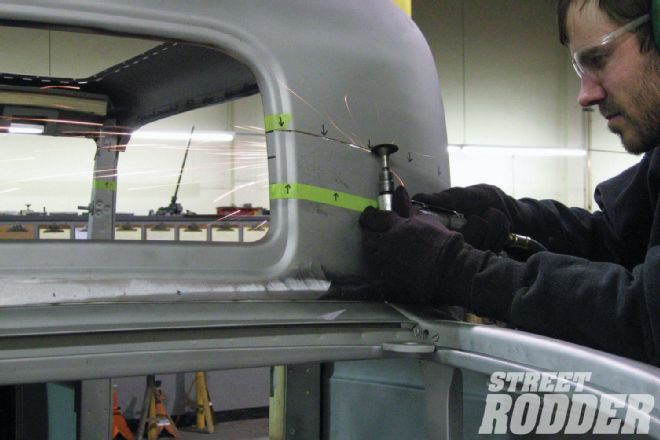 8. There’s no rocket science to separating the top from the body. If all of the marks are well planned and completely laid out, the actual cutting takes a fraction of the time of the planning stage. I like to cut along the top lines first so that the lower cuts can be made with the pieces still attached to the body.
 9. On areas with wood inside, like the B-pillars, I cut the metal skin around the wood with the cut-off wheel and finish cutting through the wood with the Sawzall.
 10. Once all of the cuts are made, the top can be completely removed from the body.
 11. With the top removed, I generally install the doors on the car before marking and cutting the window frames. Having the doors on the car makes it easier to maneuver around them and make measurements and cuts.
 12. The next step is to cut all of the lower chop seams. Whenever I use tape lines, I always leave arrows to remind me which side of the tape to cut on. It might seem obvious when the top is still attached, but after a long or short day of work there’s no telling what I’ll forget.
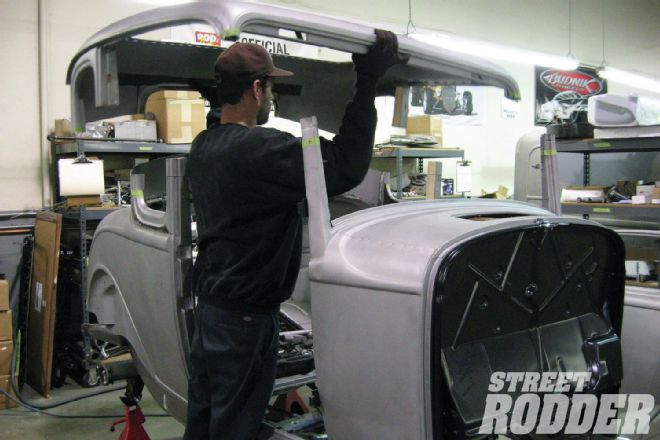
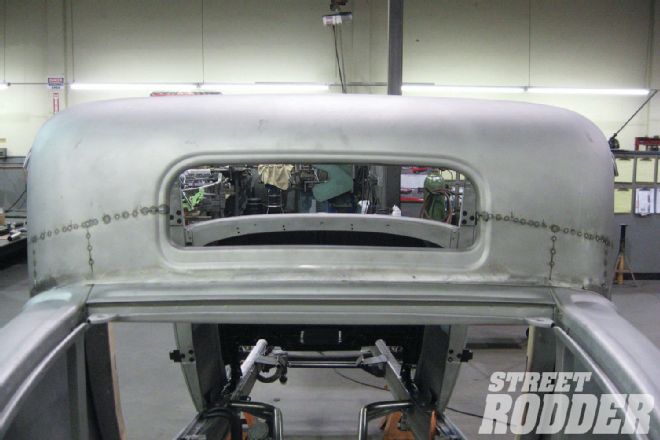
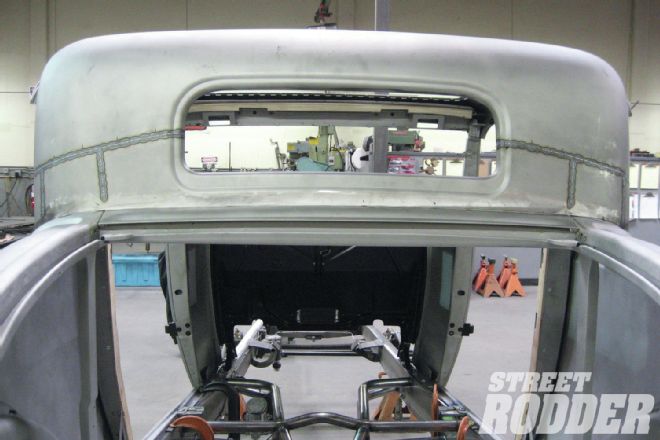
 13. With all of the lower cuts made, I like to place the top back on the body to get an initial feel for how the chop is going to look. I always step way back and look at a chop (or any modification really) from a distance and from all angles.
 14. Because the A-pillars are angled, they don’t line up after the top is lowered down. Since we’re not leaning the pillars back, I use this measurement to determine how much the roof needs to be stretched. In this case it’s approximately 5/8 inch.
 15. In order to stretch the roof, I cut through each side where the roof measures widest across. Here, with some clamps and bracing, I mocked up the two halves with a 5/8-inch gap. This is much easier to do on the floor or a large table.
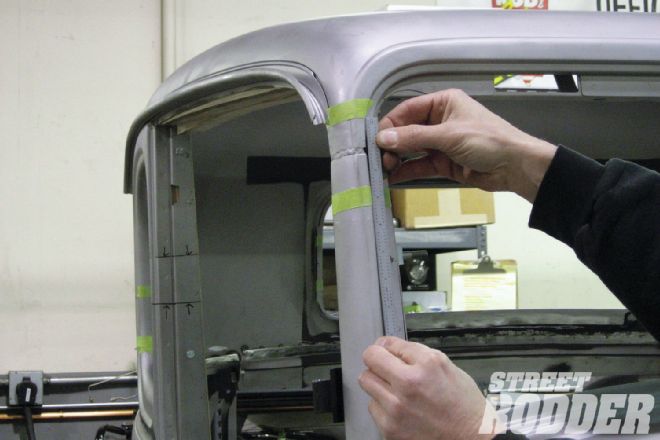
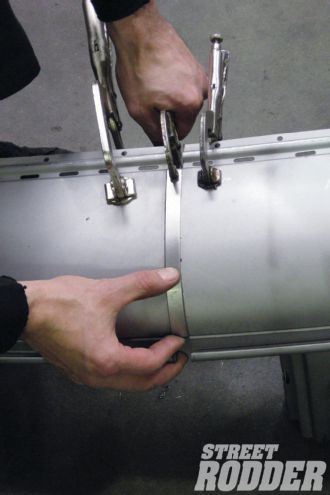 16. The filler piece needed to fill the gap in the roof sides is simply a 5/8-inch-wide strip of sheetmetal. I bent the piece by hand, making sure to match the curve of the roof sides, and clamped them in place.
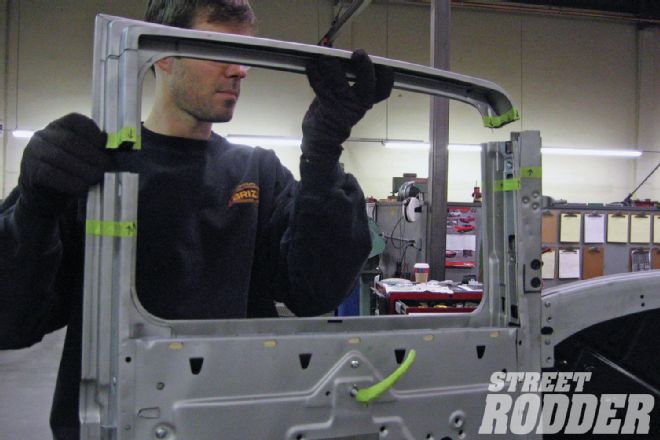
17. Before welding the roof together, make sure the roofline is straight. If you need to reinstall the roof on the body to make sure, now is the time.
16. The filler piece needed to fill the gap in the roof sides is simply a 5/8-inch-wide strip of sheetmetal. I bent the piece by hand, making sure to match the curve of the roof sides, and clamped them in place.
17. Before welding the roof together, make sure the roofline is straight. If you need to reinstall the roof on the body to make sure, now is the time.
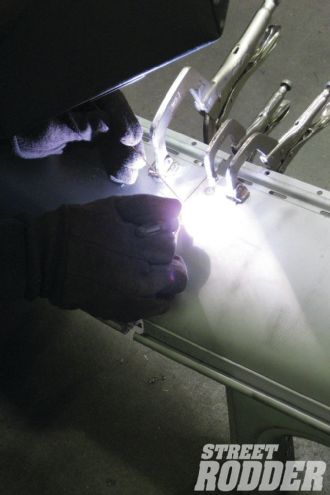
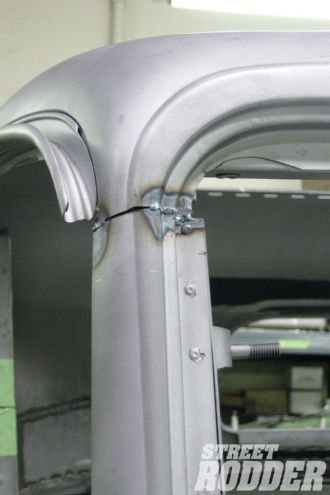
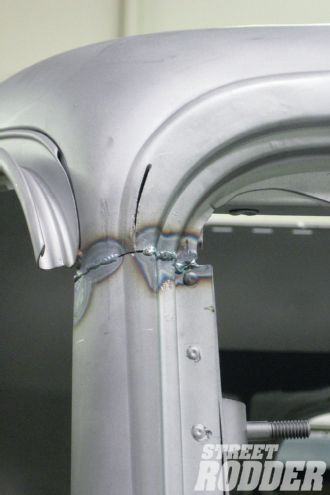
 18. With the roof reinstalled on the body, I use plenty of clamps to make sure the door pillars are absolutely straight. Once everything is lined up, it’s time to tack weld the door pillars in place.
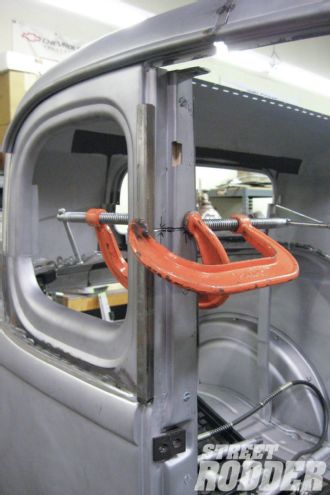
 19. In order to line up the windshield opening perfectly I used a Porta-Power to compensate for the slight discrepancy between the body lines. Once the reveals match up, the A-pillars are ready to tack weld.
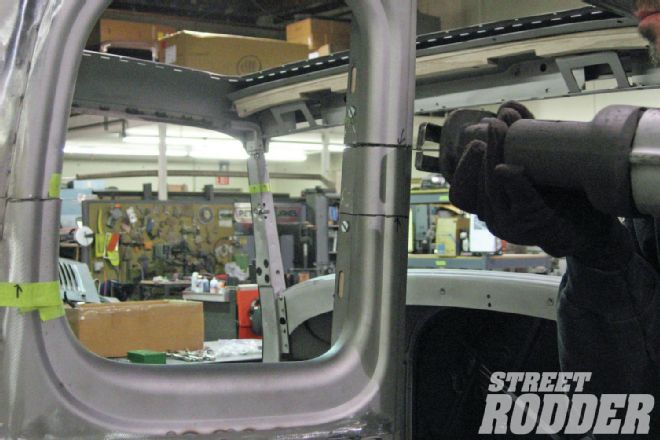
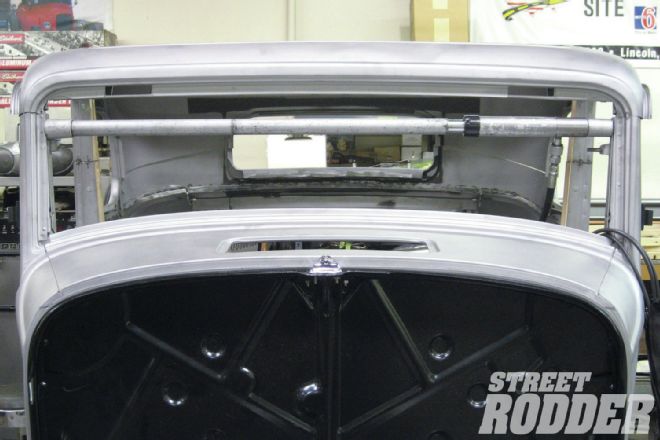
 20. The rear window sides are perfectly vertical on a five-window, so I clamp them together with square tubing or flat stock to line them up before welding.
 21. The rear quarter areas of the roof never line up perfectly so it’s necessary to pie slice the lower section to match the shape of the top section. I usually make two cuts on each side, but this depends on the severity of the chop and the year and body style of the car.
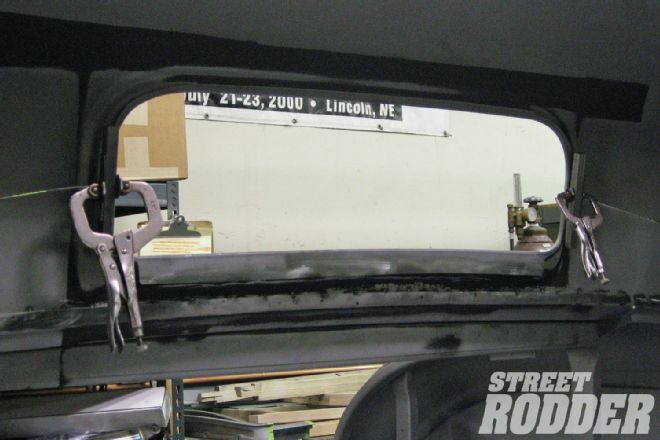
 22. With both sides pie sliced and lined up, I tacked together all of the seams around the rear window and quarter windows. Obviously you want to make sure the shape and profile looks right.
 23. With all of the cut seams tacked together, it’s time to completely weld up all of the chop seams. Areas like the driprails take quite a bit of tedious fabrication work to complete, but these details make all the difference in the finished product.
24. Because of all the pie slices, the quarter areas of the roof require a lot of hammer and dolly work once welded. One of the benefits of using a new body is that the metal is still new and malleable, which makes metal work a breeze.
23. With all of the cut seams tacked together, it’s time to completely weld up all of the chop seams. Areas like the driprails take quite a bit of tedious fabrication work to complete, but these details make all the difference in the finished product.
24. Because of all the pie slices, the quarter areas of the roof require a lot of hammer and dolly work once welded. One of the benefits of using a new body is that the metal is still new and malleable, which makes metal work a breeze.
 25. One of the often unrecognized aspects of a top chop is all of the detail work necessary to make it look perfect. Body lines like those on this A-pillar don’t line up after the major seams are aligned.
 26. In order to make the top match the A-pillar body line, it’s necessary to make a small pie slice and hammer the top bead to make it smaller.
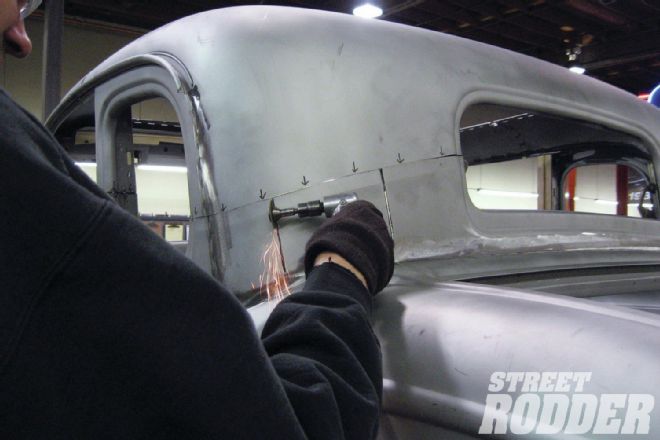
 27. Once welded, plenty of grinding and file work are required to really make the seams look like they came from the factory. Of course, some of this can be achieved with Bondo and primer, but if you’re obsessive/compulsive like me you’re obstinately compelled to try to finish it all in metal.