When it comes to fabrication, welding is one of the most basic fundamentals. And when it comes to welding, gas metal arc welding (GMAW), more commonly known as metal inert gas (MIG) welding, is arguably the most popular and easiest to learn. Using a wire-fed gun, the process joins metals by heating them to their melting point with an electric arc, which is between a continuous, consumable electrode wire and the metal being welded. A shielding gas is used to prevent contaminants in the atmosphere from penetrating the work area.
Arguably the simplest welding process, it’s fairly easy to learn, but it can also be one of the hardest to master. Years of improper technique and setup can lead to Band-Aid type fixes that oftentimes go unnoticed or simply accepted as part of the process. I know I’m guilty of this as most of my welding education was gleaned from “on the job” training, meaning I bumbled my way through the hiccups and half figured out how to fuse metal.
At the end of the day, I can get the job done, but I’m always looking for a few tips and tricks that the more experienced heads can offer up. So, when the guys over at Miller Welding invited us over to their training center for a day of Q&A, I jumped at the chance to improve my welding technique and give you guys a little refresher course on what’s probably the most popular welding technique in our little hobby.
 1. Here are two of Miller’s latest MIG welders, aimed at the DIY homebuilder, the Millermatic 180 and 211. Both welders are equipped with Miller’s exclusive Auto-Set function that automatically determines the wire speed required by setting the material thickness to be welded and the welding wire diameter. This function takes most of the guesswork out of the equation when it comes to setting up a welder by the inexperienced. The 211 has another Miller exclusive, the MVP or multi-voltage plug function, which allows the welder to be powered by either 120- or 230-volt power receptacles by simply swapping the provided plug ends. For our exercise, we’ll be using the 180 exclusively, given its broad range, from 24-gauge sheetmetal to 5⁄16-inch plate.
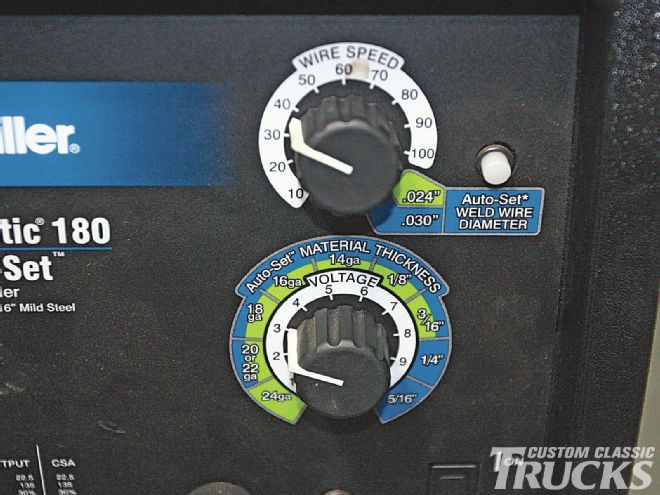
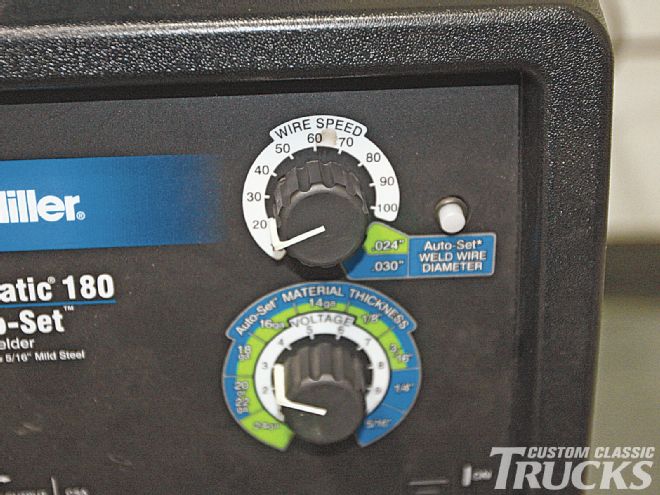
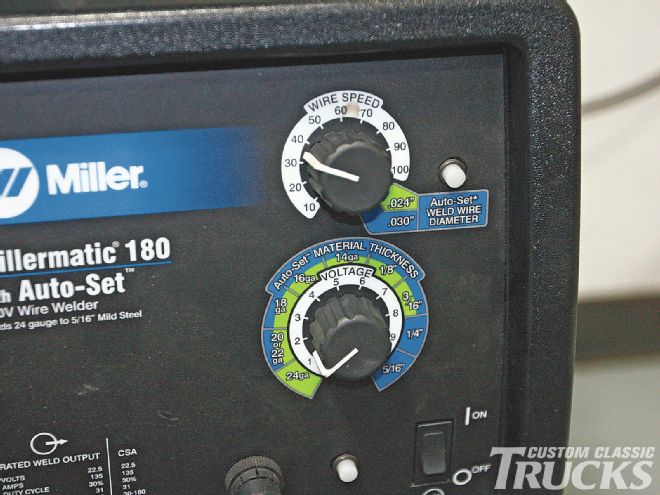
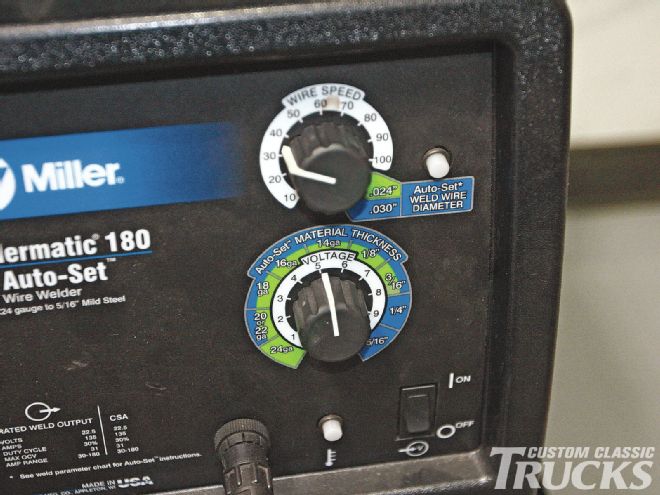
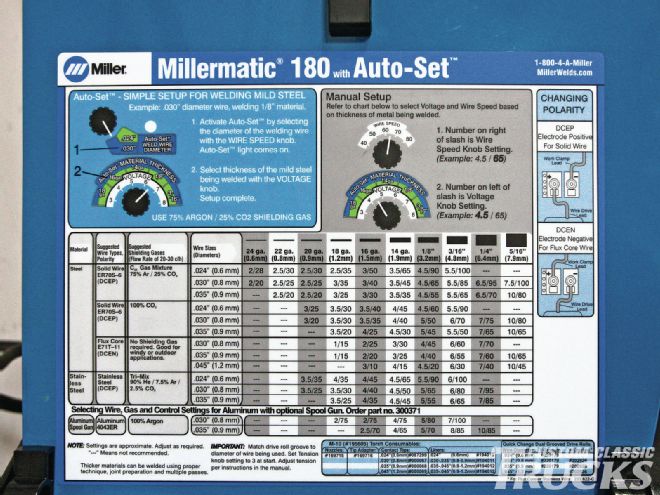 2. In addition to the Auto-Set function, both welders can also be set up manually, like a traditional MIG welder, giving the user unlimited flexibility. A chart inside the case of the welder gives baseline settings for all compatible materials and wire sizes. This gets the user in the ballpark, but it’s still good to know what makes for a good weld and how to achieve it.
 3. The weld bead shape depends on a number of variations. Gun angle, direction and speed of travel, electrode extension (stickout), thickness of base material, wire feed speed, and voltage all play into the quality of the weld.
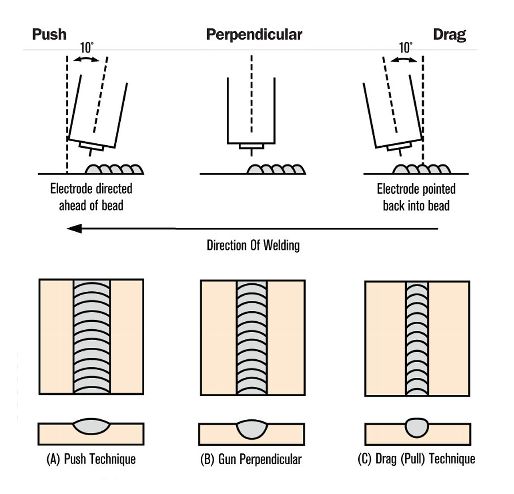 4. Proper gun technique is a great place to start when it comes to diagnosing common MIG welding problems. A drag or pull gun technique will yield a bit more penetration and a narrower bead.
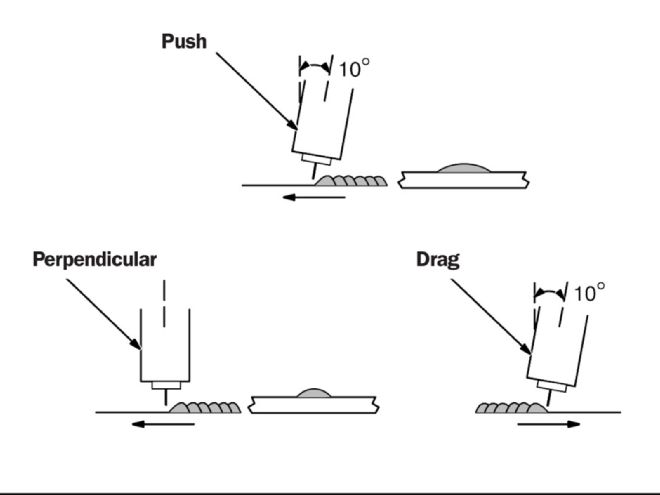 5.A push gun technique will yield a bit less penetration and a wider bead.
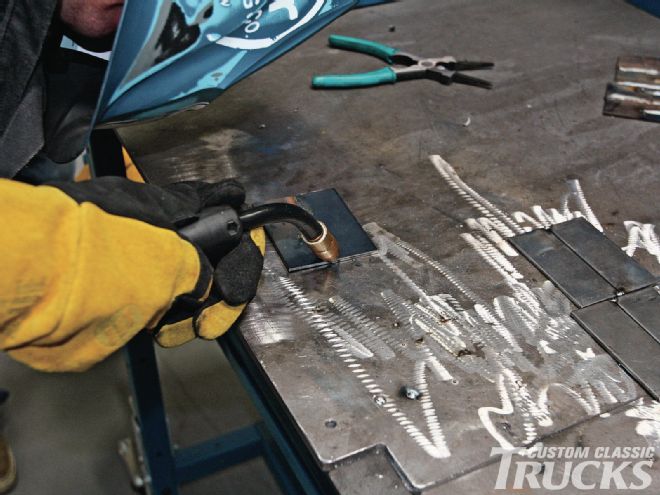
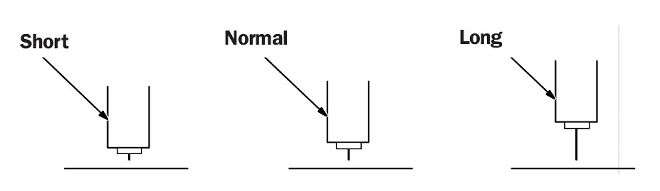 6. A 1/4- to 3/8-inch of stickout is ideal in most situations.
 7. The amount of electrode stickout when making fillet welds can affect the penetration and weld shape.
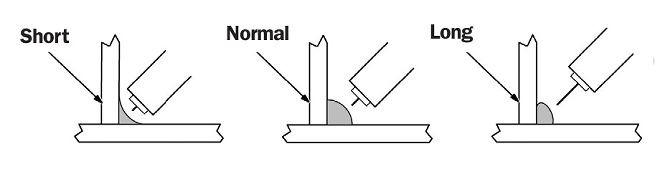 8. Short, normal, and long fillet weld shapes.
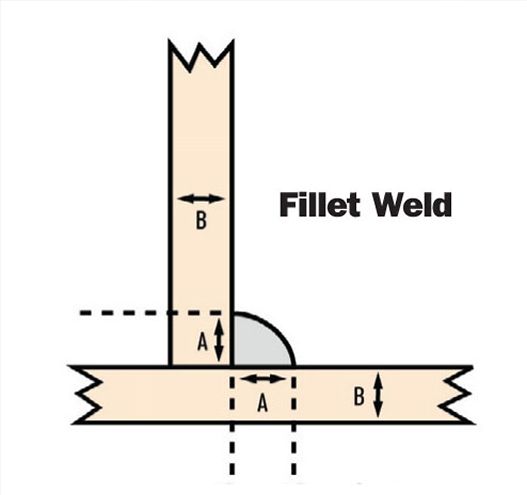 9. Note that the leg (A) of the weld should be equal to the thickness of the parts welded (B).
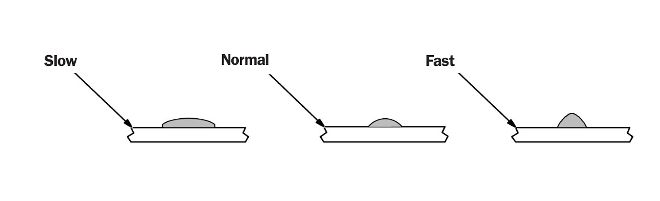 10. In addition to the speed of the wire being fed into the weld area, gun travel speed can affect the weld as well.
 11. Normally a single stringer bead is satisfactory for most narrow groove weld joints. However, for wide groove weld joints or when bridging across gaps, a weave bead or multiple stringer beads work better.
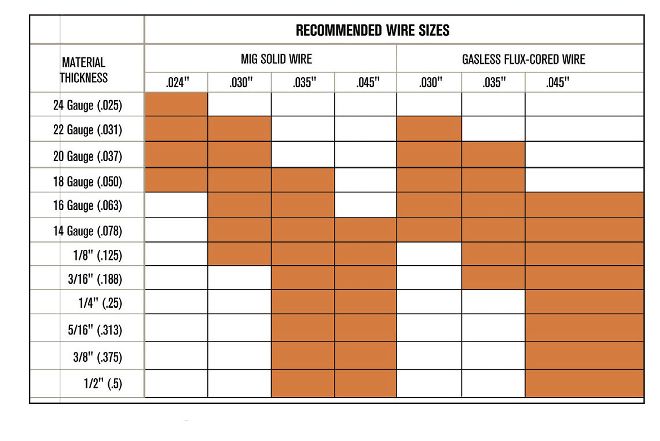 12. The proper wire varies depending on the base material, for thin metals, use a smaller diameter wire. For thicker materials, suck as 5/16-inch plate, use a larger wire as well as a larger (higher amperage) machine.
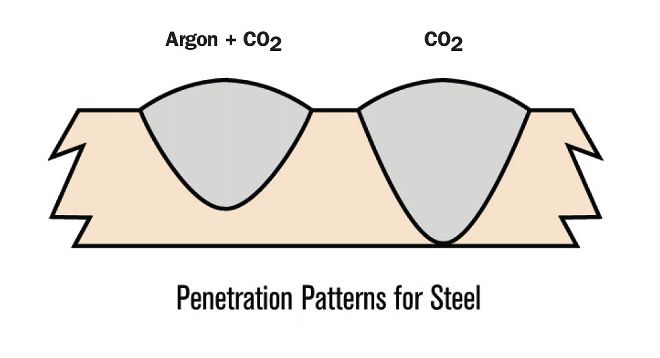 13. For most home builders MIG welding mild steel, a 75-percent Argon / 25-percent CO2 mix will be sufficient. Thicker material, however, can benefit from pure CO2 as it promotes a more penetrating weld. Aluminum on the other hand requires pure Argon. Triple mix (Helium+Argon+CO2) can be used for stainless steels.
 14. Poor weld bead characteristics
 15. Poor weld bead characteristics
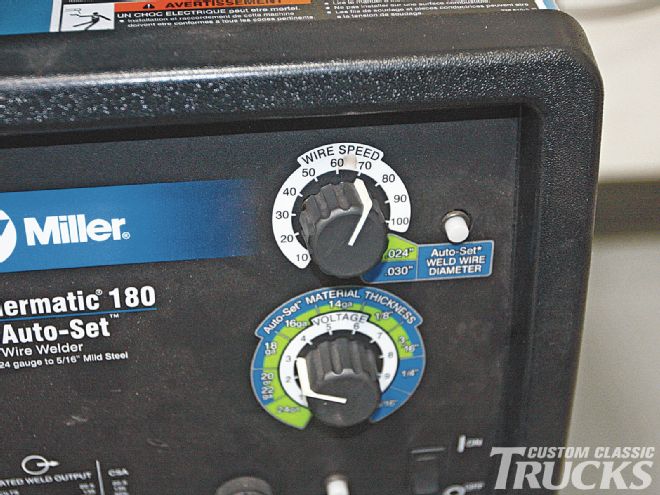
16. We set the machine at the proper specs per the inside tech sheet provided with the welder.
15. Poor weld bead characteristics
16. We set the machine at the proper specs per the inside tech sheet provided with the welder.
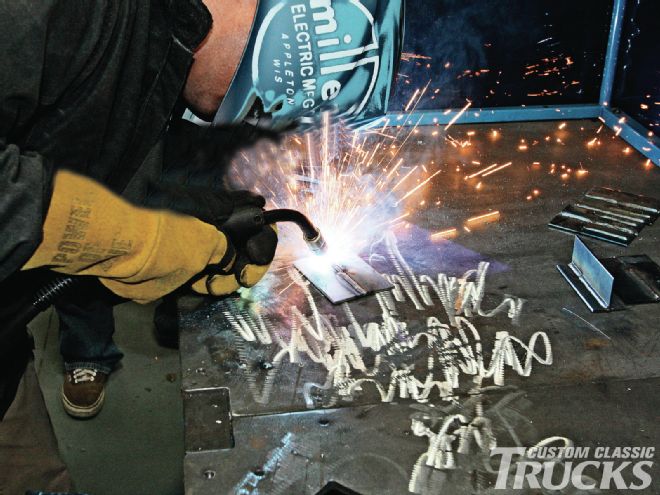
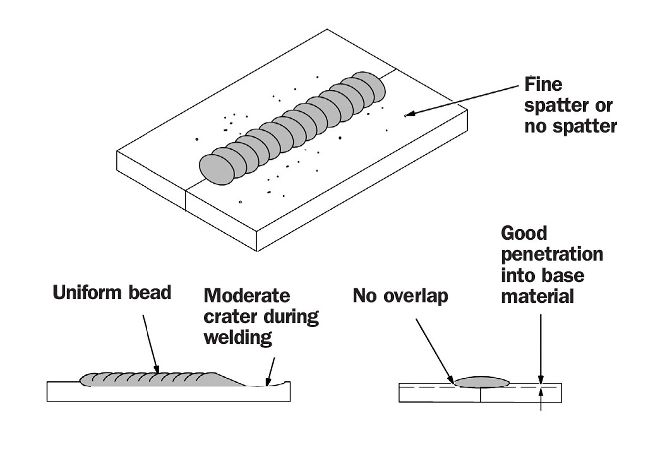
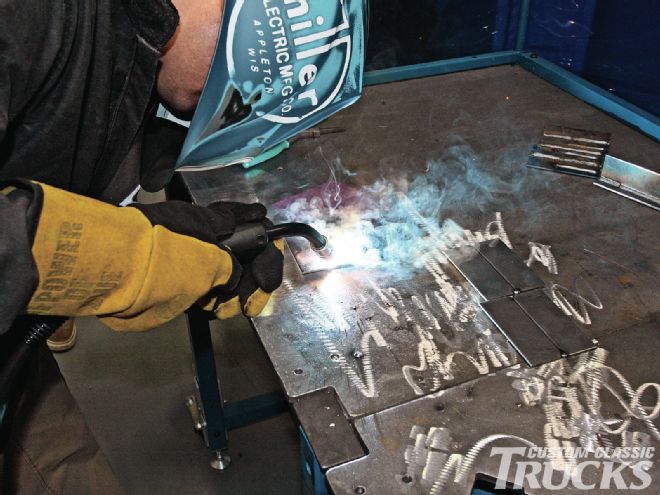
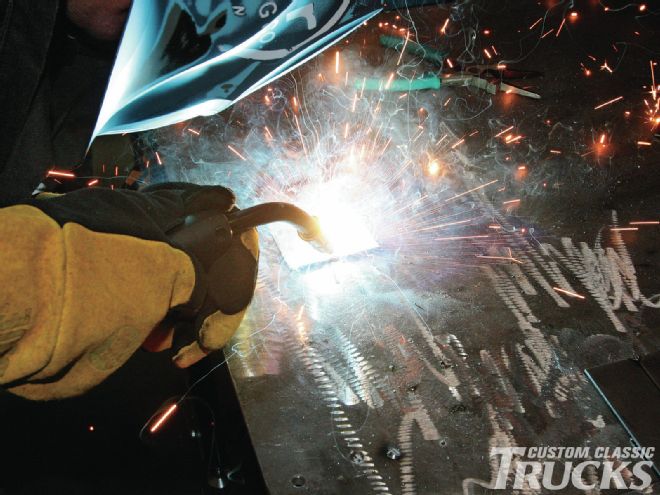
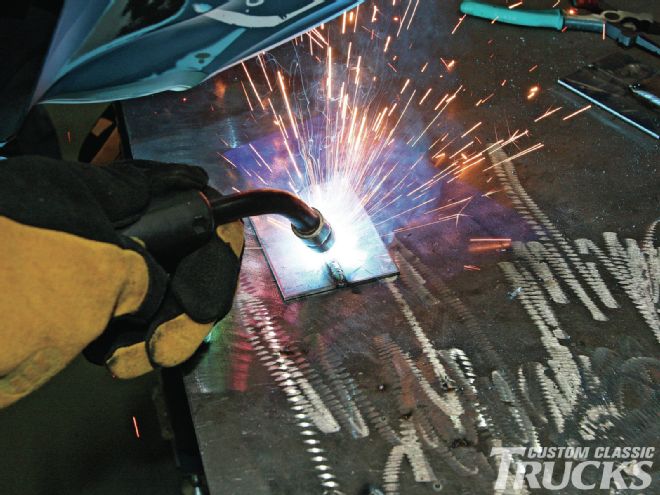
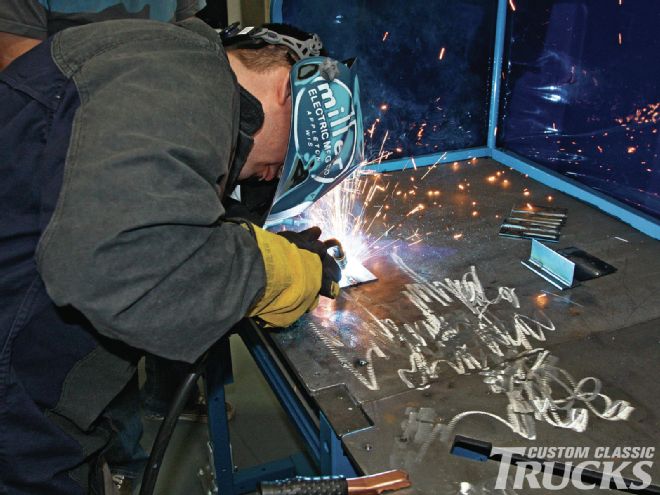 17. Begin the welding with proper technique and notice the amount of spatter for a good weld.
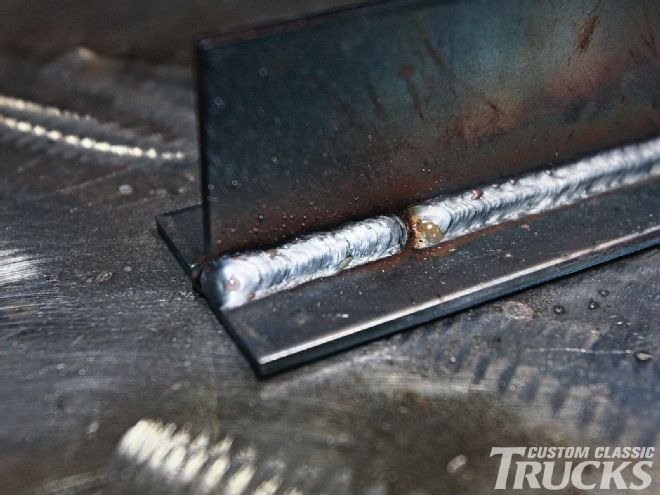
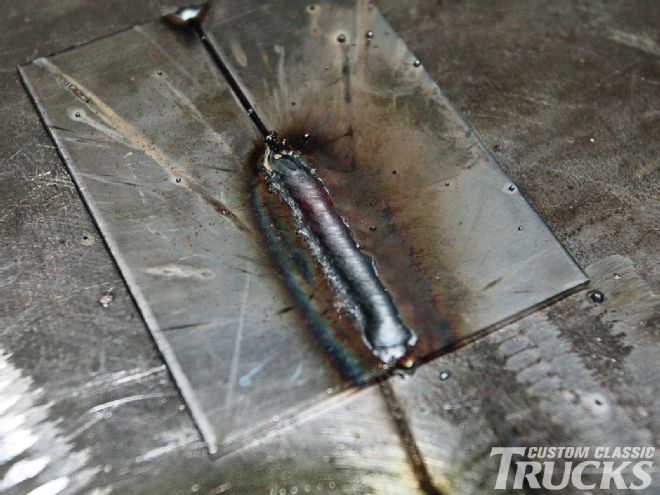
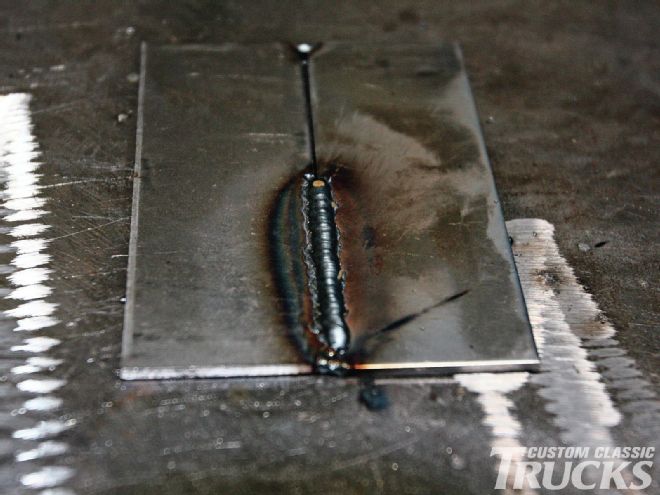
 18. You can see that the resulting weld yields all of the characteristics mentioned above that a good weld bead should have.
 19. Also worth noting, is the nice, even heat-affected zone throughout the weld and good penetration.
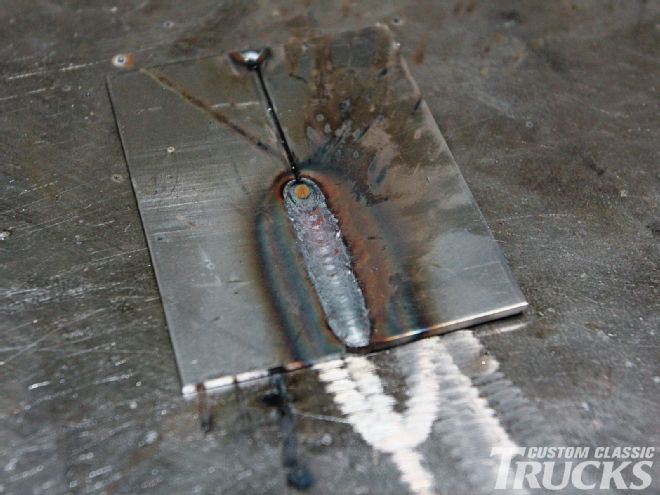
 20. A slow wire speed with the same voltage setting results in a weld that lacks that sizzling, bacon frying sound most associated with the MIG process.
 21. These specs also result in a porous weld with poor penetration.
 22. Note the lack of any spatter whatsoever during the weld process, caused by the lack of wire entering the weld area.
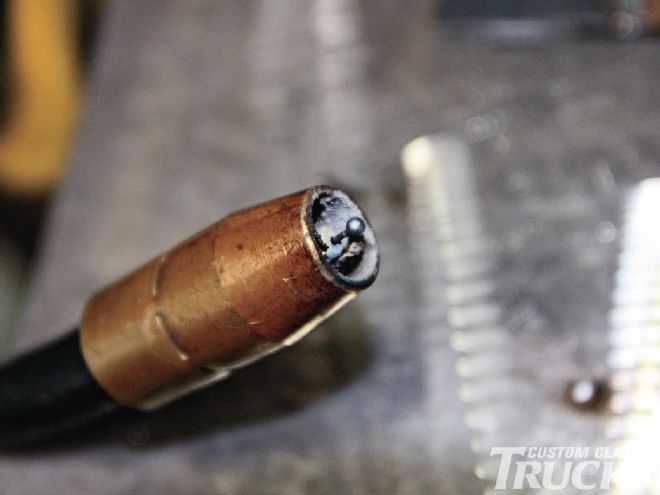 23. The wire essentially short circuits on its way to the weld area, as evident by a balled tip of the electrode.
24. Too much wire speed is the exact opposite. Where there was only smoke on the last step, now there’s fire, with plenty of spatter to go with it.
23. The wire essentially short circuits on its way to the weld area, as evident by a balled tip of the electrode.
24. Too much wire speed is the exact opposite. Where there was only smoke on the last step, now there’s fire, with plenty of spatter to go with it.
 25. A physical kick-back of the gun is also evident as the wire fails to melt fast enough as it approaches the weld area.
 26. The result is a weld that piles up on top of the weld seam and yields poor penetration.
27. Bad overlap, cratering, and excessive spatter, and a scattering of molten metal particles that cool to solid form near the weld bead, are all attributes of a weld with too high a wire speed setting.
26. The result is a weld that piles up on top of the weld seam and yields poor penetration.
27. Bad overlap, cratering, and excessive spatter, and a scattering of molten metal particles that cool to solid form near the weld bead, are all attributes of a weld with too high a wire speed setting.
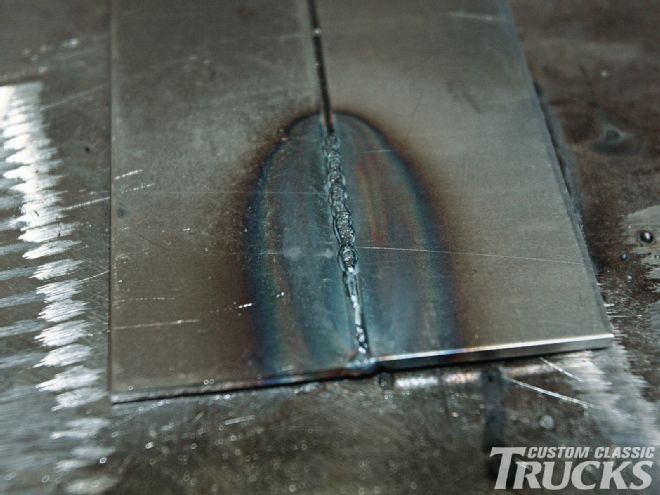
 28. A lower voltage setting combined with the proper wire speed yields a similar outcome as the weld with low wire speed did.
 29. Similarly to the wire wire speed, proper voltage, there's lots of spatter along with some smoke.
 30. The low voltage causes the weld to pile on the surface of the material resulting in poor penetration and bad overlap.
 31. Turning up the heat and we’re left with a weld that makes excessive spatter and a similar situation we saw where the wire speed was too slow, which in this case it is, even though the voltage is too high for the material being welded.
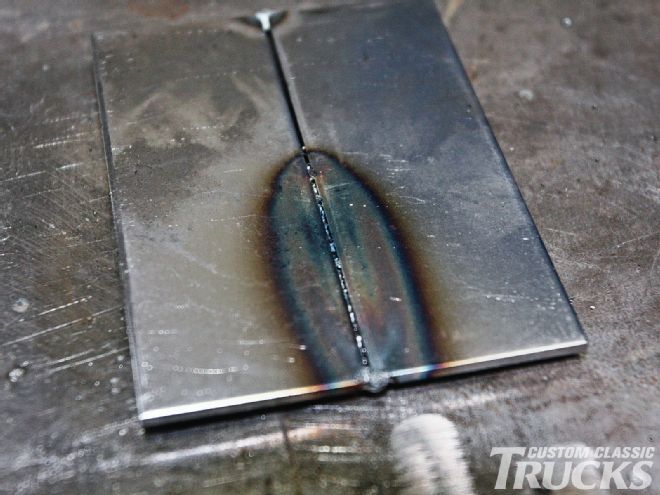
 32. One giveaway that the voltage is too high as opposed to the wire speed too slow is the excessive heat-affected zone surrounding the weld.
 33. Another giveaway is the excessive penetration taking place on the backside.