
It almost seems as though a shop today can’t survive without a bead blast cabinet. While a pro builder certainly can’t get by without one, affordability and efficiency have made them a piece of equipment the home enthusiast usually isn’t without either.
The first step to giving new life to any vintage part is cleaning off decades of grime and oxidation. Once the grease is cut in the parts washer or with some spray-on cleaner, nothing handles stripping better than a blast cabinet. Over the years we’ve worn out several wire wheels on the bench grinder and wire cups on a right angle grinder to remove rust and paint from parts. Now that we’ve got a blast cabinet, our time spent refurbishing parts has been cut at least in half, our ears don’t ring from running the grinder, we haven’t lost any fingerprints from wire wheels lately, and we aren’t blowing black boogers out of our nose from the stuff wire wheels throw into the air. Blast cabinets are quick, the dust is contained, and they’re always ready to go.
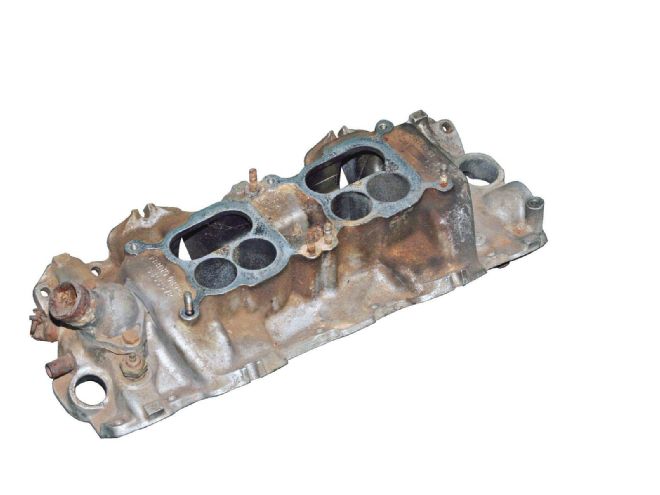 Our starting point was this grungy original 409 Chevy dual quad intake; fairly typical of a speed part, factory or aftermarket, that’s been used, neglected, a little abused, and forgotten.
When it comes to blasting metal, there are as many different kinds of media as there are metals, covering everything from relatively mild crushed walnut shells to aggressive silicone carbide. For general cleaning purposes, glass beads are by far the favorite for pro and home enthusiasts alike, as glass beads will quickly strip rust and paint without damaging the base metal, particular soft aluminum pieceswhich are in no short supply on our hot rods. Well, not actually damage, but glass beads do effect the surface finish.
Over the years we’ve noticed there’s a distinct difference between as-delivered cast aluminum pieces, and glass-beaded aluminum. Whether we spotted N.O.S. vintage intake manifolds from Edmunds and Edelbrock, or something like factory finned aluminum Nailhead or Corvette valve covers and OE aluminum intakes we’d see in original factory photos, there was always the same difference: the original stuff looks smooth and has a dull silver-gray color to it, while glass beaded aluminum always looks like it has a very fine texture to the surface and an unnatural white luster.
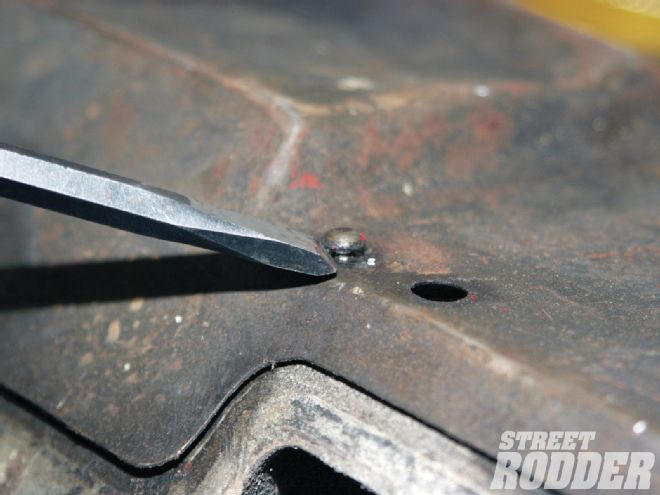 The heat shield needs to be removed. Rivets are press-fit and can be worked out with a chisel and reused. Glass beads stuck behind it will ruin an engine.
Besides the detail of done-at-home surface finish, aluminum is fairly fragile, and while factory parts will frequently need some attention, it’s the vintage speed parts that are usually in the worst shape. While factory cast pieces, like taillight buckets or dash trim, are usually in decent shape, hot rod parts have been installed and uninstalled by ham-fisted weekend mechanics or racers in a hurry since they were new, and when they haven’t been getting stripped, cracked, and broken from over-zealousness, they’ve been bounced around shop shelves and swap meets for the last 40 years. In short, their treatment has typically not been kind.
When it comes to aluminum parts, re-tapping threads or adding Helicoils is something most of us are capable of. The benefit of aluminum is that it’s easily weld-able, so some deft work with a TIG welder, and we’ve seen more than a few four-speed trans cases with welded ears or a blob of weld on an intake, but that’s where most people call it good. Some detail work with grinders and burrs goes a long way toward making a repair look better, but that’s about as far as most of us can take it.
 Glass-bead blasting makes short work of grime and oxidation. It also reveals flaws such as cracks and breaks, which we found on this intake.
Doraville, Georgia’s Lamar Walden has an impressive resume going back to the early ’60s, including being a factory-backed Pro Stock racer. Having set Pro Stock records and built record-setting engines for others over more than 40 years, he has an attention to detail that is above average, to say the least. It’s this attention to detail that has also made him an accomplished car restorer, and while you wouldn’t think to bring high-end concours-style restorations to a machine shop to have the chassis done and body panels aligned, on any given month there are ’50s and ’60s Corvettes or muscle cars in the shop being put together for judged competition.
Forty years of machining and restoring has presented a lot of opportunities to tackle problems from different directions, and for concours restoration work, Lamar and his son, Rob, needed a way of restoring cast aluminum so it looks like it did when the factory installed it on the cars, rather than when some guy glass beaded it in his garage and bolted it on.
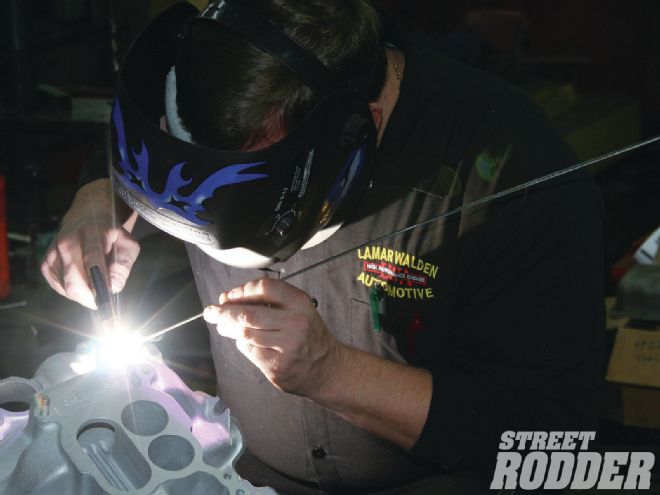
 Once the general shape has been checked against its counterparts on the other side of the manifold, the welded area is ground and contoured with a die grinder.
We’ve seen the Waldens repair and restore cracked or broken cast-iron intakes, blocks, and bell housings, as well as aluminum parts, and have spoken with them often about their process for reskinning aluminum. The finish they get runs right in line with what we’ve always thought the finish on factory aluminum parts should be: smooth, dull gray, and not the least bit porous or whitish.
When you just glass bead aluminum Lamar told us, it opens the pores and absorbs any oil or gas. The open pores also let it oxidize more quickly, Rob adds, which makes them look old and dingy before their time. With Lamar’s reskinning process, the pores on the surface of the part are closed, which not only gives a piece the proper finish and inhibits oxidation, but it keeps the parts from absorbing grease and grime. Cleaning and detailing is as simple as giving it a shot of WD-40 and wiping it off.
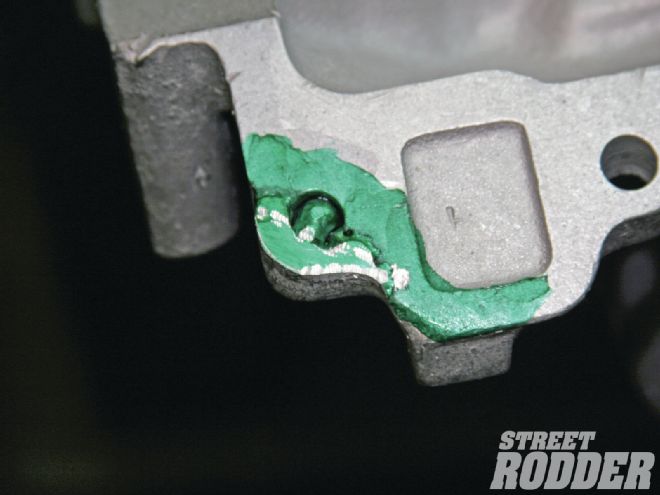 Here you can see the outside contour of the broken ear has been restored. The repair was left unground where it meets the machined surface at this point.
He’s understandably protective of the process, so we aren’t showing that final step, but he’s not so proud of the work that he charges ridiculously for it. After a cast aluminum piece comes out of Lamar’s treatment, it looks like it was just poured from good molds at the foundry, rather than looking like a porous metal lava rock.
Their restoration process doesn’t end there, thoughbesides repairing damage and recreating missing sections, they also re-machine the entire gasket mating surfaces, which yielded some surprising results in our opinion: Most intake manifolds are warped now, Lamar says, so they true the surfaces, eliminating leaking gaskets. We had them do an old Edelbrock C3B intake for our daily driver, and the intake gasket mounting surfaces needed to be milled 0.030-inch before it was square again.
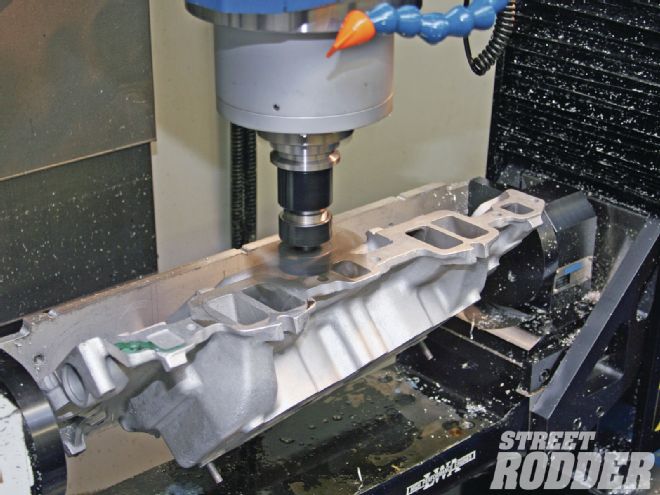 Once the repairs have been made, Walden uses a CNC machine to mill the gasket surfaces, dressing the repaired area at the same time.
Lamar is nationally known as a 409 Chevy guru, so when we asked if he could whip something together for this story, Rob walked to the pile of 409 intakes and found a suitable candidate for us to watch him restore. The one he picked off the top of the pile looked like something found in the woods, but once he was done; you’d swear the thing was N.O.S.
Bead blasting revealed a cracked mounting bolt boss, and just a little effort broke it away. Cracked temp sending holes and pipe plug bosses are also common.