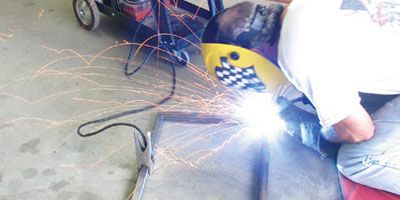

'They say it never rains in Southern California, so except for a few of our southern friends in Florida and the Gulf Coast, we are the only ones who aren't shop-bound this time of year with musclecars carefully stored away. Lucky us. For the rest of you, this leaves most weekends and winter nights open for garage tech. So we thought we'd offer up some interesting little projects that you can build yourself with the help of a tape measure, a chop saw (or hacksaw if you're really desperate), a 110-volt MIG welder, and a little bit of fabrication experience. But don't let that welding stuff scare you. As our buddy Scott Sullivan once told us, "If you can fog a mirror, you can MIG-weld." 'Nuff said.
How To Build An Engine Perch
If you're like most guys, you probably have more engines than you have cars. That's certainly the case around the Car Craft shop, where we're always knee-deep in engine projects. While the old wood-block-under-the-balancer routine is a quick fix for setting an engine on the floor, we wanted an engine perch that would also allow us to transport engines safely in the back of our pickup when it's time to run out to Westech for a dyno test.
This particular engine perch will accommodate both small- and big-block Chevys, and it also allows us to bolt the perch on the engine while it's on the engine stand. The entire perch is constructed from 1x1-inch-square, 0.072-inch-wall-thickness, mild-steel tubing using one 10-foot length. In addition, we bought a 6x6-inch-square piece of 31/416-inch steel plate for the front mounting tabs. We decided to build two of these perches (mainly because they keep walking away when we're not looking), and the entire process required the better part of a Saturday afternoon. The only tools required were a tape measure, Sawzall, bench grinder, right-angle gauge, and our handy Craftsman 110-volt MIG welder. If you really want to be professional, a chop saw makes much straighter and more accurate cuts than our Sawzall, but we survived. Check it out.
Parts List One 10-foot length of 1x1-inch-square tubing, 0.072-inch wall thickness Dimensions Quantity Base side legs, 22 in 2 Base front and rear legs, 16 in 2 Front uprights, 10 11/42 in 2 Rear uprights, 10 11/44 in 2 Front mount pad, 2 31/44 x 1 11/42 in 2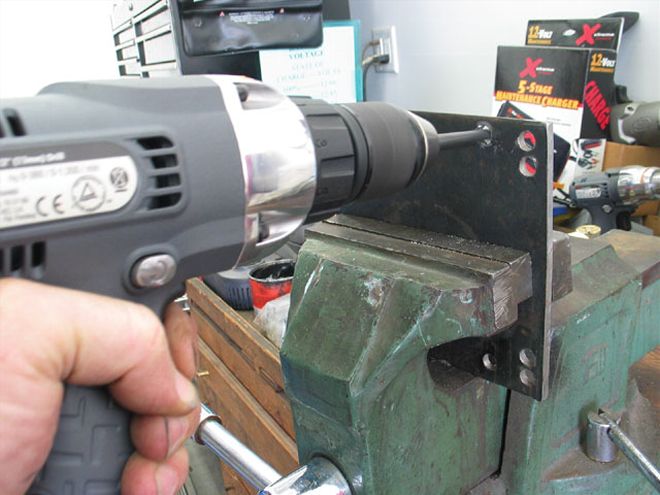
With the base plate trimmed to size, we marked the holes in the plate using a transfer punch to make three sets of holes for a standard Holley pattern, a spread-bore Q-jet pattern, and a two-barrel Holley pattern, drilled with 51/416-inch holes.
Lift Plate
We normally have one or two engine lift plates sitting around the shop. On this particular day, they all managed to go AWOL (that's military-speak for "absent without leave"), so we decided to build one rather than run all over town trying to buy one. All this took was a 611/42x6-inch, 31/416-inch-thick steel plate for the base along with a 131/44x6-inch vertical plate. We drilled some holes, then welded it together. It took us longer to figure out how to evenly space the three lift holes than it did to fabricate the rest of the plate.
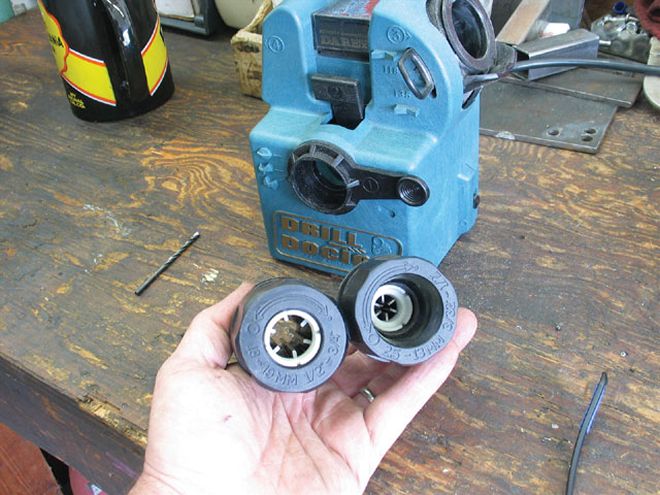
This little machine should be in every car crafter's shop if you do any kind of fabrication work. A small electric motor spins a sharpening stone inside the unit. The two chucks accommodate drill bits up to 31/44 inch in diameter.
Drill It Easy
There's nothing more frustrating than trying to drill a hole in a steel plate with a dull drill bit. When we began building our lift plate, it became painfully obvious that all of our 51/416-inch bits were about as sharp as a piece of chalk. We gave up trying to sharpen drill bits by hand, especially now that we have a Drill Doctor. This handy little tool can sharpen most bits between 31/432 and 11/42 inch and, with the optional larger chuck, up to 31/44 inch. The process may appear a bit complicated, but after the second drill bit, it's easy. The big payoff is the first time you drill a hole with a nice sharp bit. Here's how it works.
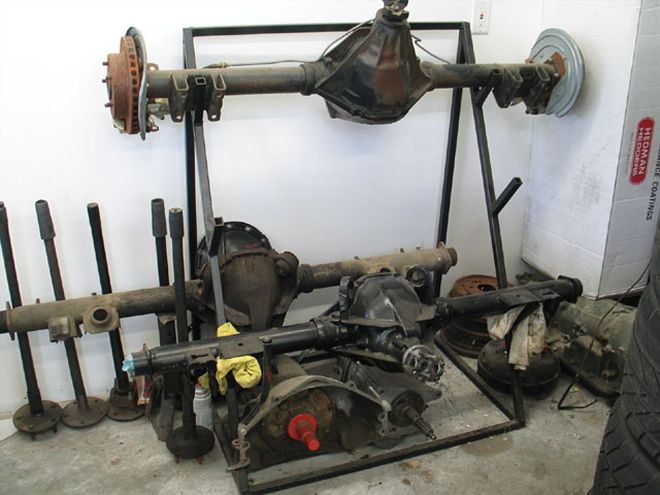
This rack is handy not only for locating all the rear axlehousings in one place, but also for giving us a place to stick an automatic and four-speed as well.
Rear Axle Rack
We built this rack several years ago when it came time to clear all our rearend housings off the floor. The rack is 48 inches tall, 36 inches wide, and 2511/42 inches deep. As you can see, we built it for three rearends, but you could squeeze in four by lowering the bottom housing position and reducing the distance between the housings. We also use the space underneath the rack for transmissions. Again, we made this rack out of 1-inch square tubing using just over 24 feet in total length.
Charge It
If you're like us, you have multiple cars parked in the shop that have a bad tendency to discharge the battery when you let them sit for months at a time. Even if disconnected from the car, a typical automotive battery will discharge on its own. This is where the old wives' tale about concrete floors contributing to discharging batteries originated. The truth is, a battery will self-discharge by building up lead sulfates on the plates that contribute to a reduced charge. We've lost several batteries that have discharged to the point that they can't be saved with a traditional battery charger.
Then we heard about the PulseTech Xtreme Charge battery charger. This unit uses something called pulse waveform that has a patented technology controlling the voltage, current, frequency, and amplitude of the charge to both restore a full battery charge as well as maintain maximum battery efficiency.
While it sounded a little like those magic pellets you drop into the cell of a dead battery, we decided to test the Xtreme Charge unit. We had two dead batteries, a yellow top Optima and a more typical lead-acid battery, that were both hammered. After a 36-hour Xtreme charge on the lead-acid battery, at first it appeared that it came back to its 12.6-volt full charge. But in less than a week, it had lost its charge. The Optima battery tested at less than 1.5 volts when we started, but the Xtreme Charge unit brought it back and it's currently working great. As we saw in our test, the Xtreme Charge unit will not save a battery whose time has come. But as part of a battery maintenance program, it might well pay for itself by extending the life of your storage batteries.
'Batter·Y: N., Pl. -Ies.
1. The act of beating or pounding.
2. Law. The unlawful and unwanted touching or striking of one person by another, with the intention of bringing about a harmful or offensive contact.
Note: This unit does not include a bottle for gas welding. You will also need a regulator for the bottle.