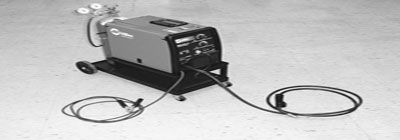
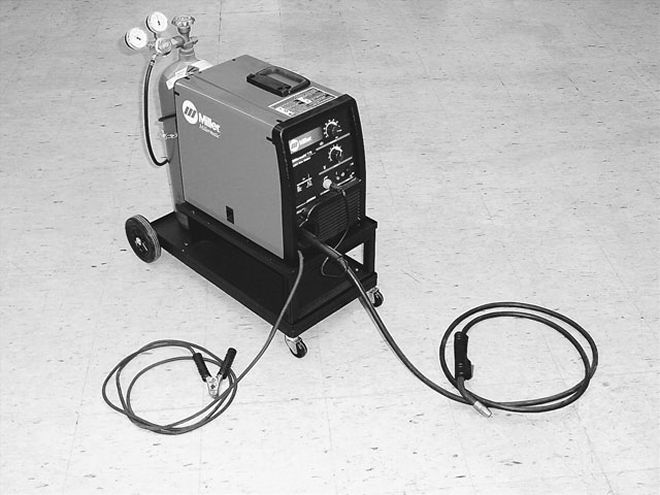
 This is a moderately priced MIG welder, a Millermatic 175 that will do nearly everything a typical custom car builder needs. Having both the machine and bottle of shielding gas on a cart makes the whole outfit easy to move around your garage or shop.
Every automotive project will require at least a little bit of welding along the way, and there is no question that MIG welding is the most commonly-used process for both body and chassis work on trucks. MIG welding is fast, strong, relatively easy to learn, and causes less distortion than most other welding processes. The machines are relatively affordable too, usually costing hundreds of dollars less than TIG welders. (We'll look at TIG welders in a future article.)
Most MIG welding machines have a self-contained power unit that holds a spool of filler wire. There is a cable that goes from the power unit to the welding gun, and the welding current and the filler wire pass through this cable. Many builders use a cart to hold the welder and the bottle of shielding gas together, making the whole outfit easy to move. Setup is easy-you turn on the gas, set the power and wire feed controls on the welder, place the ground clamp on the work piece, and you're ready to weld.
As with any welding process, it takes a little practice to get proficient with MIG welding, but most people are able to learn the basics fairly quickly. Before you start welding, there are a few things to learn about wire selection, machine setup, and gun position and movement.
There are many filler wire diameters available for MIG welding. In general, the thicker the base metal you are using, the larger the wire size. For sheetmetal, .024-inch wire is a good place to start. If you are welding mostly stock that is 1/8-inch or thicker, you might want to use .030- or .035-inch wire. ER 70 S-6 welding wire is probably the most commonly used, and should be good for most automotive applications.
Each MIG machine will have suggested settings for wire feed and welding current, usually these can be changed by turning a dial. Most welders come with a chart or booklet that will recommend starting points for these settings, but you should always do some experimentation to find what works best for your particular application. There are also online sources for this information, such as www.millerwelds.com.
The shielding gas usually used for MIG welding steel is a mixture of 75-percent argon and 25-percent CO2. There are flux-cored wires that do not require any shielding gas, but they are not well suited to the type of work done on our favorite cars.
Once the machine is fitted with the proper wire and the settings are dialed in, the next thing to look at is the direction of movement of the gun. You can angle the gun toward the puddle and drag it away, so the puddle is trailing the gun, (this is called the drag technique), or you can push the puddle with the gun, so that the gun is leading the puddle. Generally, dragging the weld gives deeper penetration with more weld bead buildup, while pushing the weld gives shallower penetration with a broader, lower-profile bead. You should experiment with both of these techniques to find your own preference, but many people use the drag technique for plate, and the push technique for sheetmetal.
The angle between the gun and the metal has an effect on the results you get, too. Generally, the gun should be held at an angle between 5 and 15 degrees, inline with the joint-this is called the travel angle. Angles more than 25 degrees can lead to more spatter, less penetration, and arc instability.
In addition to the angle of the gun inline with the weld, we should look at the angle of the gun in the other plane-this is called the work angle. For some work, the gun will be angled more toward one side of the joint, but for a butt weld, the best gun angle is 90 degrees. In the case of a lap joint, a 60- or 70-degree angle is preferred, and with a T-joint, a 45-degree angle is used. These angles may sound odd at first, but once you start welding joints, you will quickly see why different joint configurations require different gun angles.
If you are just learning MIG welding, practice on metal around 1/8-inch thickness until you start to get the feel of the process. Once you feel confident welding 1/8-inch material, then you can move on to samples that are thinner and thicker. Auto body sheetmetal takes a good deal of control to weld properly, since you are trying to get as flat a bead as possible, while achieving full penetration and avoiding burn-through. It certainly can be done, and the more you practice, the easier it gets. Another consideration with sheetmetal is that the shrinking caused by welding will often cause distortion, and the flatter the panel, the more distortion you get. For this reason, it's a good idea to skip around when MIG welding sheetmetal, welding perhaps 1/2-inch in one location, and then moving a foot or so away to make the next small weld, and to let the metal cool completely before you add more weld to your first passes. While this slows the process a bit, you'll find that skipping around and keeping the heat build-up down greatly reduces the amount of distortion you get.