Factory suspension systems have long been engineered to deliver a pleasant balance of handling and ride quality. But let’s face it, you’re not reading this article to learn how to take a smooth drive in the country. You’re reading this to better understand drag racing suspension technology and how to get your 1993-’02 Camaro to steer safely and hook up for better timeslips.
How you do this depends both on budget and your expectations. When you’re building a fourth-gen “slingshot” Camaro you don’t have time or money to waste on suspension modifications that do not work. You want a suspension system that’s going to work the first time. With drag racing, or any other kind of motorsport, the devil is in the details. Anything you can do to improve e.t.’s and speed, closes the gap. If you’re running a 10-second Camaro it’s always a good idea to get the most for your money now because you may not have it later.
Get used to the idea that racing isn’t cheap. Cut corners and you’re just wasting time and money. The faster you want to go, the more expensive it becomes. Going fast is addictive. The faster you go the faster you’re going to want to go. Be prepared to spend, but spend wisely and do it right the first time. Spending crazy money twice has never made sense, so listen up.
Begin your speed regiment with a plan. Never pick and choose suspension components all willy-nilly. Have a plan and know something about what you’re buying. As car guys, we tend to get this backwards, by the way. We build incredible amounts of power into an expensive mill without first considering brakes and suspension, which should be the first thing we think of when building a Camaro drag car.
First, you must have a rock-solid platform that can handle the punishment of drag racing. Keep in mind that when you have flex or twist in the body or within the suspension, you will lose precious time. This is why you want adjustability in your chassis without suffering flex-inducing losses. You get rigidity from super-strong components made from 4340 chrome-moly steel. Adjustability comes from Heim joints in appropriate locations to where you can fine-tune chassis dynamics, and improve timeslips. The downside to rigidity is noise, vibration, and harshness. The stiffer you make the platform and suspension components, the more you sacrifice ride quality and increase road noise. This is less of a consideration for high-time drag racers, but it bothers some.
The BMR Difference
BMR Suspension is a company that has been in business for about 20 years. They not only race and use what they engineer and develop, all their parts are manufactured right here in the USA. These folks cut, bend, notch, drill, and mill tubular components from American-made DOM and chrome-moly steel. Every product is fixture-welded to maintain consistent quality. Then they bead-blast and powdercoat parts on its own production line. Components are assembled and packaged in house to ensure the utmost quality control.
Our motivation to use BMR is its bolt-on demeanor smack in the factory locations. Simply remove the factory K-member and bolt this guy on. No welding or special modifications required.
We’re satisfying our need for speed with a 2002 Camaro featuring brute LS power. To get there we need a lightweight bolt-in front suspension system that will not only keep our wild and crazy ship on course, but get us stopped safety when the fun is over. We’re not only installing the BMR front suspension package, we plan to take it to the dragstrip and shake it down. We will keep you posted here in Chevy High Performance magazine and at chevyhiperformance.com.
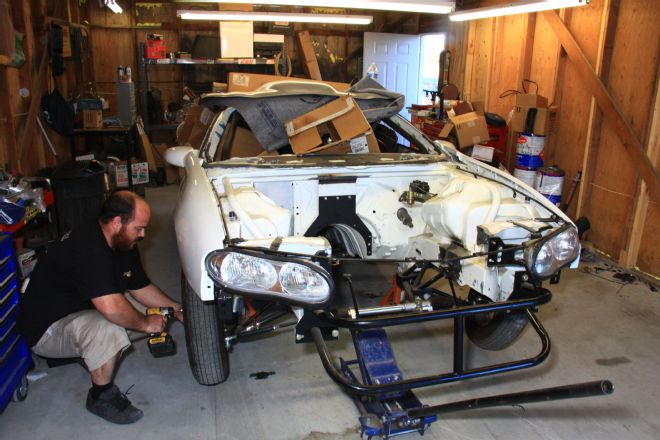
1. We’re building a fully committed 2002 Camaro drag car—a rolling testbed to prove what works and what doesn’t. We’re placing our confidence in BMR Suspension with a complete lightweight bolt-in front K-member package that will include Strange four-piston disc brakes, coilover shocks, and rack-and-pinion steering.
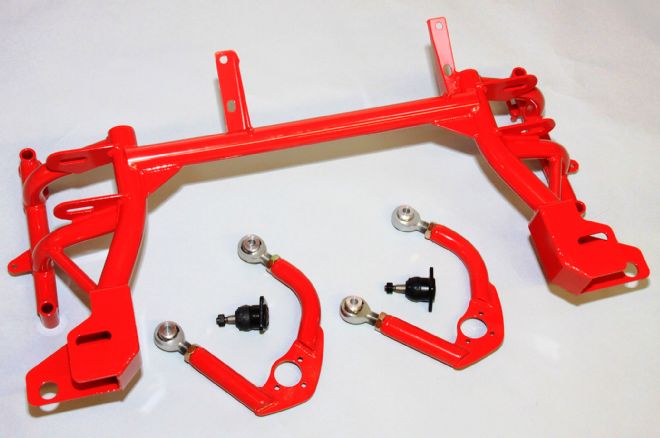
2. This is BMR’s KM001-1 K-member, devoid of engine mounts, and also designed for a standard rack. We like its lightweight design, ease of installation, and ability to adapt to any kind of street or track use. BMR’s unique tubular K-member design features integrated frame stands that replace the factory cast-iron pieces. This weight reduction allows BMR to use larger diameter tubing and thicker mounting plates for added strength. When combined with BMR’s upper (PN AA004, shown) and lower A-arms (PN AA002, not shown), a minimum weight reduction of 42 pounds is the drag racer’s bonus.
3. We scored these upper spring mounts for our BMR front suspension swap through Hawks Third Gen. They have been media-blasted and treated to high-temperature satin black paint.
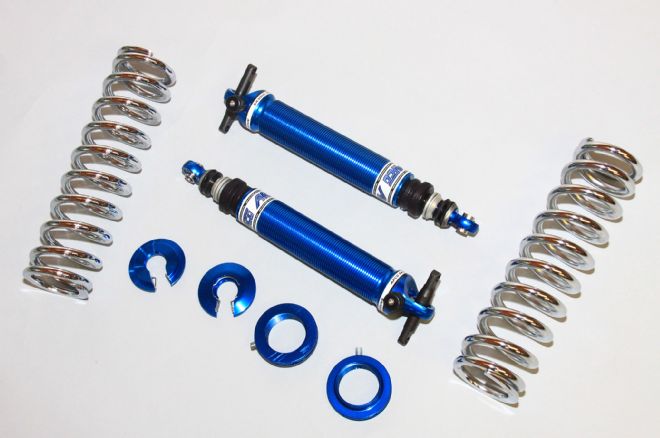
4. We’ve opted for AFCO coilover adjustable shocks (PN 3870F) because they work like a champ when it comes to good weight distribution. We’re going to test an array of springs and document our results: 14-inch coilover, 275 lb rate; 14-inch coilover, 250 lb rate; 12-inch coilover, 150 lb. rate; and 12-inch coilover, 125 lb rate.
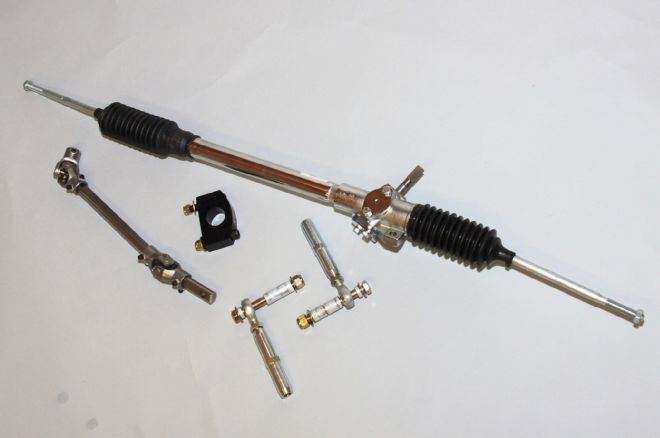
5. The Pinto-style rack-and-pinion has long been the industry standard when manual steering was required. However, the boilerplate Pinto rack doesn’t always fit every application, nor does it always work well. On fourth-gen F-bodies, the Pinto-base rack causes excessive bumpsteer. The overall distance between the inner tie rod pivot points should match the overall distance between the A-arm pivot points. Any variation to this will cause the tie rods and A-arms to swing on two separate arcs—causing toe changes as the suspension cycles up and down—otherwise known as bumpsteer. BMR’s solution is to include a bumpsteer kit in their manual steering rack kit.

6. We’ve opted for the GM Pro Series front disc brake package from Strange Engineering. It includes black powdercoated four-piston fixed calipers with adjustment shims, hard metallic pads, one-piece forged 5-on-4.75 slotted rotors, spindle, and hub.
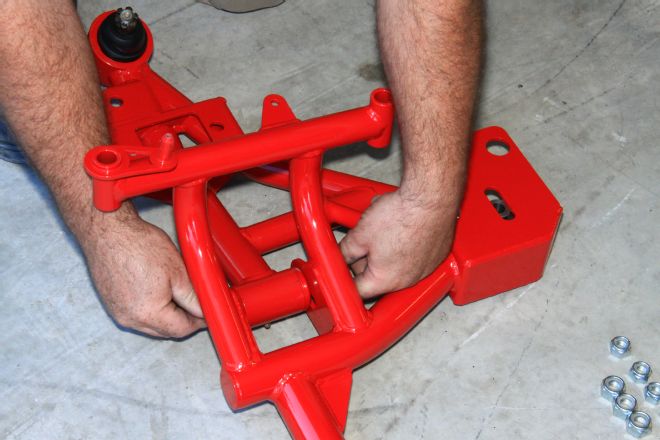
7. Assembly of the KM001-1 subframe begins with upper and lower control arms. These control arms are fabricated from heavy-duty 1.25-inch and 1.625-inch DOM tubing, including laser-cut, CNC-formed plate steel plate. Deflection is completely eliminated with these control arms. BMR’s (PN AA032) upper and lower control arms arrive with new ball joints and greasable, super stiff 95-durometer bushings, which add a solid, more responsive feel over stock rubber bushings. BMR’s bushings are internally fluted for better grease distribution.
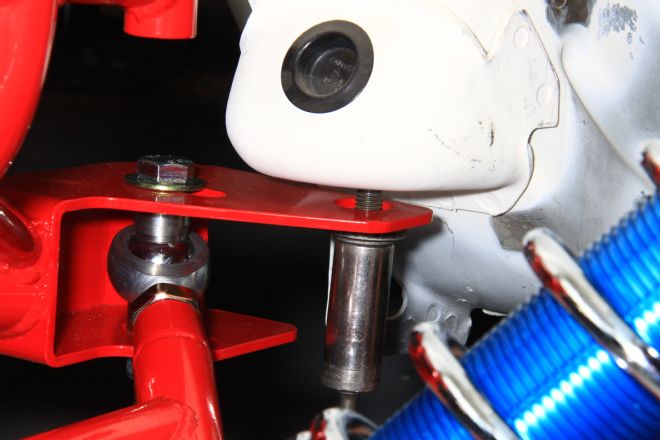
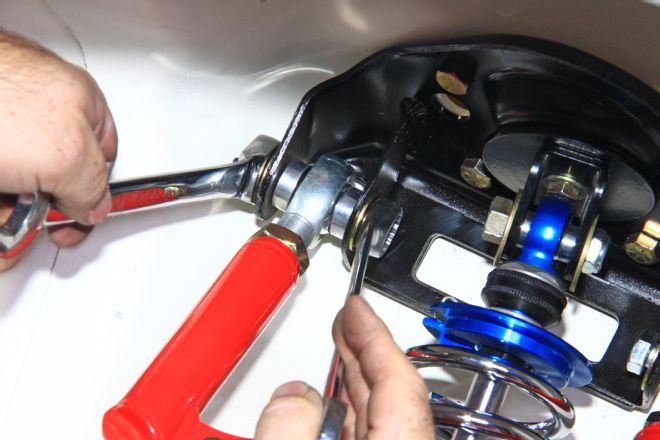
8. Lower control arms, also known as A-arms, have adjustable Heim joints for caster adjustability.
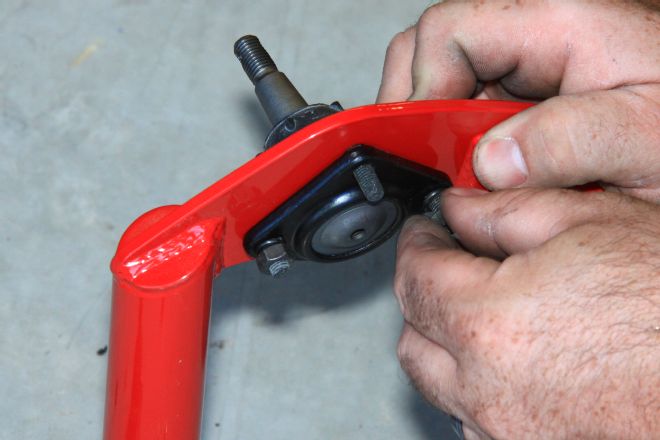
9. Ball joints, included with the upper control arms, are secured next. Don’t forget to lube them prior to use. You’d be surprised how many of us forget to do this.

10. The manual steering rack is installed next. You get everything you need with the RK001 kit, which includes the rack, steering shaft with universal joints, mounting hardware, and bumpsteer kit. This rack and steering shaft are designed to clear headers with 2-inch primary tubes.
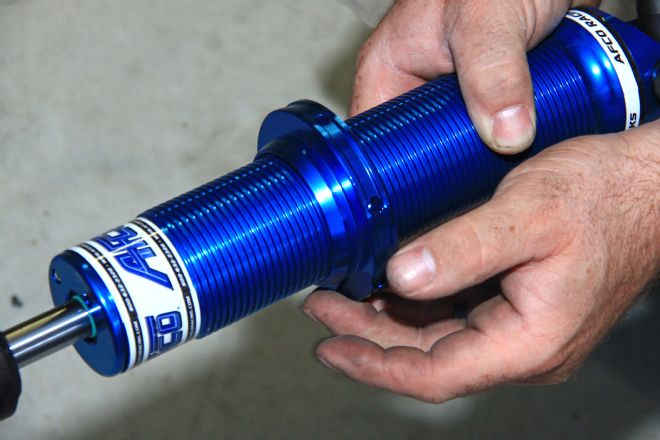
11. AFCO coilovers are prepped for assembly with this adjustment ring and seat being first, then the springs. We’re going to try a variety of springs and seat pressures to see what works best on the dragstrip.
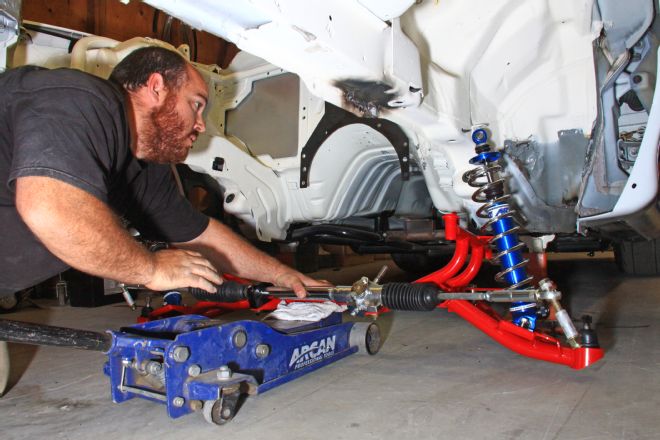
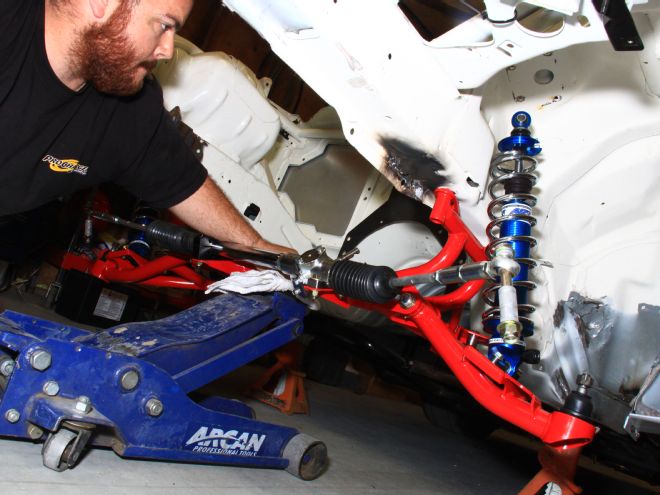
12. Installation of the K-member is easy with either a floor jack or two healthy installers. We have installed the AFCO coilover shocks, but will remove them during upper control arm installation for ease of access. Guess how we learned this one?
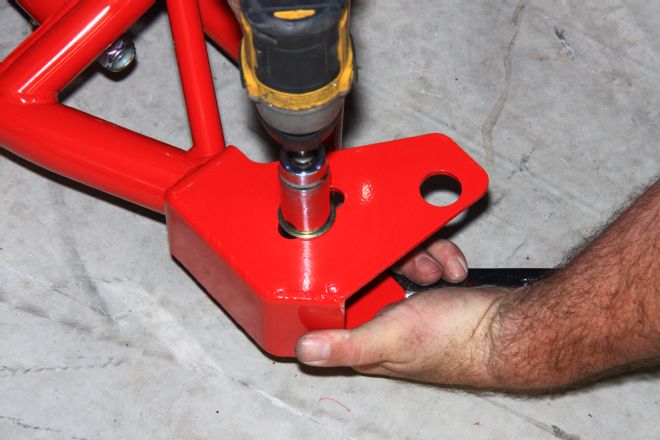
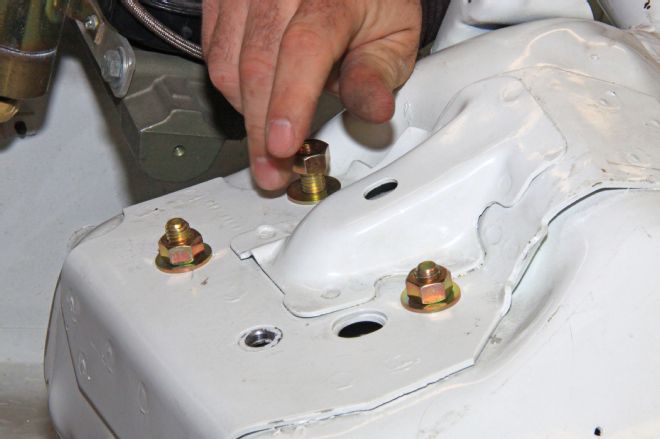
13. The K-member bolts to the framerails just like the factory crossmember. It is suggested you use a thread locker on the bolt threads for added security.

14. Notice how meaty the K-member is with its 1-5/8-inch x 0.120 wall and 1-1/4-inch x 0.095 wall DOM tubing. We like this piece for its lightweight construction and the fact that it’s made in America.
15. We’re installing the upper strut mount, which also accommodates the BMR upper control arm and AFCO coilover shock. We’re using Grade 8 hardware on everything.
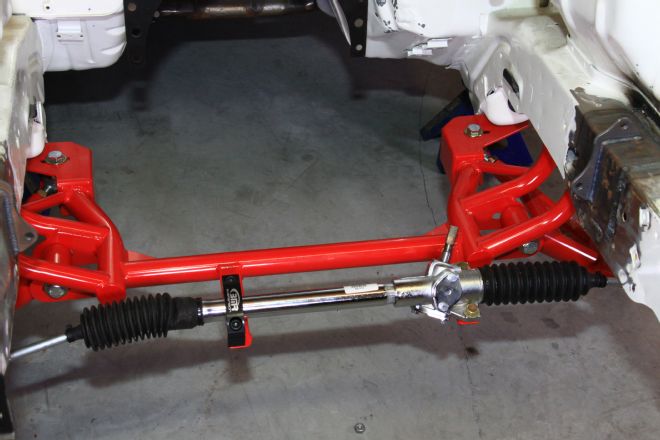
16. Here’s the installed K-member assembly, including the rack and upper and lower control arms. Too bad this nice powdercoated piece will be hidden from view by the engine and other suspension parts.
17. The BMR upper control arms are installed next, using provided hardware. Bolts are inserted from the inside out and tightened.
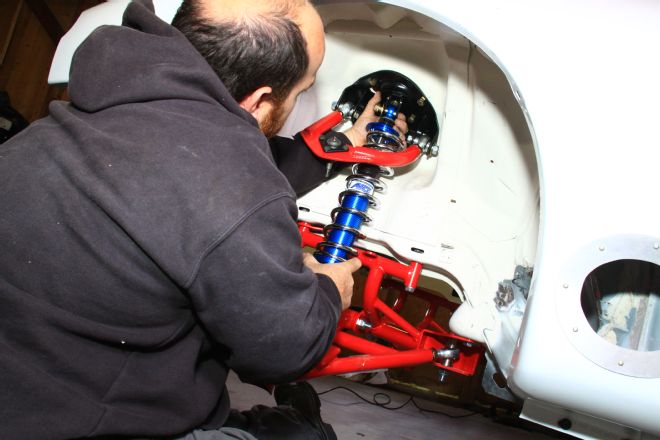
18. The AFCO coilovers are next and secured at the strut plate up top and to the BMR lower control arm down under.

19. The coilovers are secured as shown at the strut mount. AFCO and BMR make this process easy to do without special tools and coil spring compressors. Springs are adjusted once the engine and transmission are installed and the Camaro is on the ground. Ride height is adjusted once we get shakedown time.
20. The upper control arm pivot bolts are tightened and Heim joints checked for freedom of movement. The adjustable Heim joints are used to adjust both camber and caster.
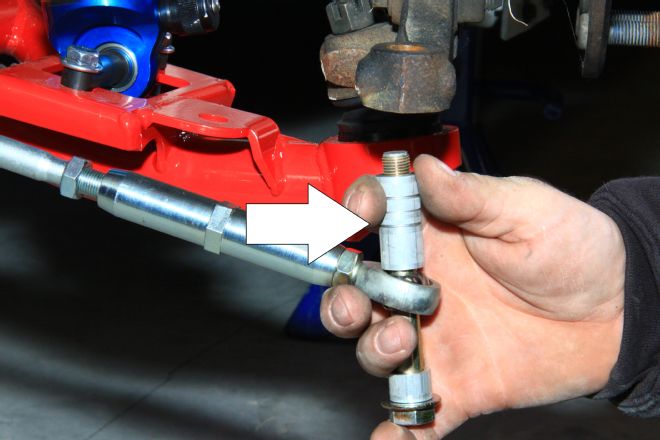
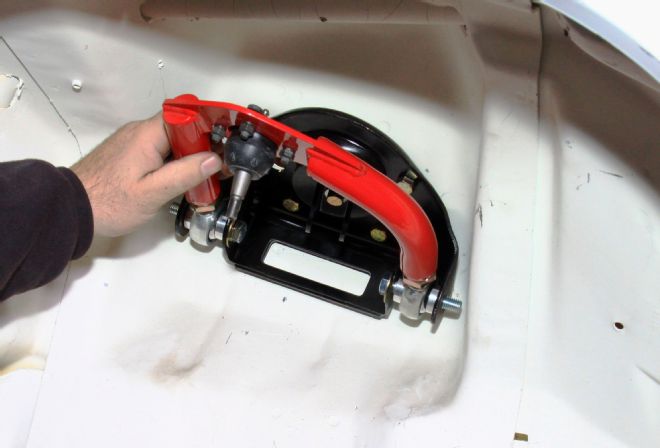
21. Bumpsteer links are connected to the steering knuckles and secured. They will be adjusted once ride height is set. Adjustment takes place via these shims (arrow).
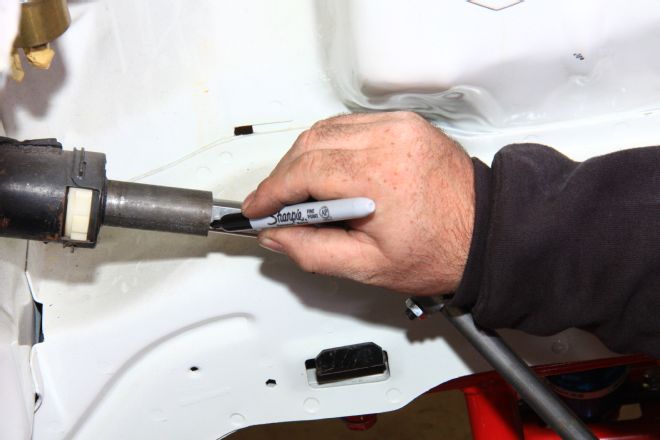
22. BMR provides this steering shaft fitted with two universal joints and couplings at each end. The steering column end is measured to the appropriate depth and marked. The hollow factory steering shaft will be marked and drilled for a 7/16-inch Grade 8 bolt.
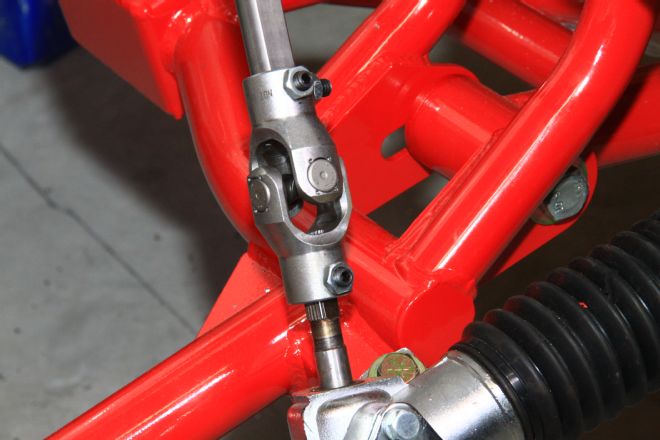
23. The BMR steering shaft is secured at the rack as shown. It is suggested you use a thread locker on these Allen set screws, then tighten the nuts.
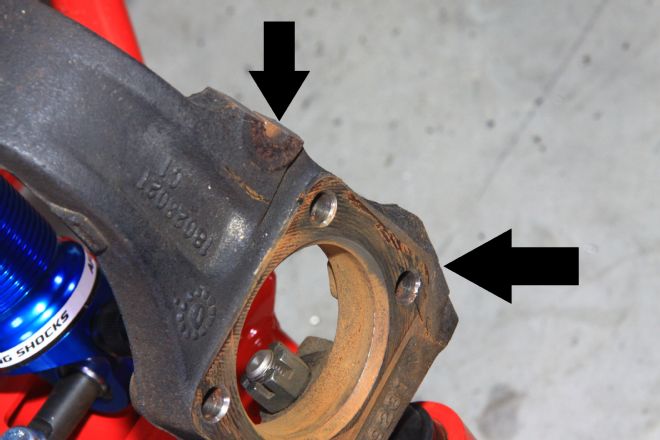
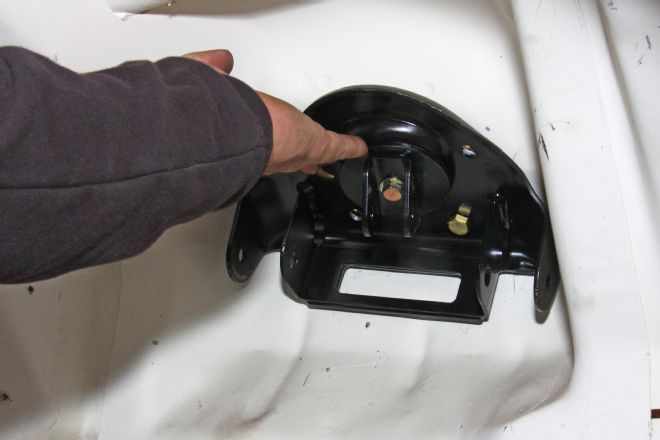
24. Factory disc brake caliper attachment points (arrows) have been removed to make room for the Strange four-piston caliper. The Strange caliper is a fixed piece and is adjustable using the provided shims.
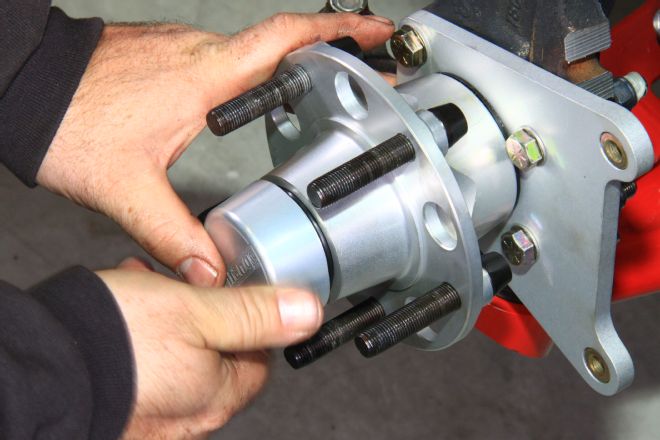
25. The caliper bracket and hub are installed at this time. The bracket is bolted to the steering knuckle as shown and the hub is conventional with packed inner and outer wheel bearings. Spin the hub to seat bearings then tighten. Check for smooth operation then install the cage, cotter pin, and cap.
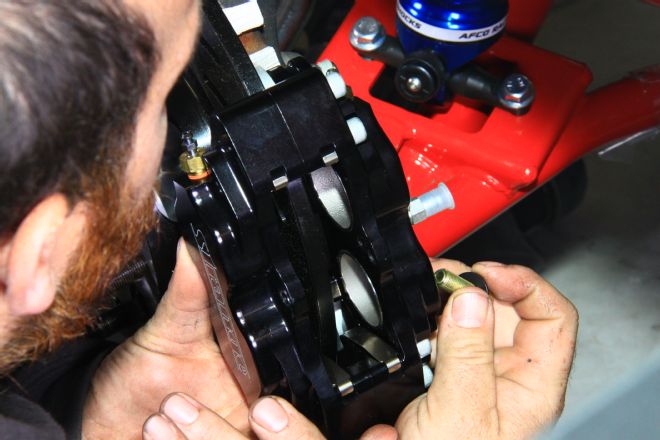
26. The one-piece Strange forged rotor is installed along with the four-piston caliper. This is a fixed caliper, which is adjustable via shims. You want the caliper centered on the rotor prior to pad installation. Once the pads are secured, install the retaining bolt and spacer. Brake hydraulics still has to be handled.
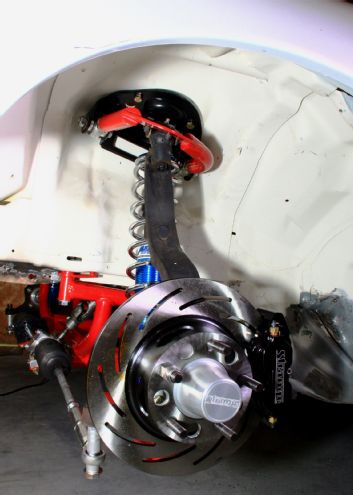
27. With the BMR/AFCO/Strange front suspension and brake package installed, we have shaved roughly 45 pounds off this front end, which is good news for the drag racer. What’s more, we have a fully adjustable frontend for extremes of finite alignment tuning.