When it comes to the handling personality of your Corvette, nothing has a greater effect than shocks. Yeah, sticky tires can help, but shocks are what really determines how your car handles, rides, and launches. There are many variations out there, including monotube, twin-tube, single-adjustable, double-adjustable, triple-adjustable, and so forth, but within each category there are vast differences in the offerings being sold. Cost is another area of wild swings with prices ranging from a few hundred to thousands of dollars.
A shock’s function is to control the timing of a car’s suspension. This is accomplished, mainly, by the internal valving that tells the shock how much resistance is needed or desired to extend (rebound) and collapse (compression) the shock absorber. This is important since different vehicular activities demand different shock personalities and that’s where adjustability comes into play. For example, a “quality ride” down the road would call for low compression and rebound settings while autocross would want the shocks set much higher for both. Shocks are even important in non-handling events like drag racing since they can greatly help with weight transfer for maximum rear tire bite. Here, the fronts, in general, would have high compression and low rebound while the rears would be set to the opposite. However, when dealing with an independent rear suspension, the goal will be to minimize rear-end squat, as squat will lessen the tire contact patch, resulting in less traction, assuming that the alignment wasn’t altered to account for a certain degree of rear squat.
Having adjustable shocks lets your car switch between street, handling, and drag with just the clicking of a couple of knobs. In a single-adjustable shock, one knob changes both compression and rebound; better than nothing, but it’s a system built on the word “compromise.” A double-adjustable shock lets you dial in compression and rebound independent of each other and, for any sort of meaningful suspension tuning, this is the way to go. Other shocks, like triple-adjustable, adds the ability to dial in high- and low-speed compression and rebound in even greater specificity. Of course, you really need to know what you’re doing to get things dialed in “right” due to their complexity. It’s absolutely critical to understand what shock forces are necessary for a particular application. As Chris King stated, “This is an area where the manufacturers need to do a better job educating their customers. For example, an individual may make the assumption that a four-way adjustable shock will perform better just because it’s much more expensive and has two additional adjustment knobs. However, the four-way adjustable shock actually makes less overall force than a double-adjustable due to the design the customer will actually hurt the overall performance of the vehicle. That turns into a very expensive lesson.”
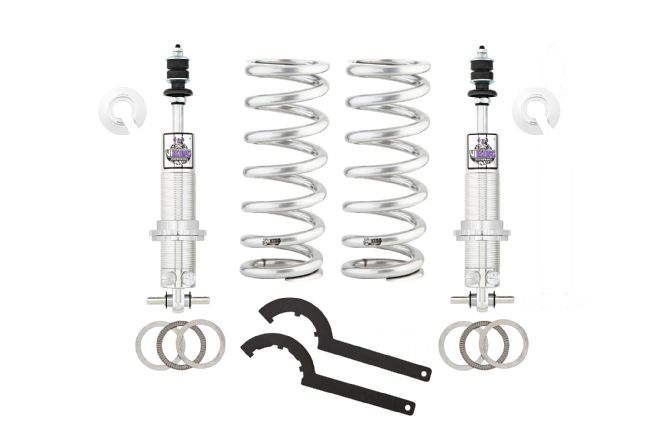
Viking Performance started in early 2011, so they are relatively new players, but their team has over 50 years of hands-on experience in racing and performance aftermarket. They feel that their line of Warrior and Crusader double-adjustable shocks are a great balance of performance and cost. The newest line, the Crusader, was designed for more serious hard-driving applications. As Viking’s Chris King relayed, “This shock was developed based on requests from the Pro Touring market and from small tire, drag radial customers. With these vehicles, there are situations that require rebound forces in excess of what standard passive adjustable shock absorbers can provide. The other factor in our design parameters was the frustration that adjustable shocks, in general, are too complex for the average person to be able to rebuild and/or revalve. From these requests, the Crusader was born. These shock absorbers have the same digressive compression valving, and various options thereof, as the Warrior line. As such, there are 19 positions of evenly spaced adjustments, the zero position and 18 distinctive clicks. The rebound valving, however, is a progressive valve that is strictly determined via orifice control. A progressive valve shock will have a softer low speed force that ramps up very quickly as shaft speed increases.”
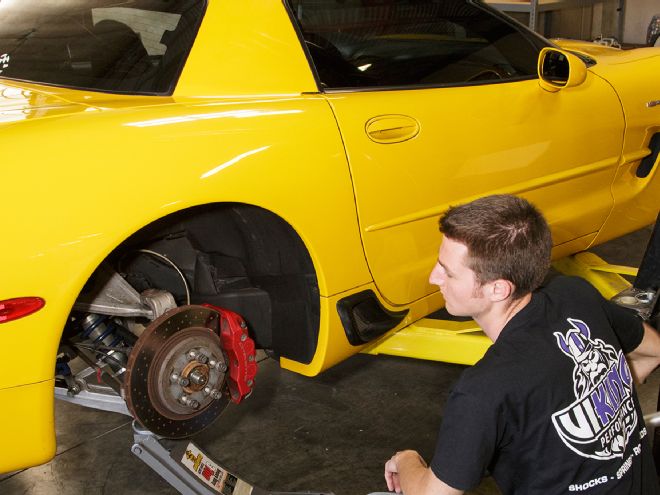
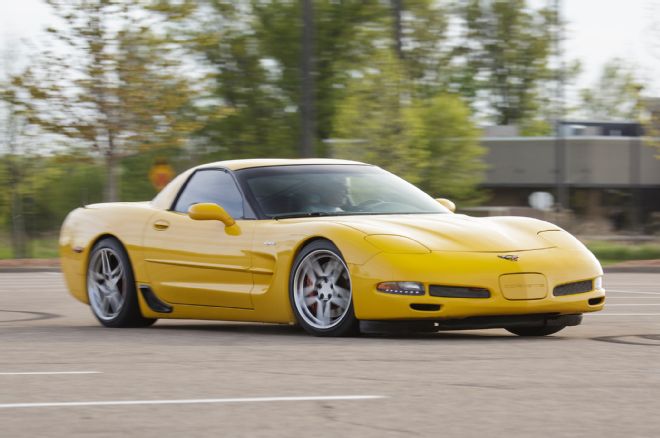
Within the Crusader line, Viking also offers a Pro-Touring option, which incorporates more adjustment points and has much more aggressive compression settings. Viking only makes double-adjustable shocks because, in their opinion double-adjustable, if done right, gives the performance driver enough control to really get their suspension dialed in without the expense and tuning hassles of exotic triple-adjustable shocks or the compromises of single-adjustable. For this install we had a yellow C5 Z06 that was in need of better handling. It already had coilover shocks, but they were non-adjustable, so the owner was stuck in terms of suspension tuning other than setting ride height. The ability to set compression and rebound should lead him to faster lap times, which is always a good thing.
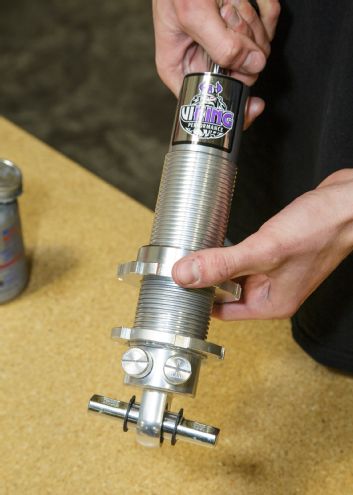
01. As Viking’s Chris King told us, “Don’t let the progressive definitions fool you, as these shocks can generate huge forces at low speeds depending on the needle and seat combination. In fact, the Crusader shock absorber produces forces far greater than nearly all other shock absorbers on the market. The rebound side has 22 available positions of adjustments, the zero position and 21 distinctive clicks. As a result, the Crusader line provides for 418 different valving combinations. This needle and seat combination allows for a very large adjustment range. For example, our Pro Touring-specific valving has a range of 15 pounds to 850 pounds at 1-inch per second, 40 pounds to 2,000 pounds at 3-inch per second, and 120 pounds to 3,200 pounds at 6-inch per second. You will not find anywhere near this broad of an adjustment range with high-end monotube shocks.”
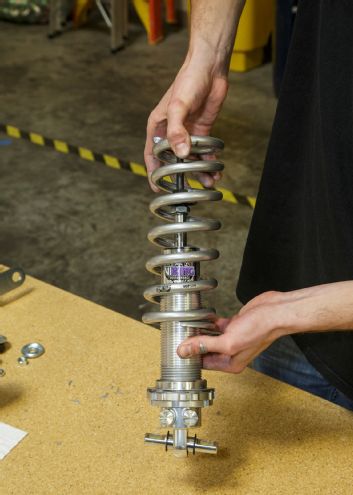
02. To prep the shocks for assembly we gave the lower areas a good slathering of antiseize. Failing to do this will make it difficult to adjust the ride height, especially once they’ve been on there for a while.
03. The lock ring was the first to go on (shoulder facing up) and we ran it down to the last threads. As the lock ring passed through the antiseize it pulled some down and coated the remainder of the threads. We then ran down the spring nut (shoulder up) until it was close to the lock ring.
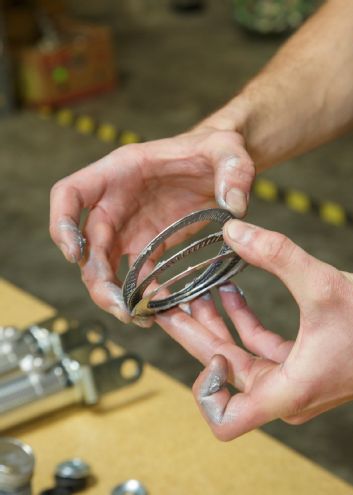
04. Two washers and a thrust bearing were in the kit. All were given a coating of antiseize and the thrust bearing was sandwiched between the two stainless washers. By now you’ll be sick of antiseize since it gets everywhere.
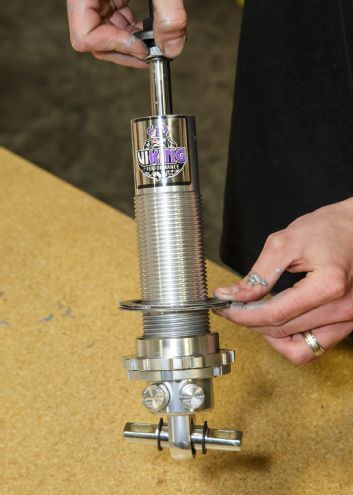
05. The antiseize-coated thrust bearing sandwich was then slid over the shock and onto the spring ring.
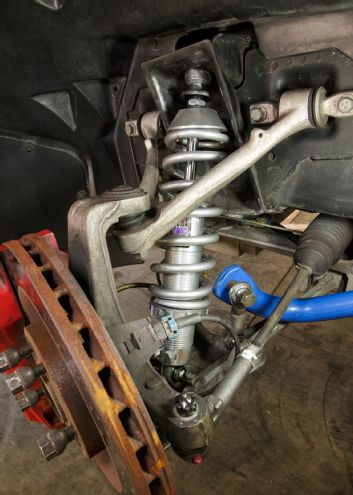
06. Next up, we slid the 500-pound Viking spring onto the shock body. The springs are made in the USA, weigh in about 25 percent lighter than many other springs on the market, and carry a lifetime warranty to stay within 2 percent of their original free height and rate.
07. We then started assembling the rear coilover shocks. The procedure was the same as the front and involved more, you guessed it, antiseize. The rear Crusader coilover shocks, like the fronts, were double-adjustable. “Another important characteristic of the Viking shocks is that every click of the adjuster makes an actual change of the force output. While this seems like a no-brainer, there are many high-end shock absorber brands that do not change the force output until 12 clicks or more of the adjuster, which makes tuning on the car difficult. Another cool feature to these shock absorbers is the interchangeable needle and seat design. The rebound valving adjustment range can be changed without completely disassembling the shock absorber. With the shock in a vice, on its side, in the fully extended position, the rebound knob can be taken off and the needle removed with basic tools and the seat changed out with a flat-head screwdriver. There are no expensive ‘special tools’ required to be purchased from Viking. The process is similar to jetting a carburetor. Obviously, it is critical that everything be kept extremely clean, since the orifices are very small. The end user can choose from a variety of progressive force ranges and Viking has developed application specific valving for drag racing and Pro Touring (handling) applications. Multiple other valving ranges are also available,” explained Viking’s Chris King.
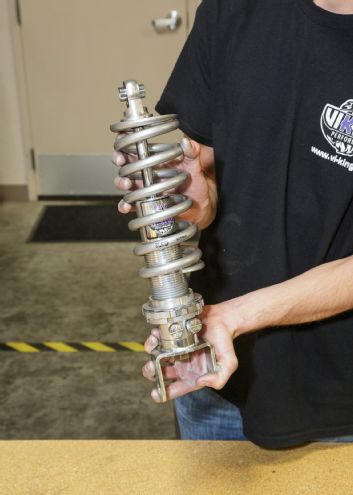
08. The rear shocks received 600-pound Viking springs. We went with heavier rear springs, as the angle on the shocks is greater in the rear of a C5, resulting in a higher spring rate requirement. In addition, we wanted to have a heavier rate in the rear to minimize the rear squat.

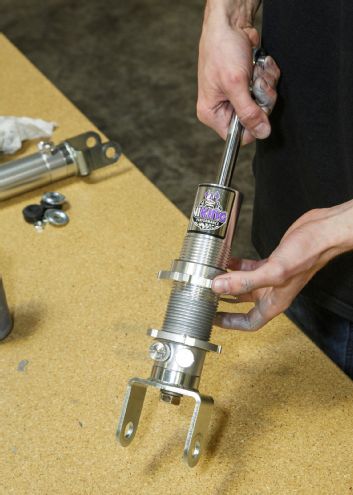
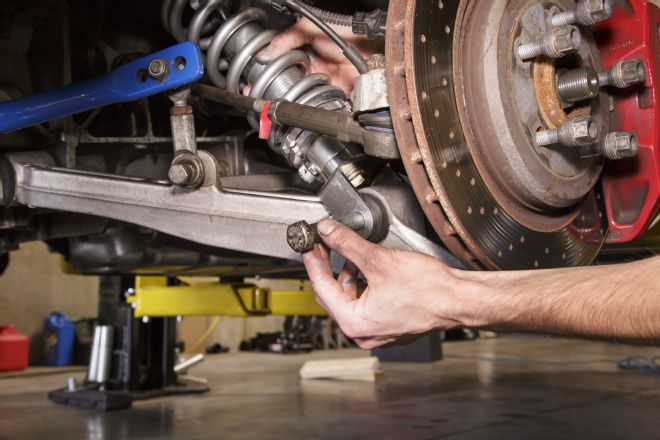
09. Unlike the front shocks, the rears required the installation of T-bars. With one of the supplied snap rings already installed on the upper T-bar we slid the T-bar through the upper bearing mount and secured it with a second snap ring. We double-checked to make sure the snap rings were securely located in the grooves of the T-bar. The T-bar mount is unique to Viking. Chris King explained, “We feel it’s a better solution, as it allows for maximum shock travel, since an added bracket, as many other shock companies supply, actually results in a shorter shock to account for the lost height due to the bracket. In addition, the T-bar has an offset which moves the upper shock toward the center of the vehicle which allows for added spring clearance. The T-bar is also universal, so the end user doesn’t need to worry about a left- or right-hand specific part.”
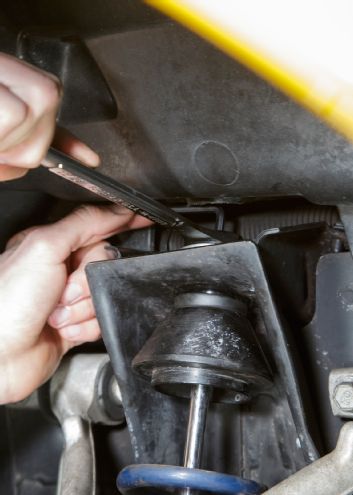
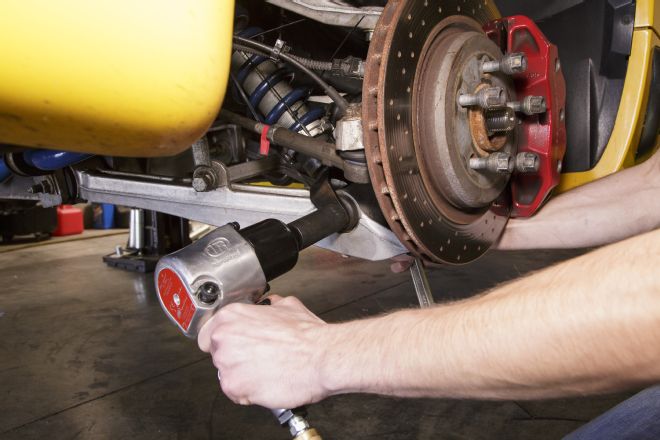
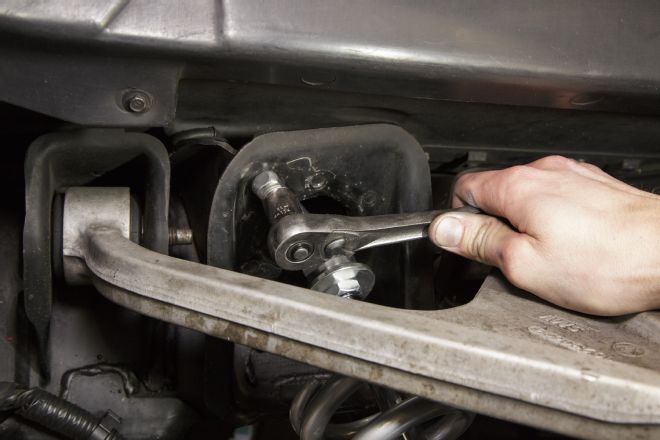
10. With the front and rear Viking shocks assembled we could go about removing the old parts. Our C5 already had a set of non-adjustable coilovers installed so the procedures were a bit different than a stock C5. Using an open-ended wrench and an Allen wrench in the end of the shock stud (to prevent the piston rod from rotating) we loosened and removed the stud nut, washer, and bushing. We then removed the two lower bolts securing the T-bar to the lower control arm. With that done we removed the old shock from the car.
11. Since our C5 already had coilover shocks, the transverse leaf springs had previously been removed. If you’re starting with a stock C5 you’ll need to remove the front and rear leafs. The process is pretty straightforward with the leaf springs held in place by two brackets on each leaf and endlinks on the end of each leaf.

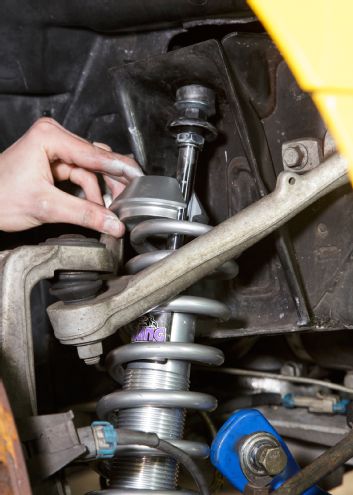
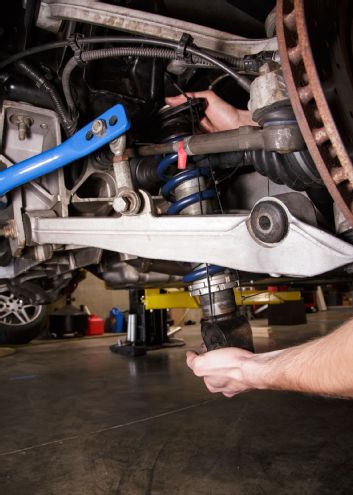
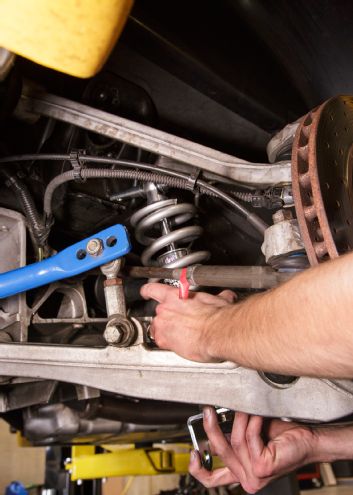
12. The new double-adjustable Viking shock assembly was carefully slid up between the control arm and tie rod until it was in place. It’s a bit tight, so if you want more room you could disconnect the outer tie rod from the spindle.
13. With the T-bar resting on the lower control arm we lined up the holes and secured it in place with the factory nuts and bolts. Viking utilizes an upgraded bearing T-bar mount that allows for misalignment and is a better overall solution since the weight of the vehicle is on stainless steel instead of polyurethane.
14. One washer and bushing were installed on the top of the stud with the washer orientated so that it “cupped” the bushing. Also, the larger shoulder on the bushing was installed facing up so that it could lock into the factory upper shock mount.
15. The shock was then extended until the stud passed through the shock tower. Once there we installed the spring cap and let it rest on top of the coil spring.
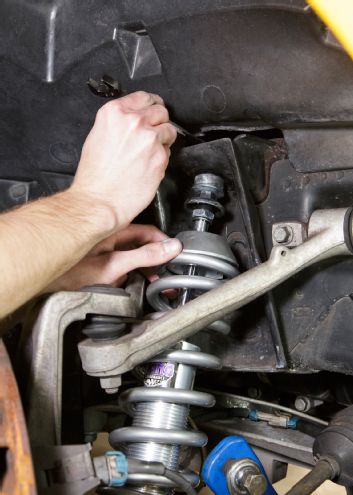
16. We could then secure the shock with the upper stud nut and locknut, making sure the rubber bushings compressed adequately. A good way to know is that the bushings should be approximately the same diameter as the adjacent washers.
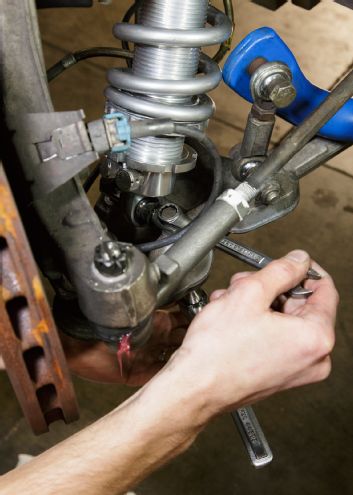
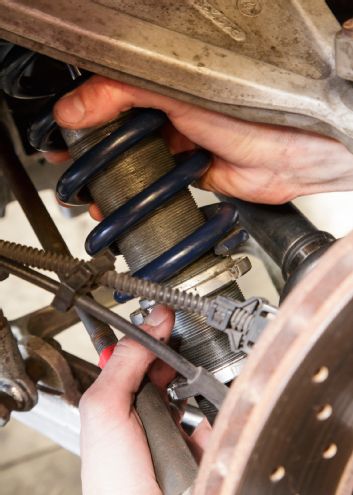
17. The upper spring cap was raised, along with the coil spring, so that the spring nut could be spun upwards to support the spring. To get in the ballpark for the ride height we adjusted the nut up about 1/3 of the way from the bottom of the threads. When we did the install on the other side of the car we made sure the measurements were the same.
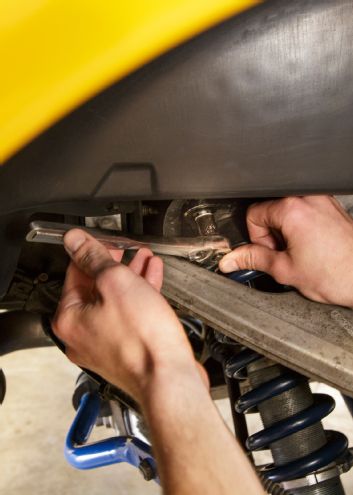
18. Moving to the rear of the Corvette, we started removing the rear shocks. Using some spanner wrenches we loosened the lock nut to take pressure off of the spring.
19. We used a jack to lift the rear lower control arm a bit to make removing the upper mounting bolts easier. If you don’t do this, the upper shock mount will try to pull away from the shock tower when loosening the bolts and this can damage the threads.

20. With the jack removed from under the lower control arm, we ran zip ties through one of the holes of the upper shock mount and around the lower mounting bracket. We then raised the lower control arm to compress the shock and tightened the zip ties. This caused the shock to remain compressed, allowing for easier removal. This step is only necessary because the shock being removed was a pressurized monotube design, and was too large to remove in its extended state. Stock shocks should come out without this step.
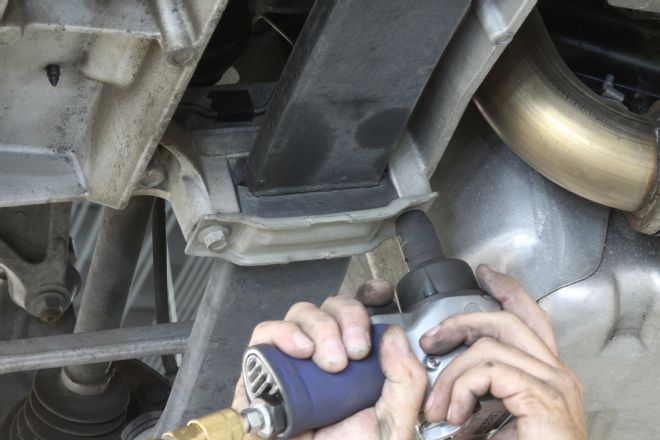
21. Using an impact wrench, we loosened and removed the lower control arm mounting bolt.
22. We then removed the old non-adjustable shock by sliding it down through the control arm.
23. The new double-adjustable Viking assembly (compressed) was then slid into place in the reverse way we removed the old shock.
24. The lower mounting bolt was slid through the lower control arm bushing to secure the shock. We also made sure that the two adjustment knobs were facing toward the center of the Vette.
25. The shock was then extended until the upper T-bar contacted the upper shock tower. Once there, the holes in the T-bar were lined up and secured with the factory bolts and torqued to spec along with the lower mounting bolt.
26. Like the fronts, we started out with the spring nut adjusted about 1/3 of the way from the bottom threads on the shock, making sure each side were the same. Once we have the ride height dialed in we will use spanner wrenches to tighten the locking rings.
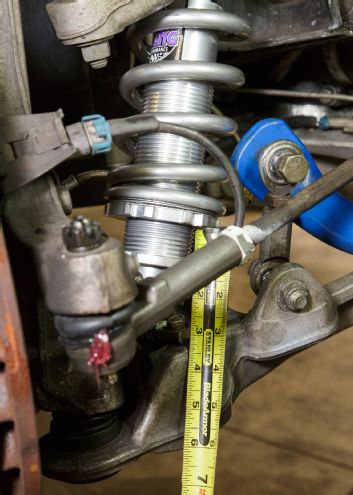
Setting Ride Height
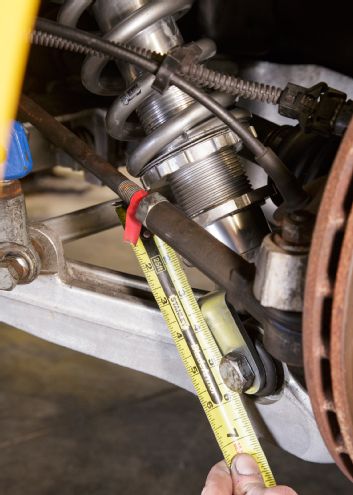
The ride height of a vehicle is adjusted by lowering or raising the spring nut on the shock body. Prior to removing any suspension components, measure and record the distance from the ground to the bottom edge of the wheel arch at each corner. Based on your desired outcome (maintaining the existing ride height, lowering the ride height, or raising the ride height) compare these measurements before and after installing your coilover shocks. If the new ride height is higher than desired, incrementally lower the spring nut on the shock body until the desired ride height is achieved. If the new ride height is lower than desired, incrementally raise the spring nut on the shock body until the desired ride height is desired.
Seating the Springs
Due to the inherent differences between applications, including desired ride height and spring rate, some installations will result in the top of the coil spring cap not being seated against its mounting surface (the bottom of the stud with respect to the front shocks, and the bottom of the eyelet with respect to the rear shocks) when the suspension is fully extended. This is due to the extended height of the coil spring and spring cap being shorter than the distance between the spring nut and mounting surface of the spring cap, with the spring nut adjusted for the desired ride height, when the rear suspension is fully extended. If this is experienced, slowly lower the vehicle until the spring cap begins to contact its corresponding mounting surface. Push and/or pull the spring until the spring cap becomes seated. Once each spring cap is seated, the vehicle can be finished being lowered to the ground.