Going fast is a risky venture, but having the right safety equipment can tip the scales in your favor if things go sideways, or upside down. One of the more common safety items found in Pro Touring cars is a rollbar. Typically this is a hoop just behind the driver with bars that extend back into the trunk. There’s also typically a crossbar, located near shoulder height that is a handy place to mount a multi-point harness system. These “four-point” bars provide a good margin of safety, especially in rollover accidents. While they are typically street car friendly, some designs make using the back seat problematic at best. Aside from safety, they also add a bit of chassis stiffness to the equation.
The next step up from a rollbar is what is termed a rollcage. Think of it as a rollbar that also extends forward of (and around) the driver. Here, the entire interior of the car is protected by bars of steel. The safety level is increased as is the chassis stiffening since the front of the car is now tied into the rear. The downside is that more weight is added and, in a street car application where you won’t be wearing a helmet, care needs to be taken that the forward bars aren’t too near the occupants’ heads. When running a ’cage, it’s important that the occupants wear a full multi-point harness, even while just cruising around town, since heads and steel bars don’t play well with each other in an accident.
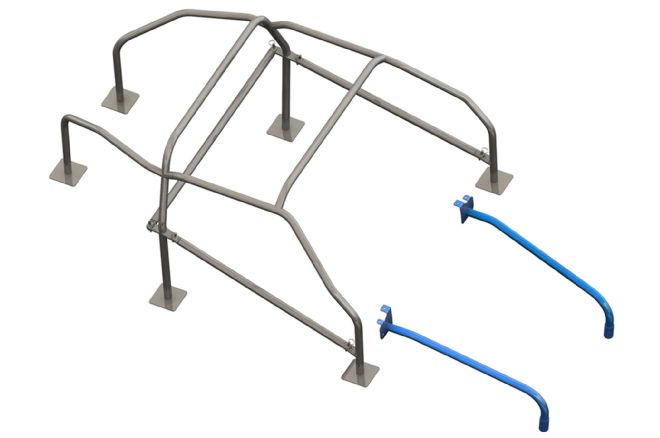
Even with the downsides, there’s no better way to increase safety and chassis stiffness than by adding a well-designed rollcage. The engineers over at Chris Alston’s Chassisworks know this and have put a lot of thought into their line of gStreet Exact-Fit rollcages. Their systems are intended for Pro Touring performance cars and have additional bends for clearance not found in race-only rollcages. They are mandrel bent and come in 1.75-x0.134-inch wall mild-steel with options for DOM and 4130 steel. Door bars can be ordered in a high-mount or low “hip mount” configuration and either style can be made to swing out or be removed. In short, there are a lot of options to fit what your needs and your budget.
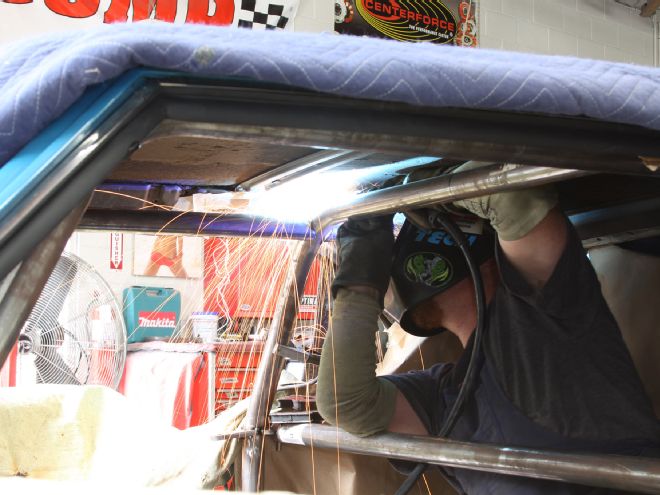
But, even though the bars have been bent to the right shape, there’s still a good deal of labor, and more than a bit of skill, required to get the stack of steel that shows up installed correctly in a car. It’s something you could do yourself, but we would suggest finding someone who is practiced in the art of ’cage fabrication. After all, you are betting your life on it holding together in an accident and the process of cutting the bars to length, notching them correctly, and welding them properly isn’t anywhere close to easy.
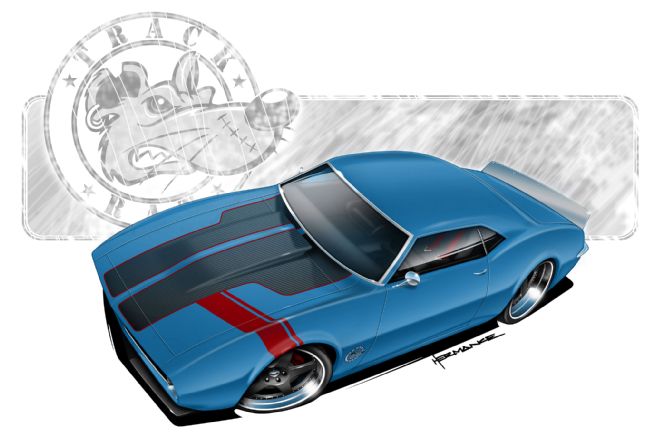
So, to illustrate what’s involved with turning a stack of pre-bent tubing into a badass rollcage, we decided to follow along as an Exact-Fit system was installed in our project Track Rat. Our 1968 Camaro is being built for the street and track, so it needs the ’cage for safety, but the bars need to be as “street friendly” as possible. So, with a stack of pre-bent steel tubing, some hardware, and a couple of welders we headed over to Best of Show Coach Works in Escondido, California, to watch a pro turn it all into something useful.
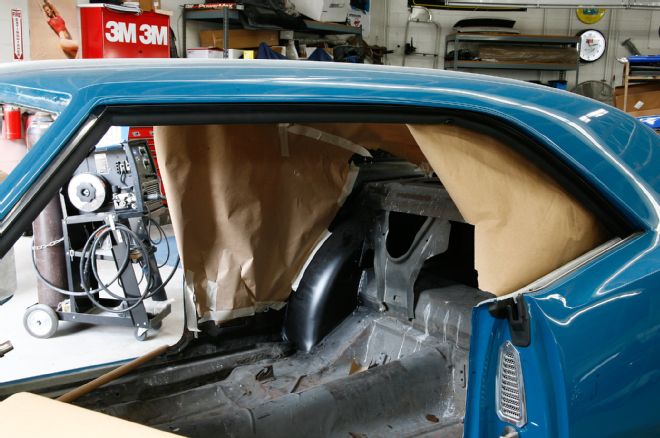
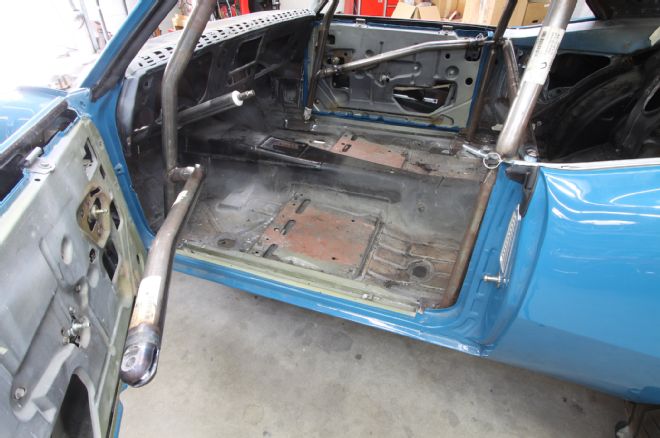
1. The interior of our 1968 Camaro project was already stripped so we just had to hang some heavy paper to protect against welding spatter. And yeah, it would have been better to do this before the car was painted, but you have to play the cards you’re dealt.
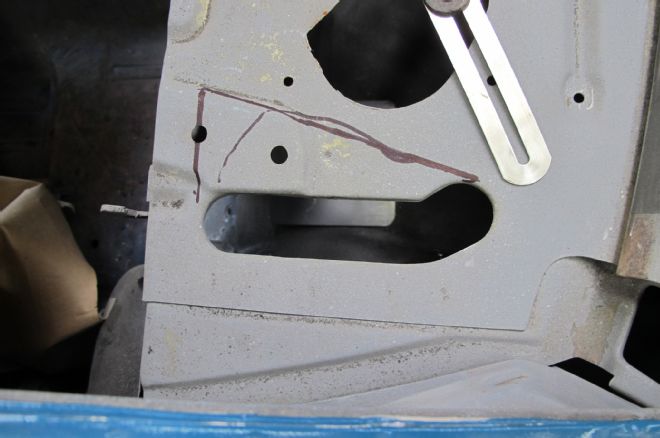
2. The Chassisworks gStreet Exact-Fit rollcage (PN 7054-F10, $1,095) came with all the needed parts, like floor plates and removable harness bar. We knew where we needed the main hoop to be, so the decision was made to install it first and then build the rest off of that piece. To mount the floor plates for the main hoop we first needed to cut away a section of the floor flange.

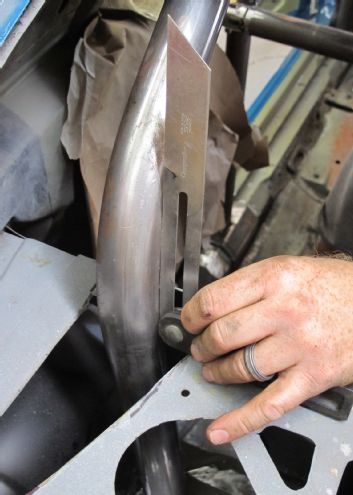
3. With the flange gone, we were able to lay the plate down and figure out where to make the first bend.
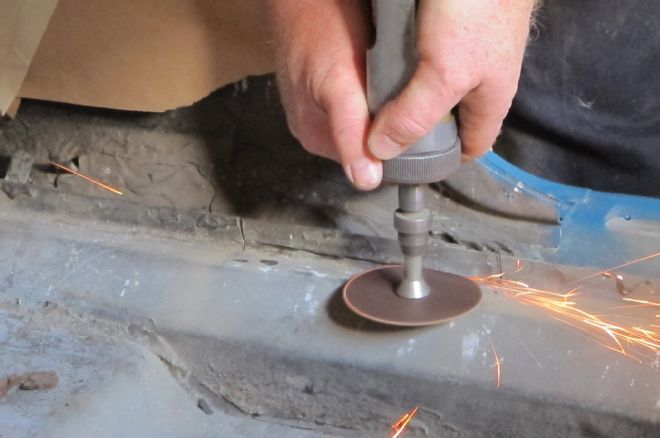
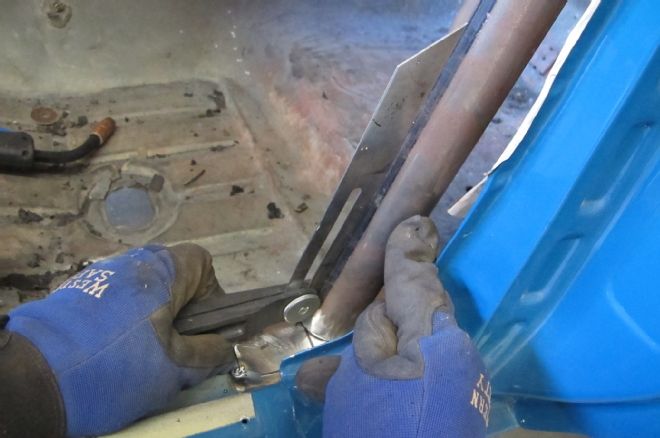
4. Shane Lingle builds a lot of ’cages, many of them in Trophy Trucks, and he had more than a few cool tricks. Instead of just bending the plates, which would result in weak areas, Shane first scored the line with a cutoff wheel and then bent the plate by hand.
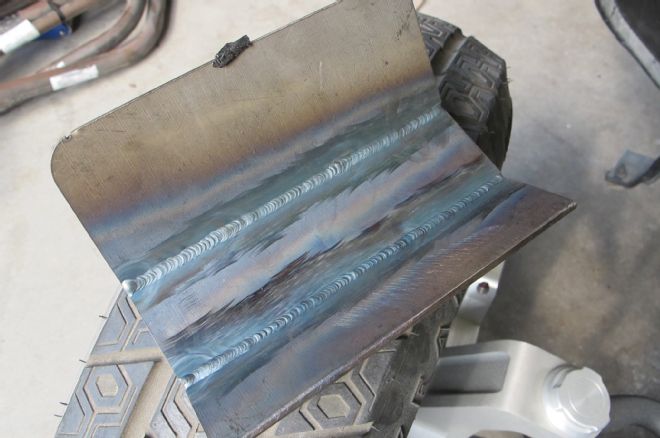
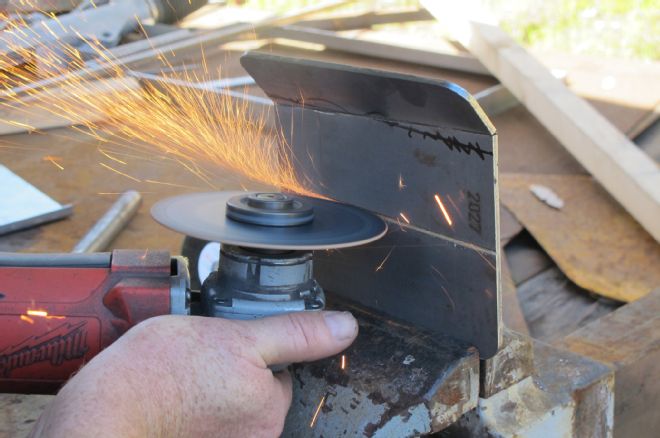
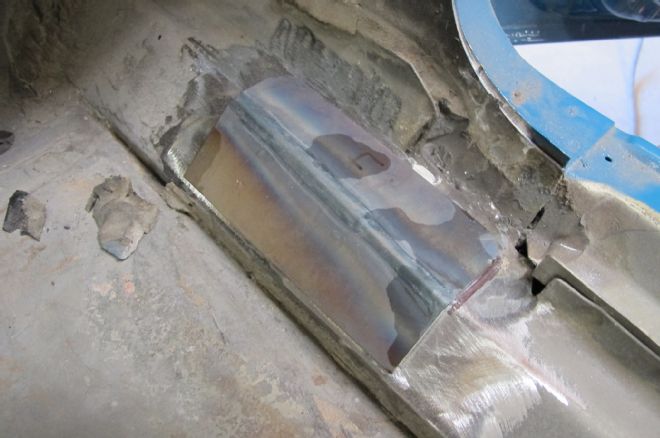
5. Once the plate was the right shape, he welded the seams, front and back, which made for a plate that was the right shape and as strong as possible.
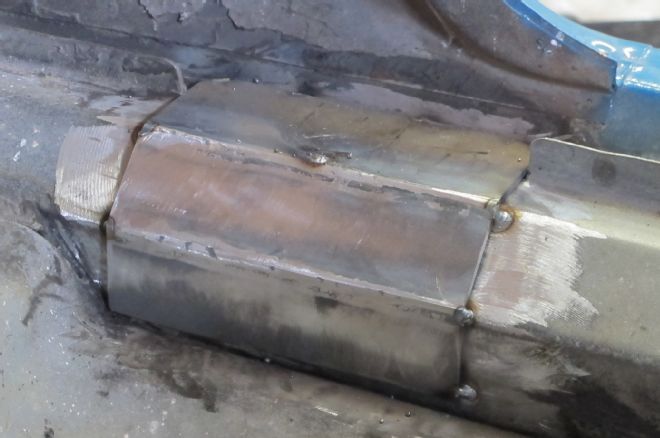
6. The outside weld was ground down and the floor plate was tack welded in place. No finish welding was done until the entire ’cage was fitted to the car.
7. All the pre-bent tubes supplied by Chassisworks came longer than needed, which was nice since it gave us leeway to locate the bars where we wanted. After setting the main hoop in place, Shane used an angle gauge to get the bar the same on both sides.
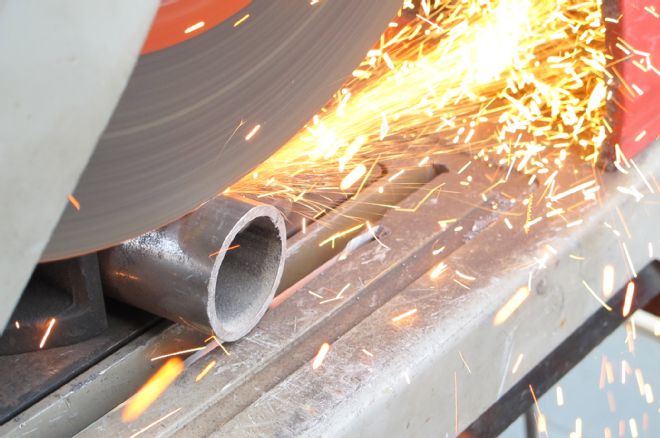
8. The bar was a bit tall (keeping in mind we need to maintain room for a fiberglass headliner from TMI), so a bit was lopped off each end. Shane also cut the angle right so there wouldn’t be a gap when bar was laid back at the right angle.
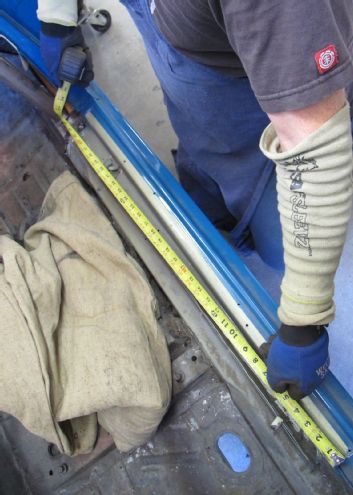
9. In our case, the main hoop bar ended up 36.75 inches back from the end of the rocker panel flange. For now, the bar was just tack welded in place.
10. For the ’cage to look right, we wanted the angle at the top of the bar to be the same as the angle of the quarter-window glass. Trust us, if the angle is different it may work fine, but it will just look wrong.
11. Using the same method, the front floor plates were scored, bent, welded, and trimmed until they fit perfectly. These plates were also tack welded in place with our Miller 220 MIG welder.
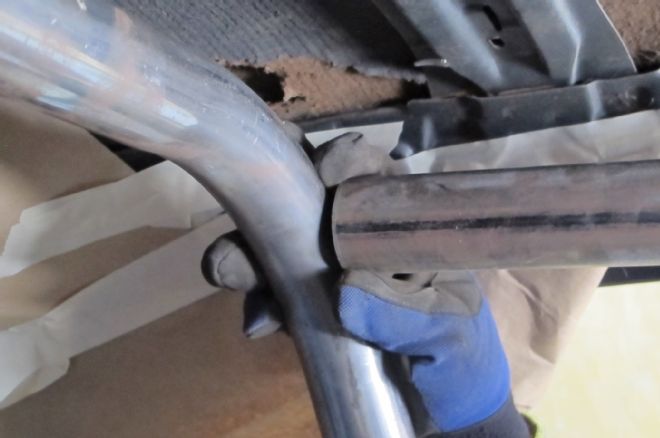
12. Next up were the side hoop bars, which extend from the main hoop forward (along the top edge of the door glass) and then turn down toward the floor. In our kit, the bars come down in front of the dash, but Chassisworks does offer a version where the bars go through the dash.
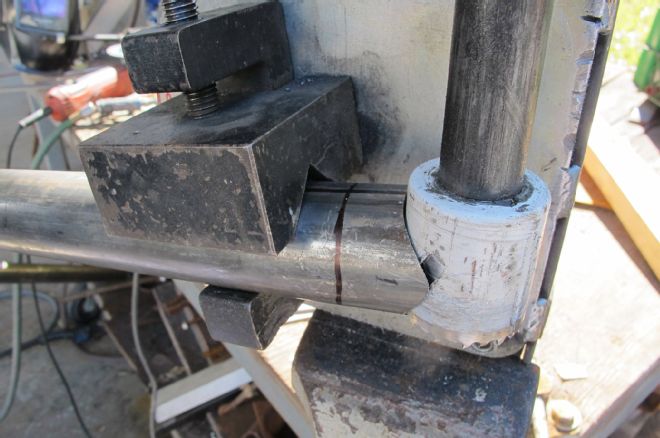
13. Once cut to length, the tubes need to be notched to fit together. This is where a good tubing notcher is required. You can find them at welding shops and Eastwood makes a portable one that works well. Also, it’s important that you go slow and measure often. Cutting it too long isn’t that big a deal, since you can trim, but if you cut it too short you’re not going to be very happy.
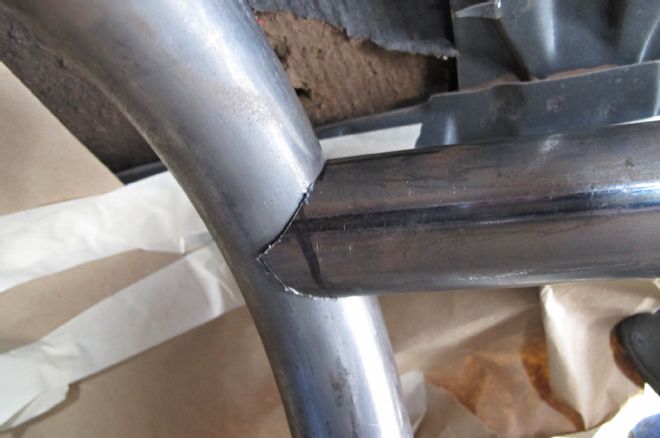
14. Here you can see the result of proper measuring and cutting.
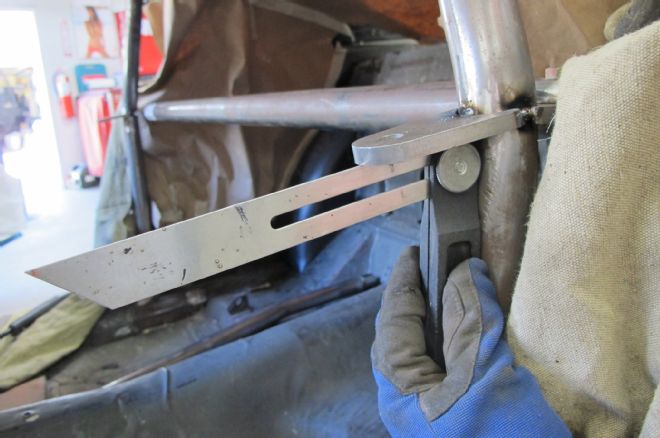
15. We then installed the tabs for the removable harness bar (included in the kit) and the tabs for our swing-out door bars. An angle gauge is mandatory for making sure both sides mirror one another. We wanted the harness crossbar to be a few degrees below our shoulder height, which turned out to be right where the main hoop made its turn inward.
16. The two sides of the “halo” bar were tied together with a horizontal crossbar going right through where the sunvisors would normally go. There’s a lot of flexibility on how far forward or back this bar can be.
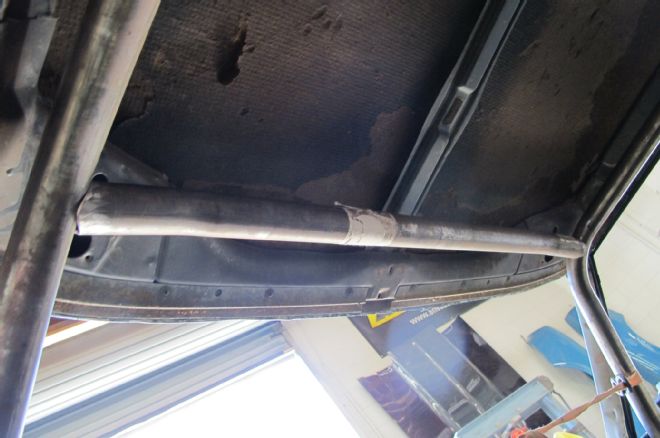
17. After notching the bar it was pushed as far forward as possible. This will negate us running sunvisors, but it was more out of the way. The tie-down ratchet strap was used to pull the two sides together against the crossbar until we could tack it all in place. The angle gauge and measuring tape were used to make sure both sides were the same.
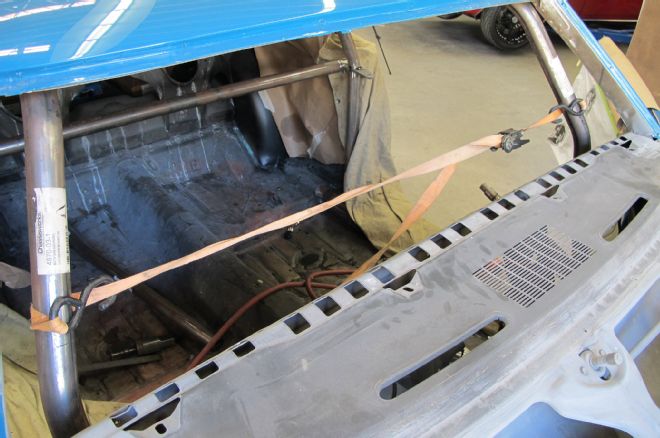
18. It was then time to run the bars from the main hoop back into the trunk. To get there we needed to cut a hole through the rear package shelf. Here’s a rough idea of how much we needed to cut away.
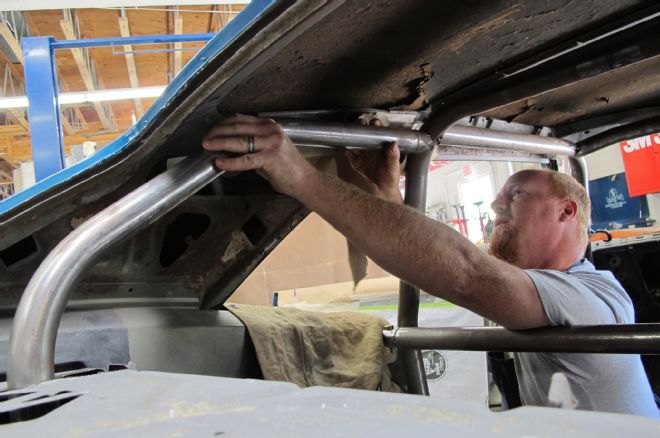
19. With the tube trimmed, Shane was able to start sneaking up on the bar. The process was trim, fit, trim, fit, and so on until it was just right. Remember, if you cut it too short you might as well just keep cutting. One aspect of the Chassisworks gStreet Exact-Fit ’cage we really liked was how they bent the tubes to stay away from the heads of people that might ride in the back seat (although we never really like riding someone in the back of any ’caged car).
20. The trusty angle gauge was used again to make sure the left and right bars had the same angle. Even tacked in place, fine adjustments can be made to the angles by gently tapping the bars with a dead blow hammer or mallet.
21. The plates for the trunk didn’t need to be bent, but they did need to notched to fit the profile of the floor. We liked how the bars dropped straight down into the trunk since it doesn’t suck up a bunch of trunk volume. Again, everything was just tacked in place for now.
22. With the entire ’cage (except for the swing out door bars) fitted and tacked in place Shane went over every bar and made sure it was exactly where it needed to be. Consider this the last chance to make changes.

23. Once happy with all the measurements and angles, the Miller MIG welder was fired up and all of the joints were completely welded. As you can see, we made sure to cover and protect all of the paint with heavy blankets. The design of the ’cage meant the upper joints were far enough away from the roof to ensure the heat wouldn’t blister the paint.
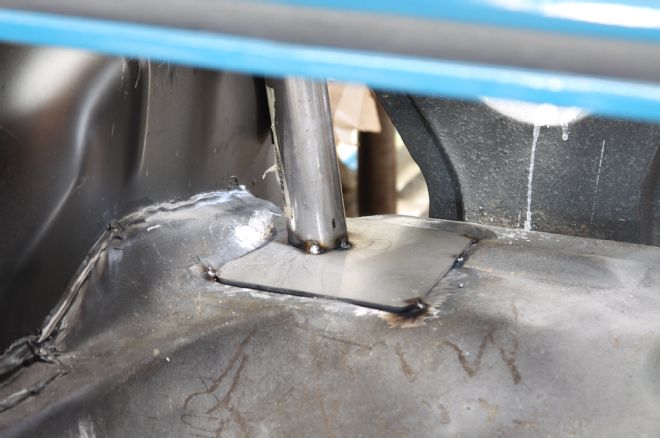
24. Here you can see the main hoop bar fully welded to the floor plate, which was likewise fully welded to the floor.
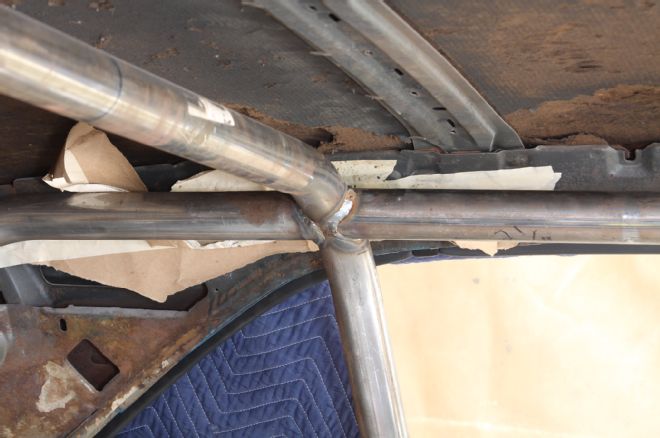
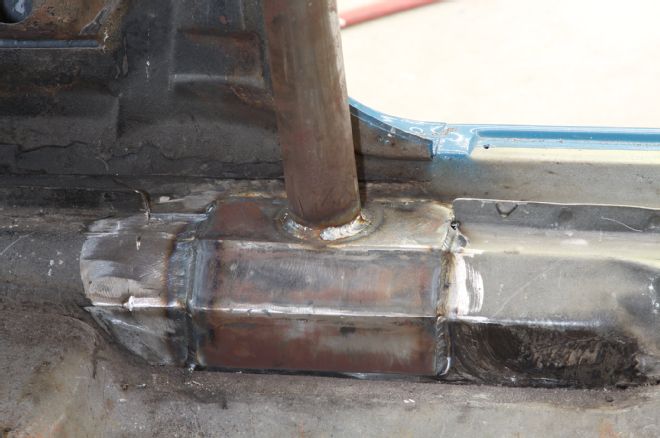
25. And here’s the main junction on the hoop bar. It looks good, but more importantly it will hold up if things so sideways.
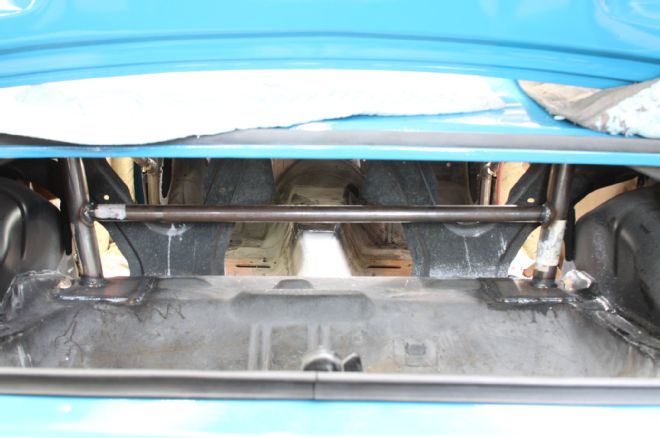
26. The kit came with a length of 1.25-inch bar for use to meet certain drag race regulations. Its purpose was to go from the main hoop down to the subframe connector. Since we’re not building a drag car, we didn’t need to do this, so we decided to add a bit more chassis stiffness by tying together the two down bars in the trunk. It will also be a handy spot to mount a fire suppression system or even remote shock reservoirs.

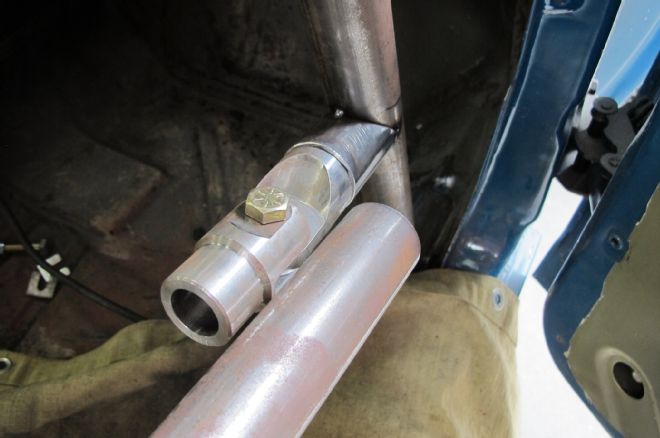
27. With everything fully welded, it was time to tackle the door bars. For this we broke out our Eastwood TIG welder and attached the machined clevis to the hoop end of each door bar. The swing-out parts are an option (PN 7031, $90 per side), but for a street car sure makes life easier.
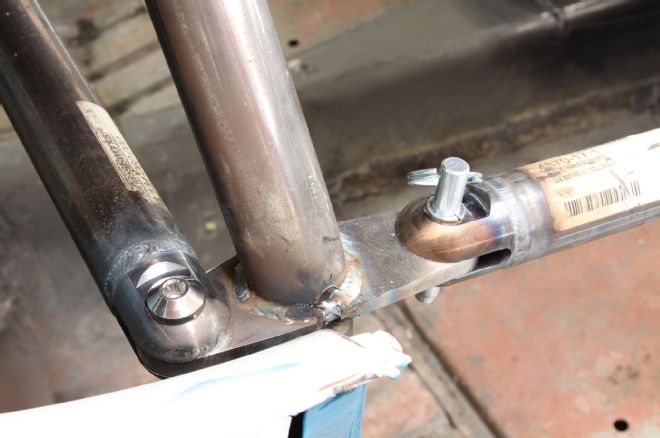
28. Chassisworks offers some really nice hardware for their ’cages. The bolts for the harness bar (also TIG welded) look a ton nicer than standard bolts and the pin will make opening the door bar a lot easier.
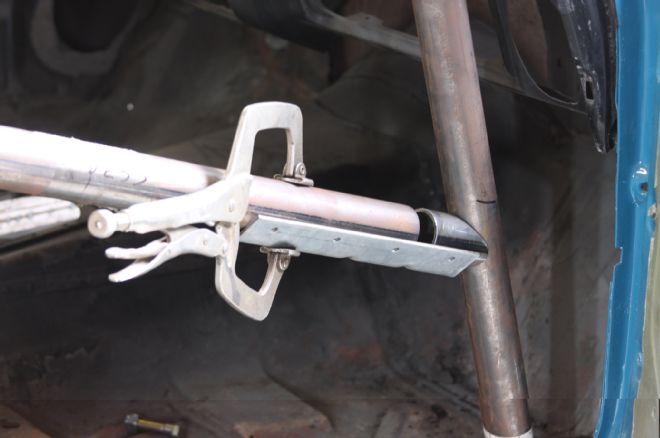
29. Shane used a section of angle iron to make sure the other end of the door bar’s hinge wound up in just the right spot. Once perfect, the small section (notched to fit on the forward down bar) was tacked in place.
30. We could then add the hinge pieces and work out where to cut the door bar. These cuts are critical to the proper, easy functioning of the door bar. This is also why the ’cage was fully welded before starting on the door swing out.
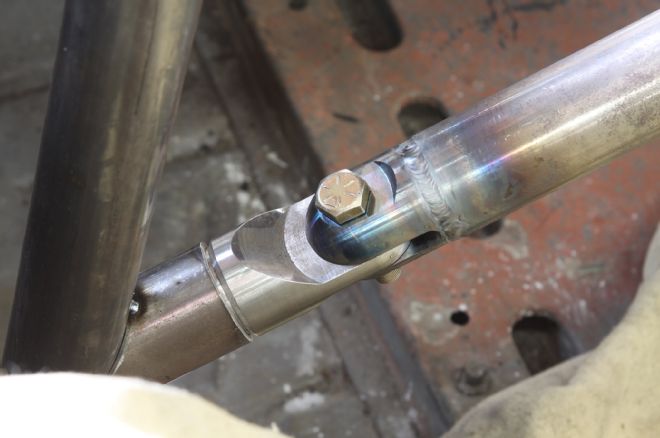
31. The door bar was then cut to length and the hinge piece TIG welded in place. We hadn’t welded the ’cage side of the hinge so this was our last chance to make sure the door bars functioned properly.

32. And here’s the fully welded hinge assembly, complete with the beautiful Chassisworks rollbar spuds (PN 5918-144, $123).
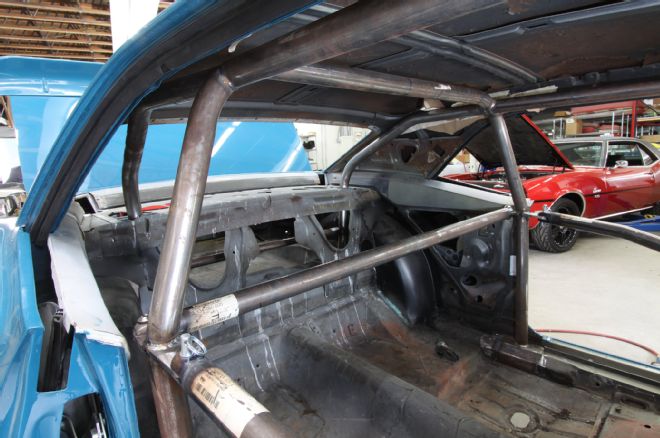
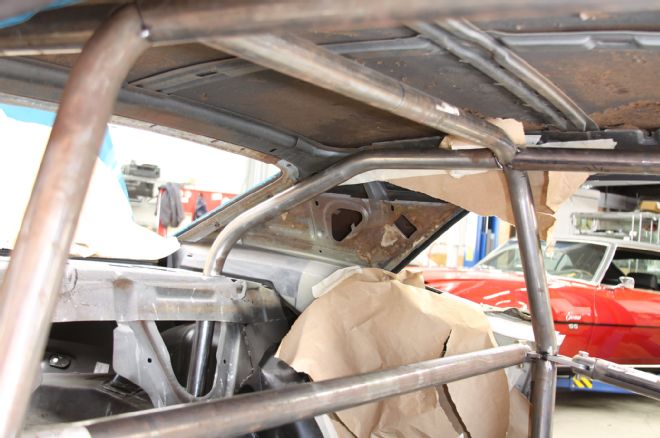
33. After several long days, we were done, but the results were well worth all the work. We were very happy with how the Chassisworks ’cage fit the car, especially with how the bars were kept away from where the driver and passengers’ noggins would be.
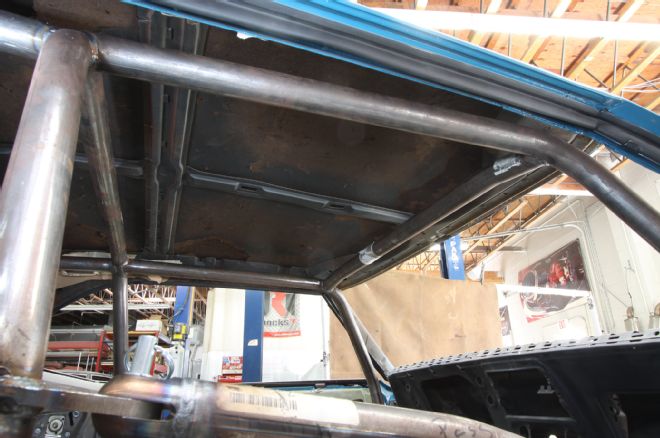
34. And here’s the front “halo” section of the ’cage. We should have just enough room to slide in our TMI headliner, which is exactly what we wanted. If you’re going to have someone fit and install this kit expect to pay around $1,500 in labor.
35. Sure, the swing out door bars cost more cash, and were harder to put in, but they will make getting in and out of the car far easier. Plus, when just cruising around town, we can remove them altogether and then pop them back in for track days.
Catch up on the rest of Project Track Rat's journey here!
1968 Chevrolet Camaro Project Track Rat - Rebuilding Doors
1968 Chevrolet Camaro Project Track Rat - Mini-tubs Install
1968 Chevrolet Camaro Project Track Rat - Tremec Magnum Six-Speed
How to Cut and Buff Paint
CA Chassisworks Chevy Camaro Subframe Install
1968 Chevy Camaro - Graphic Attack
Using Waterborne Paint - Hydrophobia
1968 Camaro Project Track Rat Back On Track - g-Link Install 101
1968 Chevy Camaro Project Car - Fender Bending
1968 Chevy Camaro Quarter Panel - Build: Battle Of The Bulge
1968 Chevy Camaro Paint Prep - Last-Minute Minutia
1968 Camaro LS Engine - Reality Check
1968 Camaro Currie Enterprises Drivetrain - Force Multiplier
1968 Chevy Camaro Project Car - Off The Wall
1968 Chevrolet Camaro Rear Sheetmetal - Drawn Then Quartered
1968 Chevy Camaro Project Car - Let The Games Begin!