Last month I vaguely alluded to the 1933 Tudor's use of Lincoln drum brakes, intentionally not going into much detail knowing that I'd be devoting a page or two this issue to the installation itself. Had we gone with a standard 1940 Ford–style drum, there'd really be nothing to discuss; but since the "adjustable" (that's the key word there) Lincoln setup uses a different shape spindle flange than the Fords, there's a bit of modification required...let's call it fitting a square peg in a round hole.
From the get go, I knew the Lincoln drums were what the sedan was going to get. And instead of having to source a set of originals to start with, I chose the higher path and opted to utilize Speedway Motors' Bendix-based versions, with all-new components—from the ribbed 12-inch drums to the stamped backing plates and mechanical internals. What I did not consider at first, however, was the forthcoming effort that would be required in order to fit said brakes to my standard (aftermarket) 1937-41 Ford spindles. The upper portion of the recessed spindle pocket on Lincoln backing plates is flat, thus won't fit over a round spindle. A good portion of the Ford spindle obviously needs to be removed, but because the King Pin boss is also part of that area, it needs to be done in a tapered manner.
Grinding on a forged-steel spindle doesn't sound like a whole lot of work, and in essence, it's not. But it's somewhat of a delicate matter, as you're working in the immediate presence of vital performance areas: the King Pin bushings and spindle shafts themselves. To avoid damaging the Oillite bushings, I did my grinding/shaping with the spindles installed on the axle; the spindle shafts were heavily taped up to aid in protecting the bearing surfaces. Wedging a punch between the spindle and the axle kept the spindle in place during the material removal procedure.
While to some the Ford backing plate may be more visually appealing, I prefer the ribbed Lincoln drum, but it's the adjustability aspect that led me to the latter. As for the looks, I'll soon add screened vent holes to the upper section of the backing plates.
 1. Showing through an open-windowed wire, such as the Wheel Vintiques wires shown in the background, shapely Lincoln drums are recognizable by their raised fins at the rearmost edge.
 2. As for the backing plates, the major difference is the depth in the recessed areas.
 3. The Ford’s (passenger-side shot) backing plate clearly having more shapeliness.
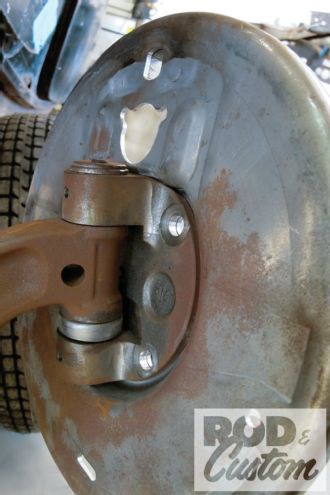
 4. At the time I was about to perform the spindle modification on the ’33, Circle City Hot Rods had recently completed a similar conversion on a customer’s ’31 roadster, shown here with original Lincoln backing plates (notice more detail depth than Speedway’s) and stock ’37-41 Ford spindles.
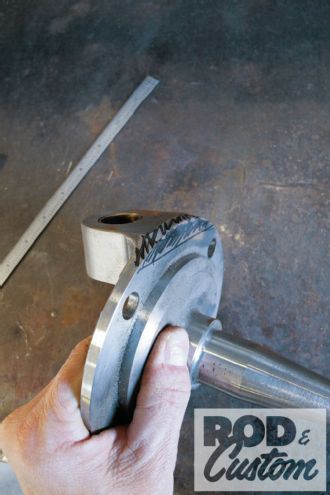
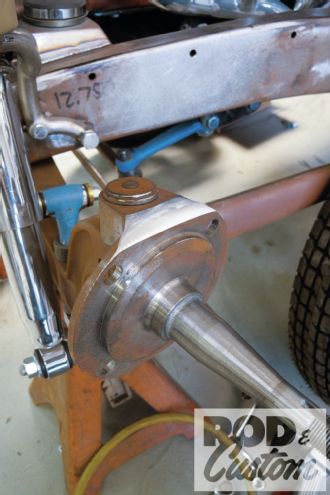 5. This is what you need to achieve in order to mate Ford with Lincoln: basically rolling the top edge of the spindle over horizontally, tapering back toward the King Pin boss (obviously without causing any structural or mechanical damage to the spindle!).
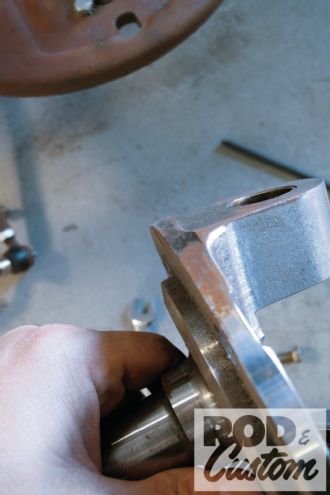 6. Prior to modification, you can see the “girth” that we’re dealing with that will require careful removal, which in my case was done with a pneumatic angle grinder using graduated-grit discs.
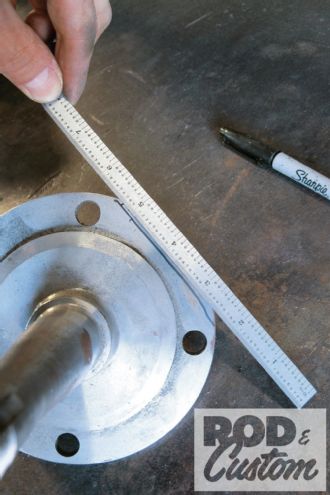 7. To help guide in my material removal process (which I learned was not an exact science, rather a gradual process until the round peg finally fit into the square hole), I began by marking where the horizontal lines would meet.
 8. I also marked the above-mentioned amount of girth that would allow clearance.
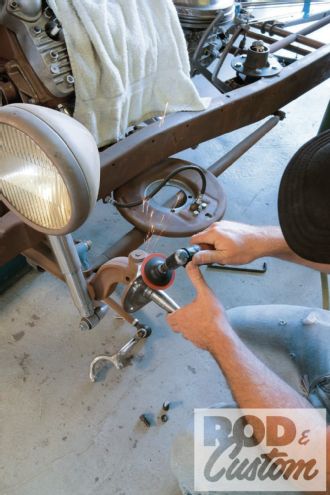
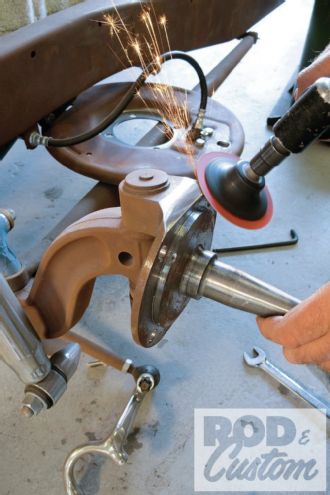 9. While I was over cautious and, as mentioned, masked off the spindle’s “sensitive” areas during the grinding sessions, Jimmy White is clearly more confident in his skills (and rightfully so). However, I still recommend it! Work started out with a heavier abrasive, finishing up with a finer to provide a more polished surface.
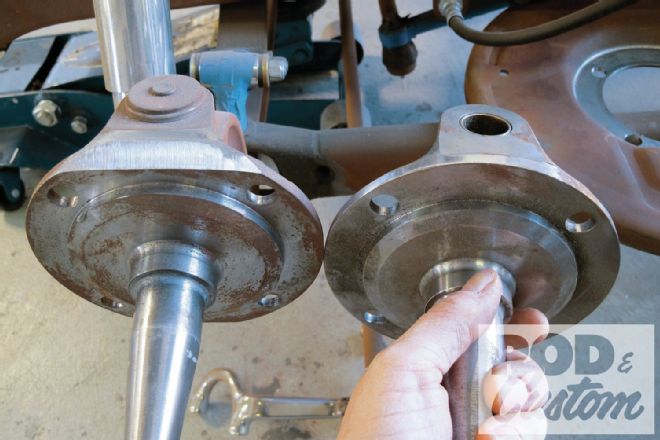 10. Before and after ought to give a good indication of just how much material removal it will take from the face of the spindle’s mounting surface on up into the King Pin boss.
 11. Also, the backing plate itself was smoothed out below the wheel cylinder where the modified spindle will now comfortably fit.
 12. Speedway Motors’ kit (PN 910-65410) comes complete with everything needed internally speaking: brake linings, wheel cylinders, and all hardware accessories—including the star adjusters.
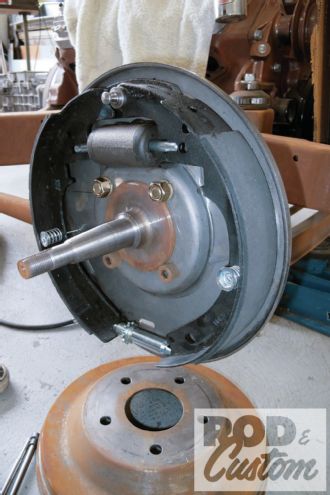
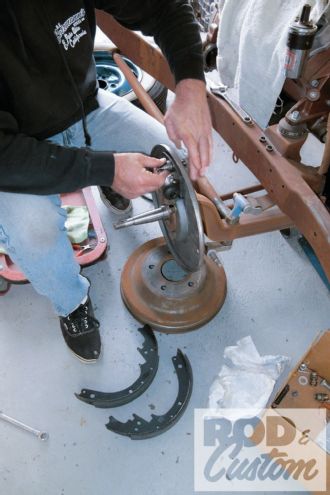 13. Once the spindles had been properly clearanced and the Speedway backing plates fitted/installed, the brakes themselves were assembled (even though they’d be coming back off soon enough, as the majority of parts will need sand blasting, which the accumulated surface patina you see should clearly indicate!).
 14. Quick duty was made using your standard brake assembly tools—just like any other “standard” drum brake assembly would require.
 15. No science here, however, just use precautionary practice when stretching the springs!
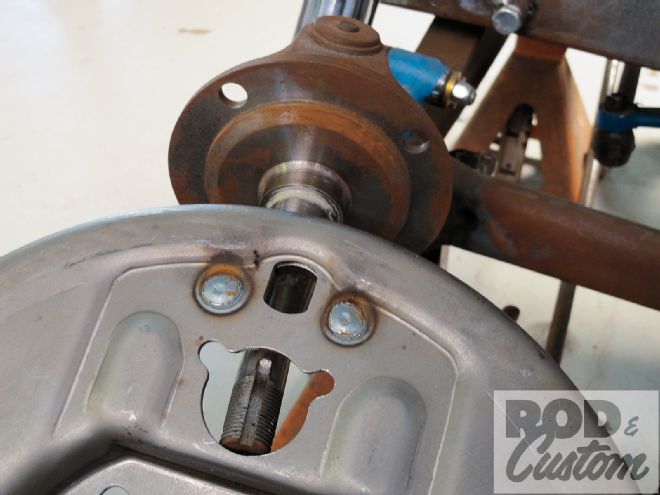
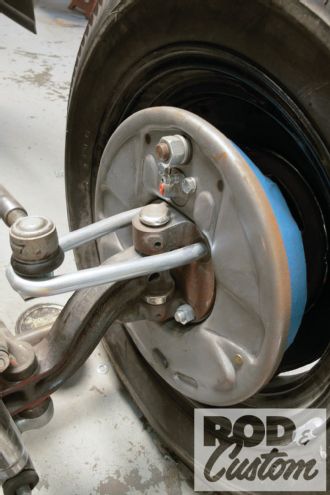
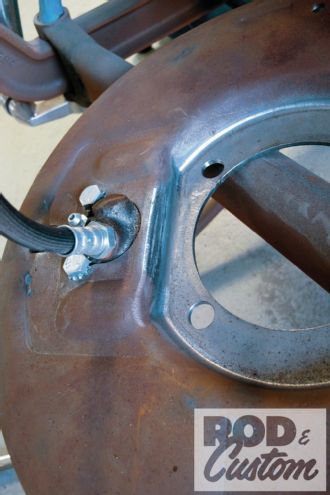
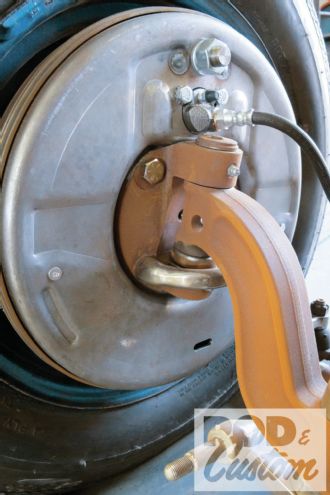 16. That little jellybean-shaped hole (arrow) is your friend—use it like any other later-model drum brake when it comes to adjusting brake shoes. Also, while we didn’t experience any problems, note that there’s ample clearance between the King Pin and the brake line fitting at the wheel cylinder (turn steering lock to lock fully to ensure).
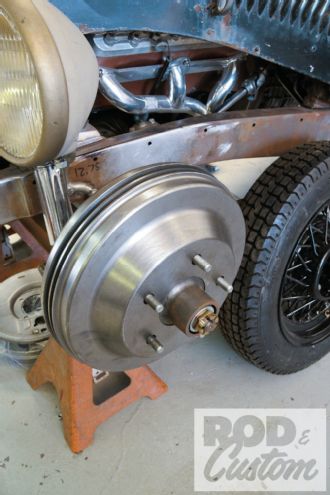
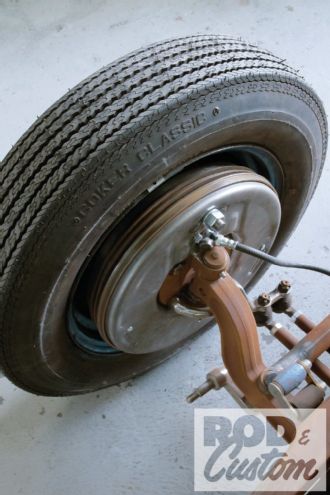
17. What could look better than a 4-inch wide, bias-ply-capped wheel mounted atop a shapely Lincoln drum? Simple—that same scenario, driving on the road!
16. That little jellybean-shaped hole (arrow) is your friend—use it like any other later-model drum brake when it comes to adjusting brake shoes. Also, while we didn’t experience any problems, note that there’s ample clearance between the King Pin and the brake line fitting at the wheel cylinder (turn steering lock to lock fully to ensure).
17. What could look better than a 4-inch wide, bias-ply-capped wheel mounted atop a shapely Lincoln drum? Simple—that same scenario, driving on the road!