It's been said that one thing leads to another—we have every reason to believe those words were first uttered by someone building a custom classic truck.
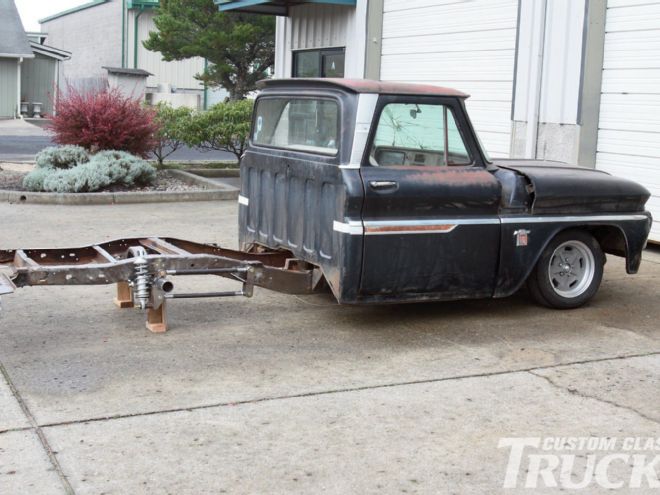
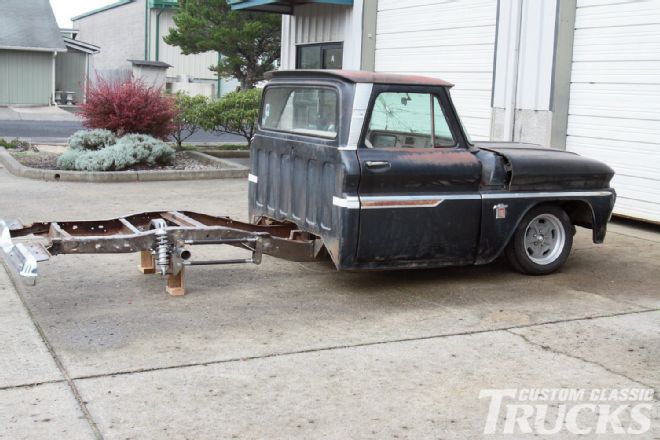
When we dragged our 1964 Chevy pickup home our intent was to do little more than make it run. That plan didn't last long as the conclusion was reached that there was no way we were going to wobble around with the truck perched on stock suspension a mile off the ground.
The first step to improving the truck's ride and handling capabilities, and reducing its altitude was the installation of a Scott's Hotrods 'N Customs bolt-in IFS with tubular control arms, coilovers, and rack-and-pinion steering. Once that was done we knew its road manners would be considerably better and the front of the truck sat just where we wanted it—now we had to do something with the rear.
To get the aft end of our ½-ton as close to the ground as we wanted it and to further improve its road manners the rear suspension would also require some changes. Certainly there was no way to get the stance we wanted with the stock trailing arms and coil springs, so we opted for a tried and true combination—four-bars and coilovers.
Four-bars are simple, strong, and compact. An effective means of locating the rear axle front to back, by using parallel upper and lower bars of the same length they act as parallelograms and keep the pinion angle constant. To provide lateral control, a Panhard bar is normally used.
Knowing what we wanted it was time to call Scott's again and order a complete rear suspension kit, which included the four-bars with urethane-bushed ends, front and rear brackets, mounting brackets, Panhard bar and brackets, and a set of Aldan Eagle coilover shocks.
Like everything from Scott's all the parts of the four-bar kit were well thought out and beautifully executed. We particularly like the way the frame and axle brackets are designed to keep the bottom bar from hanging below the bottom of the bedsides. Universal in design, the Scott's kit we used can be mounted with the bars and coilovers inside or outside the framerails—we chose outside.
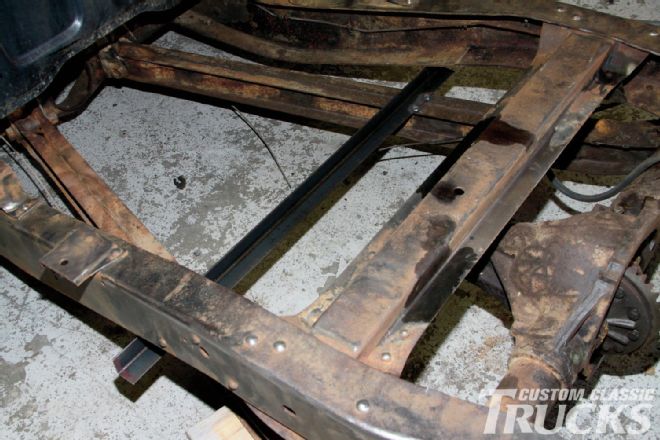
After setting the chassis at ride height and mocking up the rear suspension it was obvious that some frame modifications were in order as the axle housing was up against the frame. However, we elected to use that to our advantage. With the new Currie axle housing attached to the stock swing arms and up against the 'rails on both sides positioning the mounting brackets was simplified. With the mounting brackets tacked to the axle housing it will be shipped back to Currie for final welding and installation of the axle ends (we'll have more on this unique rearend in an upcoming issue).
In part two of our suspension saga we'll finish up showing how we stepped the Chevy's framerails and explain the proper procedure for mounting coilovers—think of it as the lowdown on getting down low.
 1. Although we knew there were frame modifications to be done, we went ahead with the installation of the Scott’s four-bar kit.
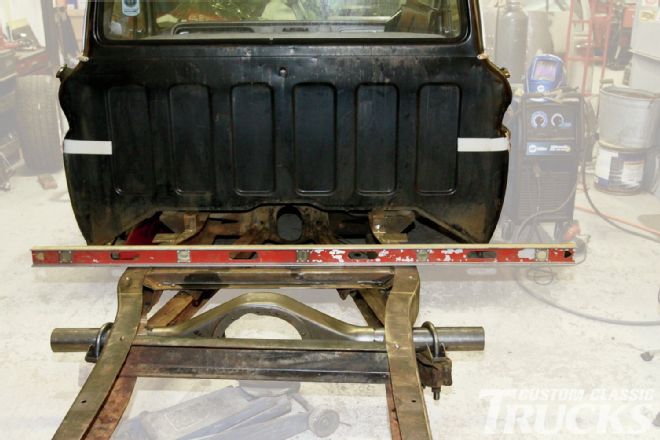
 2. Before the original rear axle was removed, a length of angle iron was tack welded to the factory trailing arms and to the bottom of the framerails to keep them in alignment.
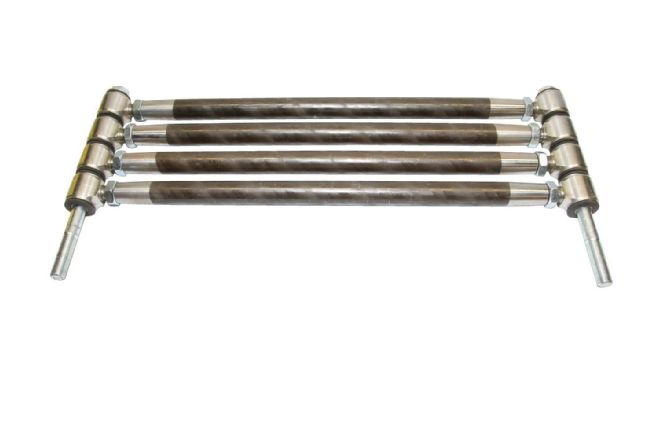
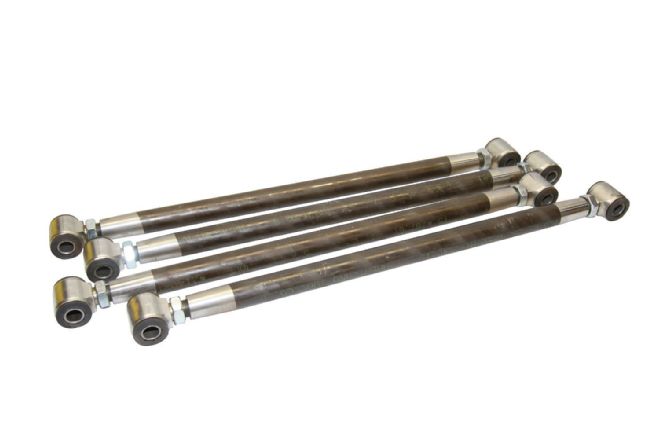 8. Scott’s super stout four-bars are made from 11⁄8-inch, ¼-inch-wall thickness tubing. They come with billet stainless rod ends with left- and right-hand threads for easy adjustments without removing the attaching hardware.
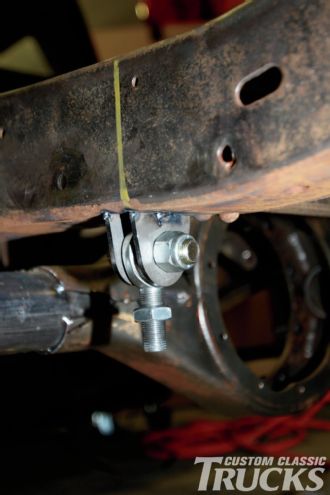
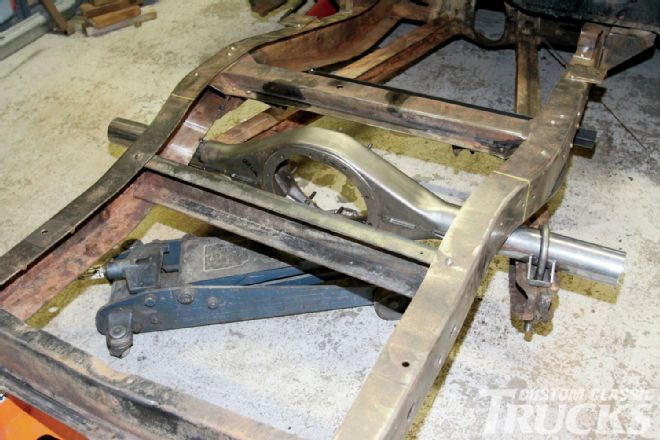 3. To locate the new Currie axle housing fore and aft we simply bolted it to the factory trailing arms.
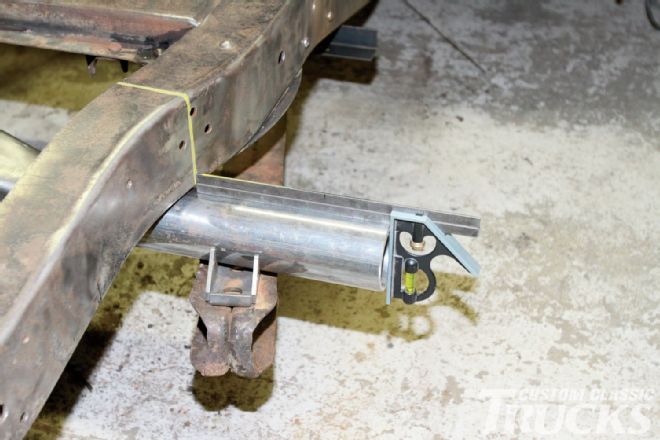
 4. During the four-bar installation the frame was supported on four jackstands at ride height with the ’rails level side to side.
 5. The axle housing was centered side to side while it was sitting in the correct fore and aft location on the trailing arms.
 6. Although the four-bars provide plenty of adjustment, we set the axle housing so the pinion would be at the proper angle (up 2½ degrees) to align with the transmission’s output shaft. With the housing supported by a floor jack the tubes were tack welded to the frame.
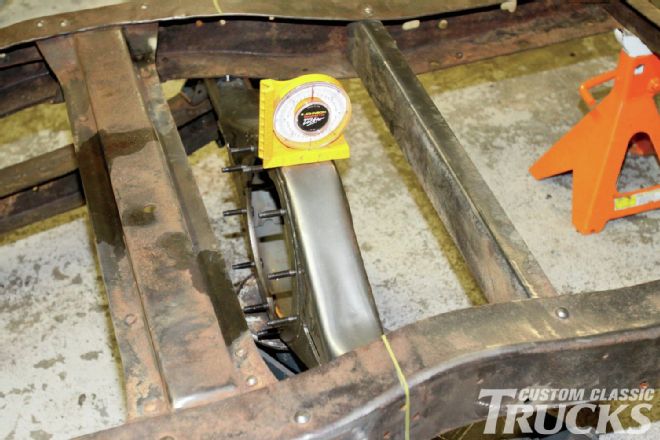
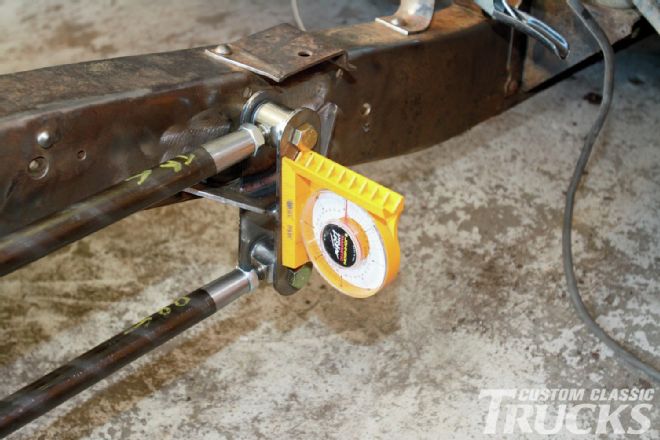
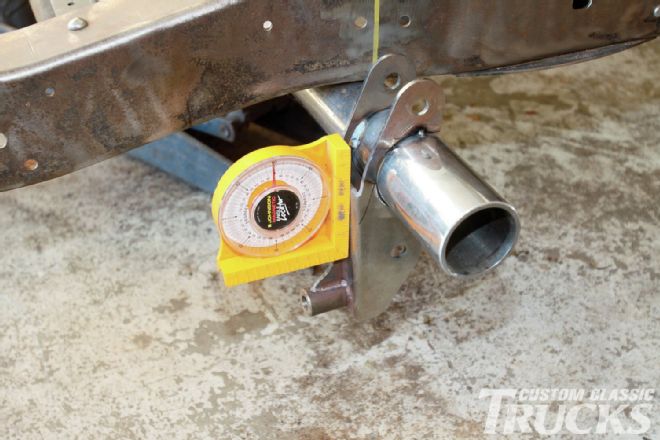 7. Next the trailing arms were removed. We placed the axle brackets equal distance from both ends of the housing and used a magnetic angle finder to position them at 90 degrees to the ground.
 9. We adjusted one of the four-bars with enough threads exposed to allow ample adjustment in or out; then we placed two long cap screws in the rod ends.
 10. The remaining bars were adjusted so they would slide in place then the lock nuts were tightened.
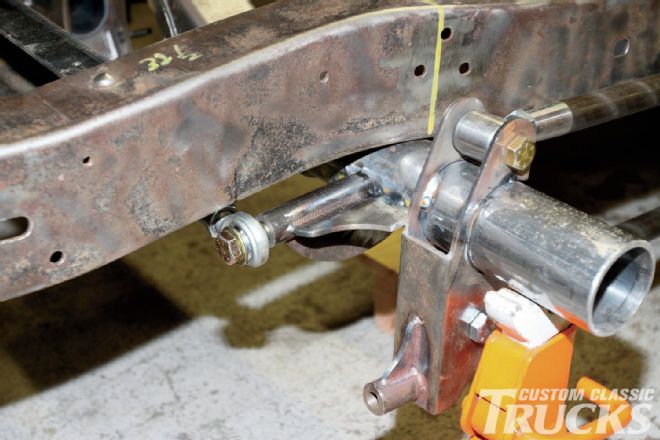
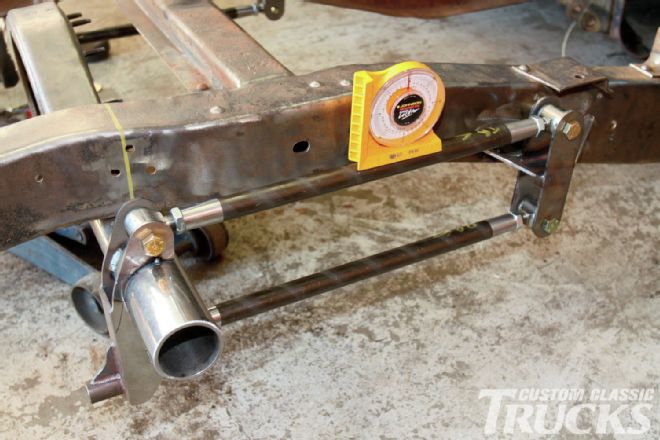 11. With the brackets tack welded on the axle housing, the bars adjusted to the same length and level the front four-bar mounts were easy to position. Nonetheless, measurements were taken to ensure both sides were the same.
 12. As luck would have it, on both sides the rear “wings” aligned with rivets in the frame (hidden behind the top bar). The angle finder was used to make sure the brackets were parallel with the frame.
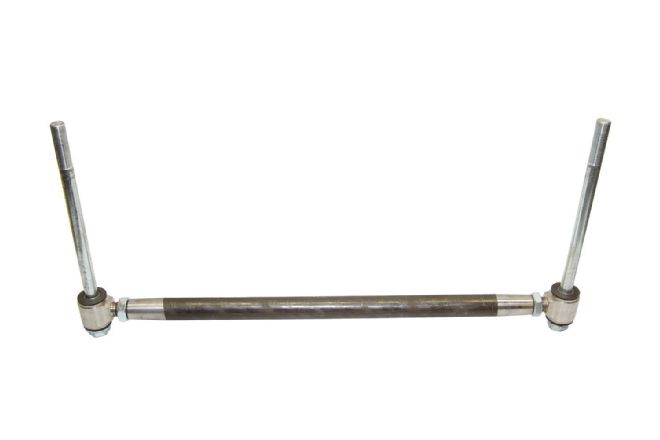
 13. The Panhard bar was attached to the underside of the left ’rail with two tabs that came with the kit.
 14. On the right side the Panhard bracket was tacked to the axle housing.
 15. The Panhard bar was positioned to allow room for the rearend’s bolt-on rear cover. The tack welds holding the housing to the frame were now be cut.
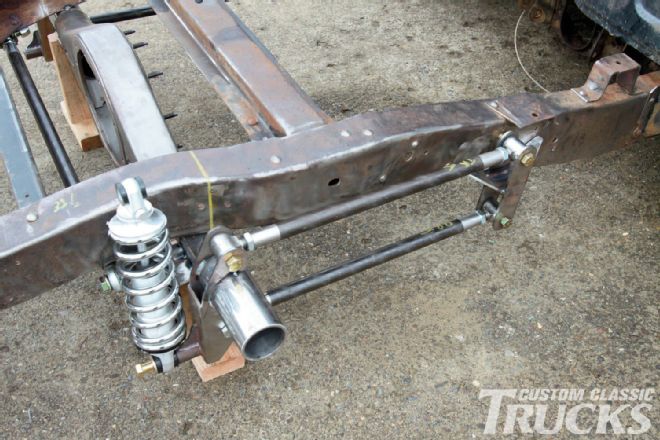 16. With the four-bars close to the frame there’s plenty of tire clearance and thanks to the design of Scott’s brackets they’re tucked up out of sight with the box in place.
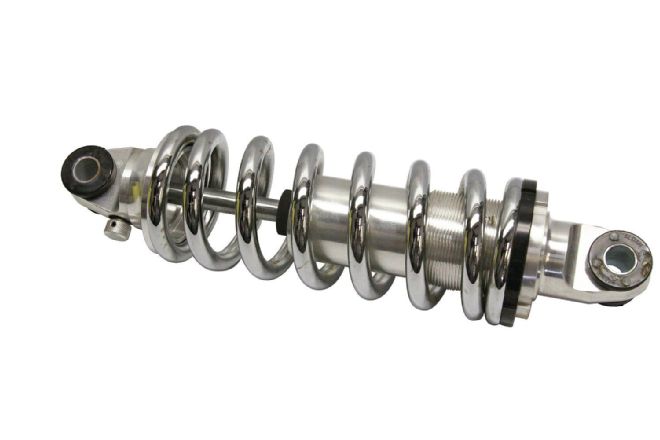
17. Aldan Eagle coilovers were included in the Scott’s four-bar kit. Machined from 6061-T6 billet aluminum they feature three-stage valving to provide consistent damping under all speed and road conditions.
16. With the four-bars close to the frame there’s plenty of tire clearance and thanks to the design of Scott’s brackets they’re tucked up out of sight with the box in place.
17. Aldan Eagle coilovers were included in the Scott’s four-bar kit. Machined from 6061-T6 billet aluminum they feature three-stage valving to provide consistent damping under all speed and road conditions.
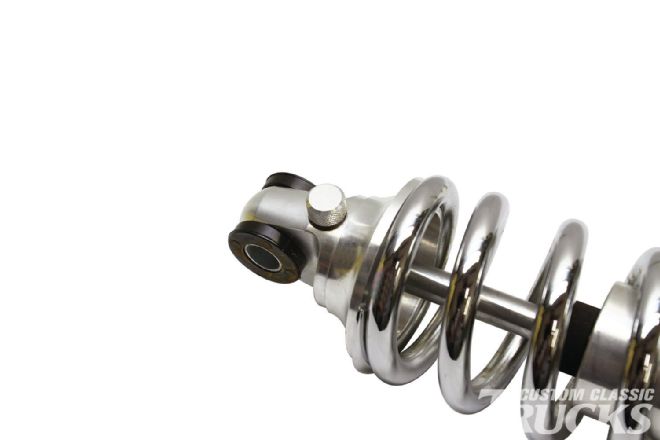
 18. Spring tension and ride height is adjusted by a threaded retainer with a lock nut to secure it. A wrench to make adjustments is included.
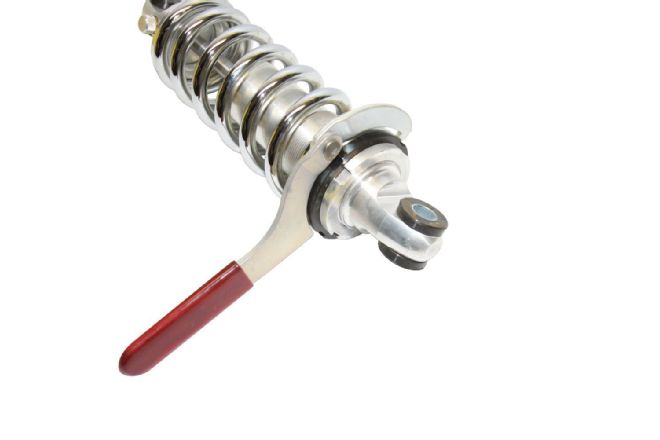
 19. The Aldan Eagle shocks have a knob to select the six valve-damping positions. To increase firmness the adjusting knob (located at the top of the shock absorber) is turned clockwise; all the way out is the softest setting.