
When Ford finally introduced the first all-new car after World War II the styling was revolutionary. The front fenders had risen to meet the hood, and the grille opening now spanned the full width of the car. Rear fenders were non-existent as the quarter-panel and fender became one long smooth panel. All traces of a running board were gone and the resulting look was that of a modern, sleek car with all the wheels tucked neatly under the body. It was a remarkable transformation from the old-fashioned shape of the ’48 Ford; these new cars looked fast sitting still. And yet as dynamic as the styling was, there was also a certain slab-side appearance that won the ’49-51 Ford the moniker of shoebox Ford.
 While the thought of simply rolling a new chassis under your shoebox Ford and bolting everything in place is a great concept, there is a bit of work to be done before you get to tighten any bolts.
These cars were immediate hits with the general publicand that included both hot rodders and customizers. The demand for truly new cars after World War II meant strong sales and these new cars were constructed well so there were plenty of them on the used car market. Fifties and early ’60s high school parking lots were filled with these simple cars and it seems every hot rodder has a shoebox or two in the closet including this writer.
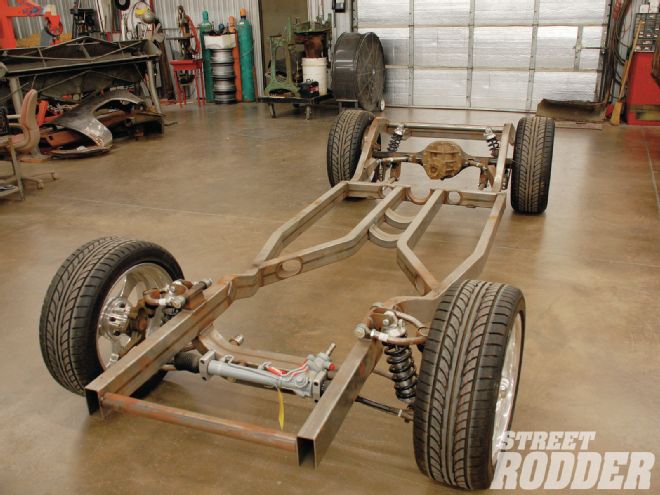 The Art Morrison frame provides modern front and rear suspension, rack-and-pinion steering, disc brakes, and a chassis that will handle all the horsepower you could ever want on the street. However, things like body mounts were not included on our frame, meaning we would have to locate the body and build mounts.
And so it is little wonder the shoebox Ford is enjoying a strong resurgence and like all things hot rod, the aftermarket is responding with great new products to improve suspension and power, along with reproduction parts to help complete the project.
The ’49-51 Ford employed independent front suspension and a solid rear axle with leaf springs and the chassis was strong enough to handle substantial power increases. The independent front suspension employed kingpins, coil springs, and a worm and a roller steering box, which was modern for the day, but hardly the crisp steering and handling we have become accustomed to over the years.
Due to the configuration of the ’49-51 Ford frame there is no simple way to upgrade the suspension to modern standards. There are disc brake kits and a late-model steering box will improve things a bit, but if a truly modern front suspension is in your plan you have three choices. Companies like Fatman Fabrication makes a front frame stub that can be welded to the existing frame and provide you with modern Mustang IIstyle suspension for an affordable price. You can find a late-model donor car and graft your own front clip to the car, or you can opt to buy a complete new chassis from a company like Art Morrison.
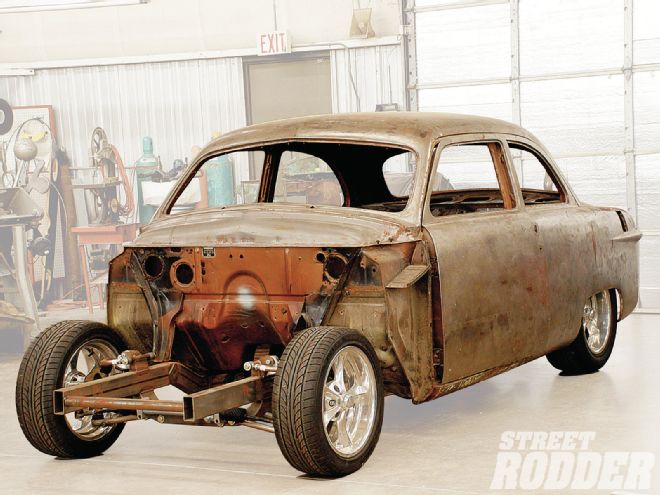
 When John Kocsis delivered this nearly rust-free ’51 Ford to Rodcrafters it was resting on the Art Morrison frame, but no body mounts had been located or fabricated to mount the body to the frame.
When John Kocsis decided it was time to build a contemporary custom he located a very nice ’51 Ford sedan that was nearly rust free, no small feat for a car that spent its entire life in New Jersey. Kocsis knew modern suspension was a must for the car, so he considered his options. In the end he decided he could sell the very nice ’51 chassis and Flathead driveline and recoup some of the cost of a complete new frame. This would solve both front and rear suspension problems and provide ample room for that new Chevrolet motor and transmission. A call was placed to Lobeck’s V8 Shop Hot Rod Parts and a new Art Morrison chassis was ordered and delivered directly to Kocsis’ door.
By ordering the full replacement chassis, the desired stance is built into the chassis using your specifications for final ride height. The mandrel-formed 2x4 framerails and associated crossmembers make for one very stout frame that will handle modern horsepower with ease. There is not rust to remove, no holes to patch, and no suspension to locate and graft, making this new chassis a prime candidate for powdercoating or paint without the expense of sandblasting or dipping an old frame. There are a lot of good things to be said about using an all-new frame.
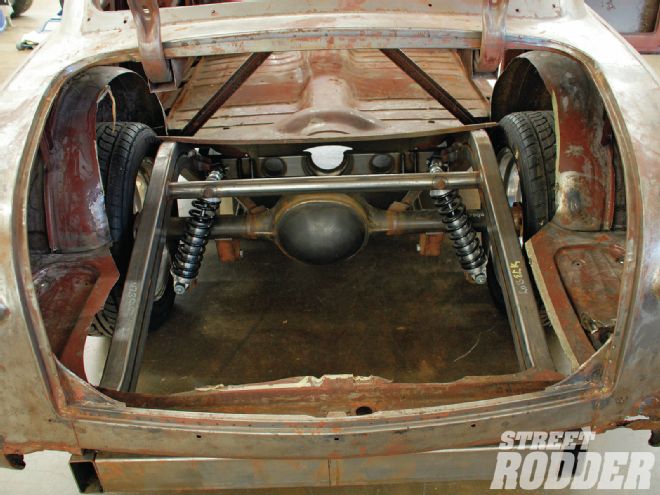 Because of the lowered ride height designed into the chassis, the rear trunk floor was removed to allow the body to rest on the frame. The higher kick-up and crossmember protrude up into the trunk area. Also note the inner wheel tubs had to be cut for tire clearance.
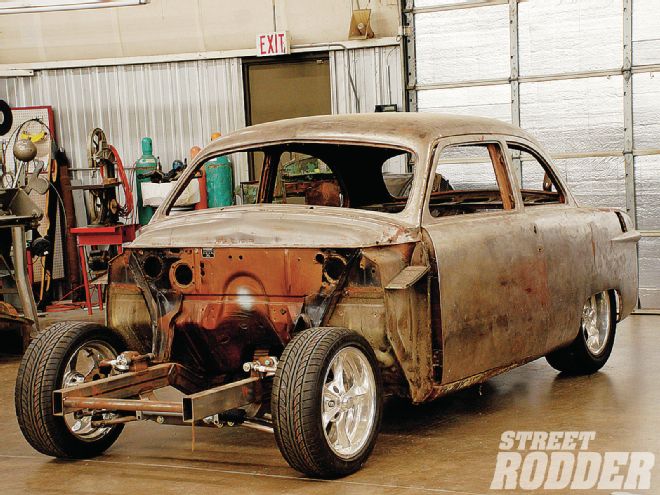
However, purchasing a complete new chassis does not always mean your body will simply bolt onto the frame and away you go. Almost all ’48 and older reproduction frames include body mounts so you truly can bolt on the original Ford body, but in the case of the shoebox frame Kocsis received, there were no body mounts or locations so mounting the body to the frame became a job for a professional. Enter Larry Shoaf and the team at Rodcrafters in Welcome, North Carolina.
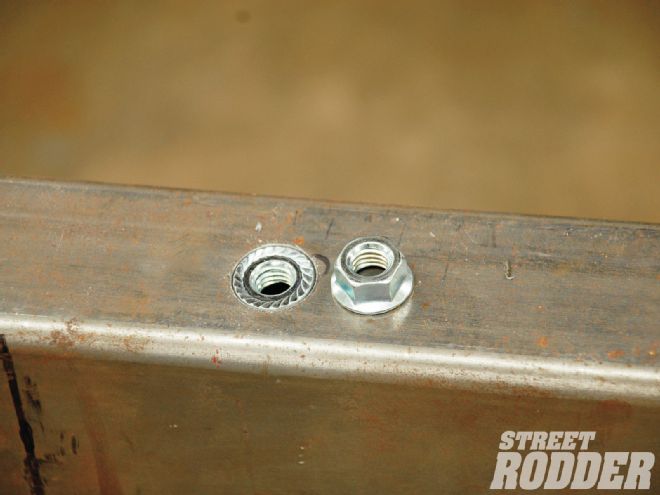 We placed one flanged nut in the framerail opening with another nut next to illustrate how the flange works. This is a simple way to mount a flush thread to any metal surface.
After all the body mounts were fabricated, a new trunk floor and wheel tubs were fabricated and welded in place, completing the install of the body on the new Art Morrison chassis. In the end Kocsis had just what he wanted: a new modern chassis under his shoebox Ford that provides a strong platform for the rest of the build. Follow along for a detailed step by step on the body mounting process; you might decide your old car is ready for a new frame too.
When John received the frame it became apparent the trunk floor would have to be removed to allow the body to rest on the new frame. He trimmed out sheetmetal until the car was resting on the Art Morrison frame, then rolled the body and frame into the trailer for the trip to Rodcrafters.
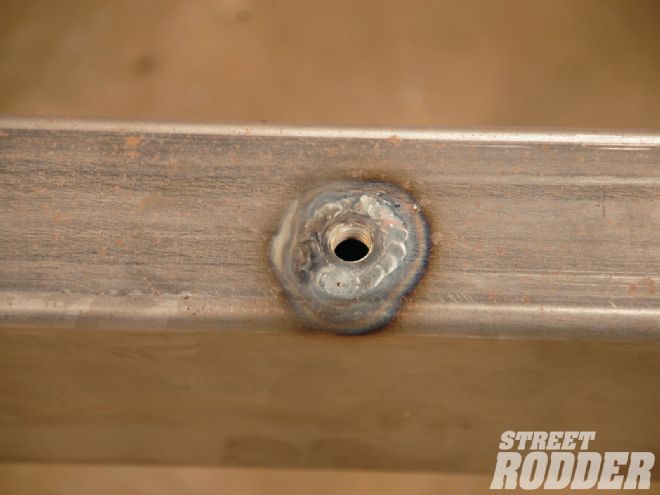 A quick weld with the TIG welder and we have a strong, flush threaded nut in place for the body mount. This process was repeated 10 times on the car for all the through-the-floor bolts.
As it turns out the fabrication of the body mounts is something within reach of the skilled homebuilder and we’d like to think that after seeing the adjoining photos that task will be even easier. Ford was pretty serious about mounting their bodies to the frame in 1951 with no less than 23 bolts holding the body to the frame. The Art Morrison framerails align directly under 13 of these mounting points, but 10 other mounts must be fabricated to bolt the body to the frame. These body mounts consist of outriggers extending out to the rocker panel area on both sides of the car and a pair of firewall braces mounted on the outside of the framerail just forward of the firewall. Basic fabrication skills and welding are involved, but the most important thing is properly locating the body perfectly on the frame.
When it comes time to locate the body on the frame it sure helps if you have a lift in your garage; if you don’t, plan on having a few floor jacks and a handful of friends on board as the body will be lifted on and off the chassis several times. The first step is to measure the wheelbase on the frame. Since the rear suspension is adjustable, it is possible to have the incorrect wheelbase by as much as an inch or more. We measured and adjusted the rear suspension until we had the factory 114-inch wheelbase setting. Now it was time to locate the body on the frame.
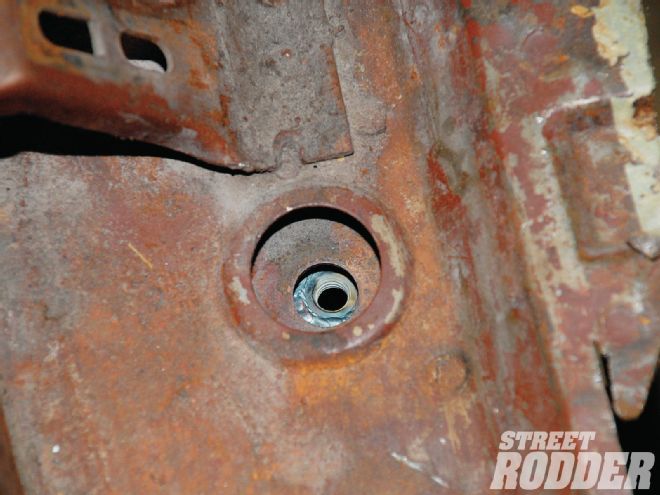 A quick peek through the hole shows the body is lined up quite nicely; the camera angle is distorting the center location just a bit.
After the preliminary trial fit it became apparent John had not trimmed enough metal out of the rear portion of the car, the inner wheel houses had to be cut out for tire clearance and the entire trunk floor was removed up to the factory seam located just behind where the rear seat back is located. After cutting the wheelhouses out, the body was lowered over the frame.
The front fenders were bolted to the car and then the chassis was rolled back to a clear area where we could eyeball the wheel and tire location. Since there are no locator holes in the frame, positioning the body on the chassis becomes a combination of moving the body until the wheels are centered in their respective openings and then taking careful measurements from common points on the body and chassis to ensure the body is square on the frame. This takes quite a bit of time and patience, but once again this is the most important part of the project as centering wheels in the fender openings is critical. Once we were certain the body was properly located, fabrication of body mounts could begin.
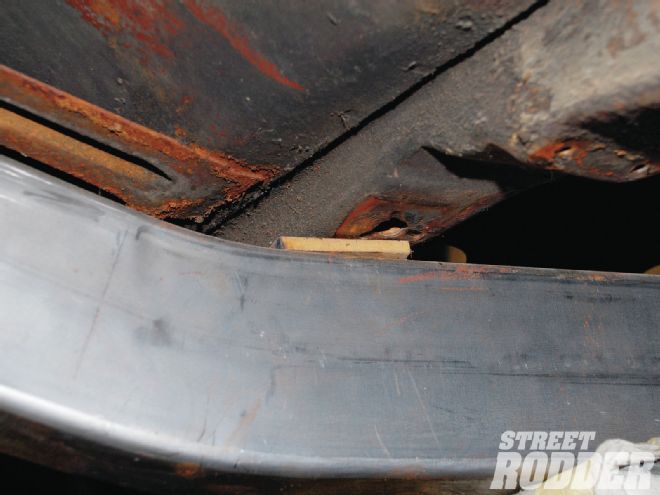 Pieces of wood 5/16-inch thick were used to simulate the rubber insulators that will be used when the body is mounted to the frame for the last time. The wood blocks were inserted between all the frame top mount holes prior to fabricating any of the outboard body mounts.
We began by locating four of the body mount holes that aligned with the top of the frame. The center of the holes was transferred to the top of the framerail with a transfer punch, the holes were then drilled in the frame and threaded inserts were welded into the framerail. A wood shim simulated the body mounting rubber and the body was lowered back on the frame and bolted in place. More measuring ensued to be certain the body was properly located before we began to build the outriggers for the other body mounts.