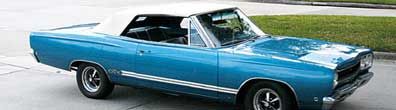
Pump and pray-that's what we think every time we have to stop quickly in our '68 GTX clone, thanks to the factory's barely adequate 10-inch drum brakes. It seems no matter how often you adjust or rebuild four-wheel drum brakes they just don't seem to work well in today's driving conditions. Aggressive braking generally leads to one side of the brakes grabbing before the other, pulling the car to one side, and requiring opposite steering input to keep the car straight. Repeated stops with drum brakes will always lead to brake fade and ever-increasing stopping distances. Let's face it, drum brakes were ok when the roads weren't clogged with go-cart-size cars that can cut you off and stop on a dime. Driving a classic car on the road these days can be a frustrating and scary proposition as fewer drivers respect, or even care, that you may not be able to stop nearly 4,000 pounds of '60s technology as quickly as they can bring their modern, lightweight, ABS-equipped car to a halt in front of you. Not wanting to hide our car in the garage just because we feared a rearend collision, we decided to take matters into our own hands and upgrade our brakes with a four-wheel disc brake conversion from Master Power Brakes. This kit comes with high-performance, vented, slotted, and drilled rotors, as well as all the hardware and parts necessary to complete the installation, and will bring our car's braking into the modern era. Converting our car to four-wheel disc brakes should put us in a good position to do battle with the more modern automobiles and take some of the fear out of driving our classic car on the street.
After making the decision to convert our brakes to disc, we had to decide what avenue to take. We could hit the junkyards searching for A-Body front discs to do the conversion, but we dreaded hunting for hours or days only to find parts that need a complete overhaul before they could be used. Finding a B-Body with factory discs would be even harder. Also, these cars never came with rear disc brakes so the option of finding used parts is definitely out of the question. We decided to find a high-quality, complete kit with all new parts so there would be no question about the safety of our braking system. We drive this car regularly and want our brakes to work every time we push the pedal, without fail. Having well-maintained, high-performance brakes can mean the difference between stopping with inches to spare or needing a new front clip.
We consulted the experts at Master Power to see what was available. After discussing several options, we chose their manual front disc brake kit with cross-drilled and slotted rotors for the front of our Satellite and their standard rear kit for out back, also with cross-drilled and slotted rotors. The front kit is very complete and comes with 11-inch vented, cross-drilled, and slotted rotors, as well as calipers, spindles, and caliper brackets. Also included are the brake pads, rubber hoses, bearings, seals, dust shields, dust caps, and hardware. Surprisingly, especially for the cost, the kit comes with a new master cylinder and proportioning valve as well. The rear kit comes with 11-1/8-inch vented, slotted, and drilled rotors, as well as the calipers, brackets, pads, hoses, parking brake cables, and hardware. We were pleasantly surprised at the completeness of both kits since we've become somewhat used to making parts store runs while installing other "complete" kits. Master Power thought of everything, even the cotter pins for the front spindle nuts!
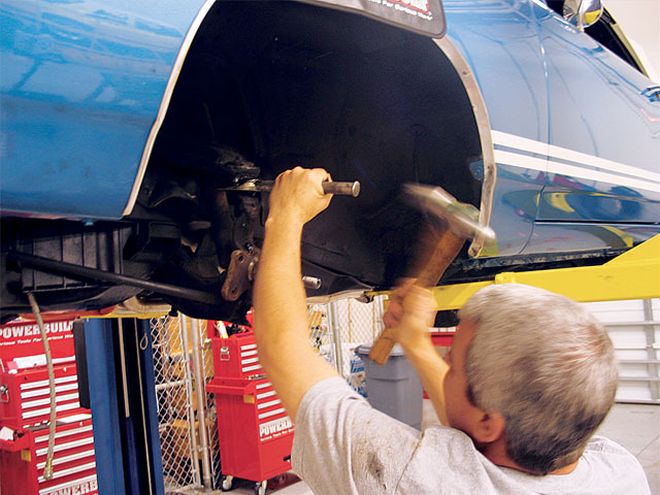 A tie-rod separator is the only specialty tool required for this project and was used to separate the upper ball joint from the spindle.
For this upgrade we wanted to put some hard numbers to the improvement in our car's braking system, so the first step was to measure the car's stopping distance with the 10-inch drum brakes. For this task we went to the Mopar Muscle proving grounds and test track (the industrial park road behind our office). After scaring the commuters away by doing a couple of burnouts, we set up some cones and performed three consecutive 60-mph-to-zero braking tests. The resulting stops were pretty scary, and our first sliding stop of 155 feet even had photographer Kevin Shaw running for cover. Our second stop was the best at 148 feet, and our third was a miserable 171 feet as our brakes heated up and faded to the point of near nonexistence. The design of drum brakes is what makes them susceptible to fade as the drum itself actually traps heat, which takes a long time to dissipate. Multiple stops in rapid succession increase the heat exponentially that glazes the pads and boils the brake fluid, neither of which help stopping distances. with our baseline established, we decided to gather up our orange cones and head back to the shop before someone called the cops.
Back at the shop we put the car on the lift to cool while we opened up our brake kits. We were pleasantly surprised to find the kits complete, clean, well packaged, and organized. Starting with the front, we removed our old brakes to install our new disc units. The supplied instructions were accurate and informative, and the brakes went together quickly. With the exception of a tie-rod separator, no specialty tools were needed for the job.
After installing our front brakes, we moved to the rear where we again found the Master Power kit to be complete and easy to install. The only issue we had was that our driver-side rear axle wouldn't allow the rotor to completely seat on the axle flange. Upon closer inspection we discovered it was the wheel studs, not the axle, that had the interference problem. We quickly corrected it by drilling the holes in the rotor slightly oversize. Even so, we easily had both kits installed in a weekend and were ready to install our wheels for another test of our stopping distance.
This is where we ran into our second problem. Our 14-inch Magnum 500 wheels wouldn't fit over the front brakes. Actually, if we would have thoroughly read the instructions or the web site description when we ordered the brakes or were first installing them, we would have found that we'd need either 15-inch or larger wheels or 14-inch wheels designed for disc brakes. No big deal, we wanted to upgrade our wheels anyway, and now we had an excuse. Luckily, we landed a sweet deal on a set of Weld Drag Lite's at the Mopar Southern Nationals swap meet, so we threw them on and went out to test our new brakes.
Before we get a bunch of letters crying foul, we'll tell you we already know our test results will be slightly skewed for a couple of reasons. First, we couldn't use the same tires for the disc brake test because the wheels wouldn't fit. This, of course, lead to a wheel change that had us installing lighter, aluminum wheels with much larger rear tires and skinnies up front. the larger rear tires will help shorten our braking distance, but the small front tires will really limit the stopping power of our front brakes. Even so, we were happy to see braking distances were greatly reduced after performing the disc conversion. With some real front tires, our brakes should perform even better and make this car a pleasure to drive and a dream to stop. With the new brakes, our best stopping distance from 60 mph was 122 feet-an improvement of 26 feet or about twice the length of the Lexus that just slammed on the brakes in front of you. Better yet, we made about a dozen repeated stops with the new disc brakes with consistent results. The brake fade of the drum brakes had all but disappeared now that we had four-wheel disc units. No doubt our drilled and slotted rotors were greatly helping dissipate the brake heat, making our new system much safer and more efficient than the factory drums.
This is a great upgrade that can be performed in a weekend and will make driving your old car much less worrisome. The cost? Call Master Power for a quote, but we will tell you the total cost was much less than replacing the front clip of our car and paying higher insurance rates due to an accident. Money well spent in our book!