Tech Center
Although a Ford in a Ford is the way to go, you gotta give these GM LS engines credit. For a computer-controlled EFI engine, these are awesome engines for swaps. They are in everything from sandrails to helicopters. All aluminum, smooth running, and a host of performance parts available make them worth considering. Don't let the wiring part of this swap scare you, Street and Performance has just what you need to connect the engine and trans to the computers and your electrical system. This particular installation will also use the drive-by-wire gas pedal.
This originally had a 460/C6 Ford combo - heavy and thirsty. The owner drives the tires off this panel truck so he wanted something lighter and with better mileage. Bobco had a chopped '56 pickup going together with this same LS setup and that's what sold the panel's owner. The parts were acquired and here we are.
I know I heard this Corvette front suspension breathe a sigh of relief when the 460 came out. This engine is big and 700-plus pounds, depending on the front accessories that it's running. Add to that the 200-pound C6 trans and we have over 900-plus pounds sitting on the front end. The LS, on the other hand, tips the scale at 460 pounds and the 4L60E trans adds another 160, wet. That's 620 compared to 900-plus. That's a 280-pound difference. With the panel truck up and running now, you can really feel the difference.
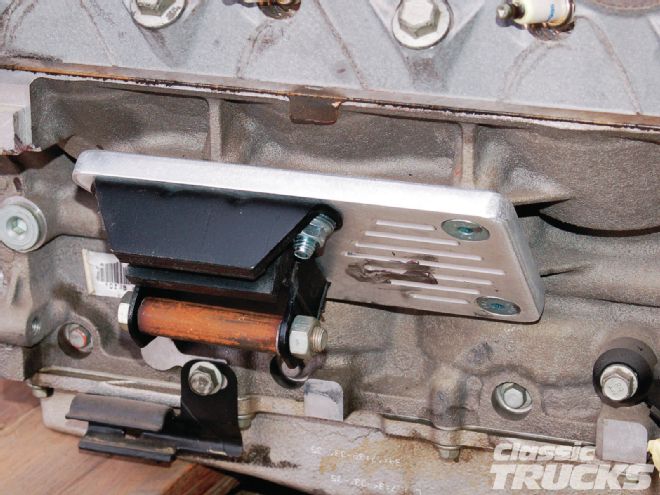
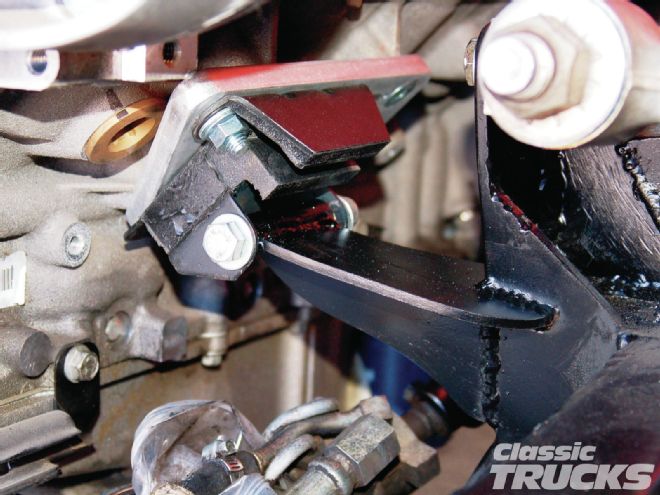
Mounting of the LS started with getting the trans mount repositioned. Then the engine and trans were installed, positioned, and the motor mounts were made. Street and Performance also carries these neat aluminum plates that bolt to the side of the LS blocks and allow you to mount a standard non-locking GM motor mount to it. This makes mounting this engine in anything really easy. First, cut a piece of 7/8-inch tubing with a 7/16-inch hole in it 25/8-inch long. Bolt the tube to the mount at the top of the slot.
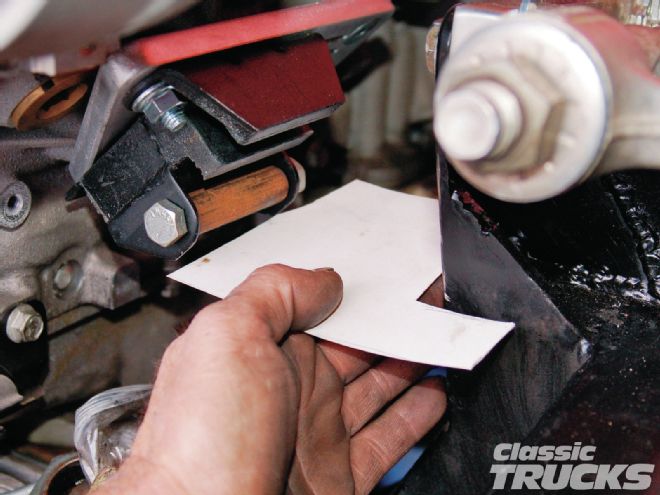
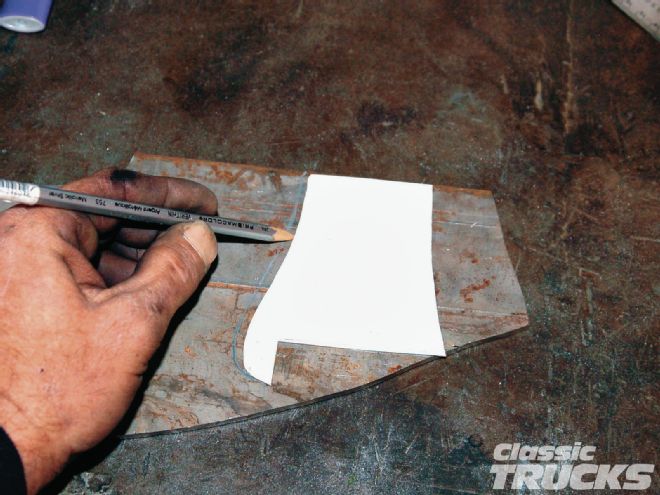
Now it's just a matter of cutting up some cardstock until you get a shape you like for the top plate of the new motor mount. Usually both sides will match; for clearance reasons this passenger-side motor mount has been repositioned on the plate, so mine will be slightly different. These patterns are then transferred to 3/16-inch plate and cut out. I use a bandsaw, but a plasma cutter works well, too.
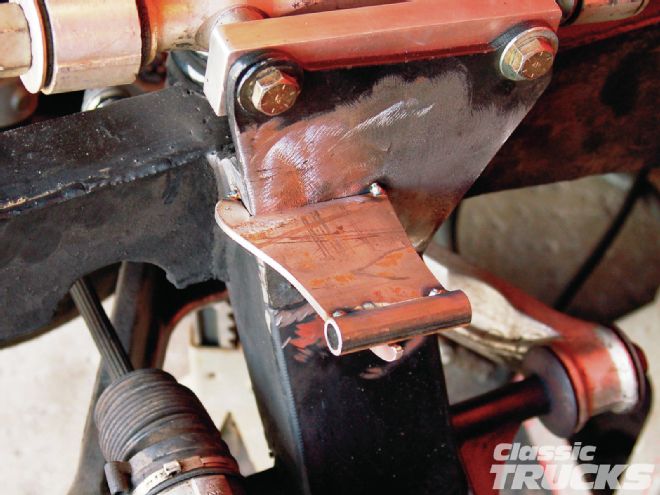
With the pieces cut and fit, tack them in place. Now get the cardstock again and make up a gusset for under the top piece. This gusset should also wrap halfway around the tube too. A couple of good tacks on these and the motor can come out for final welding. A quick coat of paint and the motor and trans go back in.
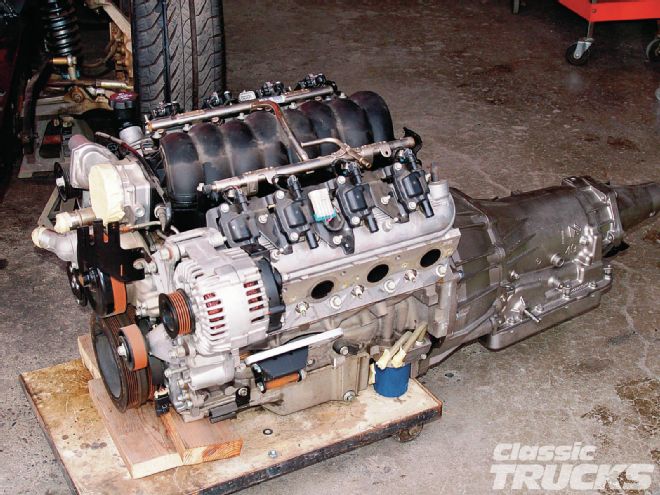
Street and Performance's harnesses come with the needed computer for the engine and one for the transmission, and are programmed to your particular application. This particular combination is an '02 Corvette LS2 with a 4L70LE trans. With the supplied GTO computer it will use an '04 GTO electronic gas pedal.
I start by first laying out the harness on the floor and check to make sure the computers hook up. Then the harness goes on top of the engine and the rest is routed where it will end up. In this case the wiring will follow the floor on the passenger side and end up going in through the top of the toeboard area, tucked as tight next to the kick panel as I can get it. This will keep it all in the same area as the A/C and heater hoses, and when the interior is done, upholstered panels will hide everything.
I'm going to need a pretty good-sized hole to get all the connectors inside, but I'll make a cover to fill the hole when the install is done. The harness will pretty much lay where it goes on top of the engine, but you still need to go through and sort the different connections. All the wires are marked as to where they connect.
Start on the driver side and start connecting injectors and sensors. Keep tucking the wiring down onto the intake as you go and it will just disappear under the fuel rails. On the passenger side it's the same thing. On the front of the engine on the driver side, the stock extension lead for the cam sensor needs to be removed from the front of the engine since the new harness plug connects right to the sensor and doesn't use the extension.
Then the trans plugs are connected, and since we already have headers on, I'll install and connect the O2 sensors now. A few zip ties here and there and the wires all loom up nicely.
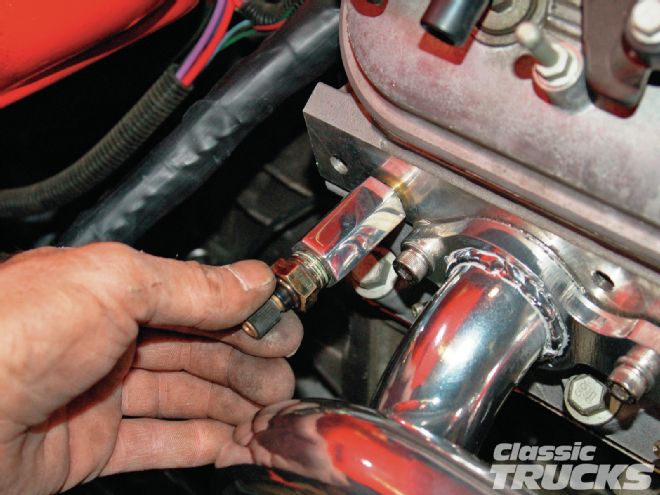
When using these LS engines, you'll look high and low for somewhere to put the senders for your gauges. GM wasn't very friendly with extra places to install senders in these engines. Another call to Mark at Street and Performance and he sent out two neat aluminum adapters. One is for the oil senders, it allows you to install the stock and required gauge sender in the original hole. He also sent out one for the temp gauge sender. It has the required metric thread to mount into the hole at the back of the passenger head. Then it accepts any 3/8-inch pipe temp sender.
Before I installed the harness, I went over the engine and reconnected the existing engine loom with the alternator, sender, and A/C compressor wiring, so when I'm done hooking things up on the engine and trans, I'm finishing each step and working my way into the cab to mount the computers.
As the harness was laid out and installed into the cab through its access hole, I knew where the computers would end up, because I just did this in a pickup and it's a good mounting area. You are kind of at the mercy of the harness' length, but in this case it works out well. The wiring and computers will all be hidden behind panels when the truck is upholstered.
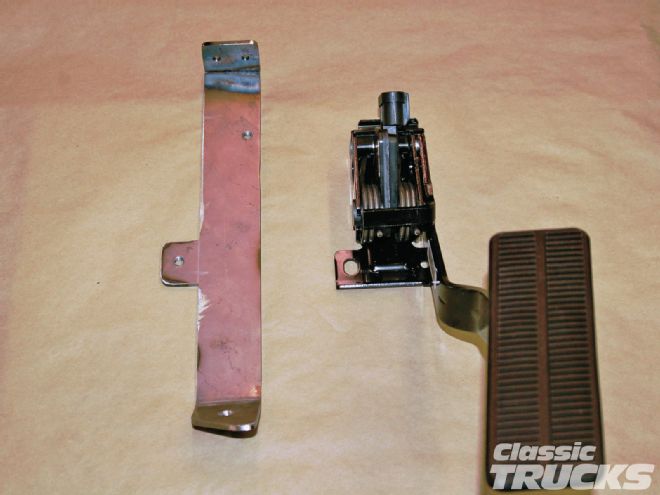
The computers are being mounted just under the A/C unit. I'll make a simple plate to mount them on, then mount the plate to the firewall. The electronic gas pedal requires a bracket of its own. It will bolt to the 1x1 square tube that I use to mount the main wiring and A/C evaporator and then to the floor. This harness uses a gas pedal out of a 2004 GTO. Stay tuned and we'll pick up right here where we left off in the very next issue. See ya next month.
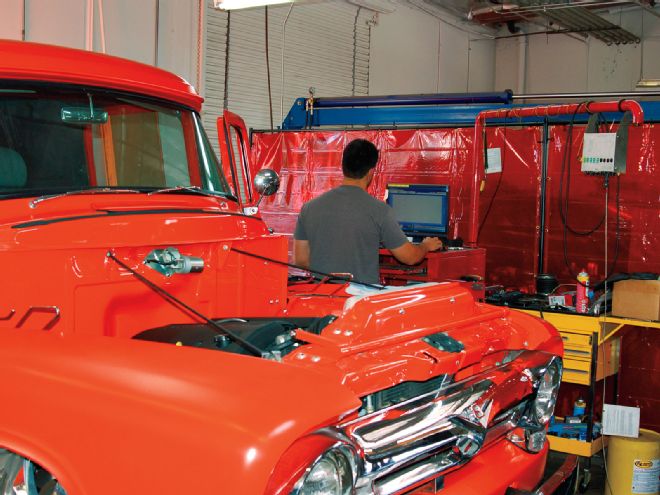
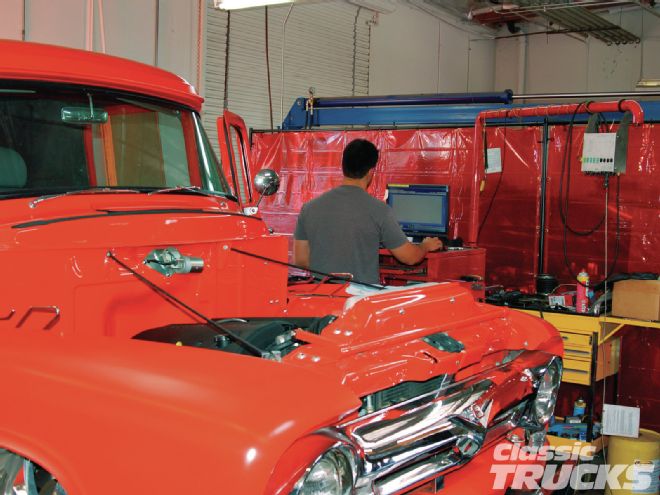
01 This is hot rod tuning in the 21st century. Adjustments are made to the computer program and dyno runs are made to track the progress. Here, shop owner Ryan Cunningham is checking the results of a dyno run. The LS ended up with 365 horsepower and 372 lb-ft of torque at the rear wheels.
02 This is one performance-ready candidate - a Corvette LS2 with a 4L70E trans. I'll get this in and wired and then we'll have it tuned by a local LS expert.
03 This is a slick little adapter that Street and Performance makes to mount the LS engines using the standard GM motor mounts. These are much easier to build mounts for than the stock Corvette mounts.
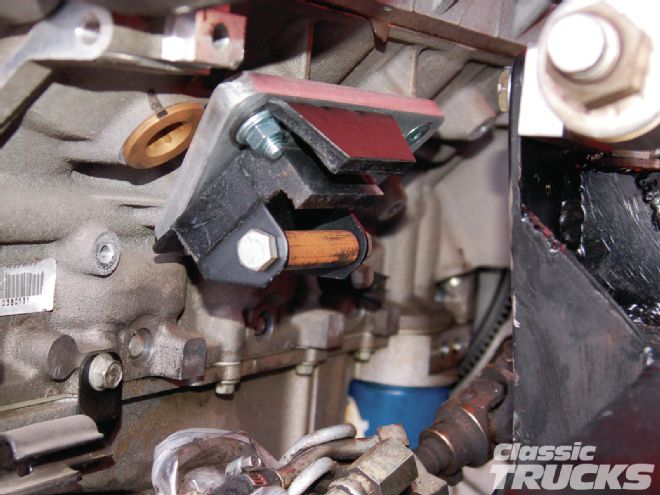
04 Yes, that's Corvette suspension also, front and rear. The motor and trans were positioned and I started making templates for my new mounts.

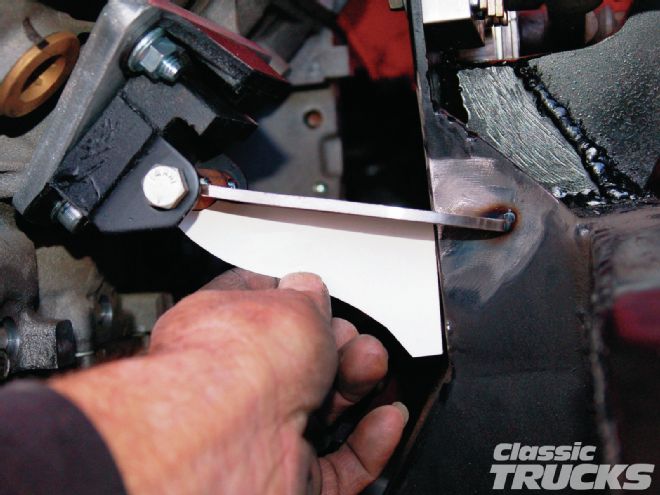
05 This is where I start. A piece of 7/8-inch tube with a 7/16-inch bolt and nut. Position the tube at the top of the slot in the mount and tighten the nut to hold the tube in place.
06 A piece of cardstock and a pair of scissors and I come up with a template for my mount's top piece.
07 Then I transfer the template to 3/16-inch plate and cut the pieces out. I do both sides at the same time.
08 Then a piece of cardstock is cut to shape for the mount gusset. This piece should wrap halfway around the tube also.
09 After the mounts are made and tacked in place, I remove the engine and trans and do the finish welding.
10 Spray bomb it semi flat black and back in the engine goes. Now onto the fun part of wiring this beauty.
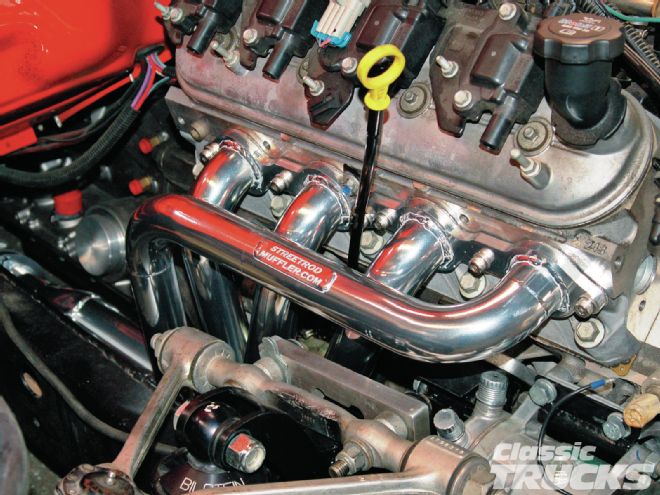
11 Full-length headers are the best for low-end horsepower and torque gains. These long tubes, X-pipe, and exhaust system that Russ at Mesa Muffler made for us should make really good power. They will definitely complement the computer tuning we're planning.
12 This is the Street and Performance wire harness for the LS2. This is a true "plug and play" harness. This one is set up for the drive-by-wire throttle body that the Corvette LS2 uses.
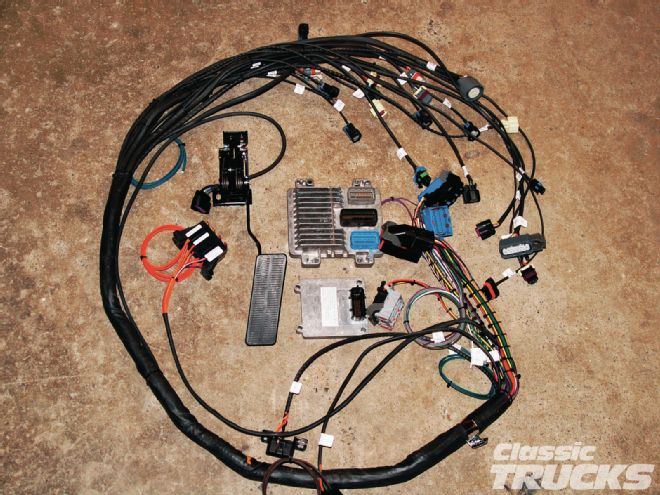
13 I start by laying the harness out on top of the engine and start routing the wires where they go. All the connectors are tagged and the connections are obvious.

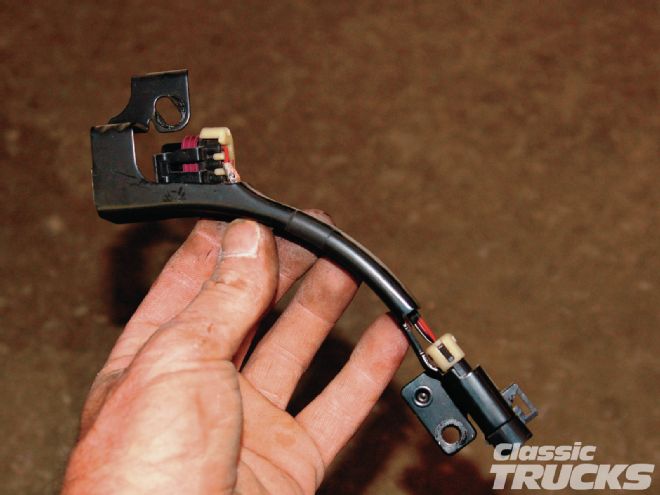
14 This connection threw me with the last harness I installed. The harness' connector doesn't connect to this stock extension. This extension runs up to the cam sensor, behind the water pump, and needs to be removed. The harness connector will plug right into the sensor instead.
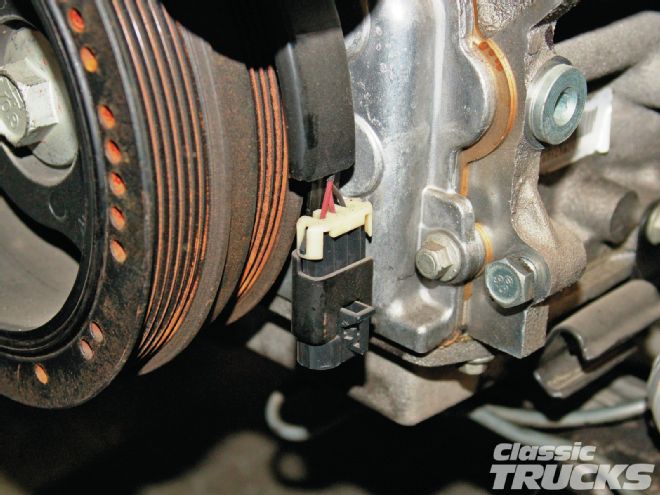
15 This is the cam sensor-wire extension that is removed and not reused.
16 The coils and injectors are hooked up and you can't even hardly see the wiring. It will all tuck down under the coil mount bracket on both sides.

17 GM was not kind to us with provisions for added sensors or senders. Street and Performance to the rescue again. They have these slick aluminum adapters that allow you to install senders for your gauges in the same ports with the stock senders.
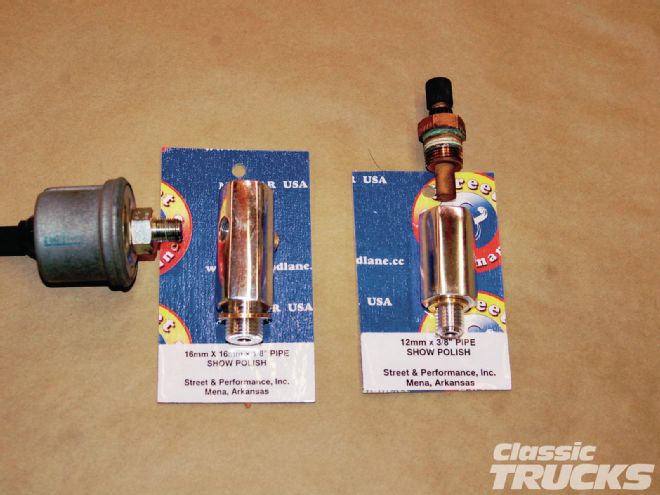
18 The temp senders are at the back of the passenger head. The oil is at the back of the block like it has always been.
19 I need an access hole for the wiring to run into the cab. I'm coming in on the passenger side toeboard, tucked as close as I could get to the kick panel area just under the A/C heater hoses. The hole has to be this size to allow you to get all the connectors, two fuse strips, and wiring through. I came back and made a plate to cover the hole and we used some dum-dum to seal the remaining hole around the loom.
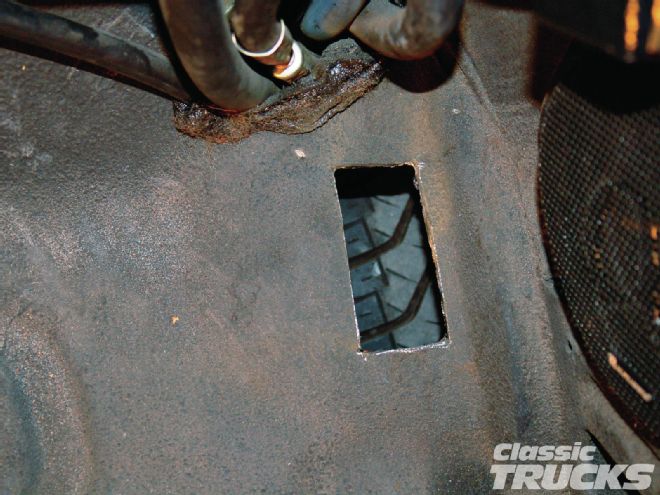
20 This is why the hole needs to be so big. The fuse panels and all the connectors for the computers must fit through.

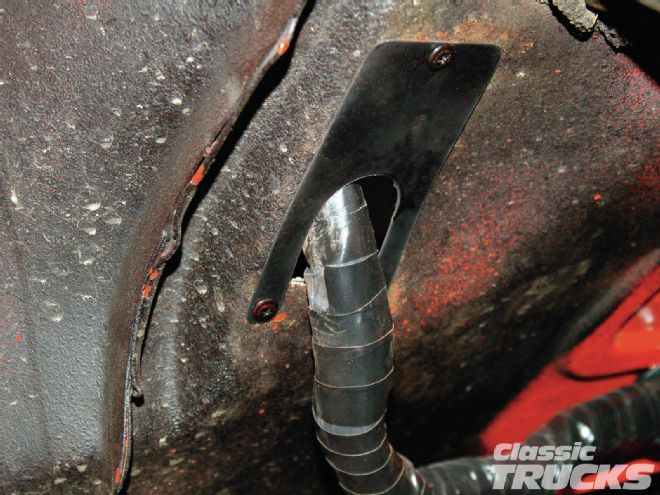
21 Here is the small cover I made to fill the wiring-loom hole. Still to come is the dum-dum rubberized sealer around the wire loom.
22 This is the engine computer and the mount I made to mount it just under the A/C unit.

23 With the computer mounted, routing the rest of the wiring is easy.
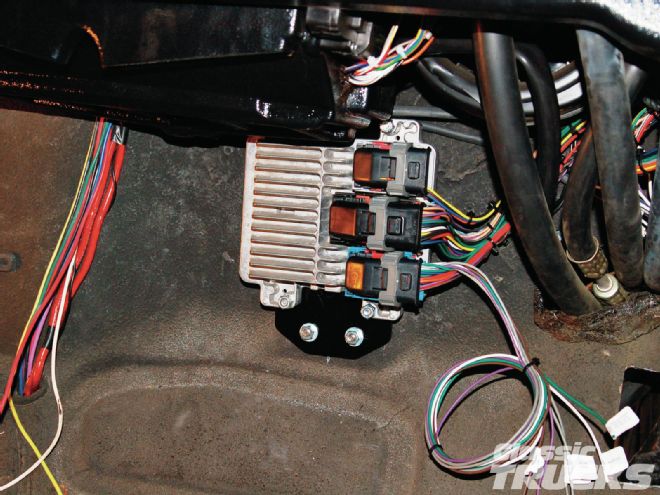
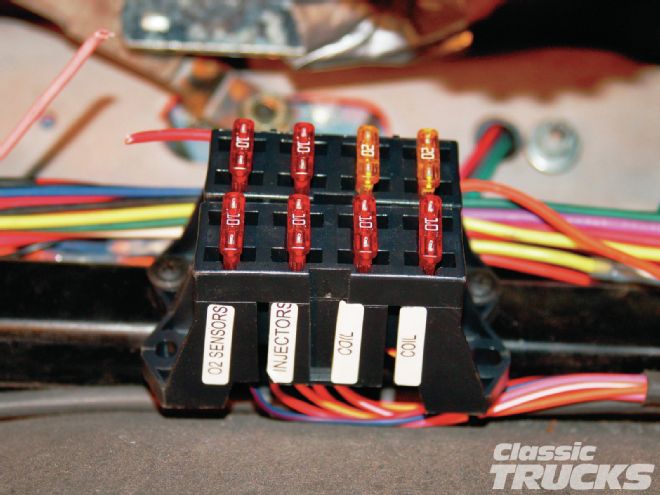
24 The fuse strips for the injectors and coils are mounted and the ignition and battery hot wires hooked up.
25 The electronic gas pedal needed a mount to get it to hang where it was comfortable to use. Now, because of space restrictions, we're gonna leave it here and continue with part 2 in our next issue. See ya next month.