Geez, it’s been way too long since I’ve made it out into the garage to work on my ’57 Chevy pickup, but I finally got my butt out there yesterday. It’d been so long that honestly I wasn’t quite sure where the heck I’d left off. After blowing the dust off the old girl I looked around and found a couple of boxes of parts in the cab and figured that I’d get into the swing of things again by opening ’em up and installing whatever was inside – I figured anything I did was at least a step in the right direction.
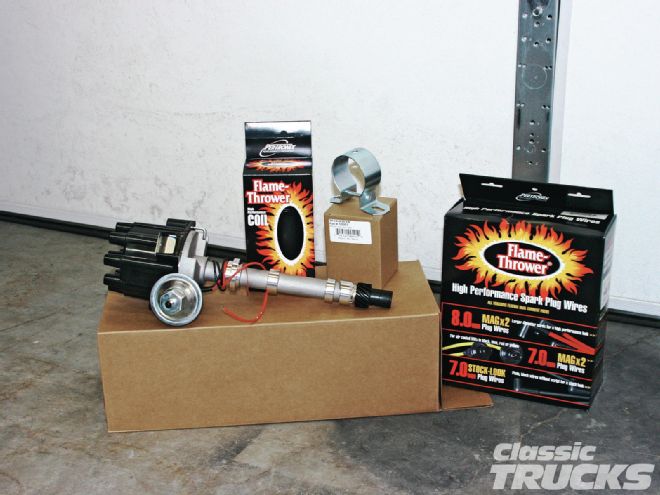
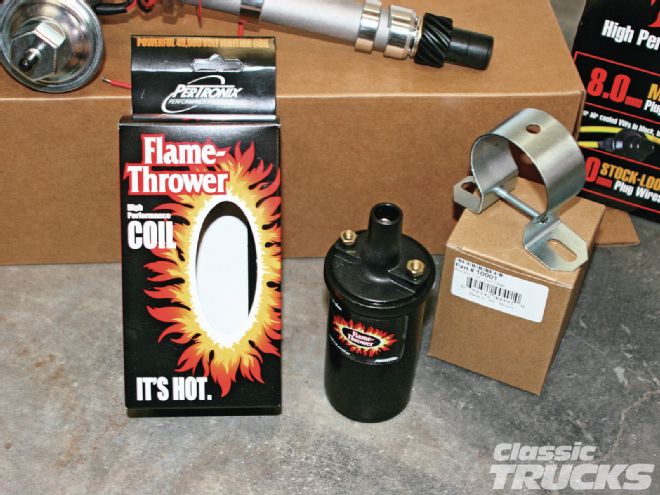
The boxes held the ignition system for my new stroker 383, which consisted of a PerTronix Flame-Thrower Stock-Look distributor, a set of PerTronix Stock-Look 7mm high-performance plug wires, and a Flame-Thrower coil and mounting bracket. I also found a new distributor hold-down and a set of plug wire looms in the bottom of one of the boxes as well.
Those that have read my ramblings over the years are sure to remember that I have a soft spot for the PerTronix Ignitor ignition modules and have been using ’em for years. For those who don’t, the Ignitor is the best electronic module on the market for converting OEM point-style distributors to electronic.
This time around though, I’d decided that since I needed a distributor for my crate engine I’d go for one of PerTronix’s complete new Stock-Look cast-body Flame-Thrower distributors rather than converting one of my old GM point-style ones from my parts stash (since I’d dolled up my new stroker to look like an early, traditional-style small-block Chevy I didn’t want to use one of those big honkin’ GM HEI units).
The big difference between the new Stock-Look Flame-Thrower and their standard electronic Flame-Thrower is in looks only (the Stock-Look has a cast aluminum housing rather than the shiny machined billet aluminum body of the standard Flame-Thrower, but both are equal in performance and quality).
PerTronix’s new plug and play cast distributors are available for small- and big-block Chevrolets and Ford 221-302ci applications too, and are designed to provide maximum ignition performance and easy installation all at an affordable price. These distributors feature the patented Ignitor or Ignitor III electronic ignition modules I’m so partial to. Plus, the PerTronix Ignitor is also compatible with any inductive ignition system coil, but high-rpm performance can be improved when used with its low-resistance Flame-Thrower coils.
And if you’re using a capacitive discharge system or the PerTronix Second Strike box, no problem, the PerTronix distributor is compatible. The Ignitor III version features a built-in Digital Rev Limiter and Multi Spark so no external box is needed. Unlike most auto parts store distributors, these units feature all brand-new (not rebuilt) parts. The gears are hardened steel for exact tolerances and the vacuum canister is adjustable for optimum performance. The mechanical advance curve has been tailored for top performance and drivability.
The distributors come with High Dielectric strength cap and rotor with brass contacts and they’re legal in all 50 states and Canada too. So, now that my commercial is over, follow along and see how I finally got myself rollin’ on my pickup project again!
1 After literally months I finally got my butt in gear and got back out in the garage to work on my ’57 Chevy pickup project. A lack of free time and a bad back had kept me from turning wrenches for way too long, but yesterday I finally made it out there.

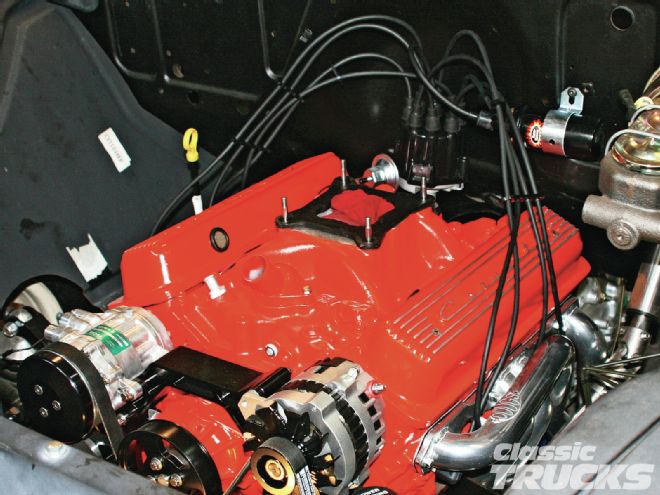
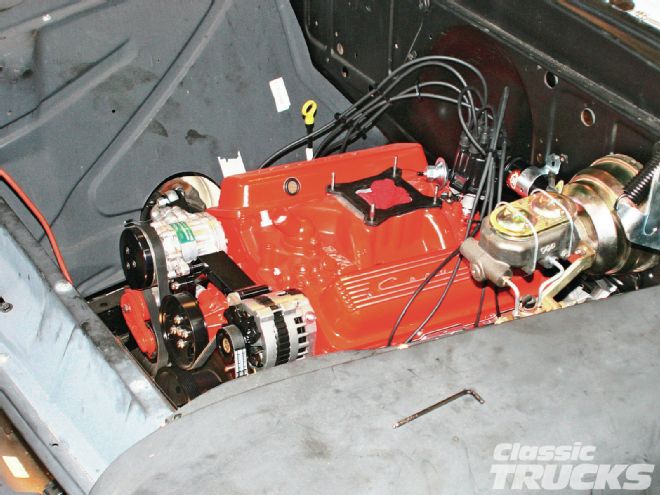
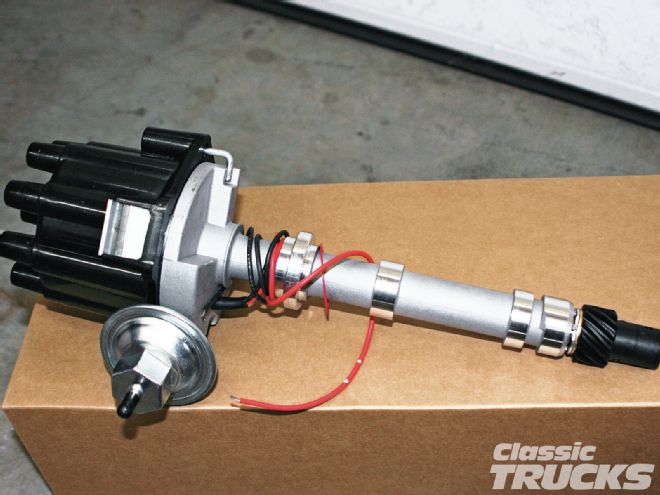
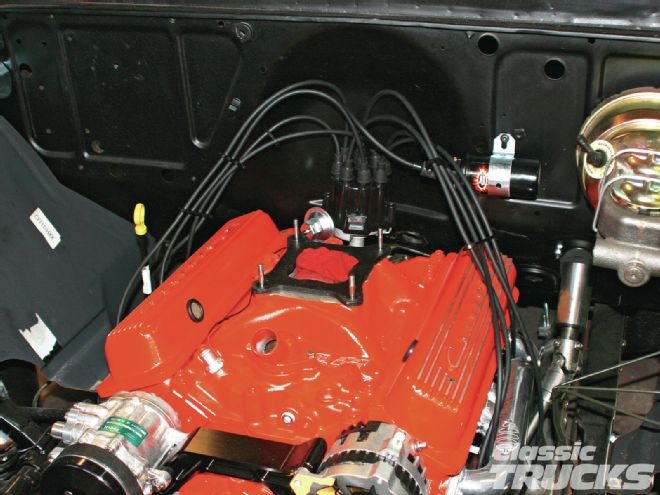
2 Since it had been so long since I’d done anything to my truck I’d actually forgotten where I’d left off – so I just tore into the first parts boxes I ran across and they happened to be the goodies I’d ordered from PerTronix Performance Products months ago. The boxes contained a brand-new PerTronix Flame-Thrower Stock-Look electronic distributor (sporting a cast-aluminum housing rather than the standard machined billet aluminum of the standard Flame-Thrower), a coil, and wires.

3, 4 The PerTronix Flame-Thrower coil and high-performance 7mm wires are high-quality components that are not only designed to work in concert with the company’s electronic distributors, but the have that early OEM look I was going for in the ’57’s engine compartment.
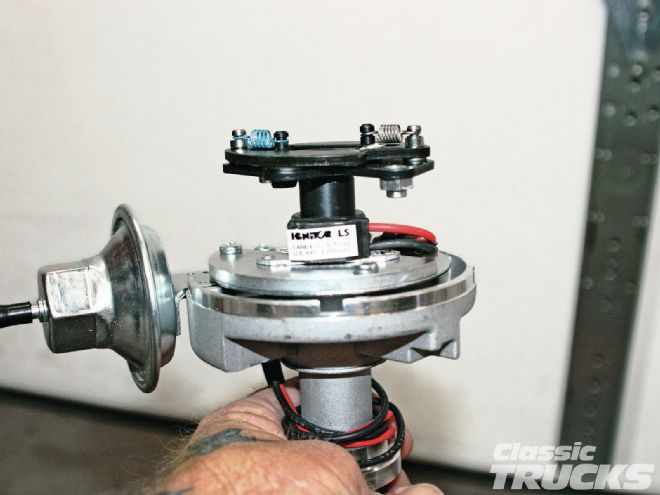
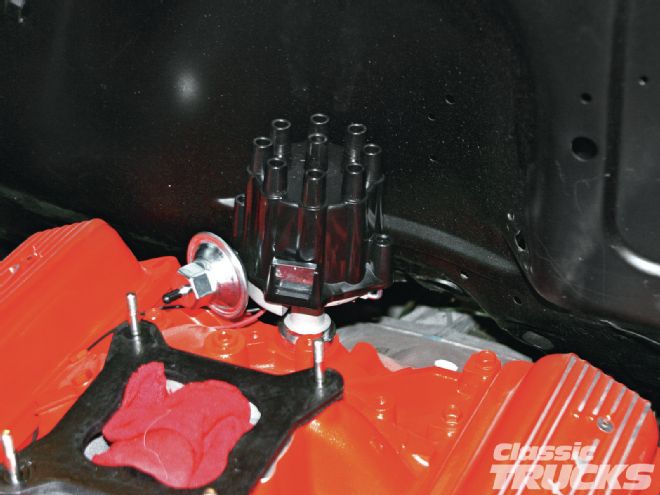
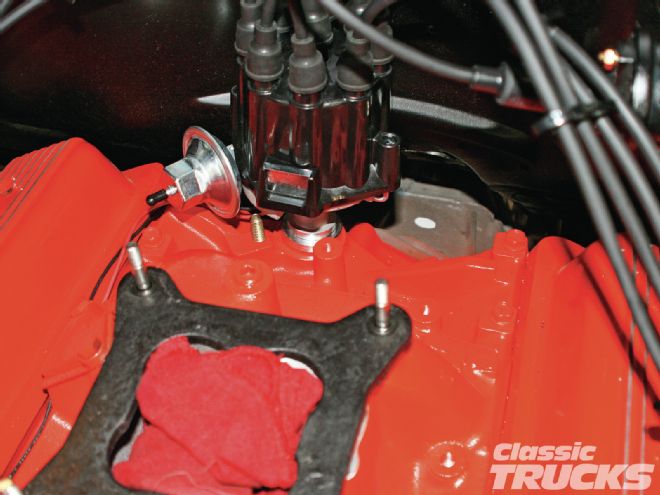
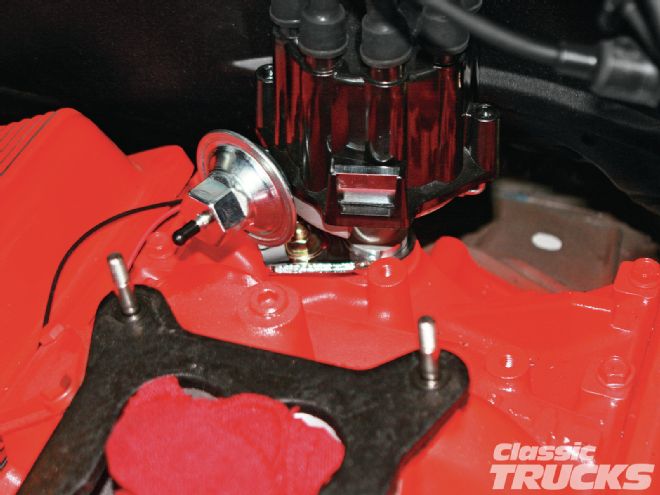
5, 6 You can see in this close-up that even though this is a brand-new high-performance distributor its cast aluminum housing and small-diameter points-style cap give it a traditional early-style look, while offering foolproof electronics.
7 As is the case with any distributor installation, the first step is to get the engine to top dead center on the number one cylinder. Since I’ve yet to wire the truck (my American Autowire harness install will be coming soon) I used a ratchet and socket to turn the engine over until I found TDC.
8 With number one at top-dead-center the distributor is lowered into place with the rotor pointing to the number one cylinder.
9 Once it was in place and I was sure it was seated with the drive gears meshed and the bottom of the shaft seated in the oil pump I then attached the cap.
10 With the distributor in place, the rotor pointed toward the number one cylinder, and the cap installed, I then pulled it back out and reinstalled it because I’d forgotten to install the gasket that goes between the distributor collar and the engine block. Why is it I rarely do things correctly on the first try?

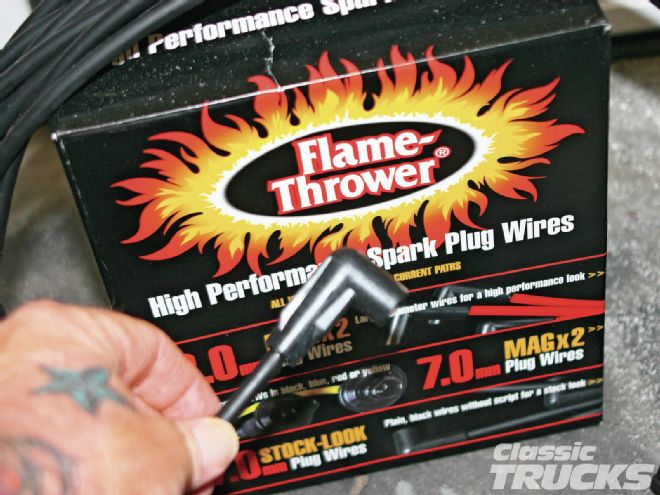
11 After installing the distributor for the second time I opened up my new Stock-Look plug wires. They’re 7mm high-performance wires with the look of stock OEM wires with no printing on them at all. PerTronix designed these wires with the same core they use in their 8mm wires. The only real difference is the 7mm flat-black silicone jacket that hides its performance potential from the naked eye. By the way, they’re available in both straight and 90-degree boot styles as well.
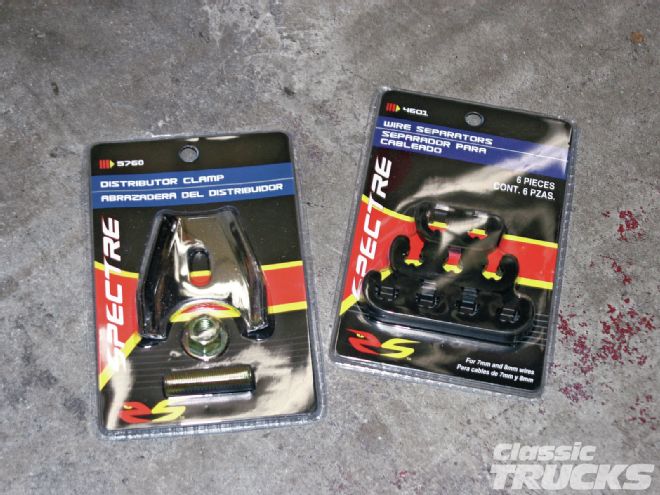
12 For once, I’d had the forethought to pick up a set of wire looms and a distributor hold-down. Will wonders never cease?
13 Oh, I almost forgot to mention that it’s always a good idea to lube the distributor drive gear with a dollop of white lithium grease before you install the distributor. This helps lube the gears and protect them until the engine oil begins to circulate on start up.

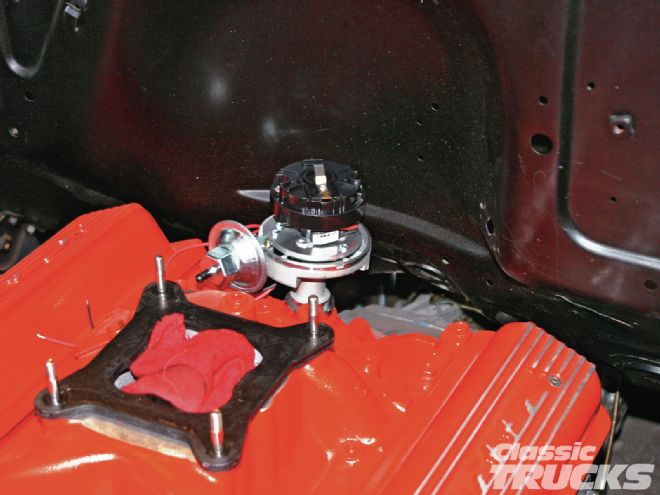
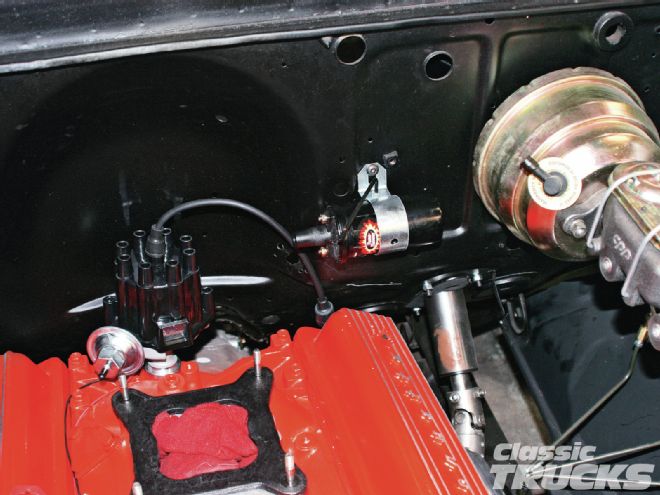
14 After spending a couple of minutes trying to find an appropriate place to mount my new coil I finally decided to mount it on the firewall between the brake booster and the throttle linkage opening. I think I prefer it there rather than on the intake manifold.
15 The next step was installing the plug wires and wire looms. I discovered that using the 90-degree spark plug boots made for a rather tight fit between the plugs and the exhaust headers. I may swap this set out for a set of straight boot wires in the future.
16, 17 The final step was installing the new Spectre distributor hold-down assembly. This unit uses an Allen head stud that threads into the engine block followed by a chrome-plated hold-down and an anodized nut and washer.
18 And there ya have it. My first foray into the garage in nearly three months. Now that I’ve broken the ice I’ll make sure that I get back into the swing of things and start making serious progress. I’ll see ya again next month as I take one more step in the long process of sewing together my latest pickup project.