 Replacing the entire fuel system in any vintage car leads to trouble-free motoring, we installed this Rock Valley gas tank and new fuel system in a weekend.
Clogged fuel filters, dirt in the carburetor, floats sticking, hard starting, gas gauges that don’t work … these are just a few of the fun things a dirty, scale-filled, rusty, 50-year-old gas tank can provide you. Nothing takes the joy out of driving an old car more than continuous problems. Happily, a cure for the rusty tank blues is available and the installation is a simple weekend project.
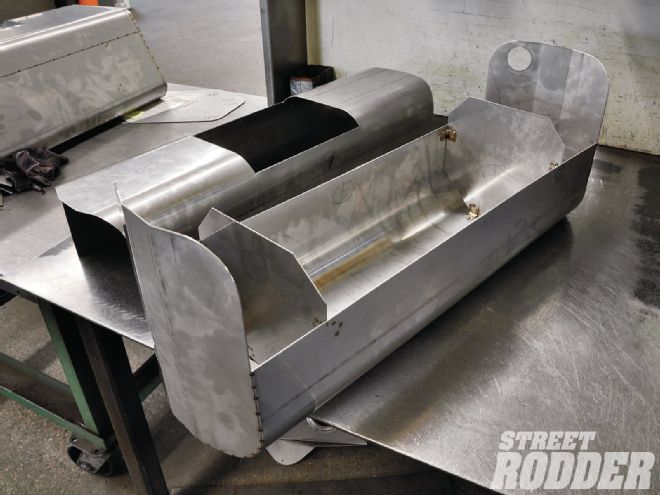 Every Rock Valley stainless steel gas tank is made in the United States by skilled craftsmen. Our tank began life as two halves with baffles installed.
First and foremost, whenever you are working with gasoline take all the proper precautions. Contain all the fuel in sealed, gasoline-approved containers and keep the room well ventilated as gasoline fumes can accumulate like a blanket on the floor and an errant spark from a drill or other source could easily ignite the fumes. Keeping a fire extinguisher handy is a good idea too.
The subject of our tank swap is a ’62 Chevrolet with several fuel delivery problems related to dirt and rust, plus we wanted to upgrade to a modern in-tank fuel pump and plumb the car with a return line should we want to install an electronic fuel injection system in the future. The fact that an electric fuel pump with return also delivers a steady stream of fuel and eliminates vapor lock problems was not lost on us either.
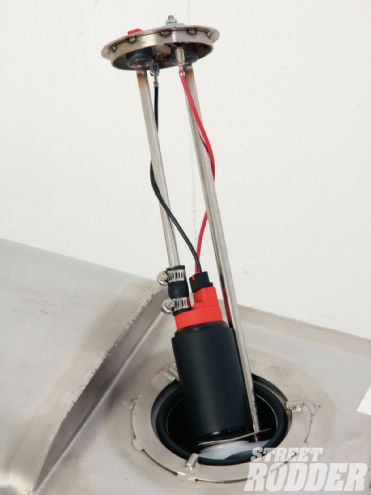
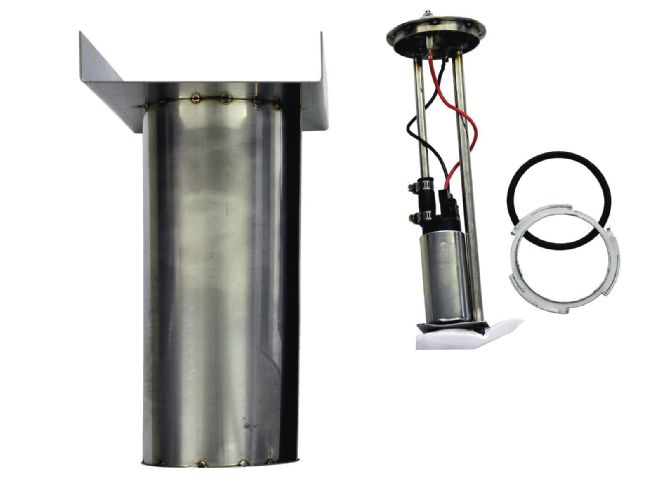 The Aeromotive in-tank fuel pump delivers fuel in a modern way. The pump mounts in the fuel tower (left), ensuring fuel will not slosh away from the pump.
When it came time to order the new all–stainless steel gas tank we turned to Rock Valley Antique and Street Rod Parts and then contacted Aeromotive for all of the support hardware and the in-tank fuel pump. All this nice clean gasoline will eventually flow through a new Holley carburetor, ensuring that all our fuel problems will be totally resolved in one good weekend.
Before we began work, our ’62 was driven until the gas tank was nearly empty; this made draining the fuel easier. After raising the car on the lift the drain plug was removed and the gasoline was drained into safe fuel containers. Be certain to have ample containers on hand because one thing is certain, there is always more fuel in the tank than you think. If you are certain the fuel level is low enough you could also carefully lower the gas tank with a small amount of gas in it, then pour it into containers, but at roughly 6 pounds a gallon the weight can add up in a hurry.
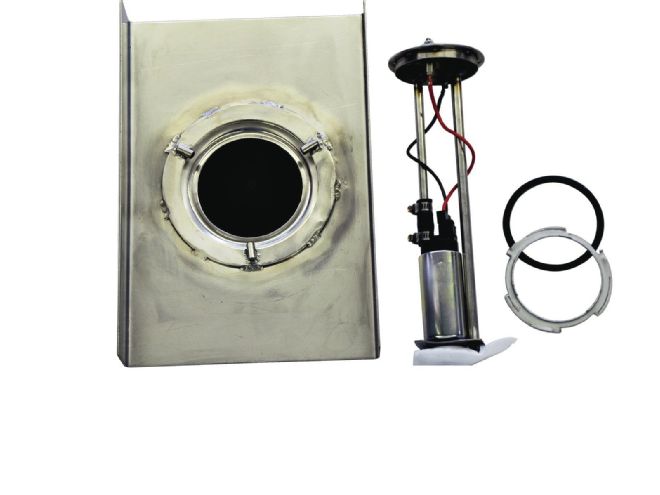 From the top we can see the mounting flange for the Aeromotive electric pump. This plate will be welded to the top of the fuel tank.
With the tank drained and fuel safely stored we disconnected the fuel line from the tank. Since we are going to run all-new fuel lines this was a simple matter of cutting the rubber fuel line with a pair of side cutters. Note, if you are cutting a steel line never use an electric saw as the sparks from the electric motor and the residual fuel in the line will definitely ignite, use a hack saw or appropriate cutters only.
Next we disconnected the wires to the fuel tank sending unit and then moved to the filler neck connection. The large hose clamp was removed from the tank side of the filler neck hose and then after some prying with a large screw driver we were able to remove the hose from the tank.
 After welding the plate and associated fuel tower to the top of the tank, the fuel pump is installed for the last time.
With everything disconnected from the tank we loosened the nuts on the gas tank straps to lower the tank down and finally out of the car. We were pleased to remove the gas tank without removing any of the suspension components, like sway bars or the Panhard bar. In some cases the tailpipes may have to be moved to permit removal of the tank. The old tank was stored outside the shop since it is filled with volatile fumes.
Before installing the new Rock Valley stainless steel fuel tank we measured the depth of the tank and adjusted the length of the new Classic Instruments floatless fuel gauge sending unit before installing the unit in the tank. As of this writing, the floatless sending units are not available in an ohm range that would render our original gas gauge accurate. Because of that, we opted to mount a new Classic Instruments gas gauge in a traditional cluster under the dash. The floatless sender bolts up to the standard five-bolt flange, however if you have an original ’36-56 Ford gas tank they have a six-bolt pattern. The senders come in a several ohm ranges, check with Classic Instruments for your application.
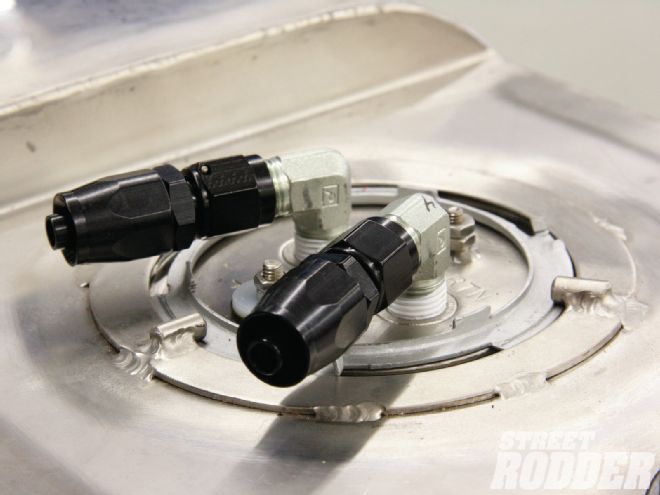 Prior to installing the tank we did the pump plumbing. A 90-degree fitting adapts us from 3/8 NPT to the proper flare fitting for our Aeromotive braided line.
The Aeromotive fuel pump was installed by Rock Valley so we began the plumbing to the fuel pump plate on top of the tank. Speaking of plumbing, our approach was to run hard lines for a majority of the fuel lines under the car, then using Aeromotive fittings we adapted to braided stainless steel lines for a flex connection to the fuel tank and the freshly installed Holley carburetor and Aeromotive fuel filter. The braided line up front starts at the Aeromotive inline fuel filter, making servicing the unit very easy. By using the flex line connection at the gas tank we did all the plumbing on top of the tank prior to installation, and then simply connected the flex lines to the hard lines after the tank was in place. This makes it simple to remove the gas tank in the future should the need arise.
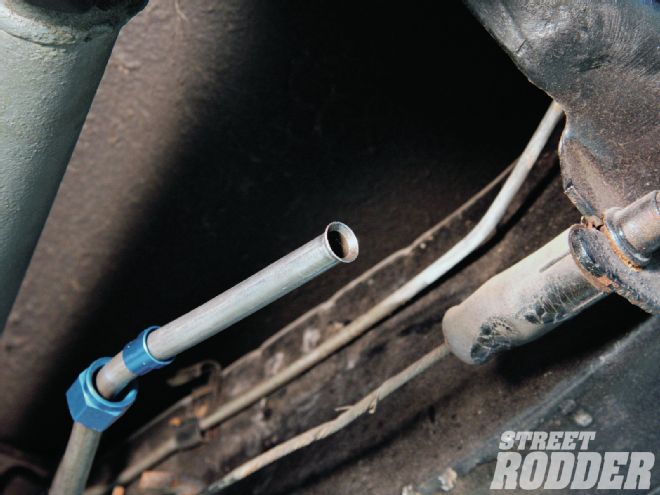
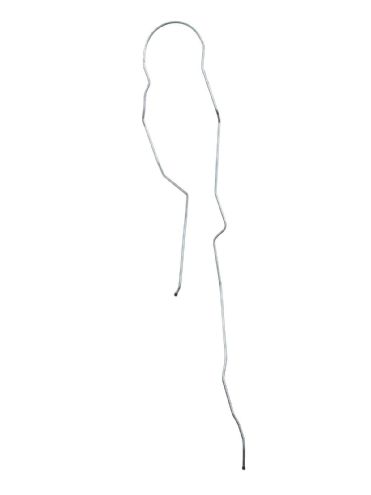 We used a pre-formed fuel line from Inline Tube to replace the old original. This piece is an exact duplicate of the original and saved us a lot of work.
Installing the new hard fuel lines involved using a pre-bent feed line sourced from Inline Tube while we fabricated our own return line from steel tubing. A flare to AN-6 adapter took us down to the braided hose and then the final connections were made. The stock filler tube was installed to the new Rock Valley tank using a new piece of fuel hose. It is important to use a piece of new fuel hose on this connection as the new hose is able to handle the modern gasoline blends without deteriorating.
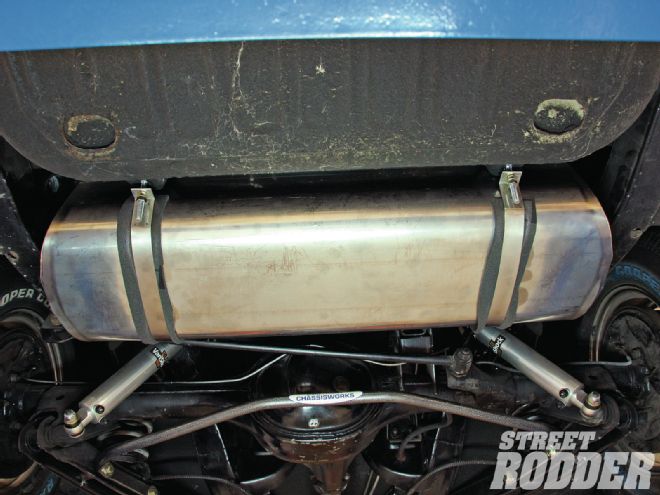
The new tank is held in place with stainless steel straps supplied with the Rock Valley tank. When we did the test-fit it became obvious the fuel pump fittings were hitting the floor brace. A small cut-out was made in the brace and since we did not penetrate the interior floor there was no need to do anything else. A quick squirt of black paint prevented future rust and we were done with that small modification.
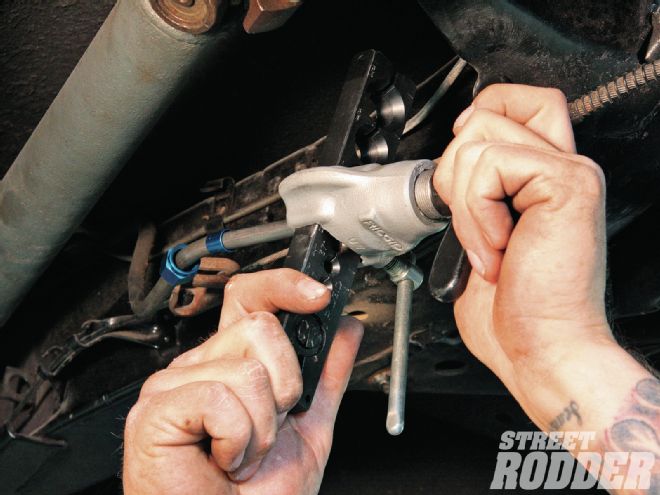 Using a flaring tool we flared the end of the Inline Tube supply line in preparation for the conversion to AN fittings.
With the mechanical portion of the job out of the way we turned our attention to providing electrical power to our new fuel pump and gas gauge. The gas gauge has a long pigtail with a plug and since we decided to use an independent, underdash, Classic Instruments fuel gauge we routed the wiring through the car and passed the wire through the floor board using a rubber grommet in the newly drilled hole.
The fuel pump was wired in similar fashion and the supplied relay was wired in and then the power was routed under the carpet rearward to the fuel pump, also passing through the floor board with a rubber grommet.
 We produced a nice clean flare, and don’t forget to put the nut and ferrule on the tube prior to making the flare.
A double check of all connections and it was time to add some fuel to the new gas tank. A few gallons would be enough to supply the pump and test the system. With the ignition key on the Classic Instruments fuel gauge needle indicating we had fuel in the tank, and the Aeromotive in-tank pump was singing its happy song as it delivered the Aeromotive-regulated 3 psi of gasoline to our new Holley carb. It is best to have one person under the car and another operating the key for this first test, that way should you discover a leak the power can quickly be turned off, limiting any spill or danger. As it turned out our plumbing was leak-free and with a steady supply of fuel to the Holley carb the engine fired to life. Certain that all systems were working well, we filled the tank with some premium gas and enjoyed hitting the road knowing there was no chance of fuel-related problems for a long time to come.