After receiving a litany of abuse from fellow hot rodders and mechanics about my lack of pneumatic capabilities in my shop in the past, I decided once and for all that it was time to get real and set up my current shop with a capable compressed air setup. I tend to be a scapegoat of used equipment so needless to say, when the time came for me to receive my first air compressor, it was in the shape of a frozen hand-me-down from an editor that shall remain unnamed. He decided that storing his horizontal 20-gallon unit in a vertical position for years on end made sense and then proceeded to revert it to said horizontal state and ran it less oil to blow out the cat hair that covered his garage. Needless to say after about ten minutes, the motor froze. And that’s how I received my first air compressor.
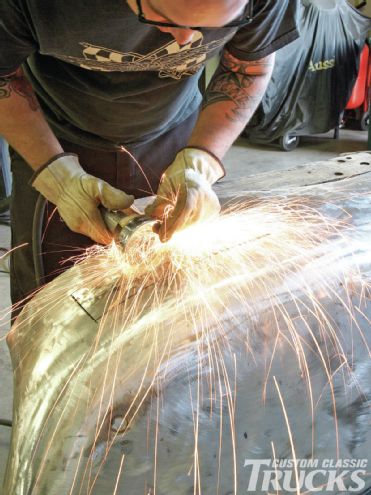
A quick teardown revealed a frozen connecting rod in the pump portion of the compressor motor and after a bit of convincing with a torch and a big hammer, the rod was free and the compressor was back in the game. Fast forward a few months and yet another frozen compressor was soon in the back of my truck, this time a 60-gallon unit. Like I said, I’m a glutton for punishment when it comes to abused, free shop equipment, but this one turned out to have the same ails as the first and within an hour, I had the compressor humming and sounding great. Attaching a 50-foot air hose, I began grinding, cutting, and sanding until the cows came home. And then I hit my first snag; I noticed that my gloves were getting damp with moisture from the pneumatic tools. Not too concerned about the $10 die grinder in hand, I kept working. The more I worked, the more moisture built up and soon the grinder was spitting out water onto the bare metal panel I was working; a big problem. I could deal with the wet gloves and even the ruined grinder that might result but the direct water contact on the bare metal panel was a problem. Taking that into consideration in addition to the fact that I’d just picked up a plasma cutter from HTP and a blasting cabinet meant that I needed to solve this moisture problem once and for all. Not to mention that I needed to paint my F-1 in the coming months and a water bath in my new paintjob is not what I needed.
Not completely sure what I needed to do to solve this problem, I consulted my buddy Zane Cullen at Cotati Speed Shop to see what they used to dry out the air in their shop and paint booth. Zane’s shop has been turning out high-end paint jobs since his days as a teenage mini-trucker and expecting a high-dollar solution well out of my reach, I was surprised when Zane tossed me a simple desiccant filter and an oil separator. We used this for years before we got an actual refrigerated air dryer system. Sounds good to me! But the key to their success was more than just a simple oil separator and desiccant system, it was in the actual routing of the air lines themselves, something I was soon to find out for myself.
My original air line exited the compressor and ran straight, via a three-foot hose, to the oil separator and desiccant filter; number one no-no. First off, compressed air needs at least 25-feet to cool down before it reaches any sort of filtration system since it leaves the compressor nice and hot and therefore full of moisture. With the filtration system that close to the compressor, the compressed air simply overcame the filtration system I installed, hence the moisture received at the grinder. What I needed to do was to mount the filtration system at least 25-feet from the compressor, giving the air time to cool down and separate the water molecules from the compressed air. And so, the next step was to mount the filtration unit across the shop, far from the compressor.
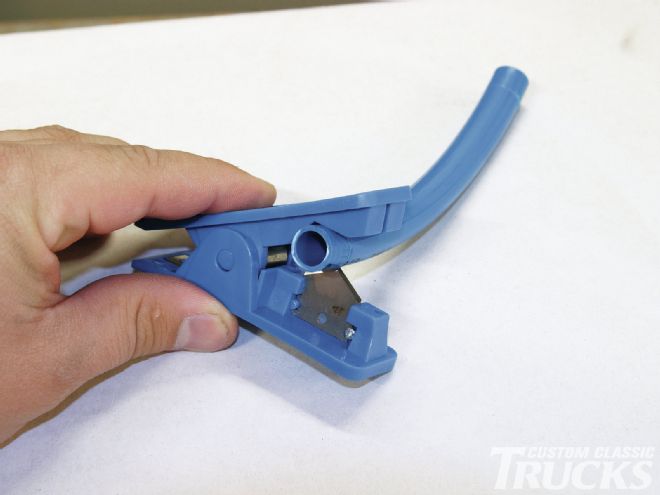
There are a dozen ways to run a compressed air line across a shop or garage, with everything from PVC pipe to galvanized tubing, but by far the easiest setup I’ve seen is now offered by Eastwood in their Complete Garage Air Line Kit. Consisting of PVC lines and press fittings, it’s a simple cut-to-fit application with more than 100-feet of line. In addition to the lines and fittings, the kit also comes with an aluminum outlet manifold that allows two outputs for air hose attachments and an additional manifold that can be used as either a drain or as an additional outlet. Eastwood also offers an inline moisture separator and lubricator that works perfectly for all those pneumatic tools that need to be lubricated yet kept moisture free.
Since I was setting up a pneumatic system that would serve two purposes, the availability of extra Eastwood distribution manifolds made this very simple. The first line would run through Eastwood’s inline moisture separator and lubricator and run all my standard pneumatic tools such as my grinders while the second line, run through the oil separator and desiccant system I picked up from Zane, would allow me to paint, blast, and run my plasma cutter without any worry of picking up moisture. I also devised a drainage system that would first run out of the compressor and then just before the filter station to try and gather as much moisture as possible.
The resulting system has performed flawlessly with no moisture building up in my tools and leaving my gloves nice and dry, just the way I like them! I still drain my compressor every day, something you’ll need to do regardless, but I’ve found that my drains before the filters have little moisture built up in them, just as I expected.
With this setup, I’m confident that not only will I not get water in the line when painting, but I won’t be ruining my brand-new HTP plasma cutter, nor will I have any problem with moisture in my blasting cabinet. A few hours of work ends up paying off in dividends when it comes to drying out that compressed air, and I did it on a budget restoring hand-me-downs. CCT