One part of project car building that often gets quickly glossed over is the fluid systems. That's partially because in most cases it's not all that glamorous or photogenic, but each part of the pipeline is absolutely critical to making a car run. Fuel, oil, water—you're not going anywhere without all three of these flowing.
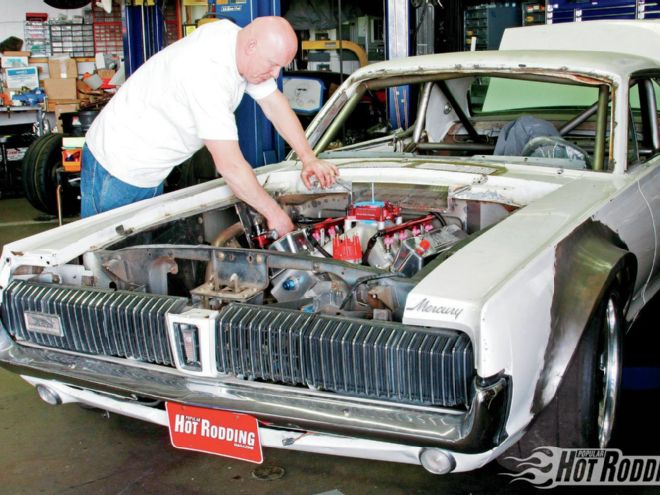
When it comes to plumbing fluid systems for high-end performance, though, things get a bit more interesting. The harder you push a car, the more reliable and effective each of those systems must be or the fun will be over fast. In many cases some factory original parts will suffice, but on a project like the Max Effort 1967 Cougar, which will see both heated track use and rush-hour traffic, we have to start from scratch. That's good news for all you pondering the job of upgrading your own project because we're planning to walk you through the right way to handle each of these for both safety and performance.
We have to tackle all three major fluid systems in the Cougar, but we're going to start with the fuel system, and a bit of a primer on building your own -AN fuel lines. Rather than standard stainless braided line, we chose Earl's Plumbing Pro-Lite 350 hose and Ano-Tuff fittings. The Pro-Lite hose is very flexible and saves a huge amount of weight versus stainless, plus it's actually much easier to assemble. That not only leads to less frustration during assembly, but also a clean-looking final installation. Yes, looks do count, so prepare to spend a great deal of time just staring, pondering, and planning before cutting the first hose.
A slick-looking plumbing system is a hallmark of a well-built car for two reasons. First and most obvious is that it creates a pleasant and non-cluttered look that won't distract from the rest of the car. Second, that same clean and uncluttered layout makes a system intuitive and easy to trace and service. Good thing Yannick Sire of Sire Custom Performance is a huge stickler for combining function with form on his plumbing systems for anything from street to race cars. With his years of experience, he's going to show us the right way to start with a couple rolls of hose and a pile of fittings and craft a high-end, race-bred fuel system from scratch.
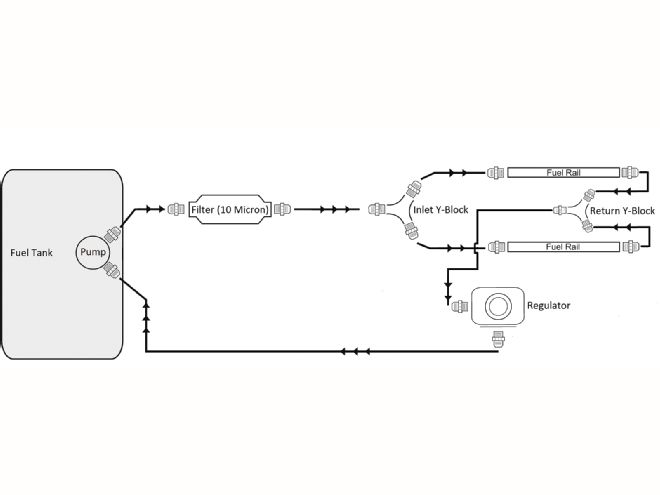 1. There is more than one legit way to plumb a fuel system; it depends upon needs, component choice, and your own preference. It helps to start with a diagram to help plan your parts choice and routing. This is the basic layout of the regulated return-style EFI setup that will feed into the back of our fuel rails.
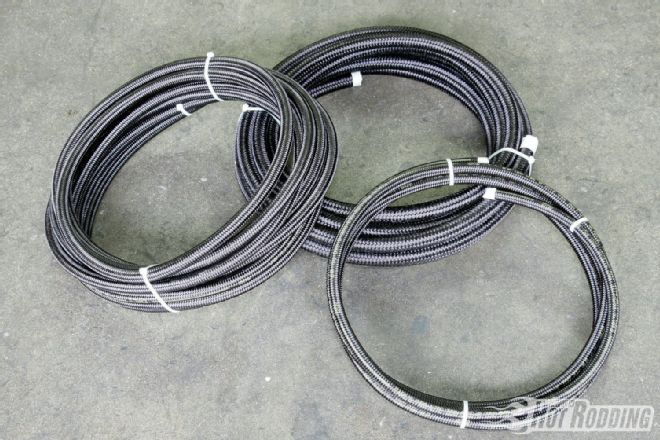 2. Hose matters! Our choice is Earl’s Pro-Lite 350. It is made in the United States with abrasion-resistant nylon sheathing banded to the textile inner braid that’s embedded in the synthetic rubber liner. This gives the hose incredible flexibility while still maintaining a pressure rating of 350 psi and an operating temperature range of -40 to +300 degrees F. On top of that, it’s super easy to assemble, about half the weight of stainless braided hose, and won’t constantly stab your fingers during assembly.
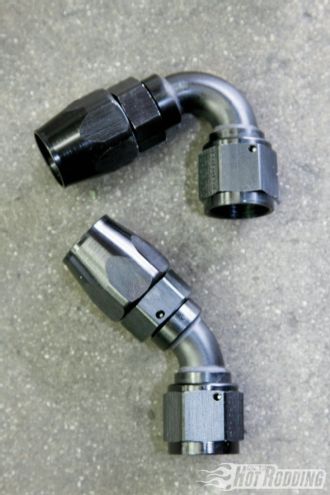 3. The hose fittings are equally important, and we’re using Earl’s military-spec Ano-Tuff pieces. Besides satin-black good looks, Ano-Tuff fittings have a hard-coat anodizing that actually penetrates the aluminum for corrosion resistance inside and out. The threads are also treated for protection against galling. According to Earl’s, Top Funny Car teams report that Ano-Tuff–coated fittings last twice as long as traditional red/blue fittings.
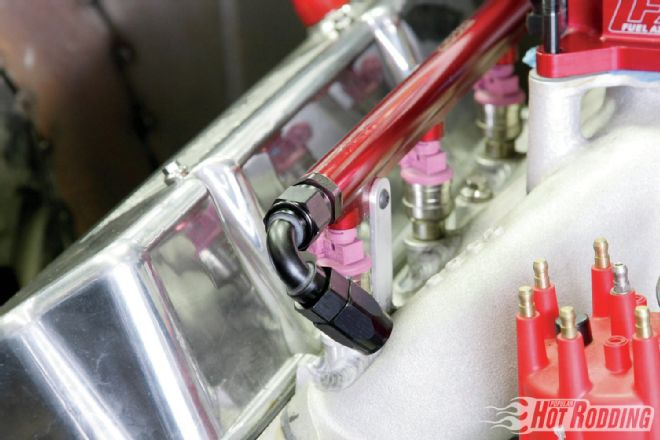 4. Planning on paper is great, but to create a good-looking, functional fuel system it takes mock-up and measuring. We began at the rails with a 120-degree Earl’s fitting.
 5. From here, Sire used a tape measure, and his eye, to get a rough measurement, following the planned route of the hose. Keep in mind that with hose arcs, it doesn’t stay in straight lines unless clamped.
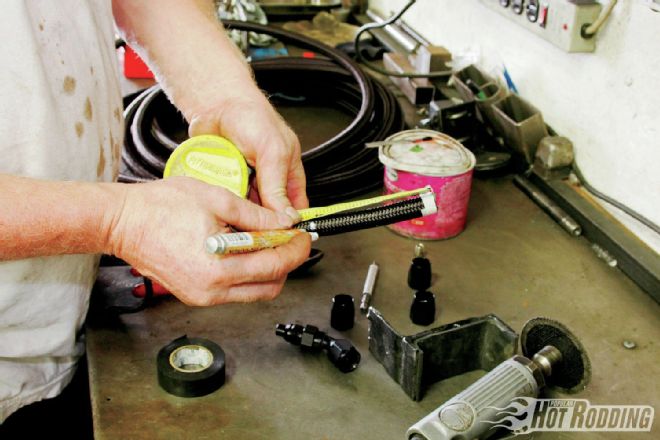 6. Don’t get too obsessive over the numbers when measuring hose because they don’t have to be super precise. We really just need a rough data line to mark on the hose to make our cut.
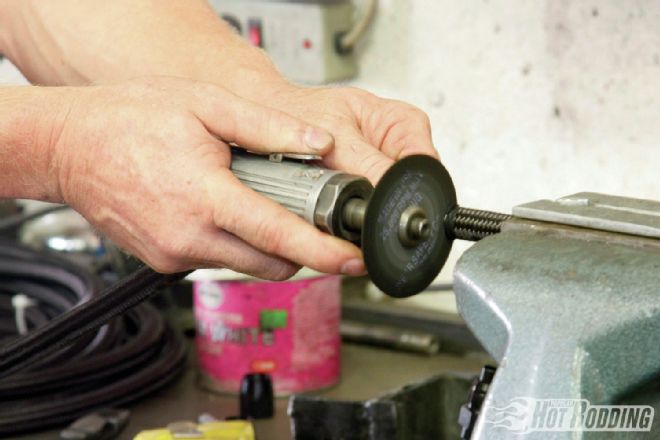 7. Pro-Lite 350 is much easier to cut with a hacksaw than stainless braided hose, but if you’re happy using a cutoff wheel it works very quickly. Just like standard stainless braid, it’s a good idea to wrap the cut end with electrical tape to keep the braid intact while cutting.
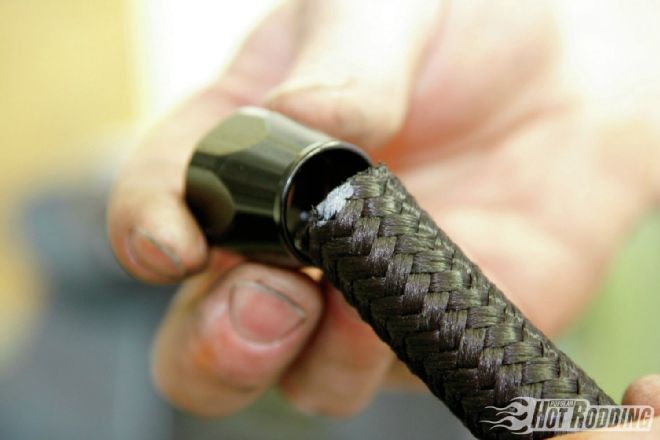 8. Check out how perfectly smooth the cut is on the Pro-Lite 350 once the tape is removed. Now it’s time to squeeze the hose into the fitting. It may help to clamp the fitting in a vise, but what we’re looking to do is twist the hose into the fitting until it bottoms out against the threads. Then we back it out about 1/16 inch.
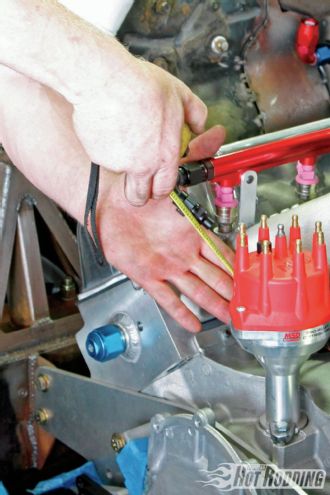
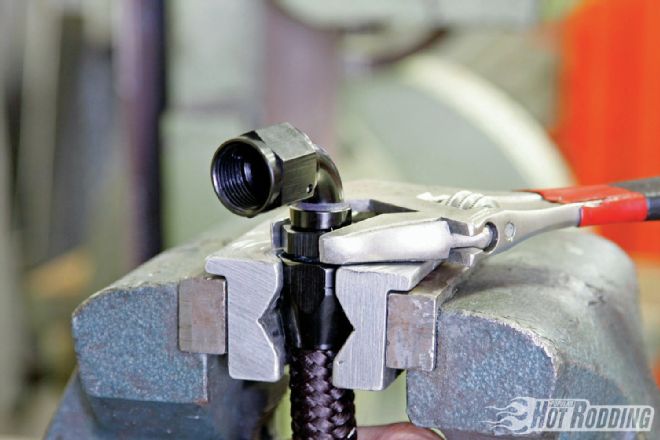 9. You’ll definitely need the vise for this part. Apply a smear of oil to the inside of the hose and the fitting and socket threads. Thread the hose as far as you can by hand, then continue using an -AN wrench or other suitable smooth-jaw wrench. We want to tighten the fitting until it’s nearly bottomed out against the socket; 1/16-inch or so gap is good.
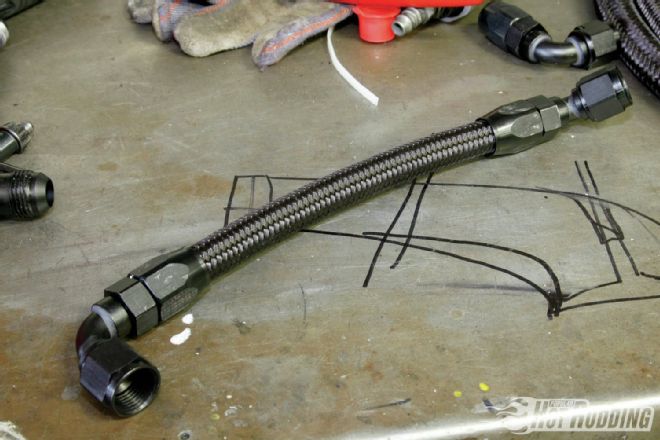 10. Here’s how one of the system’s hoses looks fully assembled. The function is great, but we’re loving the looks as well.
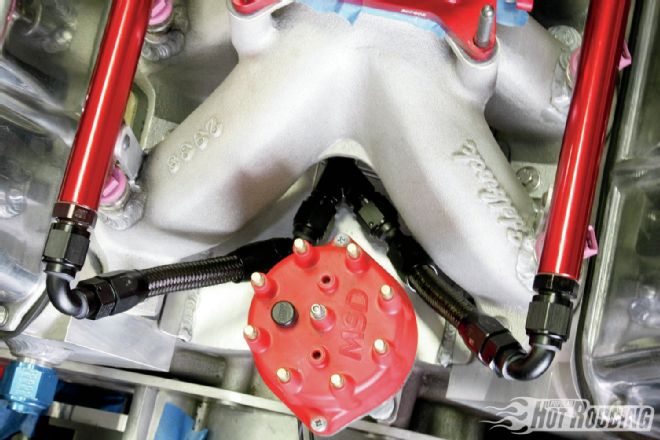 11. With the two front fuel rail outlet lines assembled, we connected them to an Earl’s Y-block down in the engine valley for both ease of routing and cleanliness of layout.
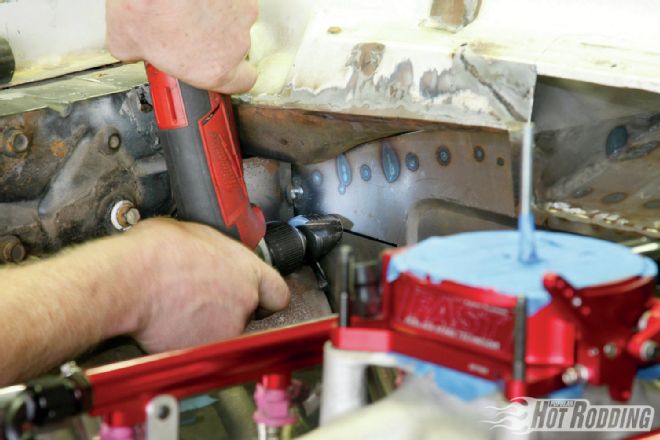 12. Rather than under the chassis, we’re running all our Cougar’s lines inside the car to keep them away from abrasion and heat sources. After making a pilot hole, Sire used a stepped bit to open up the hole to the size needed.
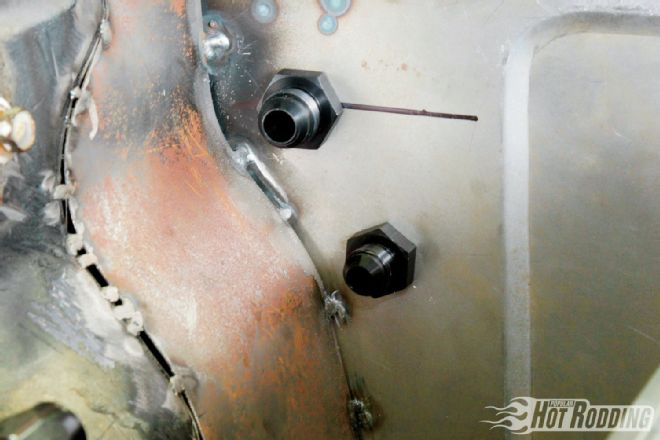 13. Even armored hoses must be isolated from the firewall when passing through, and just a grommet doesn’t cut it. Sire threaded in two Earl’s Ano-Tuff bulkhead fittings, a -10 for our inlet and a -8 for the return.
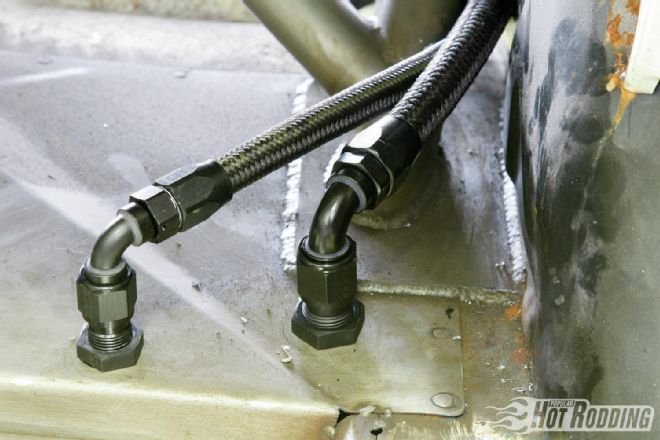
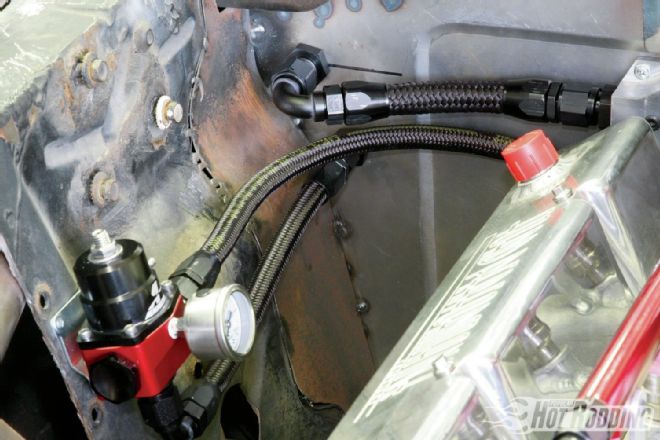 14. Using a 120-degree -10 fitting, our inlet line is routed to a larger-style billet Earl’s Y-block, just out of sight to the right. The -8 return line uses a straight fitting and a 90-degree to connect to the bottom port of our Aeromotive fuel pressure regulator. The side port wraps around behind the engine to meet up with the smaller Earl’s Y-block in the engine valley.
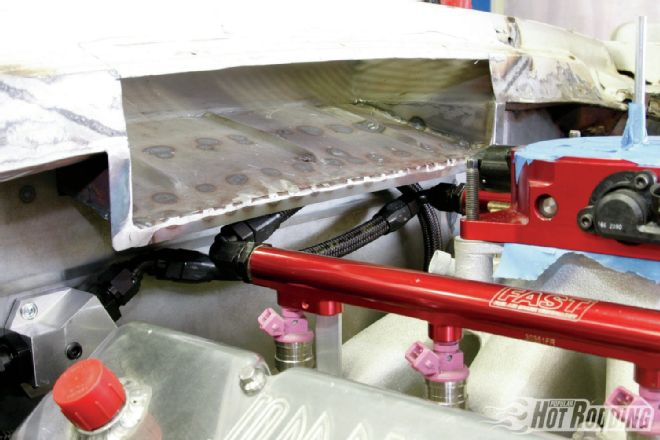 15. When it comes to routing hoses of any type, gentle curves are key. After splitting out of the Earl’s billet Y-block with 45-degree fittings, the top hose goes directly to the driver-side rail while the bottom hose makes a longer loop to the passenger-side rail. This keeps fuel flowing fast and helps prevent fluid friction created by tight bends.
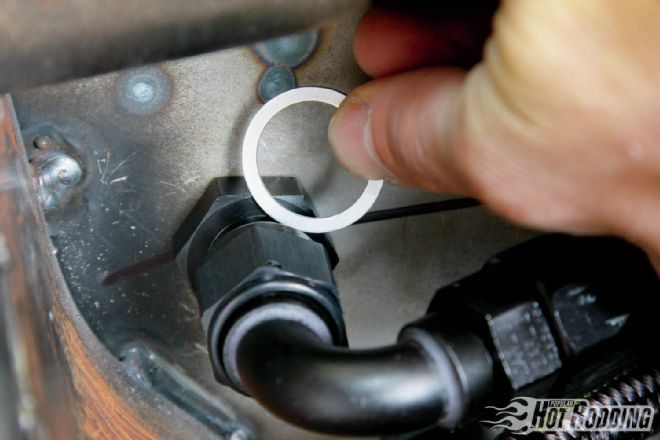 16. Often bulkheads need a little spacing when passing through thin sheetmetal, so aluminum crush washers such as this are the answer for tight fitment.
 17. On the inside of the firewall, two 90-degree fittings route the -10 and -8 Pro-Lite 350 hose toward the rocker panel. The hoses will be routed along the rocker to the rear of the cabin.
 18. At the rear of the cabin, two 90-degree bulkheads pass the line back out to the bottom of the chassis to plumb the tank, fuel filter, and pump.
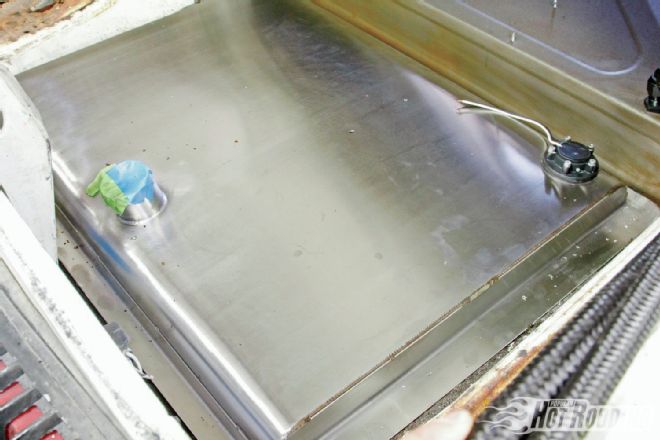
19. Speaking of the tank, Rick’s Tanks crafted a gorgeous 22-gallon version of their stainless steel Mustang tank with road race baffling inside. It drops into the stock location just like factory. This thing will last forever and is tolerant of any fuel type that we’ll ever use.
18. At the rear of the cabin, two 90-degree bulkheads pass the line back out to the bottom of the chassis to plumb the tank, fuel filter, and pump.
19. Speaking of the tank, Rick’s Tanks crafted a gorgeous 22-gallon version of their stainless steel Mustang tank with road race baffling inside. It drops into the stock location just like factory. This thing will last forever and is tolerant of any fuel type that we’ll ever use.
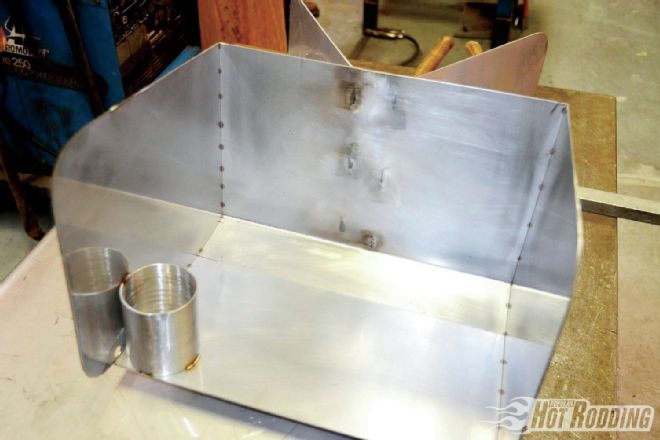 20. This is the fuel box inside the tank that will keep a column of fuel around the pickup of the pump even at extremely high lateral loads during cornering.
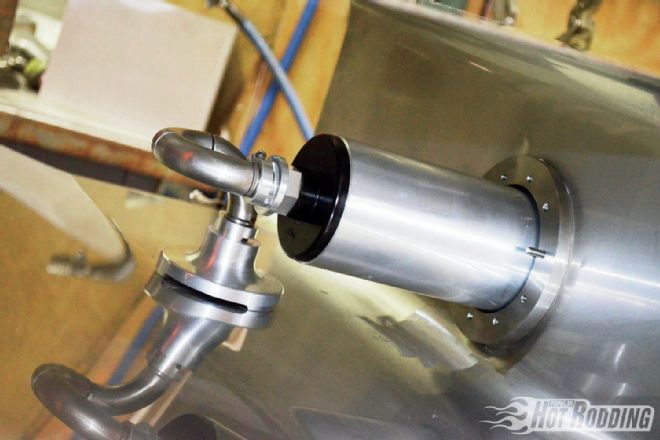 21. Speaking of the fuel pump, the Aeromotive A-1000 is submersed inside the tank and uses this very trick pickup to keep it at the very bottom of the fuel tank without impeding flow.
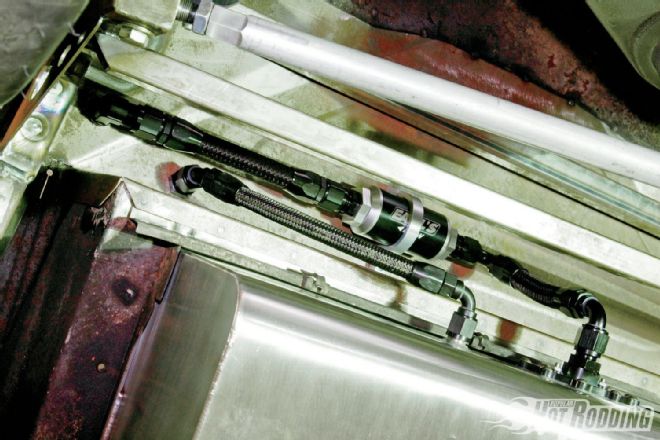 22. Just in front of the tank, the head of the A-1000 pump connects directly to a 100-micron Earl’s filter rated at 175 gph to keep any potential particles out of our system without slowing our flow. This -10 line routes to the bulkhead at the rear of the cabin. The -8 is our return, which dumps into the internal fuel box to keep fuel at the pickup.