

one of the most frustrating and embarrassing car problems is overheating. Of course, it usually happens when it's extremely hot out, and dealing with boiling coolant on the side of the road is a nightmare. From day one, this Mustang couldn't make it anywhere without overheating, and spewing a big, brown, rusty water puddle wherever it went. That's not how we do things over here.
By necessity, our first major project on the Mustang had to be the radiator-preempting everything, including our planned Windsor small-block swap. The first choice we had to make was copper/brass, or aluminum for the material. Technically, copper/brass dissipates heat better than aluminum, but aluminum can be pressed thinner to give more cooling surface area. The other advantage is weight. This is the nose of the car, so weight is always a consideration. Aluminum is lighter than copper/brass, which works for us since aftermarket radiator companies produce more radiators out of aluminum than of any other material. Having said that, you want the radiator as big as it needs to be, without being oversized.
Early Mustangs are known for having very limited space for a radiator. Ours was puking with the existing six-cylinder. With a much larger engine planned, we needed a long-term fix that would handle around 600 hp easy. The factory unit sits against a 3-inch-tall raised portion, measures 20x18 inches, and was not even enough to cool the stock engine.
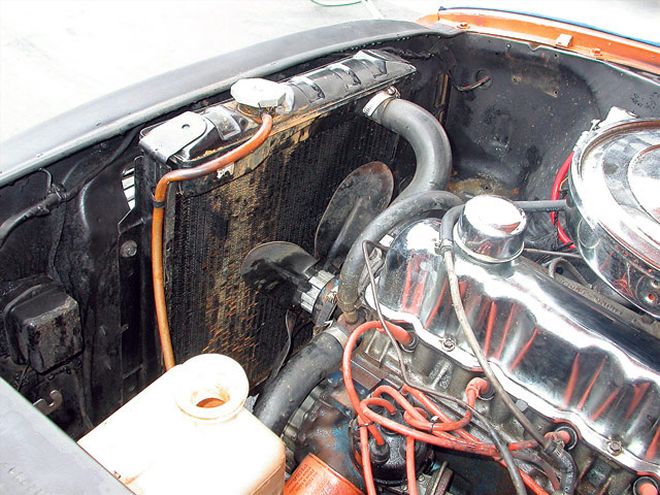 This is our starting point. Being an original six-pot radiator, its size and performance left much to be desired. Notice the radiator core support channel that the radiator bolts to. To make room for the Be Cool unit, this will be cut out. Be Cool recommends that you clean your cooling system thoroughly before installing fresh components. Flushing fluid is sold at most auto parts stores and does a great job at lifting debris from the interior walls of cooling passages.
We chose a Be Cool unit built to combat this problem. It measures 33x18 inches; that makes the original look like a tranny cooler. In order to install this monstrous radiator, some cutting and fabrication is necessary. The radiator support has a hump that pushes the radiator closer to the engine; this needs to be trimmed to allow the new unit to lay flush with the support. Last month, we installed a battery relocation kit to prepare for the cooling system, so keep in mind the battery too will have to be moved if it hasn't already. There are small things bolted to the support that can be relocated easily, such as the voltage regulator. When talking to Be Cool, they told us the radiator will look too big at first, but that it will indeed fit.
While installing the radiator, we decided to replace our belt-driven fan with a dual electric fan setup. The Spal setup we used is sold by Be Cool, and is integrated with a shroud that increases airflow through the radiator. You always want to have a good shroud to maximize your airflow. Instead of being operated by a simple on-off switch, Be Cool offers a programmable module with a high and low setting to keep the coolant at a stable temperature, and to draw the least amount of current.
Our plans for this Mustang will most definitely tax the cooling system. Without some heavy-duty, high-capacity parts, the Mustang wouldn't make it very far. With hot days on the streets of Southern California, and hotter days planned for the track, getting the cooling system dialed in is a must.
WHERE THE MONEY WENT
DESCRIPTION PART NO. PRICE
Be Cool aluminum radiator 60187 $666.39
Be Cool fans/module package 95007 $559.95
Be Cool overflow tank 70003 $114.95
Be Cool radiator cap 70001 $39.95
Coolant flushing fluid $5.99
Distilled water (5 gallons) $3.50
Coolant $7.39
Total: $1,398.12