The 1962-1964 Galaxie 500XL was the first big performance Ford, with engine options all the way up to the legendary 427 in the factory lightweight cars in 1964, of which only 25 were built. Hot Rods By Dean proprietor, Dean Livermore, thought the new Ford Coyote engine would be a great fit in one of these big cars, and set about looking for one, the search unbelievably turning up a one-owner example just a few miles from his shop in Phoenix.
From the very beginning, the plan was to build the car with a factory appearance, as if the Coyote was an original option, which is why you'll find no polished parts under the hood; factory clips on rubber hoses where possible; and the EFI, ignition, and trans modules hidden inside a box.
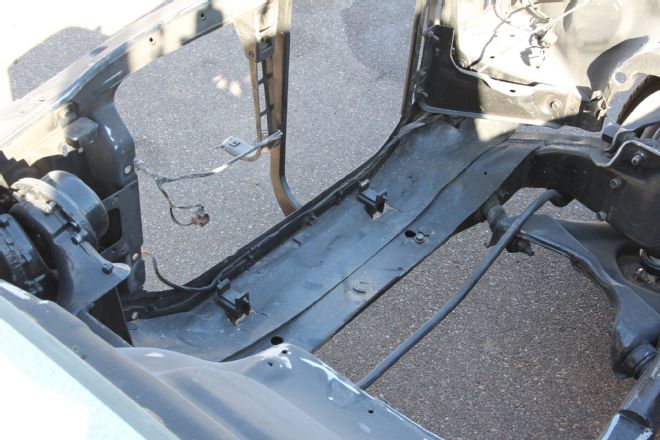
The Galaxie may have a large engine bay, but the Coyote is a larger engine, its location limited by the use of the 8-Stack injection, which had to fit under the hood, retaining a stock firewall. This meant some modifications to the suspension arms, mounts, crossmember, and steering assembly. Even then, it was a tight fit, and installing the headers was more than a little challenging.
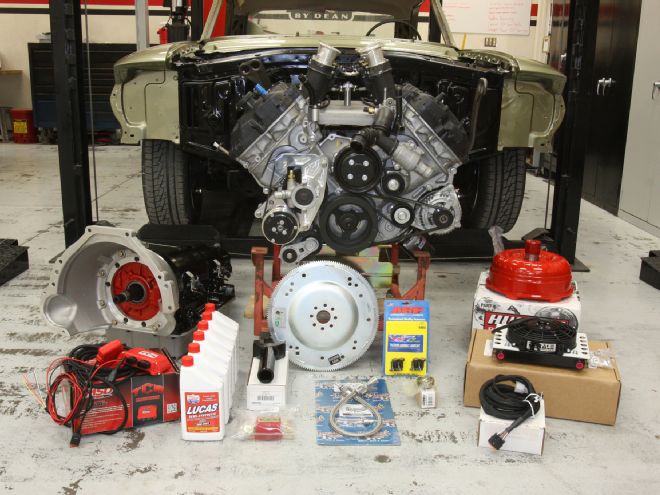
A Hughes Performance 4L80E was chosen, and being a GM transmission, required adapting to the Ford motor. This was hooked to the 9-inch rear via a Dynotech driveshaft. With fresh paint, six-piston Wilwood brakes all around, and a restored interior, Livermore racked up 1,000 test miles then hit the road with his son on Hot Rod magazine's Power Tour.
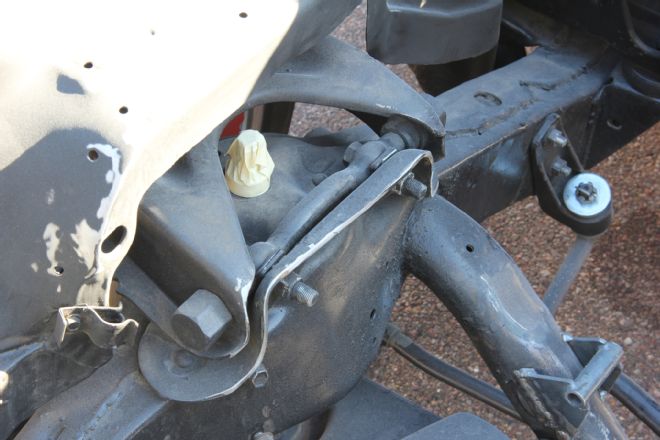
What you don't see is the numerous trial fitments of the engine and trans, but the final result was the upper A-arms and mounting brackets required trimming for clearance.
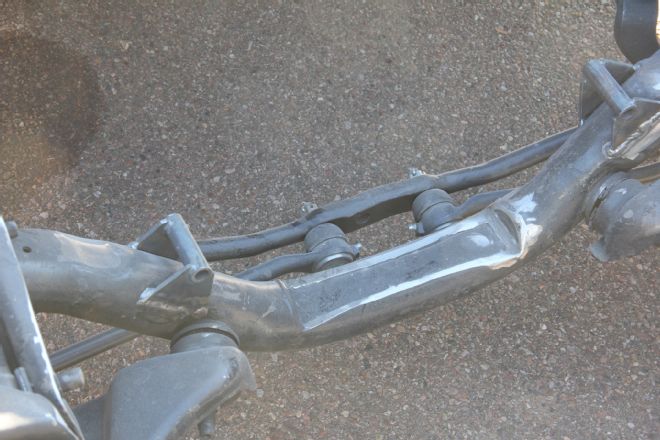
Similarly, the crossmember was clearanced by 1 inch, and engine mount brackets welded in place.
A new tubular trans crossmember was fabricated, mounting to the original brackets on the framerails.
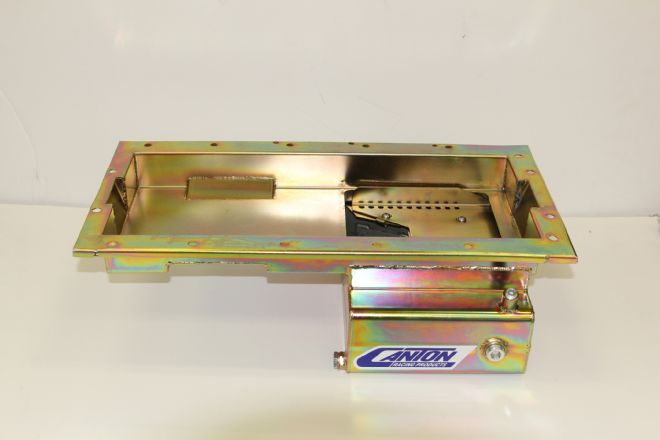
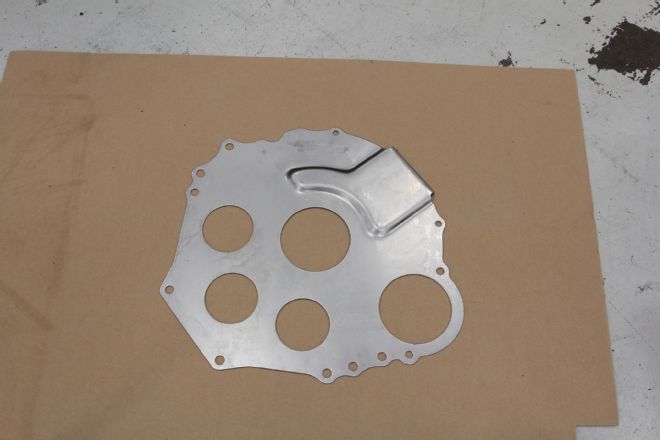
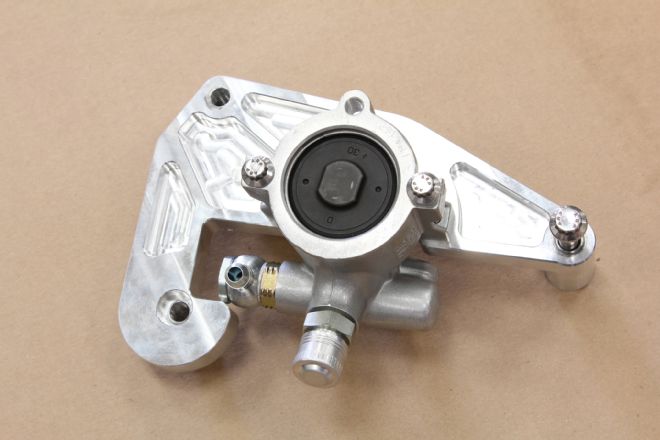
The Coyote engine comes with a rear sump oil pan, which interfered with the crossmember, so this front sump version from Canton Racing Products was ordered.
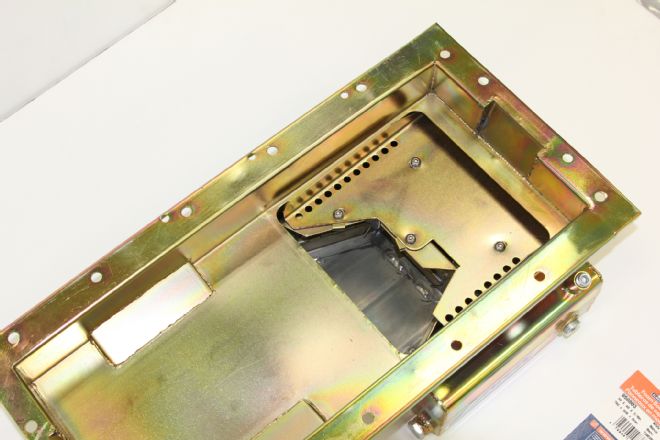
Canton's new 15-738 Ford 5.0 Coyote oil pan is designed with a "T" front sump for extra capacity. It features a diamond-shaped road race baffle assembly with four trap doors and a removable Windage/anti-slosh baffle.
Canto also offers a pickup specifically for its pan, as well as a dipstick, though a Lokar version was used in this application.
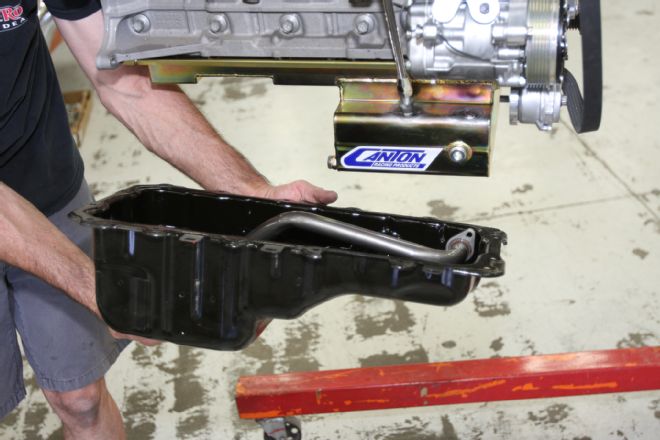
This clearly shows the difference between the stock pan and the Canton front sump pan.
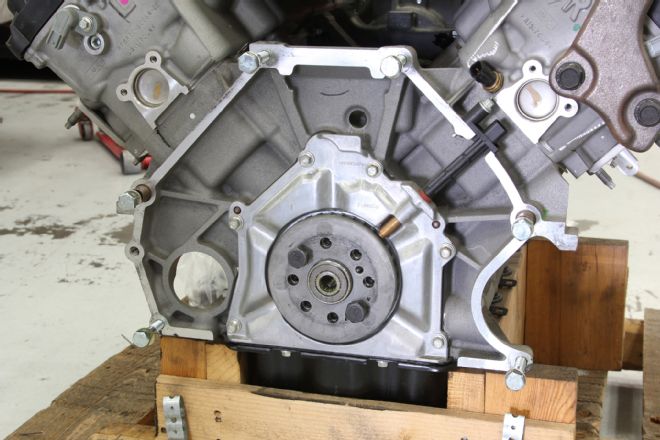
As well as illustrating the position of the crankshaft position sensor, here you can see the stock pilot bearing.
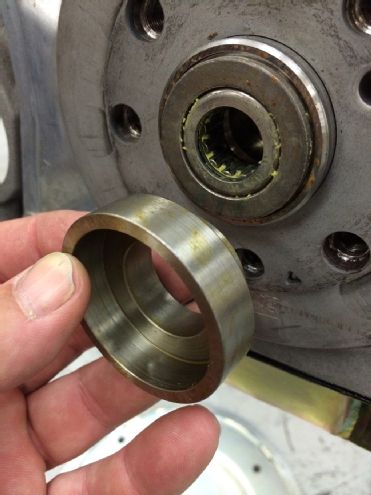
The stock bearing was removed and replaced with this solid bush for use with the 4L80E torque converter. This makes up the difference in distance between the crank and converter, as the nose of the latter locates in the bush.
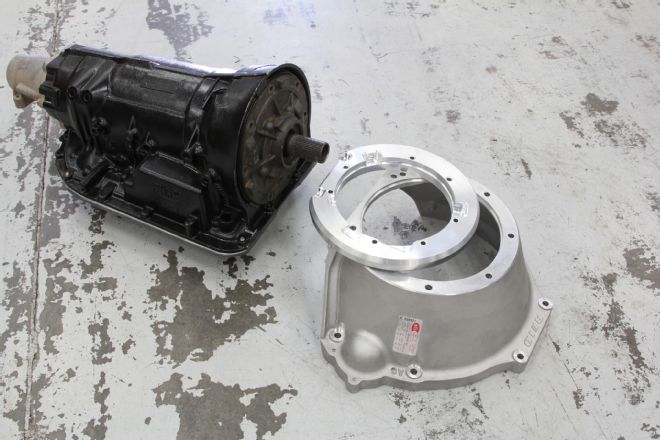
Hughes Performance supplied the 4L80E, the SFI spec 30.1 bellhousing and adapter to mate it to the Ford engine.
The adapter was bolted to the trans and then the bellhousing could be installed.
A new starter index plate was installed before the flexplate went on.
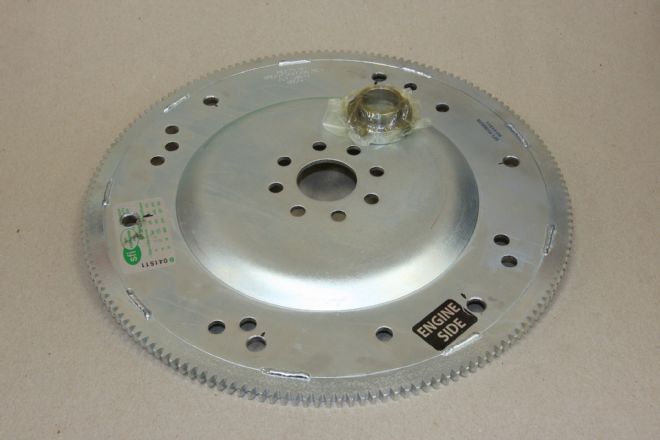
Here's the new flexplate and pilot bush.
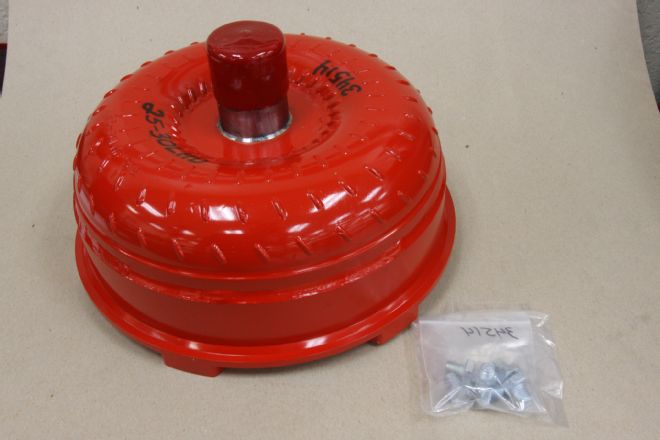
Supplied by Hughes with the trans, the converter is an 11-inch 2500 stall speed billet converter.
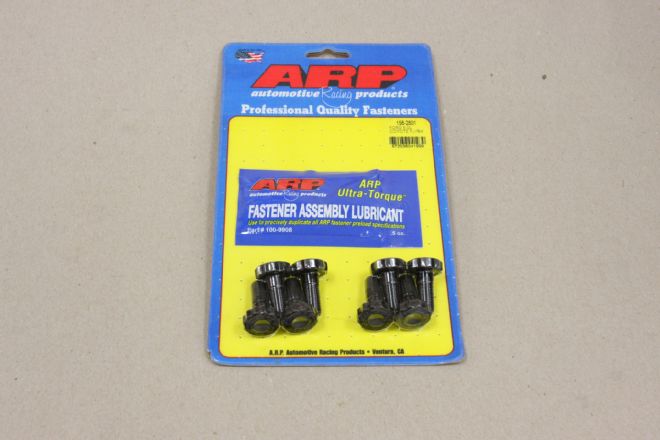
ARP fasteners were used throughout, these for the flexplate.
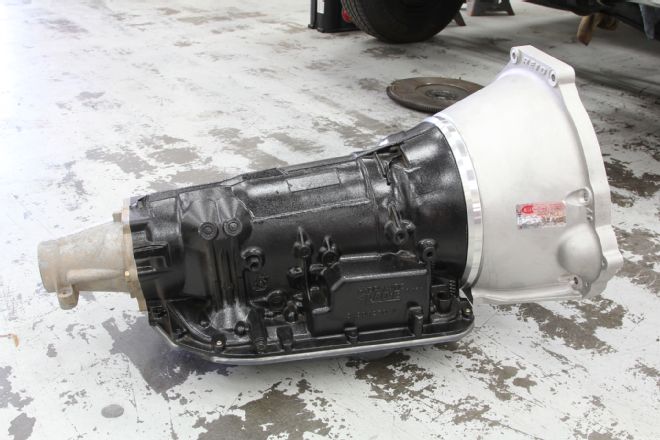
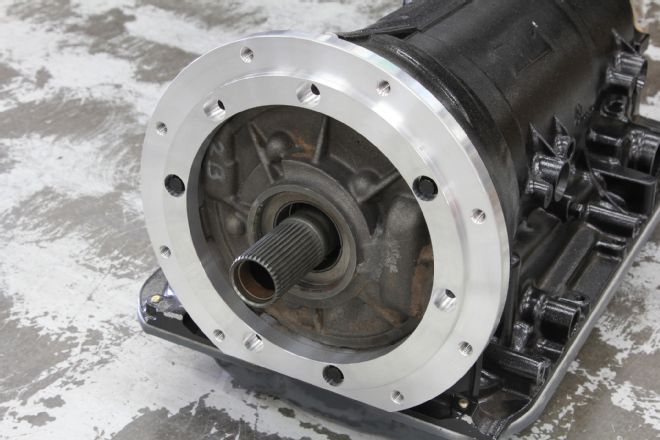
The completed trans assembly ready for installation.
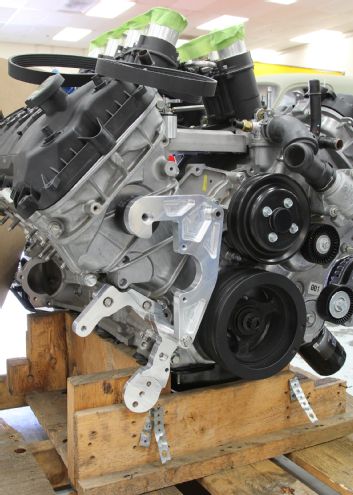
Here's the bracketry for the Vintage Air Front Runner A/C compressor and power steering components. Some holes on the block, which the lower bracket uses for installation, are already tapped, others for the upper bracket require some work.
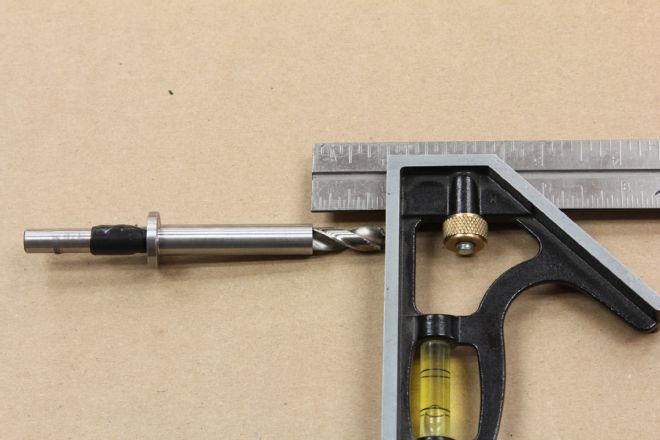
With a "Q"-size drill bit in the drill guide, 1 inch was left protruding, and the bit taped off to prevent the guide passing this point.
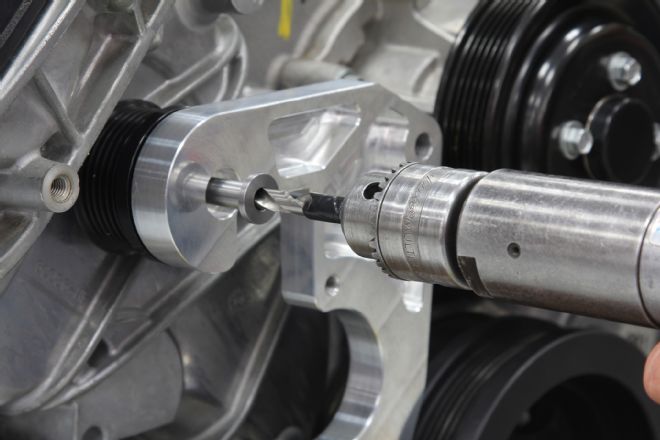
The upper bracket was bolted to the lower, already installed, then with the drill guide inserted 1 inch, the mounting boss was drilled 1 inch deep. The same was done with the upper mount hole to the right.
With the brackets removed, the bosses were tapped using a 10mm x 1.5 tap.
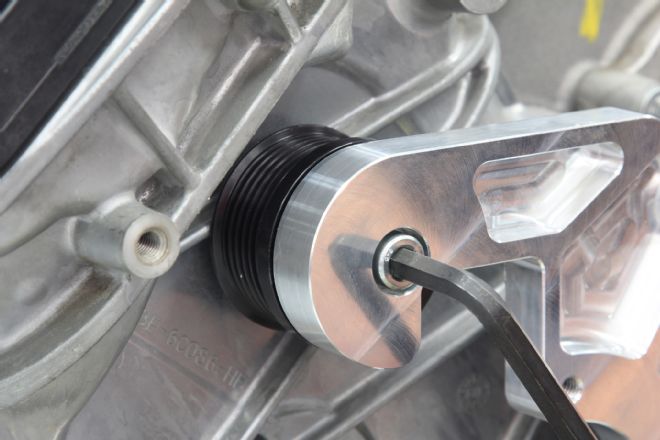
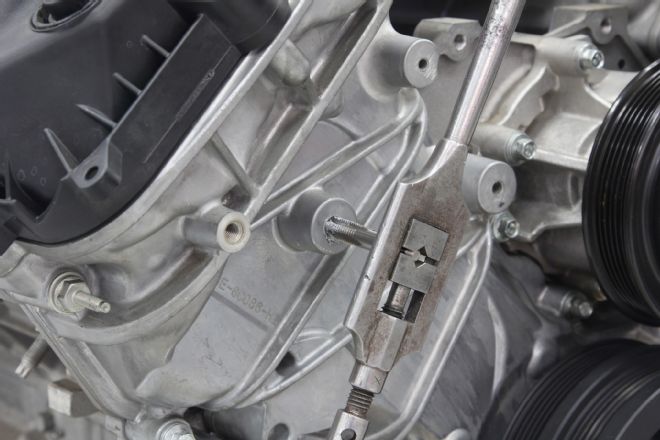
The brackets replaced, the mounting bolts were installed. The one on the head also mounts an idler pulley.
The power steering pump also bolts to the upper bracket, the pulley installed on the rear using a pulley installer, not a press.
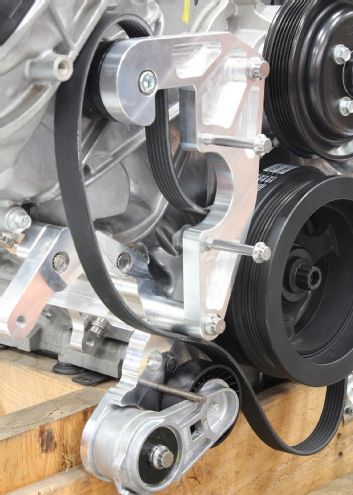
The belt tensioner is installed, a length of 1/4-inch rod used to lock it in place while the belt, P/S pump, upper bracket, and compressor are installed. The latter mounts above and behind the tensioner.
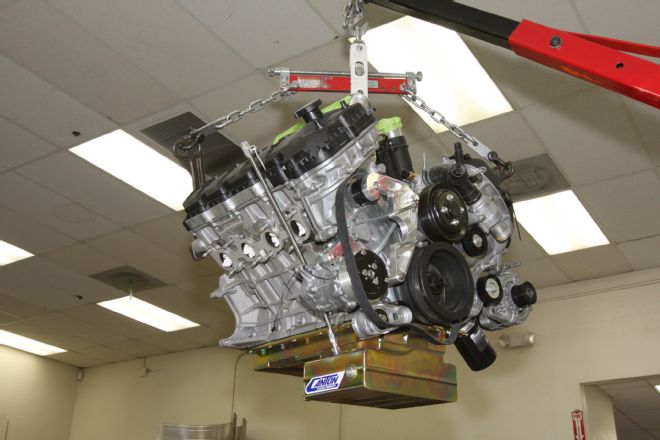
With all the new parts installed—Vintage Air A/C, Canton oil pan, and Lokar dipstick—the engine was ready for final installation. The trans was bolted up once the engine was in the car, as there was no room to drop them in as an assembly.
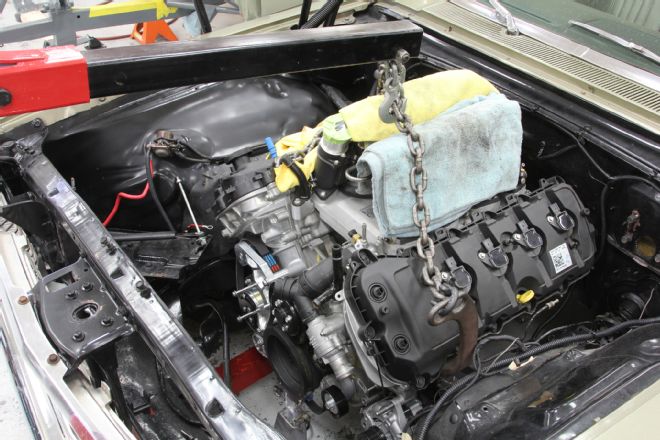
Obviously at an earlier mockup stage, we wanted to show these Ford brackets, which made connecting the chain simple. In fact, you'll have a hard time installing a Coyote engine without them, as there are no "normal" bolt locations to use.
With the engine mounted, it's obvious what a tight fit it is, and just why the A-arms and their mounts had to be modified. Yes, the headers were a challenge!
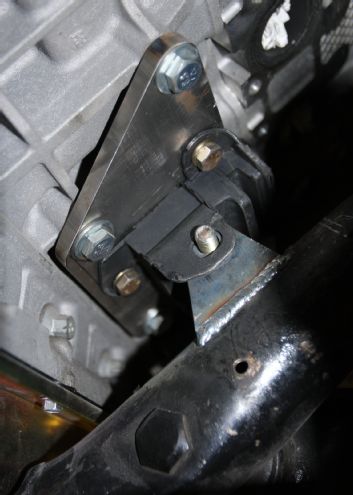
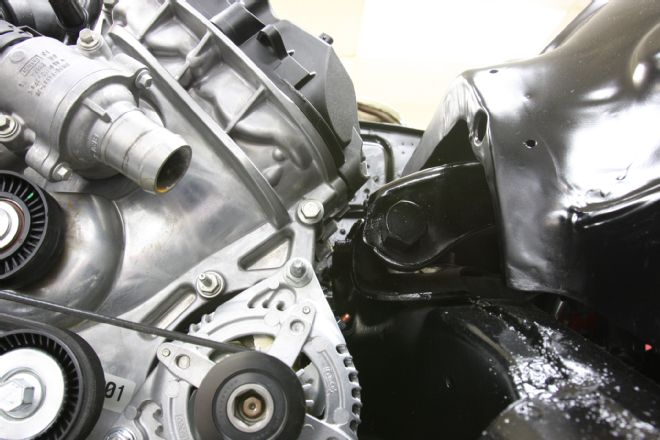
Hot Rods By Dean fabricated the plates bolted to the block, allowing SBC engine mounts to be used, locating on fabricated mounts on the crossmember.

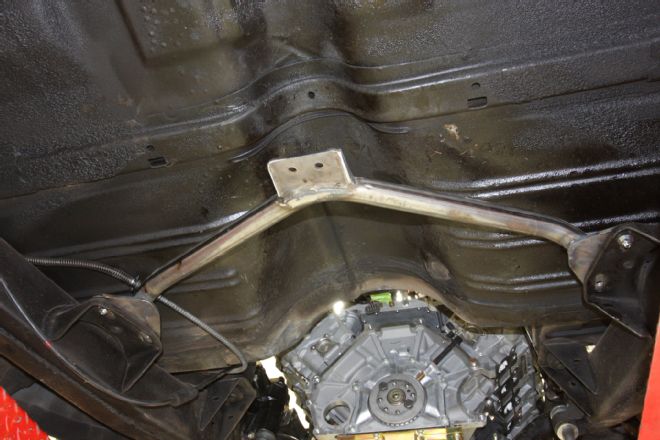
With the trans installed, and mounted to the custom crossmember, the Dynotech driveshaft was installed. Note how everything clears the stock floorpan.
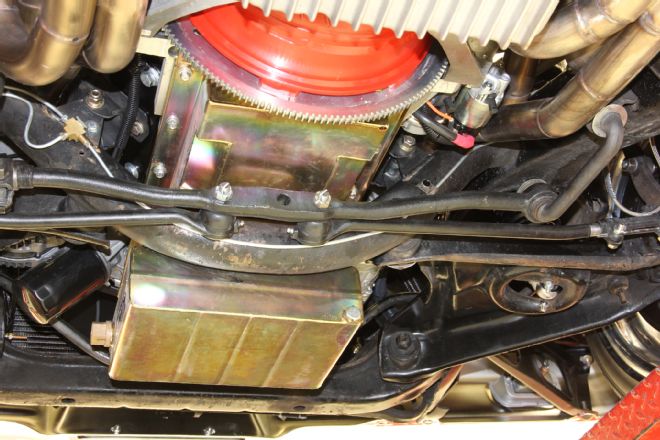
Looking at the completed installation from the rear, we see the Canton oil pan is a perfect fit, and the starter is accessible from below and removable with the headers in place. What you can't see here is the Borgeson power steering box on a fabricated mount as the stock power steering wouldn't fit. The center link was modified for correct alignment.
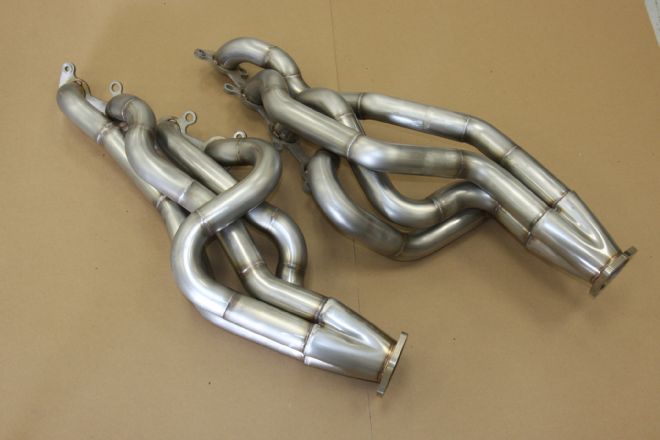
With an engine fitting this tightly, headers were always going to be a feat of fabrication, as well as a chore to fit, but Hot Rods By Dean pulled it off with this stainless set that can be removed and installed with the engine and trans in place.
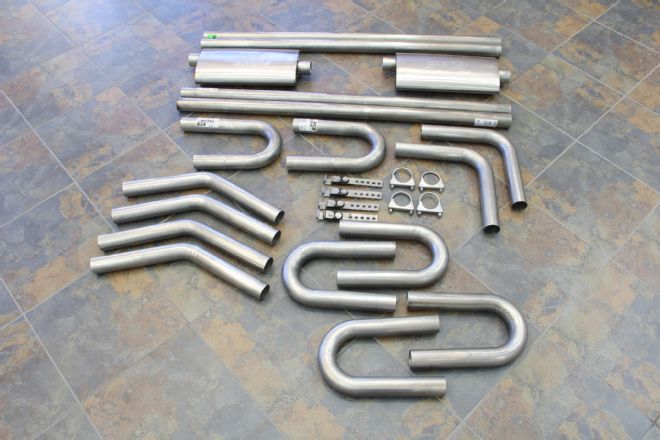
Borla Exhaust supplied this selection of 45-, 90-, and 180-degree mandrel bends, straight sections, clamps, and mounts, along with a pair of Borla Pro-XS mufflers, from which Hot Rods By Dean fabricated the complete exhaust system.
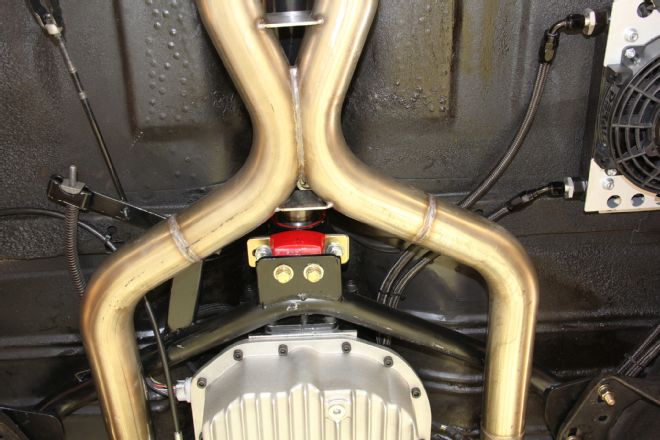
The exhaust system was designed to come together in an X just behind the trans mount...
… and then run on either side of the driveshaft before entering the mufflers. From the hesaders to the rear of the mufflers, the system is one piece.
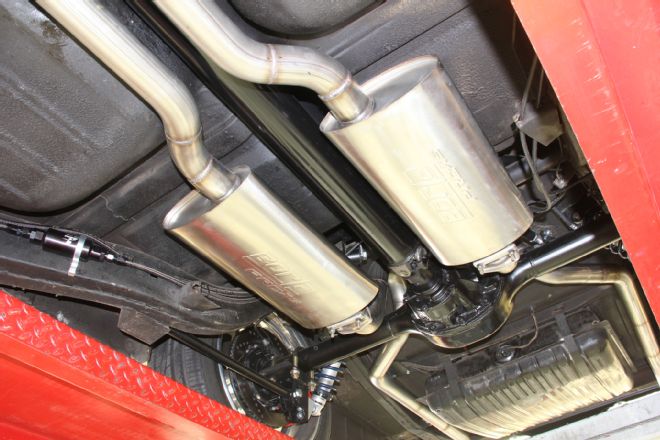
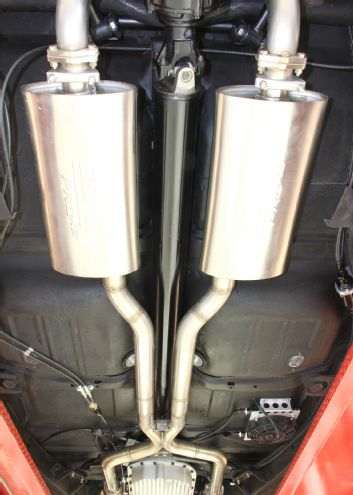
There are flanges behind the mufflers making the rear sections easier to install as they go over the rearend and exit each side of the gas tank.
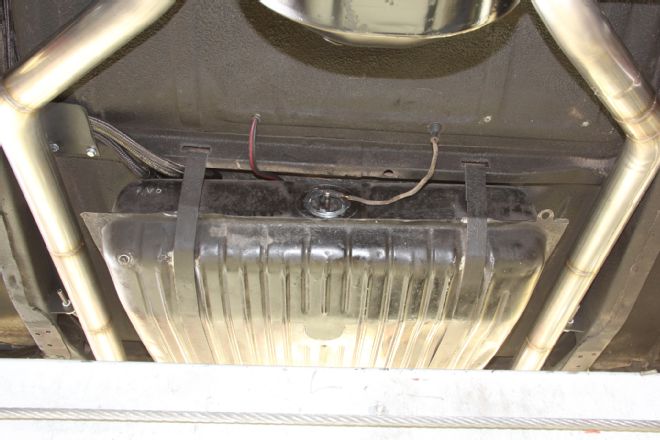
The gas tank is the stock item, but with an Aeromotive pump and pickup that fits the stock hole. They're available and compatible with many '50s and '60s cars. Even the wiring is stock!
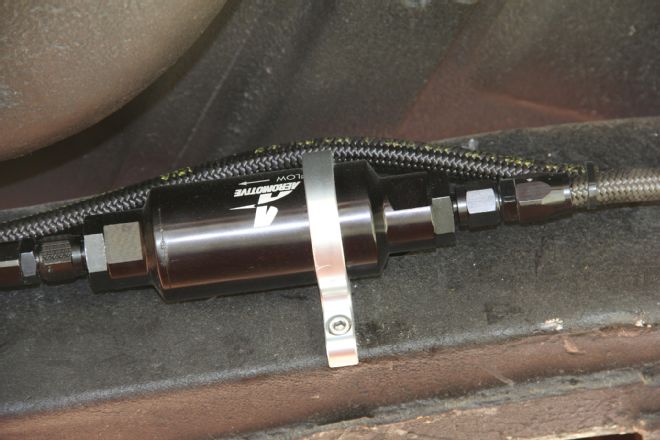
An Aeromotive inline fuel filter was installed on the right side chassis rail. That's the return line above it.

Notchead Accessories supplied line clamps in various sizes, used throughout the vehicle.
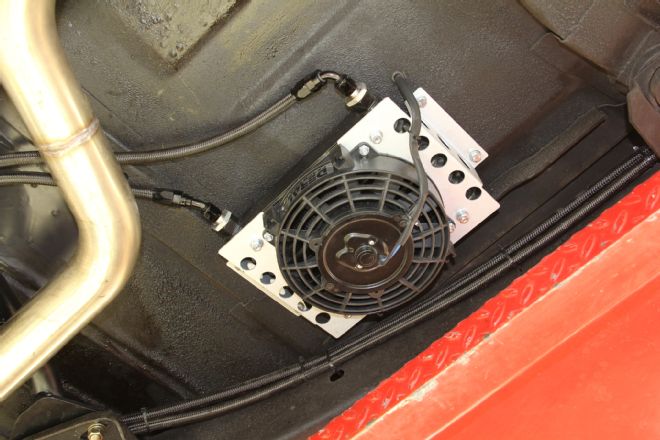
A Derale transmission cooler with electric fan was bolted through the passenger side floorpan under the seat.
Using a radiator from Classic radiator meant the original lower mounts could be retained.
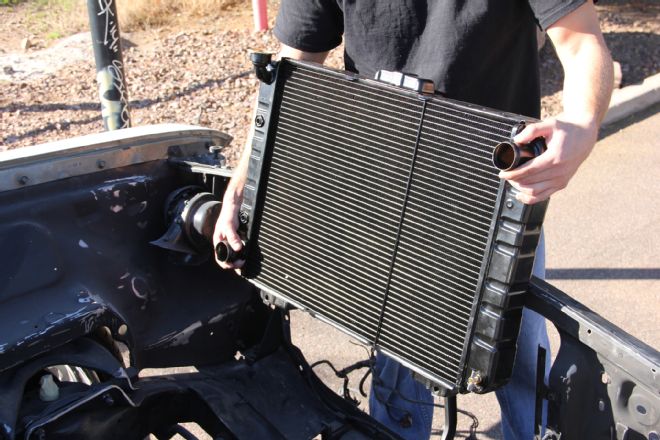
The Classic radiator is designed like a modern radiator, eliminating the need for the large expansion tank originally found on these cars. It does, however, need an overflow tank like a modern version. While modern in design, note it's a direct fit into 1961-1964 Galaxies with stock upper and lower mounts.
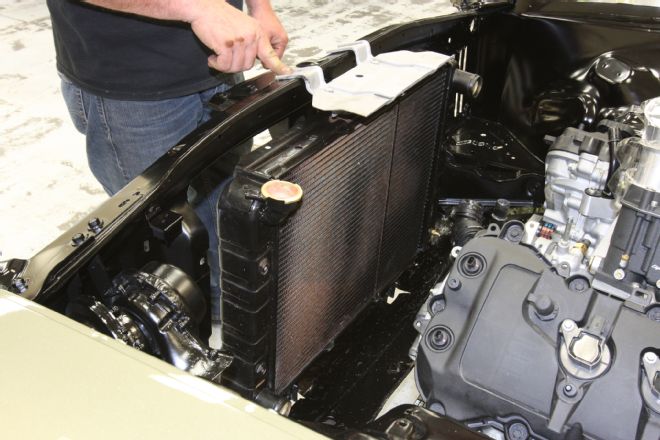
The stock upper bracket will go back in once painted black. Though Livermore built a shroud and used an electric fan, the finger guard section of the mount was retained.
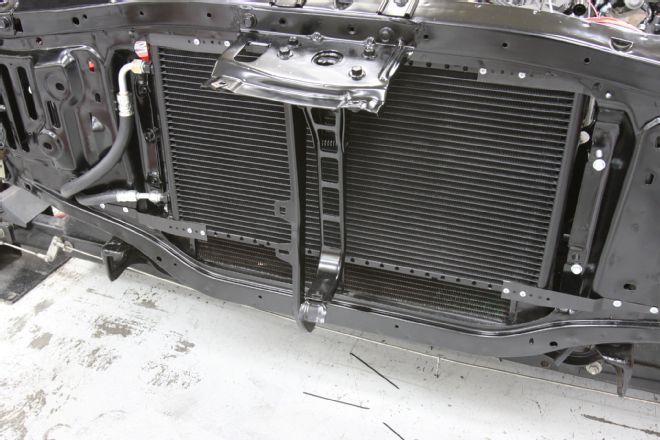
Speedway Motors supplied the Moroso filter–topped breather tank for the Coyote's evacuation system. The two tanks next to it are for the radiator overflow tank (front) and the power steering reservoir (rear).
With the radiator mounted, the Vintage Air condenser could be installed and plumbed.
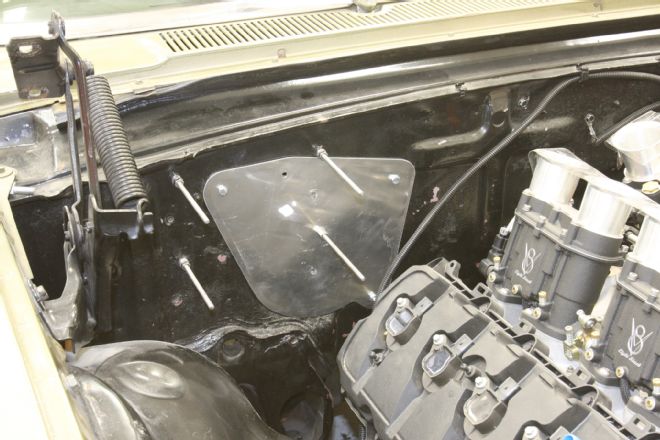
These four studs on the firewall may look odd now, but they serve a multi-mount purpose.
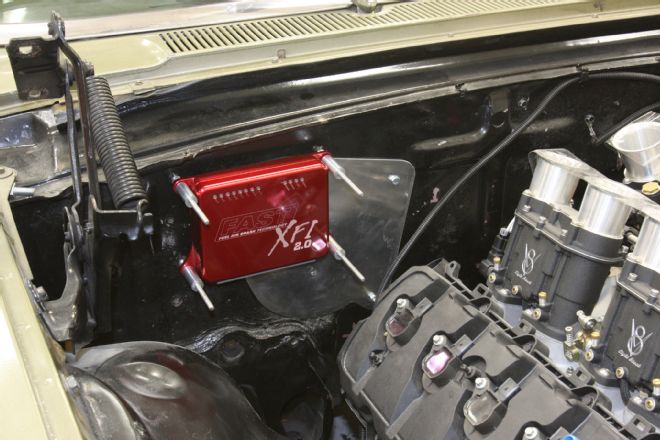
The FAST XFI module slides into place first, followed by spacers …
… then the FAST ignition module and more spacers …
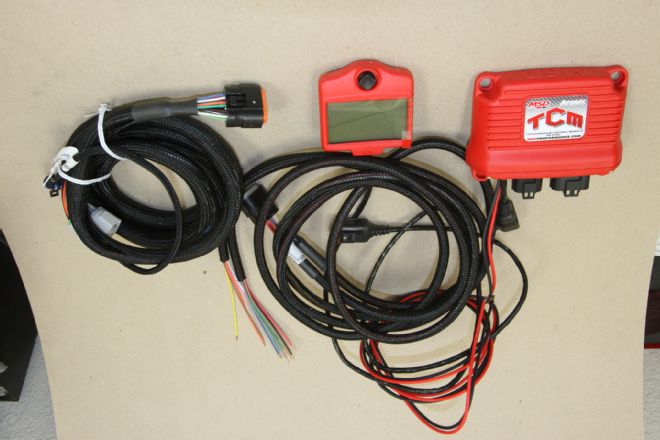
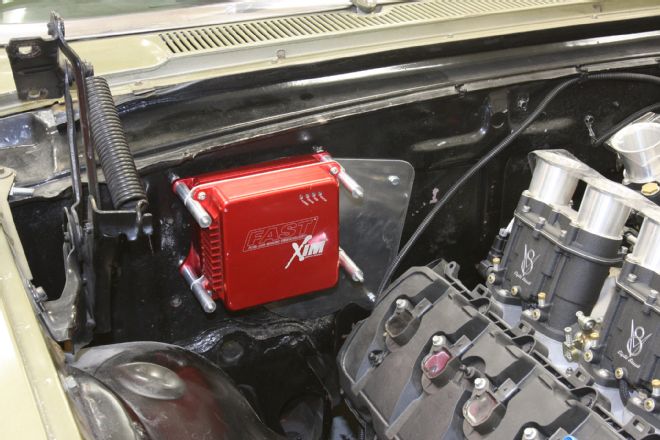
… then this MSD Atomic transmission control module.
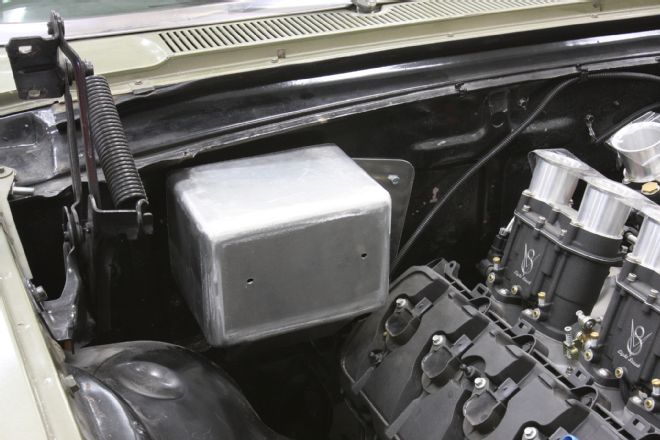
This aluminum cover was fabricated for the FAST and MSD modules. Once painted it'll "disappear" and look factory.

The main harness in the Galaxie is the factory wiring, but Hot Rods By Dean modified this Ford Racing power distribution module to supply power from the stock harness to systems such as the A/C and electric fan. A nice touch, it looks factory on the mounting pad on the inner fender.
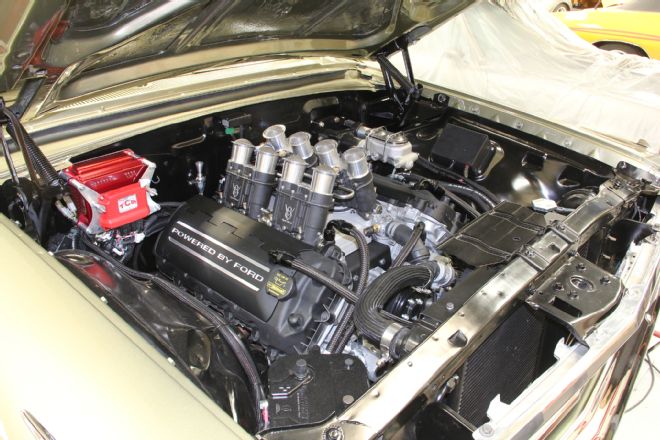
The completed installation without the cover on the MSD and FAST modules. Dean Livermore wanted it to look like a factory installation, and we'd say he succeeded, complete with battery in the engine bay and many stock-appearing components. A Lokar column mount cable kit was modified to work with the factory column shifter. Induction is courtesy of an 8 Stack EFI that has the appearance of a quartet of downdraft Weber carbs.