 When pushing your race engine to its limits, it is easy to float the valves.
While making our usual rounds of race shops, we came across a problem that plagues many racers and unnecessarily costs them lots of money-and we thought we'd share the solution with you. While performing a rebuild of a Late Model-style Chevy race engine, cylinder head specialist Kevin Troutman of KT Engine Development saw the telltale signs of classic valve float. The racer either didn't notice or just didn't bother to mention the problem to KT Engines, and the results were costly. But the good news is that valve float can be avoided.
Valve float occurs when the valvesprings are incapable of holding the valvetrain against the camshaft lobe after peak lift. This happens when either the weight of the combined valvetrain components or the rpm speed of the engine creates so much inertia that the spring is no longer able to control the valve. The most common response to valve float is to increase the strength of the spring so that it can better control valve motion. But stronger springs generally weigh more and cause their own problems. Achieving the optimum strength-to-weight ratio is a delicate balancing act for every engine builder.
 The damage to this valve stem tip is an obvious sign of valve float, which is caused when the spring slams the valve back into the rocker.
The most efficient and dependable race engines are able to hit the sweet spot in the triangle created between strength of the valvespring, weight of the valvetrain components (lifters, pushrods, rocker arms, valves, retainers, locks, and springs), and the engine's peak rpm levels. In order to maintain good valve control at higher rpm levels, many engine builders have begun reducing valvetrain weight (and therefore the overall valvetrain mass) by using beehive-shaped springs.
Comp Cams is leading the development of high-performance beehive springs, and the results have been good so far. The beehive-shaped spring has several advantages when used correctly. First, its conical shape makes it smaller at the top. This reduces mass in the area of the springs that moves the most every time the valve is opened. Second, the smaller size means that a smaller retainer is also used, reducing mass there as well. Third, the beehive spring is a single-spring design by necessity, and while it cannot be made with as much spring pressure as a more conventional, double-nested design, the simpler design makes it much lighter. Beehive springs are also used in GM's LS1 and LS2 engine designs, making it legal where rule books require "stock-type components only."
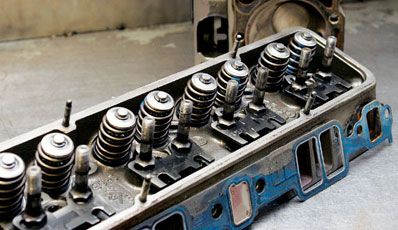
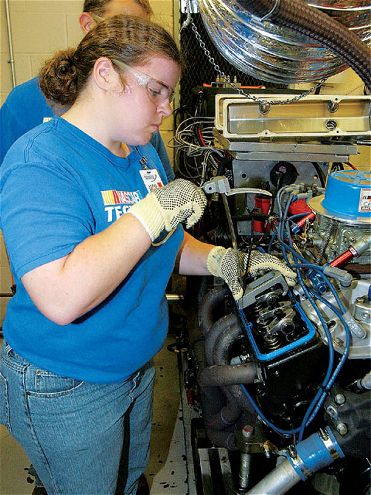
 KT Engine's cylinder head specialist Kevin Troutman pulls all the valves to inspect for damage.
The lighter overall weight means that a smart engine builder has more options available for his build, such as using less spring pressure to get the same results. He can also maintain spring pressure to increase engine rpm before valve float occurs. Or he can experiment with even more radical camshaft designs that weren't possible with conventional springs. The one thing that must be remembered, however, is that while beehive springs can help offset the effects of valve float, it is still possible to float a valve when the right conditions are reached.
The Clues During teardown, Troutman says he first noticed the signs of valve float as soon as the rocker arms were pulled to reveal the tips of the valve stems. Because the intake valve is larger than the exhaust valve, and therefore heavier, it almost always enters a float condition first. Whenever the valve floats, the "floor" of the system, or the closing ramp of the cam lobe, falls out from underneath the system. This creates gaps along the line of components between the cam and the valve stem. When the spring is finally able to overcome the inertia of the moving valve and begin closing it, its movement of the valve is uncontrolled. This movement can be very harsh as the spring slams the valve closed. Because of this, one area of high wear is the valve tip, which is repeatedly smashed into the pad or roller tip of the rocker arm.
 The cause for the float becomes quite evident when the valvesprings are checked.
A damaged valve tip will most often appear as though part of the metal has flaked off. When you have this condition, it is sometimes possible to grind a few thousandths of material off the end of the valve stem, but this is rarely worth it. Grinding down the end of the valve stem, even if only a few thousandths of an inch, changes the valvetrain angles, which can lead to other problems. Also, even if you grind off the portion that is visibly damaged, there is no easy way to tell if the remainder of the valve hasn't been compromised. It's far better to throw the valve away and install a replacement.
The action of the valve being slammed closed is also quite hard on the seats-both at the valve and the combustion chamber. In the worst-case scenario, the valve is smashed against the seat of the combustion chamber so hard that the valve "tulips" or becomes warped. It's easy to tell when this happens, even if you cannot see it, because the valve won't hold a seal against the seat. In less extreme cases, the seat cut into the valve will be pounded until it becomes concave. This was the situation found on our engine. The seat in the combustion chamber may show signs of damage by being wider than originally cut. On a typical three-angle valve job, the 45-degree cut where the valve actually seats against the chamber is usually only 0.040 inch wide. The intake seats in the combustion chamber on this engine were nearly 0.100 inch wide. Particular care will also be required when inspecting the lifters and camshaft after the short-block is torn down.
 Here, you can see how valve float has pounded the seat on this exhaust valve and made it concave.
When he spotted the problem of valve float, Troutman immediately guessed a couple of possible reasons for the problem. But because the valves didn't show any signs of float when the engine was originally built and dyno'd, the most likely culprit was simply worn-out springs. That is easily detected by checking the spring pressures against the rated pressures when they were installed. Troutman's records indicated that when the engine was built, the Comp springs were rated at 160 pounds on the seat and 340 over the nose with a 1.760-inch installed height. Peak valve lift is 0.485 inch, which is well within the springs' range, safely managing 0.530 lift before going into coil-bind.
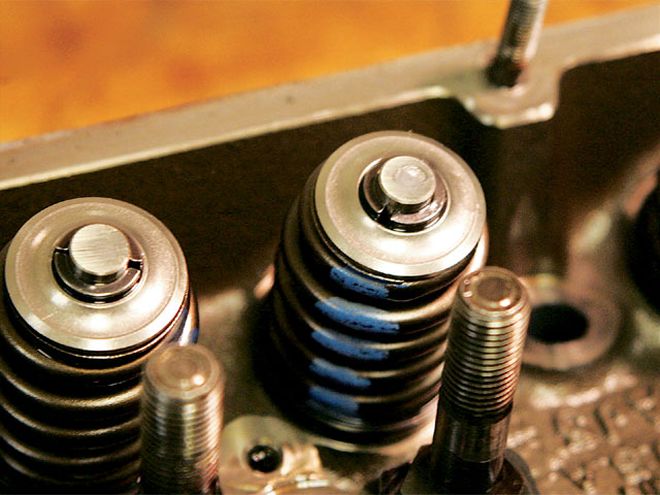
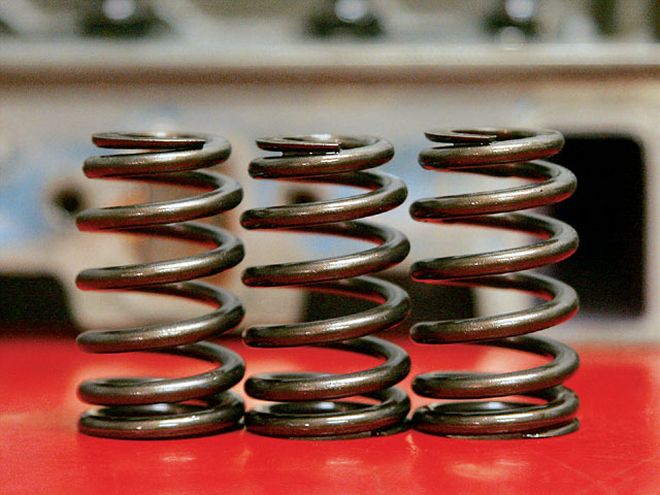 Even if you don't have a spring pressure checker available, you can still recognize a failed valvespring. Notice that the spring on the left is slightly shorter than the one to its right.
On the scale, it quickly became obvious that these valvesprings had been raced far too long. Troutman checked several springs, and the average seat pressure had dropped 40 pounds to 120, and the spring pressure at max valve lift (over the nose of the cam lobe) dropped approximately 90 pounds to 250. Normally, new springs will drop 5 to 10 percent of their total spring pressure from breaking in, but these amounts are indicative of springs that are worn out.
It turns out that the springs had been run all season, and they probably should have been changed around midseason. There was no fault with the springs. The combination of a strong cam lobe and high rpm levels meant the useful spring life was limited. Buying a new set of valvesprings midseason may be tough to swallow for some race teams. However, in this instance, the investment of a new set of springs would have been worth it because new springs, valves, and retainers must now be purchased. In addition, touching up the valve seats in the combustion chambers is necessary at almost every rebuild, but valve float can be so harsh that the hardened seat inserts must also be replaced. In the long run, it would have been much cheaper for this racer to purchase an extra set of springs.
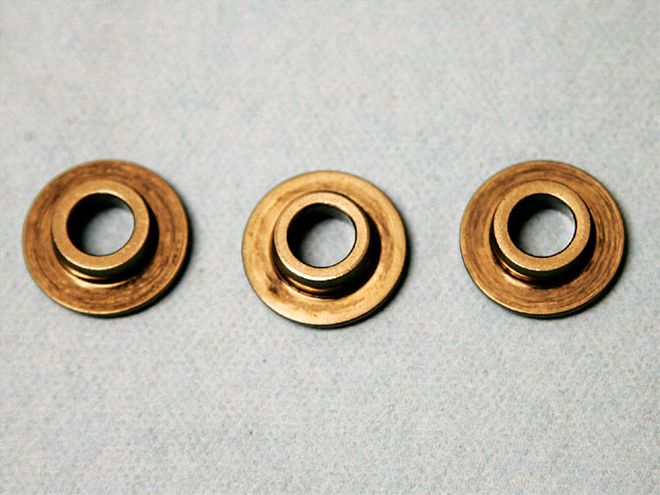 Titanium valvespring retainers are softer than their steel counterparts and have a shorter usable life. These, however, had to be thrown away earlier than usual because valve float caused the springs to eat into the bottom side of the retainers.
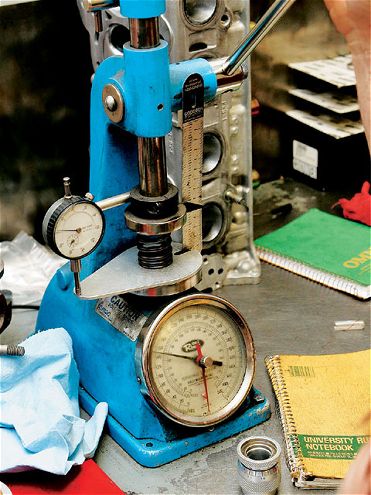
The best way to avoid the damage of valve float caused by worn-out valvesprings is to check spring pressures regularly. On-head spring pressure testers can be purchased for anywhere between $75 and $250 and should be in the toolbox of every race team. It doesn't matter if your spring tester finds the same rates as your engine builder's spec sheet. Simply check the rate of the springs when the engine is new. After a couple of races, the springs will drop approximately 5 to 10 percent of their original pressure and then stabilize. Log your pressures and check a handful of your springs randomly after every second race (or more often if you are running long races). The springs' pressures should be the same within a pound or two. Once the pressures begin dropping again, you can be confident it's time to replace the springs. Sometimes you will have only one spring go bad, but they will most often begin failing as a group.
 The best method to spot failed valvesprings is to check the spring pressures regularly with an on-head spring checker. Catching and replacing one set of springs before they cause damage to other components can more than cover the cost of the tool.
If valve float is a problem, even with fresh valvesprings, Troutman says there are other options available to you. Generally, you must try to change one or more of the components of the triangle we talked about earlier: valvetrain component weight, spring pressure, and rpm levels. The most common solution is to simply raise the spring pressures. Often, however, that isn't an option because the rules limit the types of springs you can use. The next option is to limit valvetrain component weight. If you're running steel retainers and titanium is allowed, you may have to invest in a set of titanium retainers.
Troutman also recommends always running the shortest valve stem and pushrod combination possible that still allows you to achieve maximum valve lift without getting into coil-bind. Any extra valve stem length is just extra weight you have to move up and down every time the valve is opened. Shaving 0.050 off the valve stems may not sound like much, but every gram of weight saved helps. Finally, when all else fails, you may have to change your gearing to affect the rpm range the engine experiences on the track.
In all, valve float is something each and every one of us should be able to easily avoid. A little routine diagnosis of the springs coupled with proper component selection means that you should never experience a valve float problem.