In our last installment of the Double Take 360 series, we discussed the virtues of the 340 "X" head. However, it would not be the "X" head that would be installed on our 360, but rather the lowly, late '70s smog heads-#4071051 castings-that came with our E58 salvage yard refugee engine.
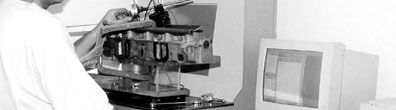
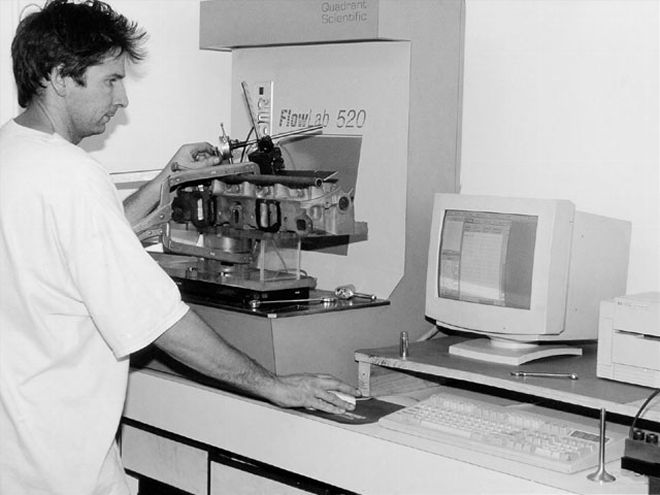
To get the most from these stock small-block smog heads, we performed some basic intake porting in our January 2000 issue to see how much flow we could unlock on the intake side. Since our aim with the stock heads is to put together a budget combo, we weren't going for the full-on Pro Stock porting job, but realistic do-it-yourself street porting. Using the equipment at Specialized Motor Service in Riverside, California, I performed all of the cylinder head machining using a Serdi 100 seat and guide machine, while the subsequent port modifications were done at home using an air die grinder and a selection of carbide bits and grinding stones-a true home porting job. All of the flow tests were complements of airflow expert David Vizard's Quadrant Scientific flowbench, which we used last year in our series on big block heads ("Go With The Flow," Mopar Muscle, January, February, March 1999).
This issue, we'll tackle the exhaust side and, in our effort to outperform the fabled "X" head, provide you with the information so you can be armed with your die grinder in hand.
Exhaust: Where To Begin
On the exhaust side, the 360 heads already have the amply-sized, 1.60-inch diameter valve-the same diameter used on the high performance 340s. Nothing special was done here, except to use the sweeping cutter out to the gasket line, as was done on the intake, to reduce valve shrouding. The valve's seat location was dropped slightly with a 5-degree topcut in order to even the exhaust valves to the height of the intakes. (If anything, the exhaust should be lower than the intake.) The seats were a conventional 45 degrees, with a 30-degree top cut and a bottom cut of 75 degrees. We toyed with the idea of keeping things cheap and reusing the stock exhaust valves, but made a change to new Milodon Street Stainless valves. These offer a slight improvement in flow and greater durability than our used stockers. By reusing the stock exhaust valves, the cost of the heads can be reduced by about $100.
Rounding out the other machining possibilities, the guides were judged to be acceptable, if slightly on the loose side, and nothing was done there. Credit the flash-chromed stems on the E-58 heavy-duty police 360's valves for the low guide wear on this high-mileage salvage yard motor. Since the cam we will be using is conservative-with only .480-inch lift-the tops of the guides did not need to be machined down. Also due to the cam choice, the regular replacement umbrella-type valve stem seals will work with the matched single springs (Competition Cams #901-16), precluding the need to cut the guide bosses for PC-type fixed valve seals. Milling would wait until we finished with the porting, and then we'd figure out how much we'd need to skim to dial in the chamber volume, and thus, the compression ratio.
Exhaust, Easy Flow
We had our intake numbers and were looking to achieve 70-75 percent of peak intake flow on the exhaust side, or about 175 cfm. As on the intake, the 340 "X" head would serve as our benchmark, and the stock ports were flowed to get an idea of where we were. These numbers are in Table 2, Columns 1 and 2 on page 68, respectively. In the street lift ranges, we were surprised to see that the 340 "X" head and the 360 smog head ports flowed essentially the same. In fact, the 360 head pulled better numbers down low, indicating that the seat on the smog heads was better in the particular heads we tested.
At high lifts, the 340 head had a marginal advantage over the later heads. Examining the ports, there was little difference in port design between the two castings other than the air injection passage protruding in the low-speed area on the floor of the 360 port.
We cut our seats on the Serdi using the production 45-degree seat angle, a 30-degree top cut, and a 75-degree throat cut-your basic three angle valve job. The valve was actually sunk some .020-inch to set the seat height equal to the intake, and the 5-degree chamber sweeping cut was taken down to meet the top cut of our new three-angle seat. With the machine work done, we were ready to flow our ports. The flow results are shown in Table 2, Column 3. As expected, the flow was pretty bad, not even equaling a stock 360 smog head.
As expected, you ask? The 75-degree throat cut used to finish our seat bored down into the bowl, leaving a large sharp step in the direction of flow nearly all the way around the seat. Air coming out of the chamber and around the seat smacks squarely into the step like it's hitting a brick wall. Forget about flow. While on the intake side we had a similar step after cutting the seats-the air is coming from the other direction and is not nearly as affected because it skips over the step rather than running into it. The lesson? Always avoid a stepped mismatch in the direction of flow, particularly with intake manifold, headers, etc., where two parts of a passage join.
The next step was to blend the machined throat cut into the bowl below. Using a carbide cutter, the 75-degree bottom cut was blended to 90-degrees straight into the bowl, totally eliminating the step in the bowl left from the machining. An eyeballed 0.140-inch of the machined 75-degree cut leading to the seat was left undisturbed. The carbide cut surface was then blended in with a grinding stone. The bowl throat area was opened noticeably through our efforts. It was a quick and easy cut-and-blend job, and resulted in the flow we see in Table 2, Column 4. We could call the exhaust ports done at this point, as the flow from .350-inch on up was increased 20-25 cfm. Lower lift flow was also up.
Looking for other areas to clean up, we turned our attention to the air injection hump in the floor. The floor of the Chrysler small block heads are hollow in the shortside area, a poor design, making this a fairly dead area in terms of flow. The W2, the late-swirl Pre-Magnum, and later Magnum heads have a much better form in the exhaust shortside. We had to work with what we had. First we drove in a piece of brass rod to fill the hole (the rod was staked at the exhaust manifold side to hold it in). Next, the hump was blended out, yielding the flow shown in Table 2, Column 5. Not much gain, confirming that this is not a busy area in terms of the flowpath out of the engine.
With not much happening on the floor, we turned to the roof. The roof comes out quite flat leading from the bowl. Then, halfway to the port exit, the roof flares upward rapidly. Ideally, we'd like to see a gradual angle sweep up from the bowl and out the port exit. However, there is water right behind the hump where the roof changes direction. We were already satisfied with the port's flow, so we just gave the roof a mild blending where the angle changes heading out of the port. This netted us a few more cfm as shown in Table 2, Column 6.
Finally, we went back to the valve itself. The Milodon Street Stainless exhaust valves have a fairly thick margin. Exhaust valves typically respond well to having a radius put on the margin to help get the exhaust gases around the face of the valve and into the port. With this modification to the valves, we saw the flow move up as reflected in the numbers seen in Table 2, Column 7. A few more cfm across the board. Our exhaust ports were up by solid double digits over the 340 "X" heads from as low as .250-inch lift, and nearly 30 cfm at the top of the lift range our engine will see. At higher lifts the gains were even greater. It only took some very simple port mods, even though we were running the same sized valves.
 The last step was to cc the chambers so we could get an idea of how much we'd need to mill the heads. We were after a volume which would yield a 10:1 compression ratio. Stock chambers measured 70cc, while ours gave 76.5cc with the flat Milodon valves installed. Doing the math, we would need either a .030-inch mill to give us the compression we were after, or we had to substitute a thinner head gasket and cut less. Each thousandth off the head lowers the volume by 0.21cc.
The Wrap Up
The chamber mods included the initial Serdi machined de-shrouding cuts outwards from the valve seats, plus final hand blend-in and polish. The mods made for a substantial chamber volume increase to 79.9cc from the stock smog 360's 70cc. That alone would have a serious impact on compression ratio, to the tune of a full ratio point lower on a 10:1 engine like ours, and 0.6:1 of a ratio in a stock 8:1 compression 360. Since the Milodon valves that we used have a flat face, we regained 3.4 of these cc's with the valve swap (the stock valves are dished on the face). The net effect is that our chambers with unmilled heads spec'd out at 76.5cc.
Since our short block is equipped with Federal-Mogul's flat top pistons, we can achieve a high street compression ratio with the appropriate milling and head gasket thickness. Each .001-inch skimmed off the head will equal 0.21 of a cc volume reduction. Milling .010-inch will get back 2.1cc, so milling .030-inch will get the chamber volume just about back to stock. On our engine, with the block decked to give a positive deck height of .010-inch, we calculated that the heads will need to be milled .030-inch to give us a real 10:1 compression ratio. If you're planning on retaining stock dished, low-compression pistons, look out. The already abysmal compression ratio will be dropped further (unmilled) unless the appropriate steps are taken to minimize chamber volume. Even the best flowing heads won't make up the difference in lost power from lack of compression. Keep it in mind.
So what have we got? Other than the cost of the valves and seat machining, and the subsequent surfacing to be done prior to final assembly, all of the modifications made to the heads are an investment in time. The cost is broken down in the accompanying chart. Sure, the porting takes some skill and a couple of weekends, but if you want to go fast for a minimum of dollars spent, you have to pay the piper, be it through know-how, or time, or both. We hope we provided the know-how here, the time is up to you. By our measure, these lowly 360 smog heads should make for a sweet running small block. Just how sweet? We'll just have to wait 'til next month when our heads meet the short block and the assembly meets the dyno.
Table 2: Exhaust Port Modification Sequence Col. 1*Col. 2*Col. 3Col. 4Col. 5Col. 6Col. 7* 360 Head:360 Head:360 Head:360 Head:360 Head:StockStock3 Angle-ThroatAirPortRadiusLift340 "X"360ValveCutInjectionRoofExhaust(in.)HeadHeadJobBlendHumpBlendValve0.0000.00.00.00.00.00.00.00.0259.110.410.412.212.412.313.00.05021.823.322.725.925.925.927.40.{{{100}}}45.348.946.050.350.050.251.60.15069.672.570.575.774.675.477.60.{{{200}}}94.597.192.1100.5100.7100.6103.50.250111.7113.9109.7121.3122.7122.4124.90.{{{300}}}122.4122.6120.1137.5138.4139.3140.20.350129.8129.2124.4149.1150.3151.9152.30.400134.6133.1126.6157.5156.9158.5159.40.450137.7134.4127.2161.8162.2163.5{{{164}}}.40.500139.7137.1127.7166.6165.0167.4168.00.550141.0137.2127.3167.7167.5172.1174.00.{{{600}}}142.2136.5127.6166.6168.1170.5174.9Figures plotted on graph "Exhaust Flow Comparison." Flowed at 28-inches H2O on Quadrant Scientific Flowlab 520
Small Block Cylinder Head Cost Breakdown*Full Seat and Chamber Machining. Refacing of (8) Intake Valves To 30 degrees$275.00Misc. Porting Supplies Consumed12.00Head Milling75.00(8) Milodon Street Stainless Exh. Valves #45645103.60(8) Milodon Street Stainless Int. Valves # 4564095.60Total cost on our heads$561.20*Guidework or hired porting extra if required