Tech Center
When I think about Optima batteries, I think of the times just before and right after SEMA. Every year for the last four years or so Optima has been putting on what they call the Optima Ultimate Street Car Invitational and it's one of the premier events of the year. But the event is not what Optima is all about; they are also known for making batteries, and really good ones at that.
A lot of things are not fully understood about batteries like how they work, or a better question, why they quit working when you need them most? But for the most part, people know that there is a positive side (red) and a negative side (black) that makes starting and running a vehicle possible.
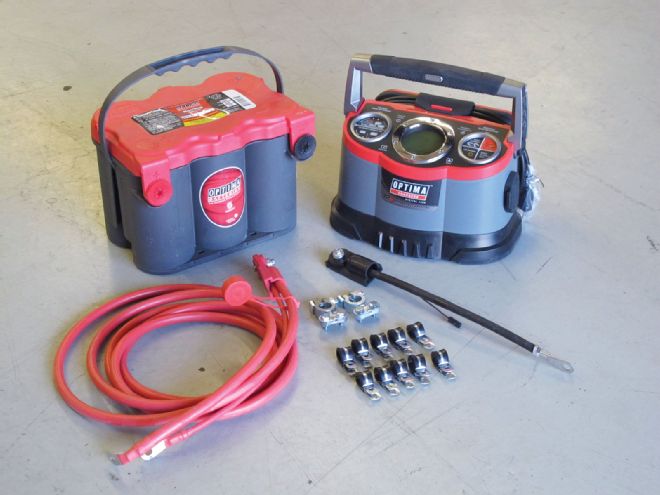
Let's start with the battery itself, and in this case, an Optima Red Top battery. Unlike traditional lead acid batteries that can leak when flipped over, the Optima battery is filled with AGM (absorbed glass mat) and not gel. The Optima also has six tightly wound spiral cells inside the battery that are 2 volts each, and when all the cells are connected together they form 12V. Because the Optima battery is sealed, it can't leak anything, so you can get creative with mounting. Another bonus of the battery is that you won't have to worry about battery acid leaking on your paintjob or frame like other lead acid type batteries.
A great functioning battery is the heart of every vehicle on the road, but the trouble is that we never know when they are going to go completely dead. By removing the battery from the vehicle's electrical system, it is easier to determine if the battery is OK or not. This holds especially true when working on vehicles that have been modified with fuel injection, high-output radios and amps, etc., because they hold voltage in small capacitors that can trick the battery test device. So a good rule is to always test the battery with the power and ground removed.
01 If you've read the Nov. 2011 issue of CLASSIC TRUCKS, you'll know that my firewall was moved back and cleaned up a bit. This meant that the stock battery location was no longer available, nor did I want it to be in the engine bay.
02 Now the next question was where would the battery fit and what can I use to hold the battery in place? I looked under the truck and found several locations, but under the bed near the right rear tire looked like the best location.
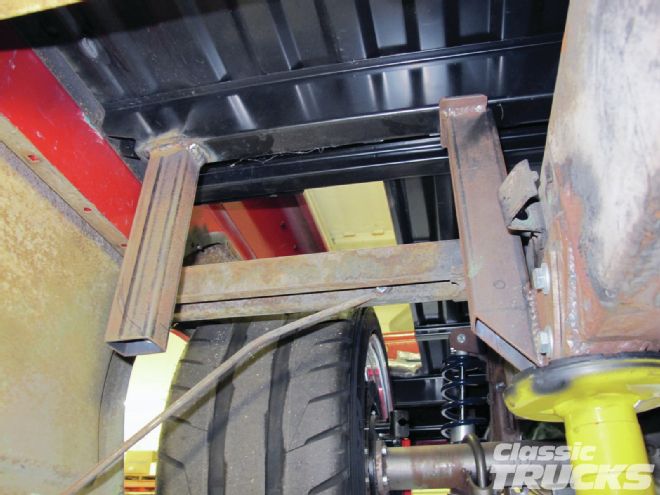
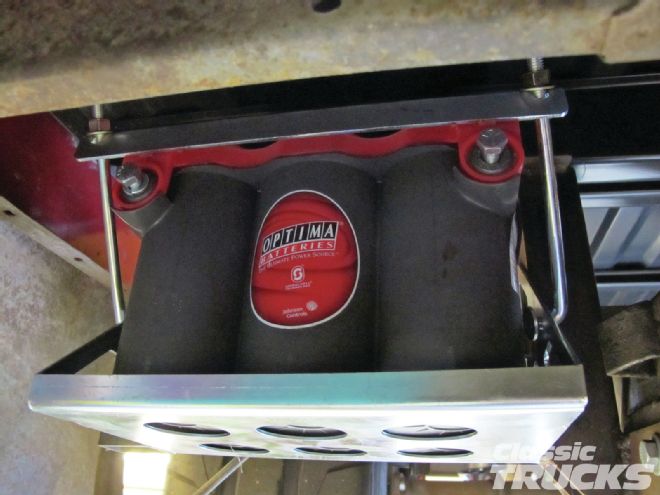
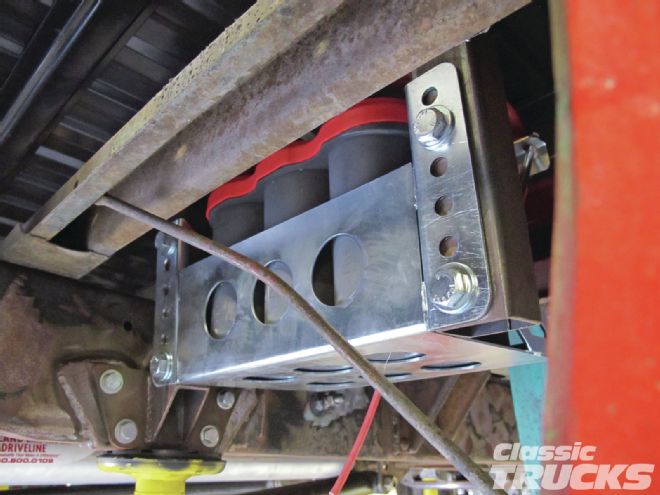
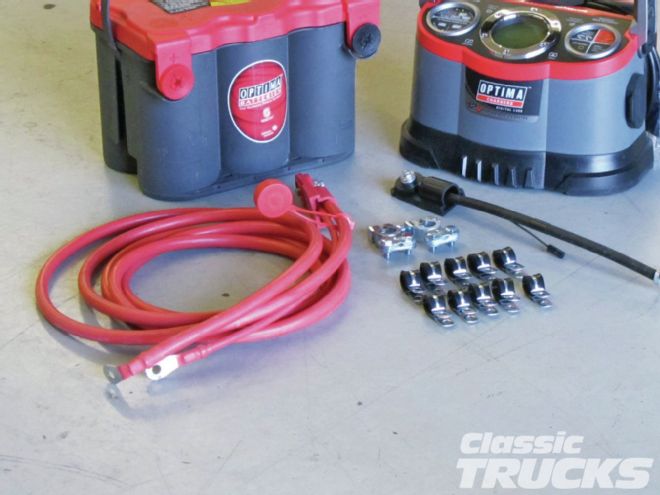
03 I used a universal battery tray from Summit Racing that not only provides a solid mount for the Optima Red Top, but I can relocate it under the bed.
04 Notice the multiple holes that can be used to mount the battery tray to the frame or wherever.
05 I used the Red Top battery since it will deliver more than enough juice to start the vehicle - 1,000 cold-cranking amps to be exact, and that's a lot. But every now and then even a good battery needs to be charged or looked at and that is why I also picked up a Digital 1200 12V Performance Maintainer and Battery Charger. Not only can I see the condition of my Optima battery, I also can use it to help maintain the battery in those winter months.
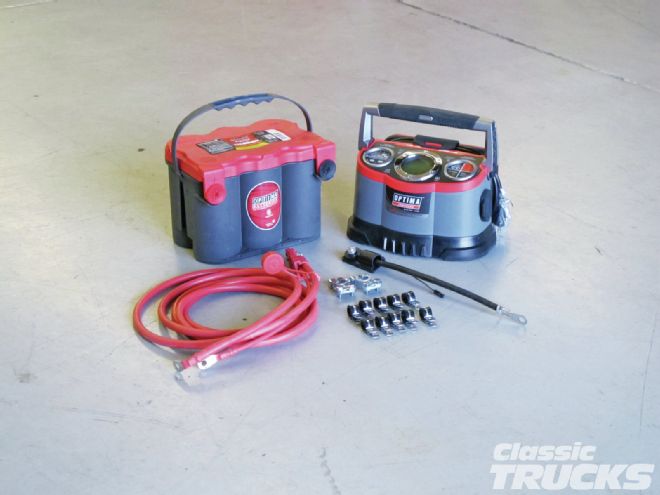
06 If you have a quality battery, you need to think about how to run all that energy to the starter and other accessories. I also ordered a battery cable kit that relocates the cables from the engine bay to just about anywhere the cables will reach.
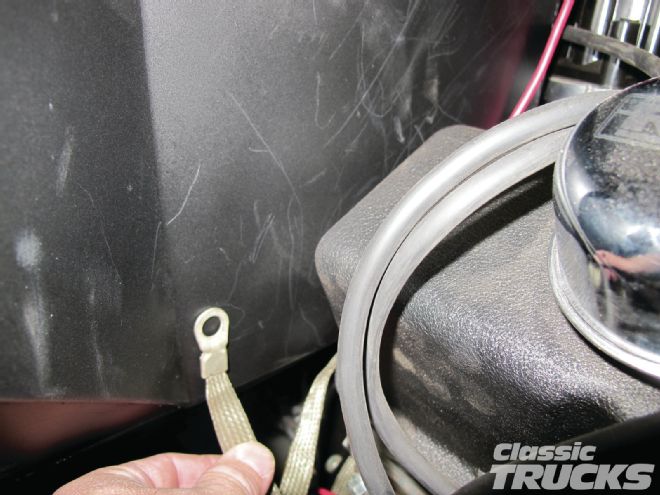
07 The ground cable is a very important part of how the battery, starter, alternator, and everything else electrical on the vehicle works. With the battery relocation kit a small cable from the battery and frame is used. I will use this negative cable, but I will also add another negative cable that goes from the battery ground to the engine block.
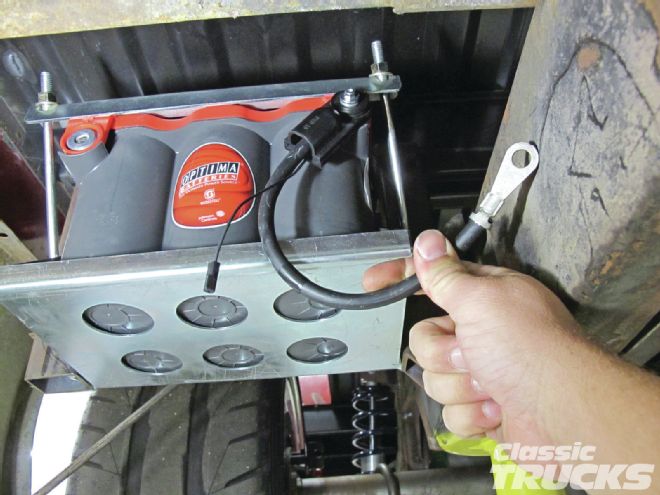
08 I simply TIG welded a nut and bolt into the frame close to the battery for one of the grounds.
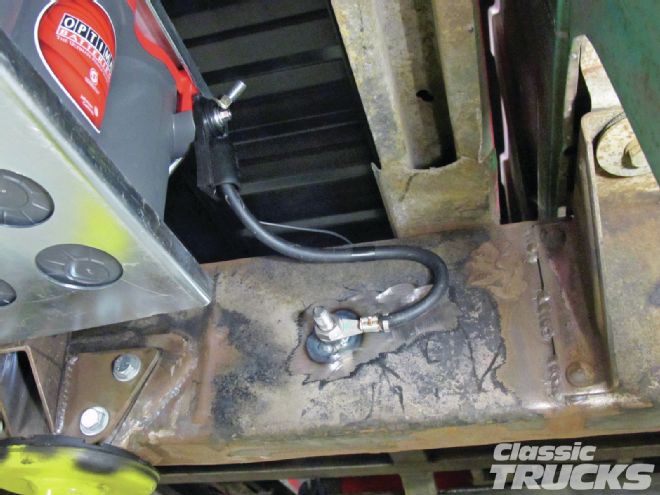
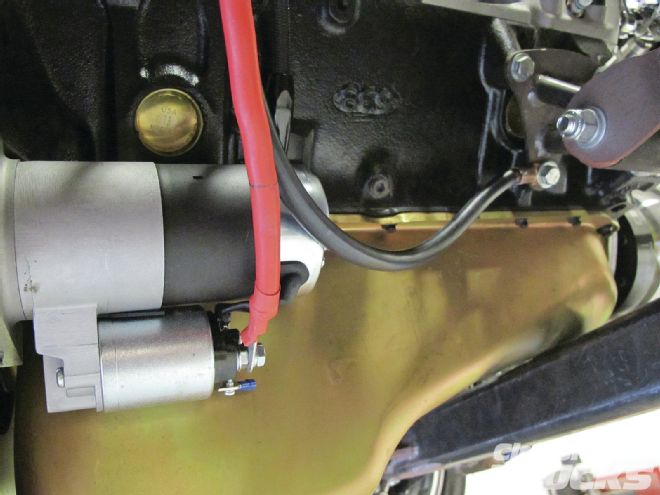
09 Next I used some bulk stranded battery cable to go from the battery's negative terminal to the engine block. This way the starter's ground would not have to travel through the engine, transmission, body, or any other source of grounds to complete the circuit for starting. Remember the starter uses its case as a ground and has to get the ground via the engine block.
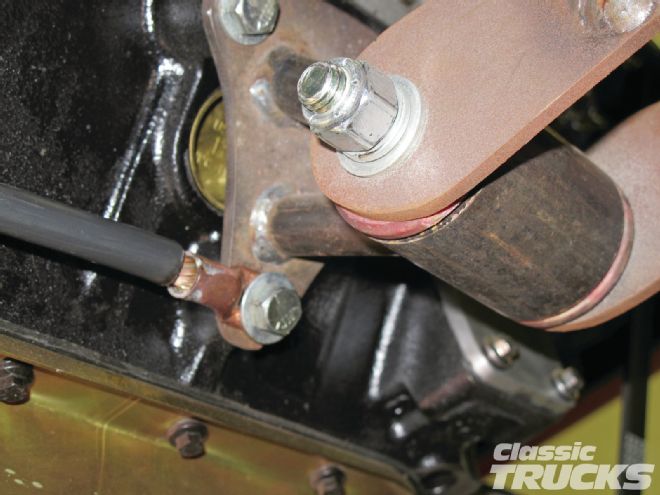
10 You also need a ground or two from the engine block to the cab. This way the ignition switch, radio, headlights, or any other ground you need from the cab will work properly. It is also a good idea to ground the engine block to the frame one more time on the driver side. The more grounds, the better.
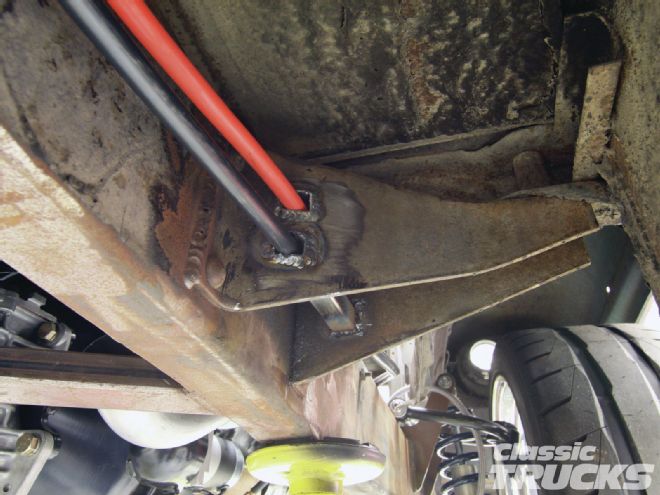
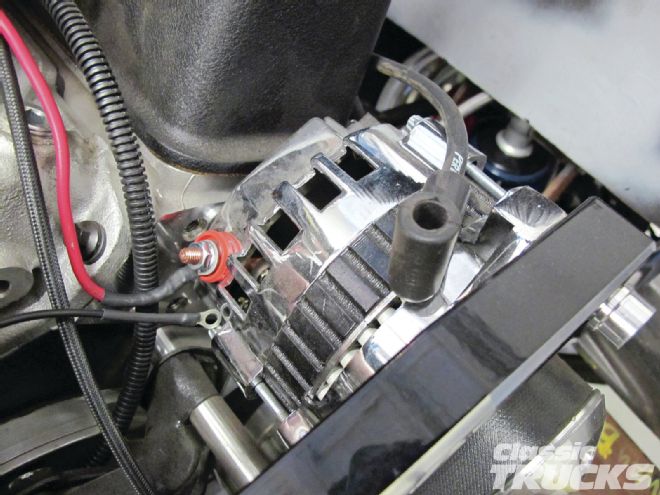
11 If you have any kind of aftermarket pulleys and/or painted the engine block then a ground may be necessary to the alternator case. I used one of the outer alternator case bolts and a 16-gauge wire run to a known good ground.
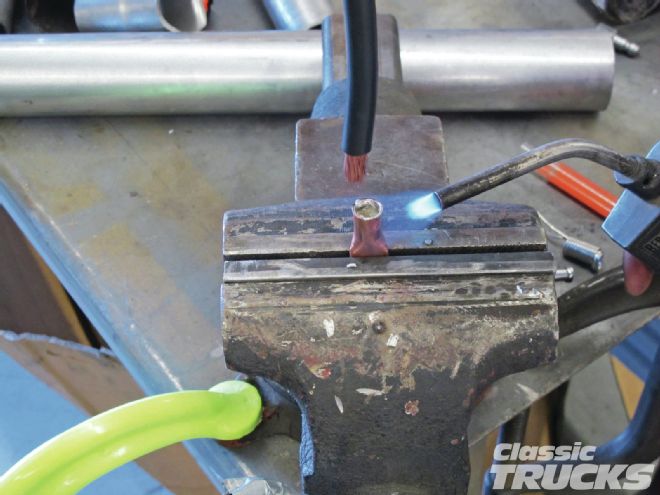
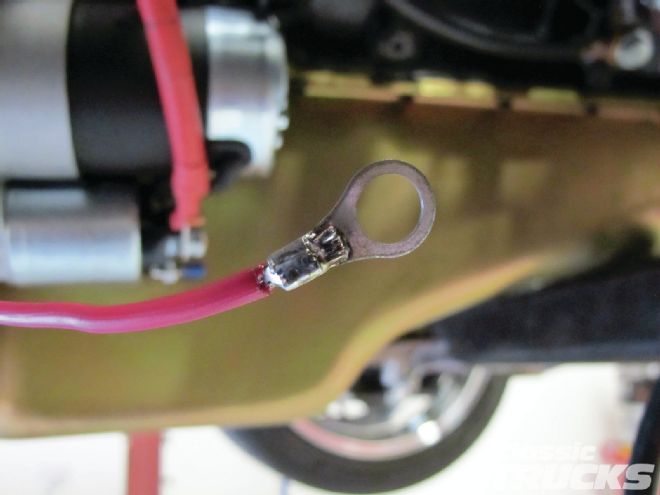
12 The battery cables can be cut to fit any length. Adding a battery terminal end is simple as finding the right size connector and using map gas and solder to fuse the connector on the cable.
13 On a typical battery relocation, the power wire from the battery is attached to the starter. The starter terminal can be used to provide a connection for 12 volts, such as a jumper to a fuse panel or ignition circuit. It is recommended when using electronics such as fuel injection that you run power directly off the battery to the computer and same goes for the ground.
14 Here is an example of a good connection that has been crimped and soldered. The next step would be to add heat shrink around the terminal and wire to prevent oxidation on connection.
15 With the exhaust running on the inside of the frame I didn't want the battery cable to run next to the heat. So I routed the cables on the outside of the frame. Then I cut and welded in the square tubing to the cab mounts to make the cable route as clean as possible. I made sure to clean the edges of the tubing before running the battery cables inside the tubing. Also I will be adding a protective layer around the areas that could rub or chafe the cable.