It's hard to imagine what the automotive world in general would be like if it weren't for the military-industrial complex. Now, while you may be asking yourself, what has the Navy got to do with my F-100, think about it for a minute. The majority of manufacturing techniques, tools, and materials that were commonplace in the 1950s and '60s, were a direct byproduct of things learned by industry during World War Two. The stringent tolerances demanded by the military and the production challenges that came with them enabled automotive manufacturers to more or less learn on the government's dime in a few short years what would have taken them decades and millions of dollars to develop on their own. Building tanks, ships, and aircraft of all shapes and sizes challenged their manufacturing abilities and allowed them to develop new technologies and techniques that are continued today. Better braking systems, more reliable engines, improved electrical components, precise manufacturing; these were all byproducts of what industry learned while they were manufacturing products for the military. During the late '30s and early '40s, the automotive industry accounted for a major portion of aircraft production, going so far as halting automobile production completely by 1942 to concentrate on aircraft and related production. By the time the war was over, the automobile and related industries would be forever changed.
For us truck guys, other than being a neat little bit of history, these military influences have little to do with what we're wrenching on out in the garage. Or so you think.
Take the Allen bolt for instance. Invented in the beginning of the 20th century, its name comes from the Allen Manufacturing Company, who actually applied for the patent in 1943 due to escalating needs by the U.S. government brought on by World War Two.
And how about all those anodized fittings that you have connecting all your fluid transfer hoses? You know, the ones that take those weird, expensive wrenches that are neither a fractional size nor metric but some seemingly random number preceded by a dash? Known as AN fittings, these mil-spec (military specification) fittings also trace their heritage back to World War Two when the Army and Navy agreed upon a single standard for fluid transfer fittings used to connect flexible hose and rigid metal tubing. This designation became the standard in the aerospace industry for decades and has recently found its way into the classic automobile market.
Another aerospace standard that has found its way into the automobile hobby is the practice of "safetying." Familiar to anyone who's ever removed a cotter pin from a ball joint, tie rod, or spindle nut, safetying is defined as securing by various means any nut, bolt, turnbuckle, etc., so that vibration will not cause it to loosen during operation. These practices are not a means of obtaining or maintaining torque, but rather a safety device to prevent the disengagement of hardware. There are three basic methods used in safetying; cotter pins and self-locking nuts, of which are no doubt familiar to most of us, and safety wire. While there may be many of you who are familiar with the practice of safety wire, there is probably a good number who are not. I know I've watched guys do it for years but it's something that I've never seemed to get the hang of. That said, I thought I'd educate myself with help from a few products from Graham Tool Co. and the FAA, and bring you guys along as well.
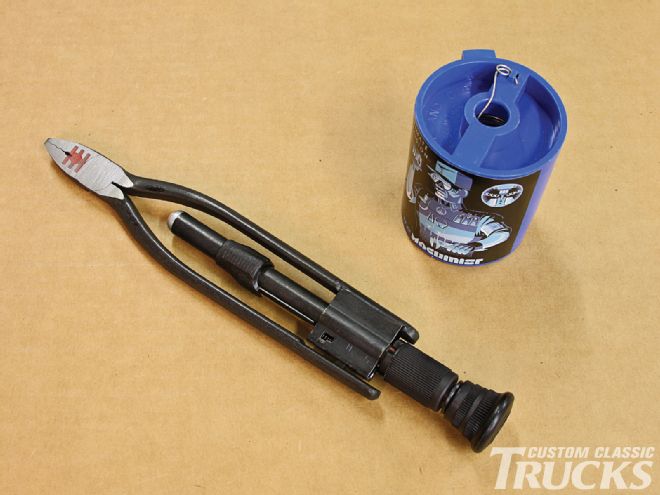
 A pair of decent safety wire pliers is a must if you're going to be doing it with any regularity. This is the 9-inch pair offered by Graham Tool Co and features reversible action handy for both left- and right-hand twists. The other item necessary is a spool of safety wire. Pictured is a 1lb spool of 0.032-inch military spec stainless steel safety wire. This conforms to the military MS-20995-C and government QQW432 specs. What does that mean? Basically it means that it's the highest quality safety wire available and meets the FAA, military, and the NTSB requirements for use in aircraft.
Safetying 101
Basically, there are two methods of safety wiring; the double-twist method that is most commonly used, and the single-wire method used on screws, bolts, and nuts in a closely spaced or closed-geometrical pattern such as a triangle, square, rectangle, or circle. The single-wire method may also be used on parts in electrical systems and in places that are difficult to reach.
When using the double-twist method, a minimum diameter of 0.032-inch wire should be used on parts that have a hole diameter larger than 0.045 inch. Safety wire of 0.020-inch diameter may be used on parts having a nominal hole diameter between 0.045 and 0.062 inch with a spacing between parts of less than 2 inches. Note that these specs are for steel wire designed for safety wiring and not aluminum, copper, or brass wire.
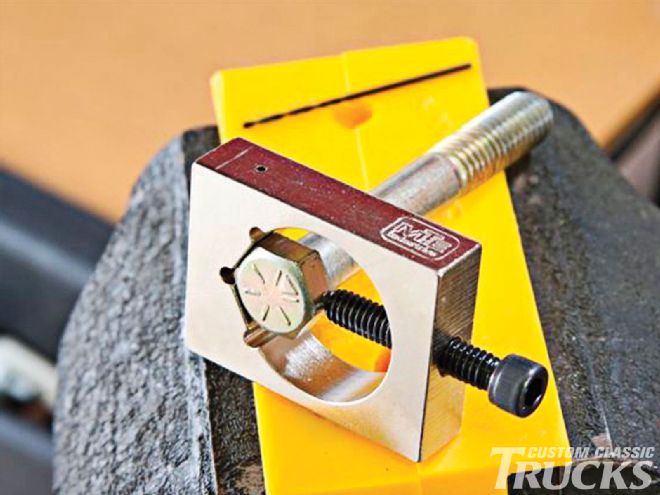 Here's even another way to drill both bolts and nuts.
Safety Wiring Procedures
There are many combinations of safety wiring with certain basic rules common to all applications:
1. When bolts, screws, or other parts are closely grouped, it is more convenient to safety wire them in series. The number of fasteners that may be wired together depends on the application.
2. When self-locking nuts are used, their respective bolt heads need not be safety wired.
3. Ensure that the finished safety wire is tight to prevent failure due to rubbing or vibration.
4. Safety wire must be installed in a manner that will prevent the tendency of the part to loosen.
5. Over-stressed safety wire can break under vibration if twisted too tightly. Safety wire must be pulled taut when being twisted and maintain a light tension when secured.
6. Safety wire ends must be bent under and inward toward the part to avoid sharp or projecting ends, which may present a safety hazard.
7. Before safety wiring fasteners, check to see that they are torqued to spec and that the wiring holes are properly aligned to each other.
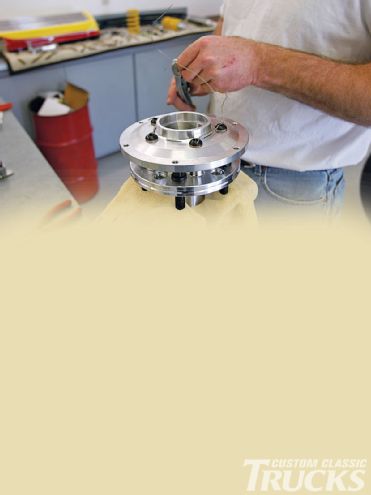
Securing screws, nuts, bolts, and snap rings.
The safety wire is shown installed for right-hand threaded hardware. For hardware with left-hand threads, the safety wire is routed in the opposite direction.
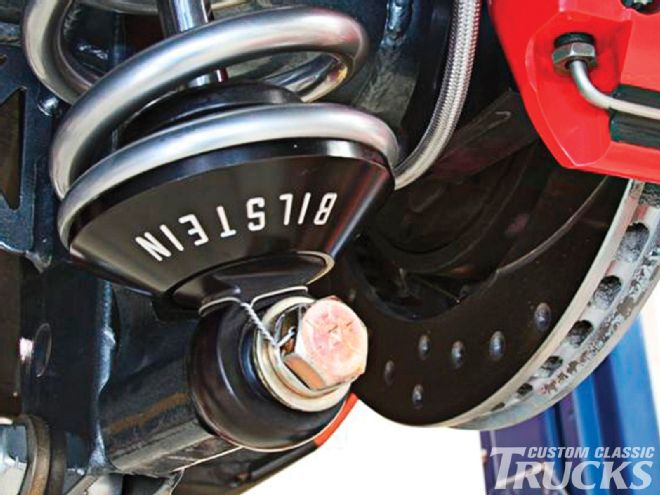 This style can be used when wiring a single fastener as shown on the lower shock mount. The safety wire is run through the head of the bolt and around the base of the shock, holding it firmly in place.
Using Safety Wire Pliers
While safety wiring can be done by hand, it is commonly done using a pair of safety wire pliers. These are similar to traditional pliers, except they feature a center shaft and pull knob that allows the user to hold on to the pliers while they twist the two strands of wire together by pulling on the knob. This ensures a taut fit against the fastener, keeping it from coming loose when wired in conjunction with another fastener or fixed point.