Not everyone has the big bucks it takes to buy the turnkey Chevelle of their dreams and then start driving it right away. That said, it doesn’t mean that it’s impossible to find a decent example for less money and then enjoy driving while one brings it up to snuff.
To test our theory we bought the best example of a ’66 Malibu two-door hardtop we could find at a reasonable price and then with the help of our buddy Brian Shaw we’re making mechanical and cosmetic improvements in between appearances at local SoCal car shows and cruises.
Beyond cosmetic looks it’s all about proper maintenance when it comes to making a car a dependable daily driver. And it doesn’t matter how much one paid for a Chevelle or how good it looks, in order to be reliable it has to be maintained. So if you just bought a running Chevelle it’d be a good idea to give it a full service.
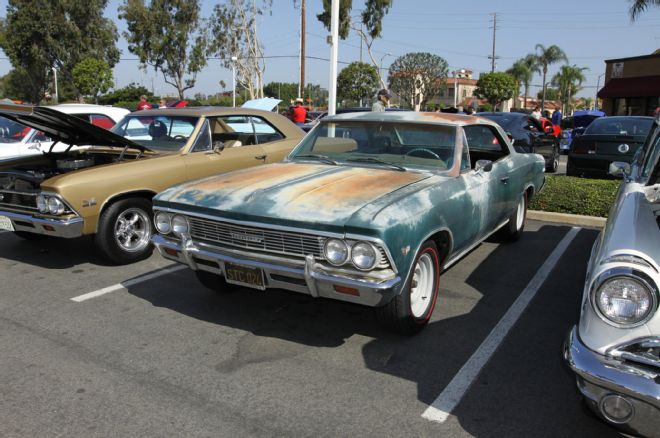
As experiments go, our ongoing cruise and restore ’66 Chevelle project has provided more insights into the car collecting lifestyle and the people in it than we could have ever imagined. The first time we rolled the ’66 out to a Sunday morning cruise we were greeted by the owner of a mega-buck former magazine feature car that expressed utter disgust toward our Chevelle.
How dare someone think they could drive in with an unrestored survivor and hang out with the cool cars? As it turned out, the guy’s mega-buck beauty didn’t seem to have as much crowd appeal as the old Chevelle. Guys and gals were swarming around the ’66 admiring its unmolested beauty and dreaming about what they’d do to customize it to their tastes.
As the weeks have progressed and improvements made we’ve been returning to the local car shows with the ’66 and it still draws a crowd. It seems folks prefer looking at a car in constant transformation as opposed to a mega-buck show car that hasn’t been touched since it was built.
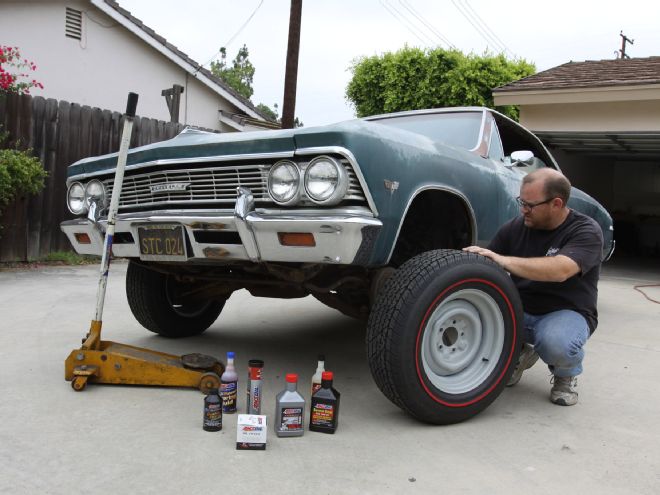
1. Moving on from how dangerous and likely it is for an old tire to blowout, replacing worn-out tires with new radial tires restores steering and ride. Cattywampus, mismatched tire sizes make it near impossible to set a car’s stance.
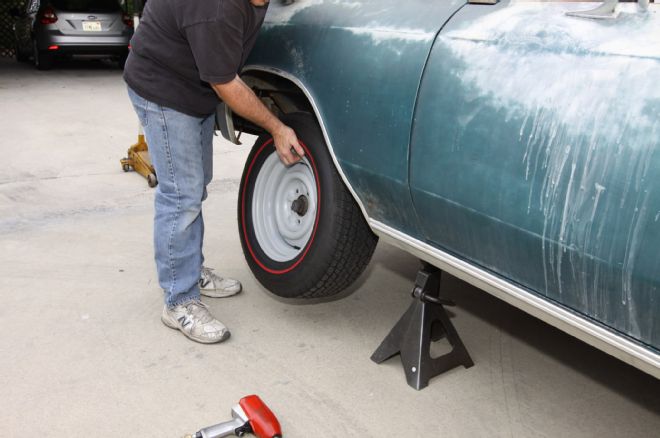
2. Ready to mount and they made a world of difference. A complete wheel and tire package direct from Coker Tire’s City of Industry, California, location meant tossing the bent and rusty 14s with rotted rubber for Coker BFGoodrich Silvertown P225/70R15 Redline radials.
3. That old adage, “clean oil is cheap insurance” still rings true today. There are a lot of extra trouble-free miles that can be squeezed out of an old engine if one makes sure the oil level is checked and kept at a proper level between changes.
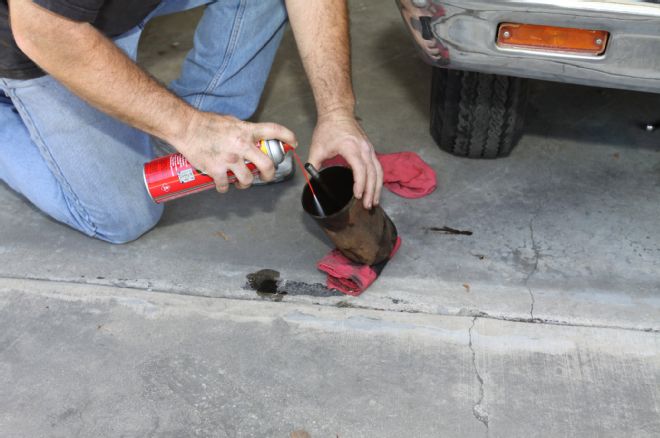
4. Remaining sludge contaminates and dilutes clean oil. At every oil change always flush sludge and grime from wherever it can be found. A spin-on oil filter conversion is a good option.
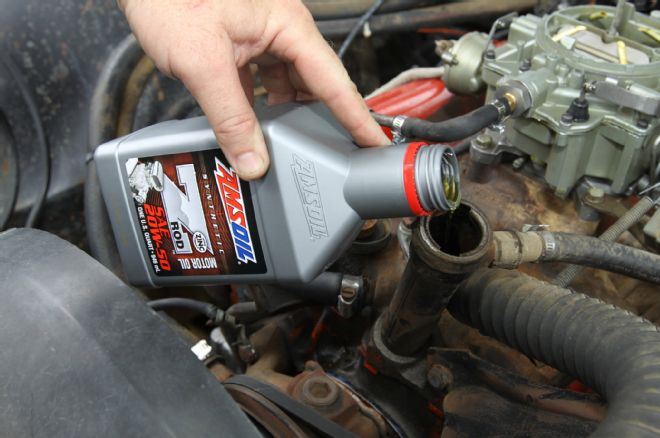
5. Our factory high-performance 283 sounded better (quieter) after adding AmsOil Z-Rod SAE 20-50 synthetic motor oil. Motor oils developed for today’s modern engines do not contain ingredients (additive packages) like ZDDP, developed for high-compression 20th century engines with flat-tappet camshafts. Z-Rod’s increased levels of rust and corrosion inhibitors battle the dampness of humidity generated by short drives.
6. An overnight shipment from Summit Racing delivered a correctly remanufactured Rochester 4GC four-barrel carburetor. The carb it replaced had stuck floats and allowed raw gas to contaminate the engine oil. Gasoline contaminated engine oil provides poor lubrication that accelerates engine wear.
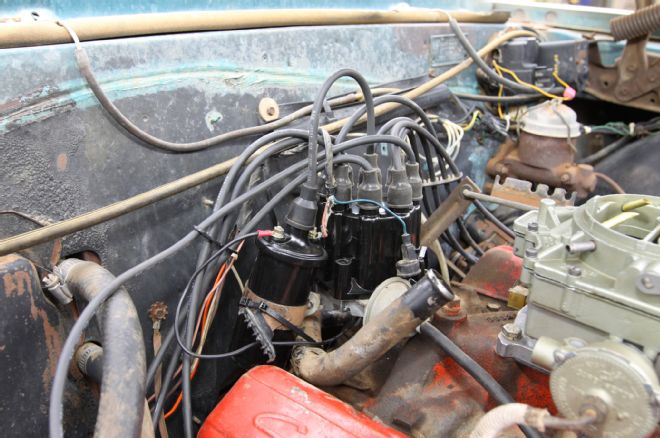
7. Another next day shipment from Summit Racing eliminated having to look all over town for an ignition coil to replace ours, that had gone bad. Before replacing a suspect coil always ensure the primary wiring gets voltage. To test use a continuity light and turn the ignition switch off and on.
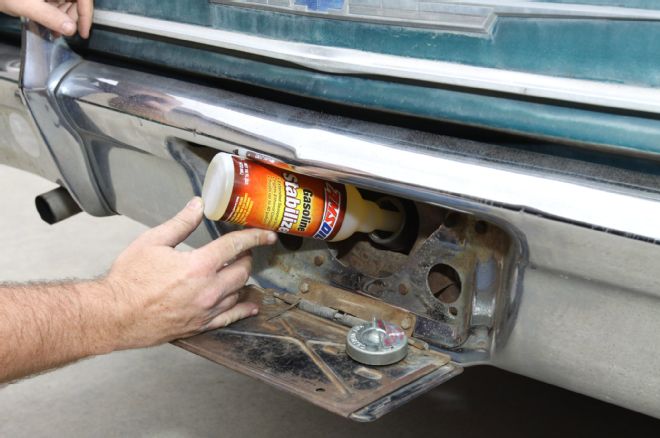
8. Starting problems can be caused by bad gas after a car has been sitting in storage for an extended period of time. There’s no sense in buying a new carburetor and then allowing varnish and sludge caused by oxidation to gum up intricate hard-to-find parts. Tip: Check to ensure gasoline cap gasket seals out water after washing car.
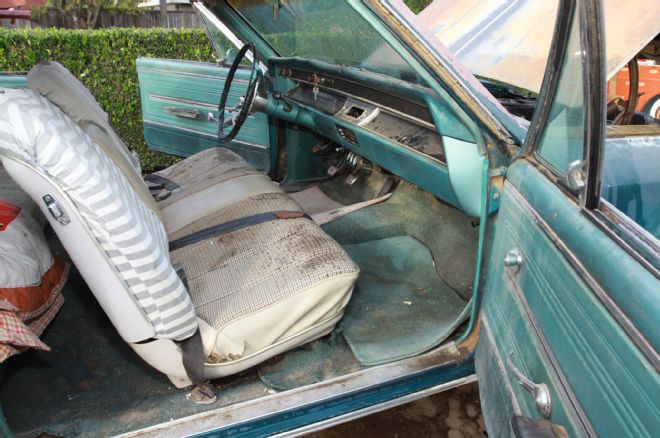
9. Proper setup for a project car that is intended to double as a daily-driver or backup car should be set up to disassemble easily for installation access and then quickly re-readied for driving. Removing a bench seat by yourself as often as you changes your socks is a big hassle.
10. A quick trip to the OPGI Chevelle catalog found a pair of Custom Rally bucket seats. We ordered the factory original Madrid grain vinyl with the ’66’s original turquoise two-tone colors. Naturally, OPGI also sells bucket seat mounting brackets.
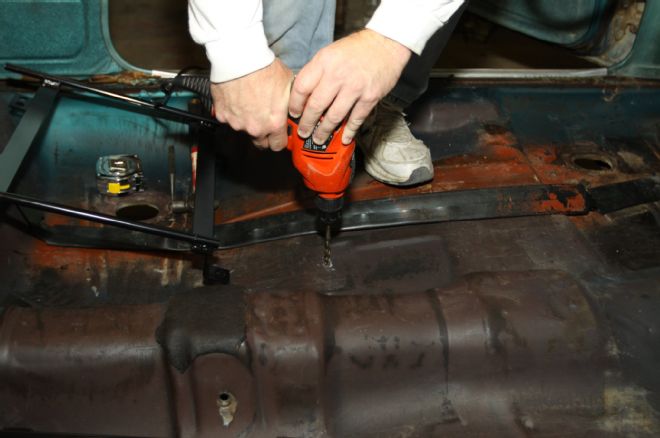
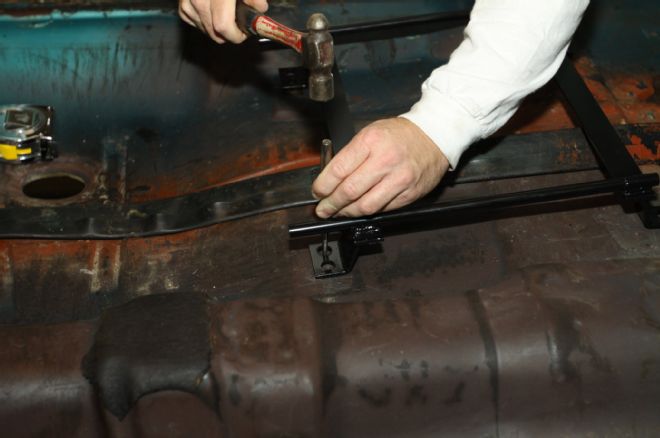
11. Step 1. We aligned the outboard bucket seat bracket holes with the existing bench seat mounting holes, and then center punched where two additional holes must be drilled. Only four 5/16-inch holes total had to be added to floorpan.
12. A person has three choices when it comes to fastening the additional bucket seat mounting bolts to the floor. The quickest in the short run is to back up the underside with a nut. Quickest in the long run when it comes to removing the bucket seat brackets is to tack weld or Nutsert the boltholes.
13. Here’s the ’66 on its first Sunday outing. For day-in day-out comfort it’s amazing how nice, new seats and tires and wheels can make an old car ride. Future improvements include OPGI dog dish hubcaps and painting the Coker steel wheels Tropic Turquoise.

14. Here’s a view of the OPGI custom rally buckets installed. Notice the color match is perfect against the original factory colors. Zoom on the knob adjacent the steering wheel at 7 o’clock and you’ll observe our ’66 has factory Overdrive.
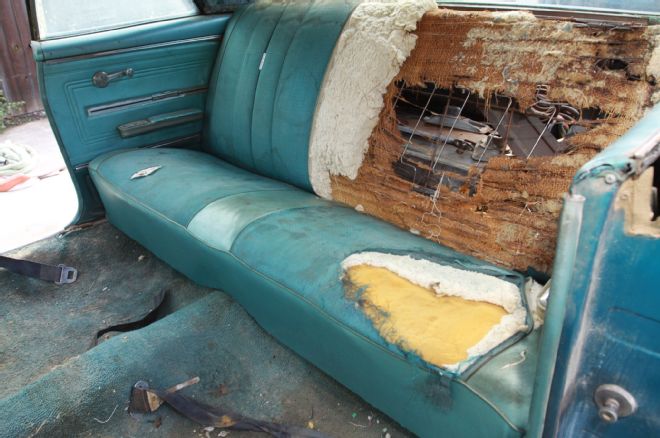
15. Still in place, but showing a little wear, here’s the back seat that left the factory in ’66. Unlike driver-side front seat springs that are always broken when it’s time for reupholstering back seat springs always seem to be in excellent, useable condition.
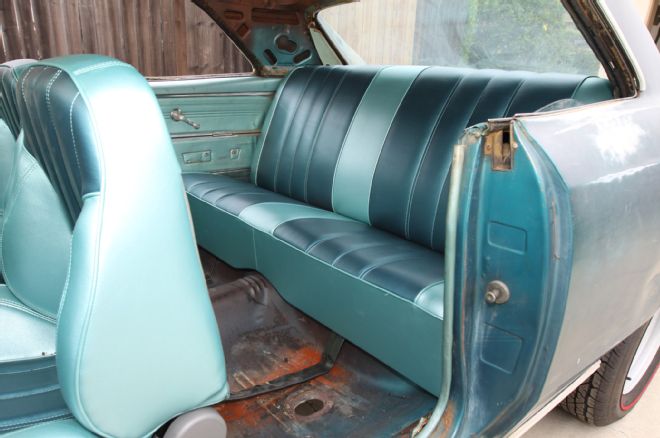
16. Now its ready for date night, look how nice the OPGI reproduction rear seat upholstery kit from Distinctive Industries looks and fits.
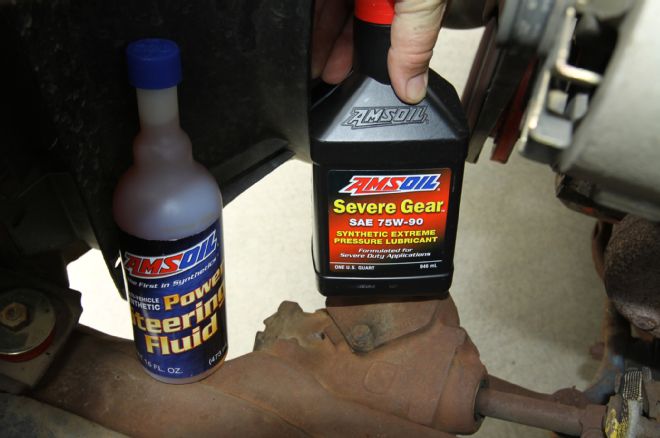
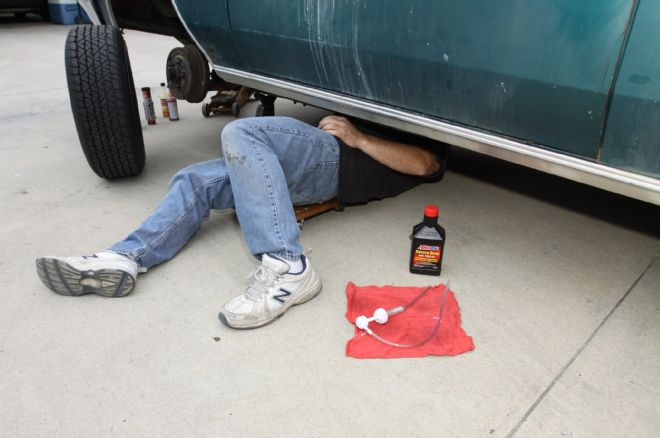
17. Heavy steering? Avoid premature wear; never overlook checking the fluid level in the manual steering box. You can’t go wrong with using either AmsOil SAE 75W-90 Severe Gear or AmsOil power steering fluid in power steering pump reservoirs.
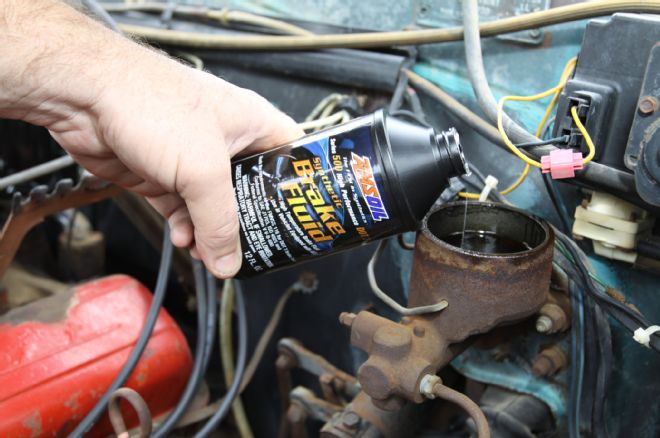
18. Brake fluid degrades with age. Often neglected until rust damage appears and it’s too late, it’s a good practice to flush old brake fluid completely from the system at the farthest point away from the master cylinder.
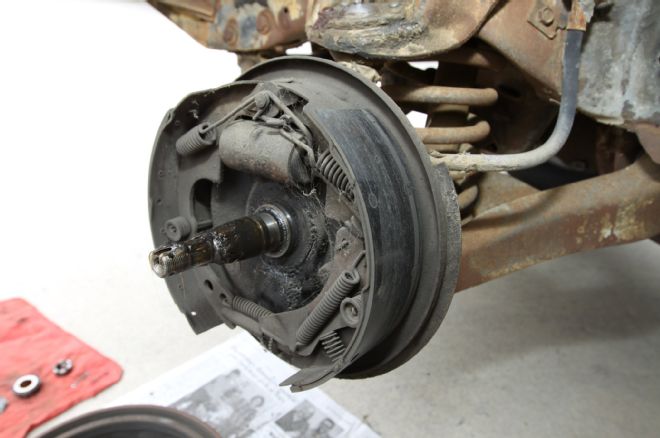
19. More times than not you’ll find the gear oil level is low in a stick shift transmission. Years of experience has taught me that adding a good synthetic gear oil to the proper level will make a stick transmission shift easier, run quieter, and last longer.
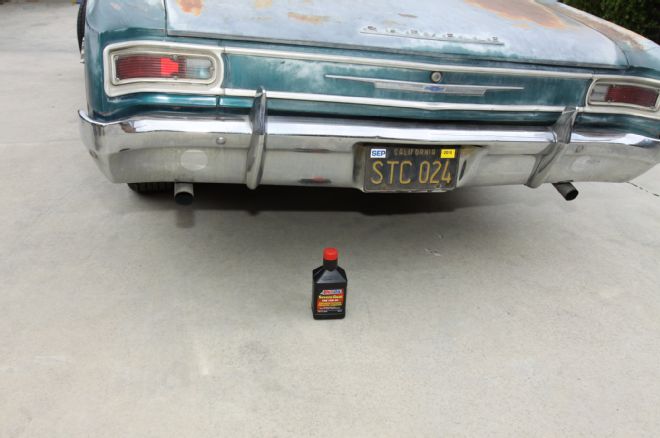
20. Ditto for the differential, they’re usually low on gear oil. Another often-neglected member of the powertrain, flushing out smelly old 90W hypoid gear oil and replenishing to the proper level with quality 75W-90 synthetic gear oil will add life through reduced friction and help to silence noisy gears and bearings. Try it, you’ll like it.
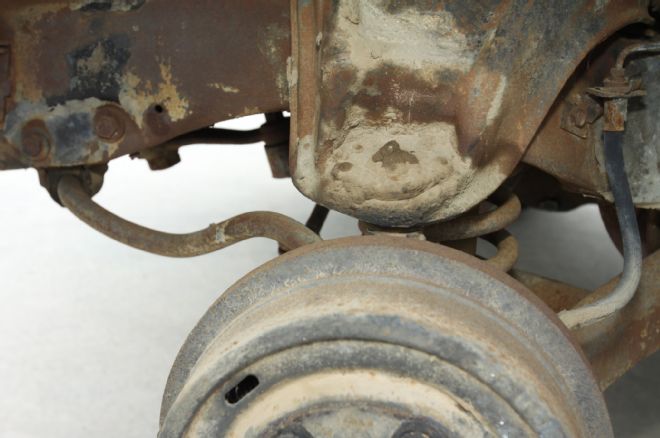
21. Look for the wet spot. If they haven’t been neglected too long, ball joints, tie-rod ends, and idler arms can be brought back to life with a good chassis lube.
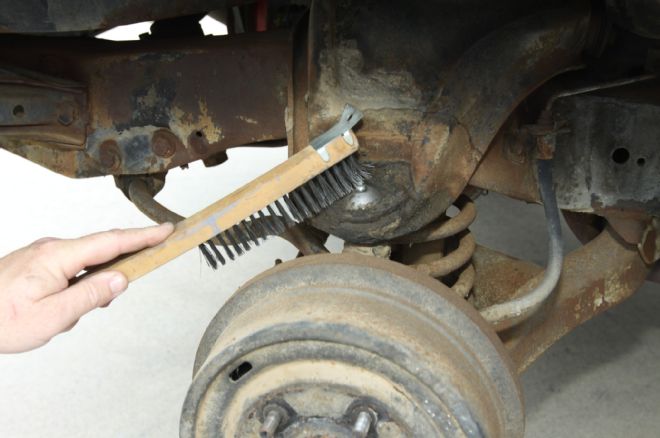
22. Before using a grease gun its always a good practice to clear away dirt and grime that could be forced into the Zerk (grease) fitting and cause a blockage, impeding proper lubrication. Also, be sure to look for cracked suspension components, such as the A arms.
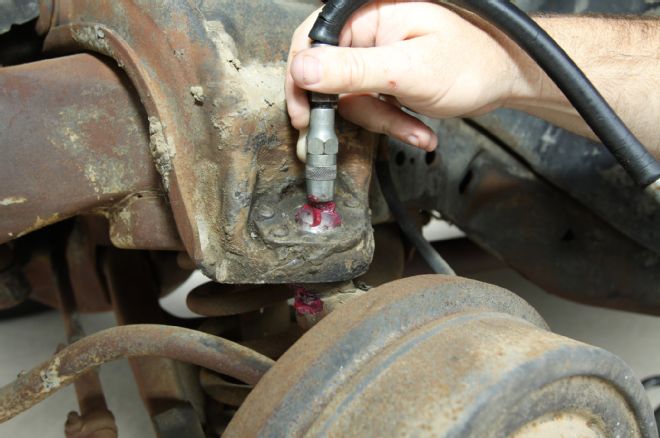
23. Don’t overdo it, but a good way to ensure grease is making its way is to pump the grease gun until grease is observed exiting at the farthest point. Overdoing it can rupture rubber boots.
24. We intended to check for hydraulic leaks, but as soon as it was discovered the car needs brake shoes the decision was made to junk the totally inadequate, far from new 9.5-inch Chevelle drum brakes and install disc brakes. Note that sometimes a car is in good enough condition that it can be brought back to daily-driveability, and sometimes its going to be tied up for a while.