When it comes to vintage Mopars, everyone knows it's "money in the bank" to avoid cars from regions with severe seasonal changes and harsh winters. In the case of Mopar "young gun" Mike Mauro, the Massachusetts-based 26-year-old Mopar fanatic bought the red '67 Plymouth Belvedere II subject car from a seller in Stockbridge, Georgia, way back in 2004 as a high school freshman. He tells us: "I grew up in Georgia and my dad used to take me to monthly North Georgia Mopar Club meetings in his '69 440 four-speed GTX. We spotted this car, and I really wanted it."
Born an F-code 318 two-barrel small-block car, somewhere along the line a '69-vintage 383 two-barrel had been swapped in along with a big-block 727 TorqueFlite and full dual exhaust system. Some haggling was required, but a deal for $700 was made and the Plymouth was Mike's. The plan was to slowly refurbish the machine and hopefully by the time he was a senior, the car would be ready for the road. That was 11 years ago.
Mike graduated high school with solid grades, but the Belvedere languished. Smartly choosing to further his education right away instead of stopping to work on the car, Mike was accepted at the New England Institute of Technology in Rhode Island. There he excelled, completing the entire 18-month auto body and collision repair course in only 14 months. Armed with an Associate's Degree in Science, Mike decided to move to nearby Massachusetts and settle down.
By October of 2013 Mike was gainfully employed as a radio dispatcher and things were in place to resume work on the Belvedere. Trouble was, the car was 300 miles away. Luckily, his father had just purchased a 1969 Dart GTS 383 from noted Rhinebeck, NY Mopar hoarder Larry Hauptman. Since Mike's dad had to pass through Massachusetts en-route to Hauptmann's to grab the Dart, why not deliver Mike's red Belvedere on the way?
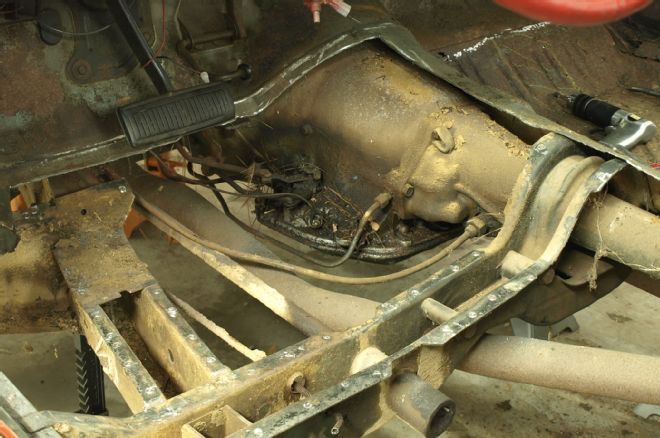
And so, in October 2013 the Belvedere arrived in Massachusetts and work began. The first shock came when Mike discovered a serious amount of floorpan rust. The otherwise straight and solid body suffered over a decade of outdoor storage on a damp, grassy yard. Worse yet, the passenger-side door glass was partially rolled down for much of it. But thanks to Auto Metal Direct (AMD), a solution was readily at hand.
Let's watch and see what it took to replace the rotten flooring with fresh and tasty reproductions from Auto Metal Direct (AMD). As you read, remember that Mike did all of the cutting, grinding, fitting, and welding on his own—every bit of it. As a Mopar youngster, Mike's can-do attitude is a reminder that there are lots of younger folks who are hip to the Mopar way. You probably know some near you. Invite them into your shop and watch them flourish!
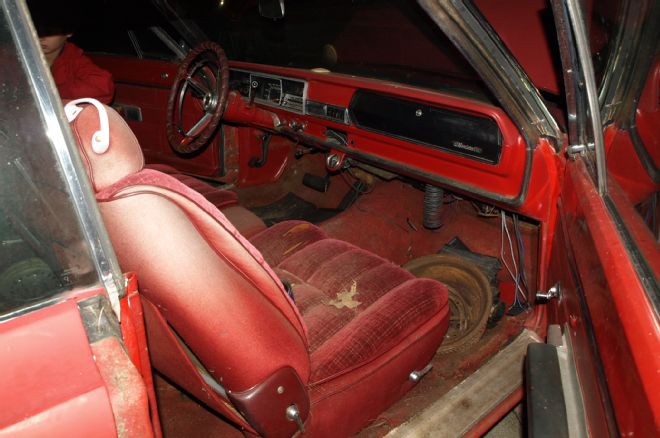
1. More worrisome than the hokey velour bench seat was a nasty squishy sensation underfoot. Knowing the '67 Belvedere had been stored outdoors, Mike expected some rust.
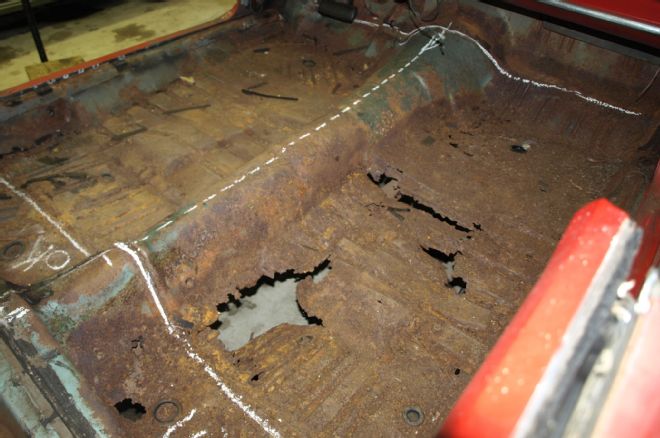
2. Sure enough, Mike discovered terminal floorpan rust. The driver-side floor wasn't perforated, but corrosion had reduced metal thickness by half. Mike used chalk to mark the areas for surgery.
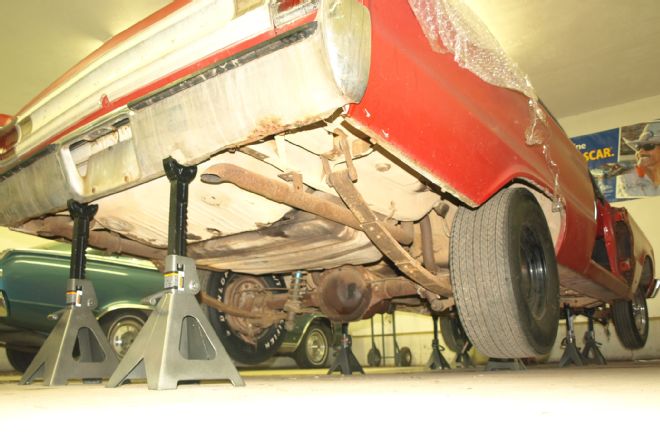
3. Before the rotten floorpan was removed, the body was supported directly at numerous locations to spread the load and to assure nothing would bend, kink, or otherwise shift during work.
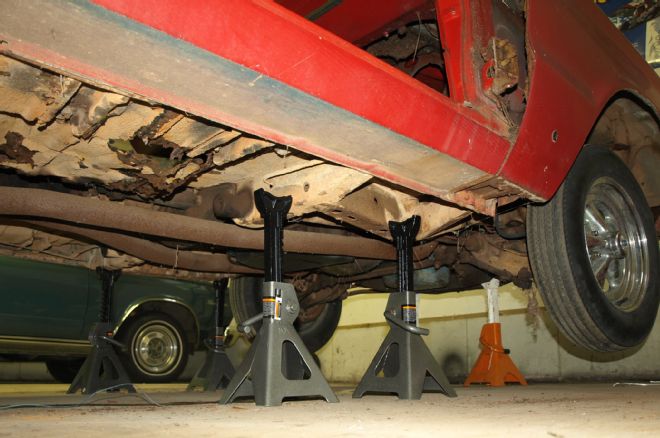
4. Up front, numerous jack stands support the body directly. As with the rear, suspension members must not be used for body support since they can compress and move from weight of people and equipment inside the car during work.
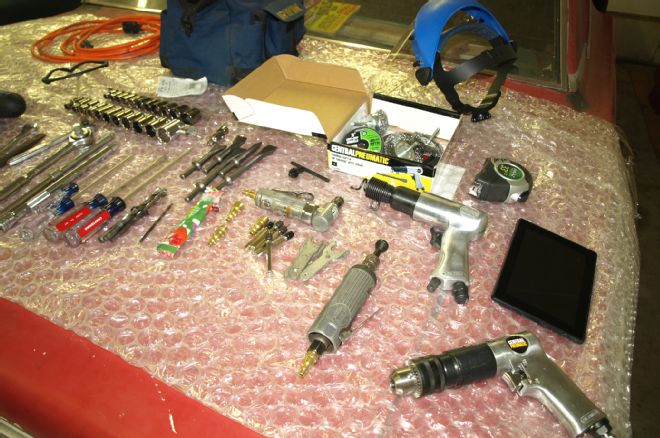
5. Basic tools needed include a pneumatic chisel, cutoff wheel, spot weld cutters, wire wheels, and abrasive discs to clear surface rust before welding.
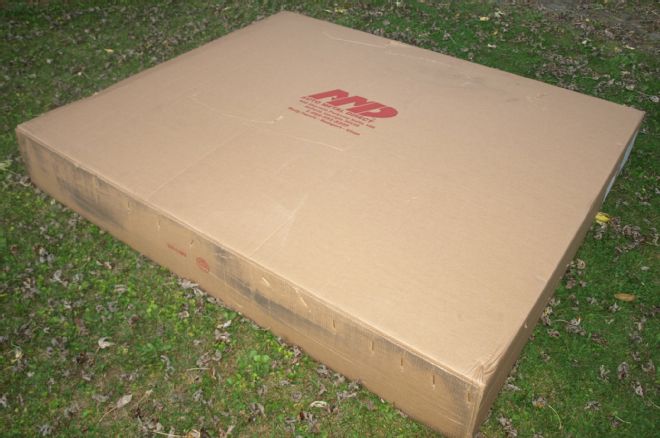
6. AMD sent the one-piece floorpan (PN 400-1466) via truck freight. At $499.99 (plus shipping) it's a bargain. Before AMD took the lead, floor pan restoration work involved cobbling together bits of sheet steel or hassling with recycled metal cut from donor cars.
7. Rather than attempt to remove the crumbling floor in one piece, Mike divided it into smaller sections. A cutoff wheel was used to make plunge cuts and separate bad metal from good.
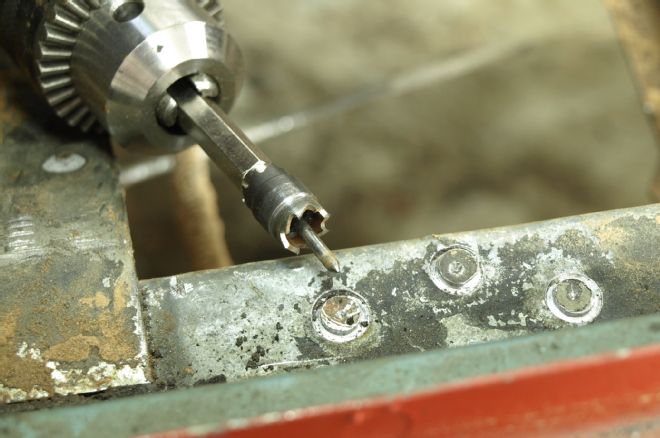
8. Since Chrysler used spot welds rather than seam welds to join panels, Mike used Eastwood spot weld cutters (PN 11282) to sever the factory unions. Though he anticipated wearing them out rapidly and bought 10, the entire job only required six. Note that the cutter can be flipped 180 degrees to expose a fresh set of teeth.
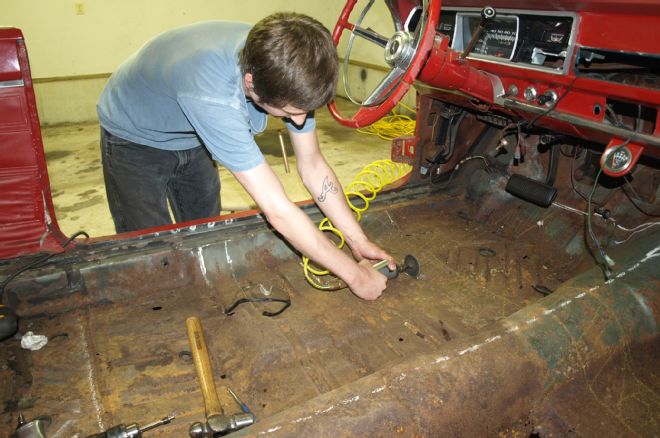
9. The first section to be removed covered the driver-side seat and foot area. All told, the removal took a half hour. Beware of fuel and brake lines and parking brake cables/stanchions during surgery.
10. Since the upper toe-board panel of the firewall was solid, Mike took care to maintain a clean border. Fortunately, the integral subframes exposed when the floorpan was lifted were in excellent condition. If yours are rotten, AMD stands ready with fresh replacements.
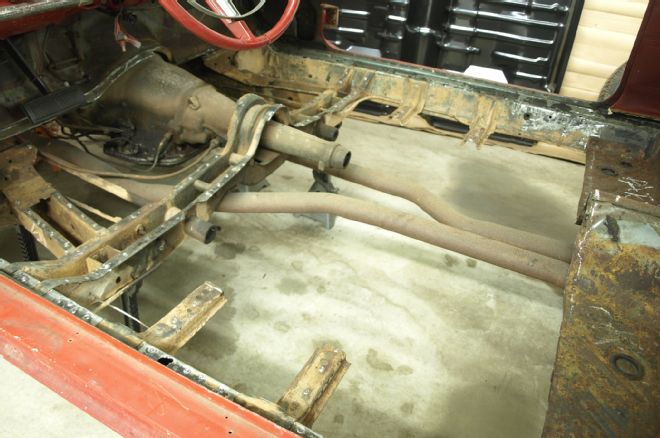
11. With the driver-side floor panels removed, Mike duplicated his efforts on the passenger side. Despite the extreme rot afflicting the floorpan, the passenger-side subframes were as solid as the driver side.
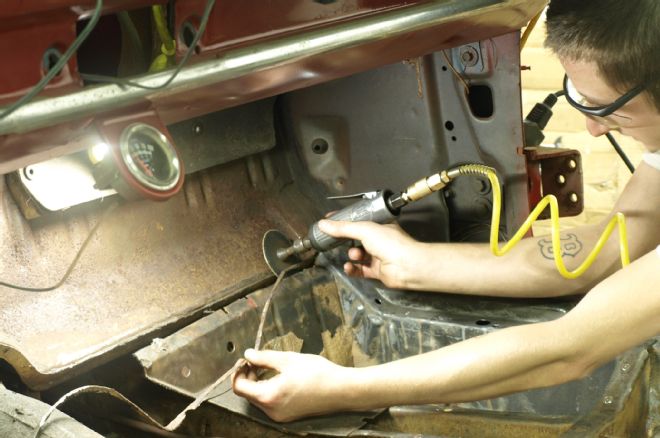
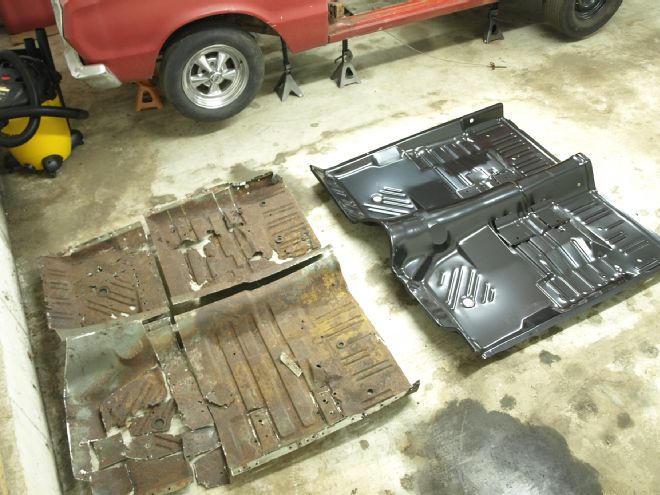
12. The junctions between the new AMD floorpan and the perimeter must be dressed to eliminate high spots that could hinder a flush touchdown. Here Mike uses the disc grinder to trim an unwanted remnant from the firewall merge point.
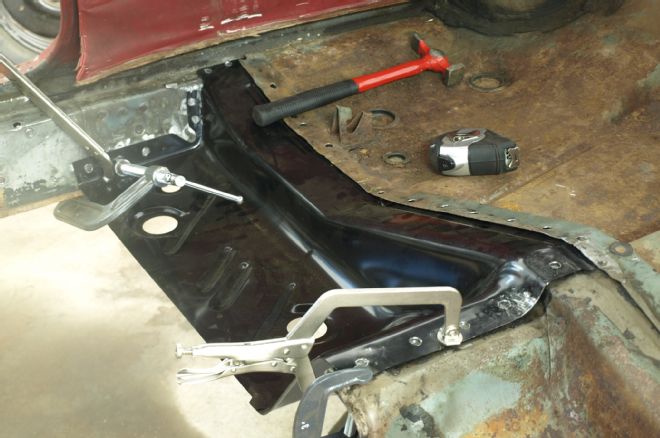
13. Initially overlooked, the passenger-side rear foot well was too rusty to retain. AMD sent a replacement (PN 410-1466-R, $129.99) that's a duplicate in every way. The black coating is a durable paint-ready primer that is also weld-ready. There's no need to grind it away before welding and it won't pollute the MIG atmosphere when heated.
14. Before clamping the new panel in place, Mike used the original panel to transfer the welding holes using a ¼-inch drill bit.
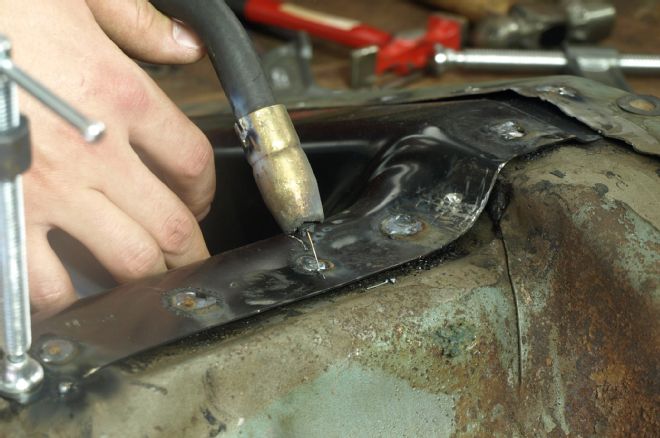
15. The MIG welder fills the holes and joins the new panel to the floor. Though the MIG welder doesn't exactly replicate the electrically heated factory spot welds, the effect is functionally identical.
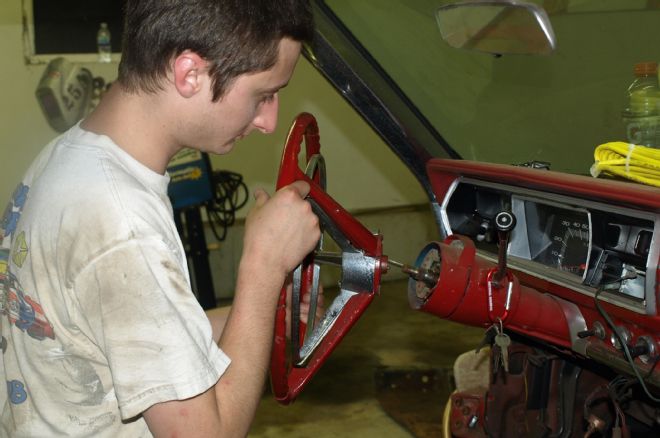
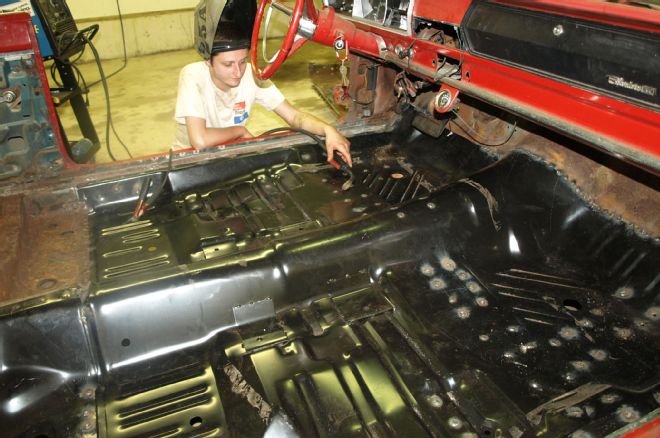
16. With the perimeter of the floorpan cleared and ready to accept the new one-piece AMD floorpan stamping, test fitting revealed the need to remove the steering wheel.

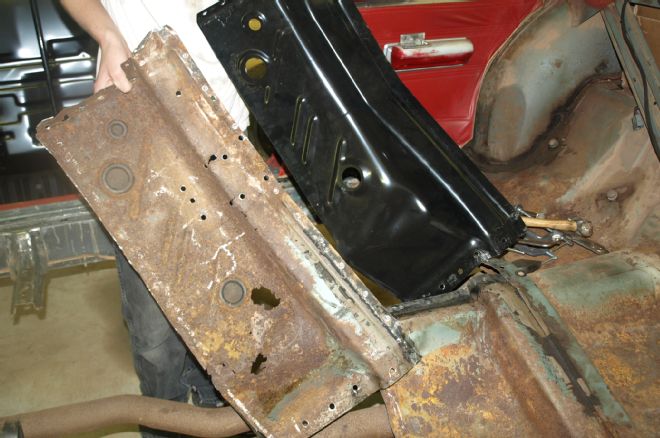
17. Before it goes in, here's one last look at the fresh AMD stamping compared to the rotten original (which Mike pieced together for this picture). A dial caliper test showed the AMD panel to be about 15-percent thicker than the factory floor pan sheet stock. Notice the bucket seat brackets welded near the driveshaft tunnel. Four-speed users can opt for a four-speed—compatible tunnel, for which AMD also offers metal shift humps.
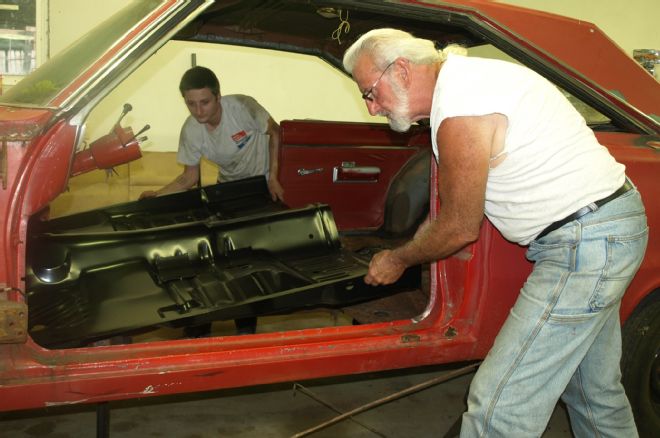
18. Thanks to the lack of a fixed B-pillar on Mike's Belvedere II, the entire floor pan can be loaded into the car through the side window area. One with an A-pillar would necessitate slicing the AMD pan into halves for fitment. Here, "Hemi Head" Fred Leigh helps guide things in place.
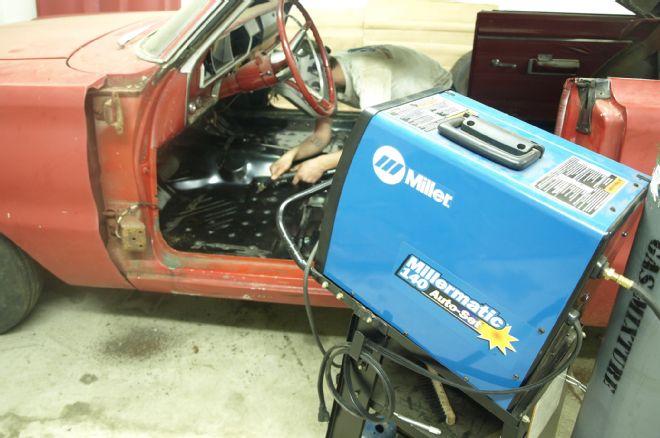
19. A simple 120-volt Millermatic 140 handled all unions. Less than half a spool of welding wire and a quarter bottle of gas were consumed.
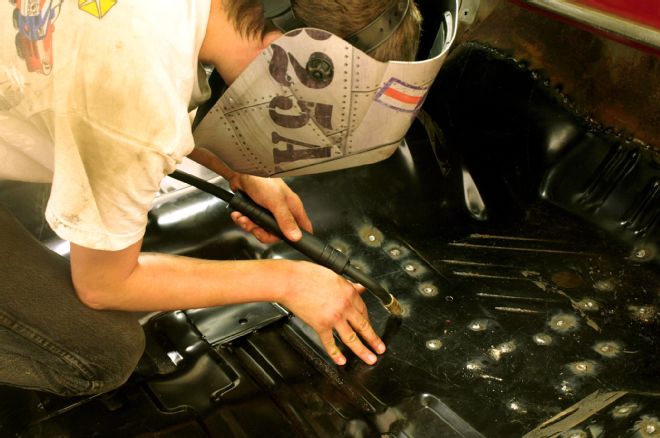
20. As with the smaller rear side foot well, Mike carefully studied the rotten take-out portions and used them as guides to transfer all spot-weld locations to the AMD pan.
21. The floor pan replacement took approximately 20 hours, but re-set the Plymouth's life clock. Mike's plans call for a pair of lightweight bucket seats and a retro B&M floor shifter.
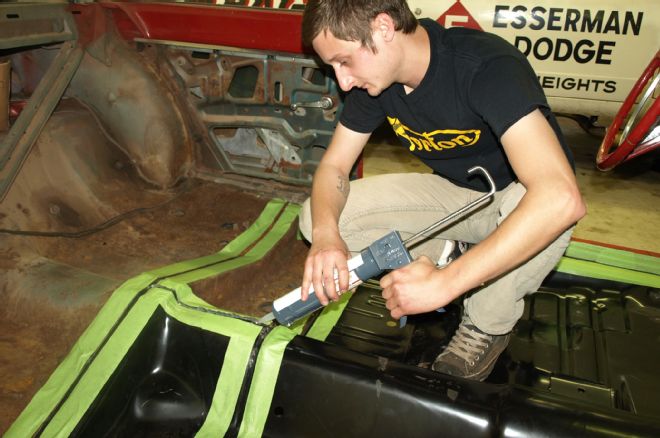
22. A thick bead of 3M Flexiclear seam sealer (PN 08405) was applied to restrict moisture from entering seams. Unlike RTV and other non-automotive sealant temptations, the Flexiclear can be painted.
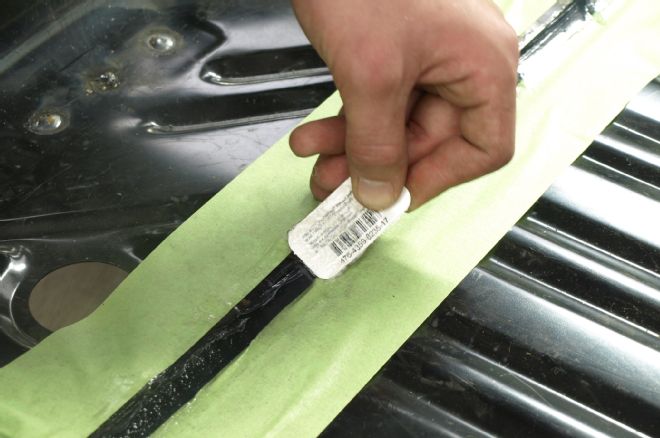
23. Mike used a plastic card to compress and smooth the sealer. Once dried, the tape boundaries were removed to reveal tidy results. Underneath, Mike applied Rust-Oleum to protect the welds.