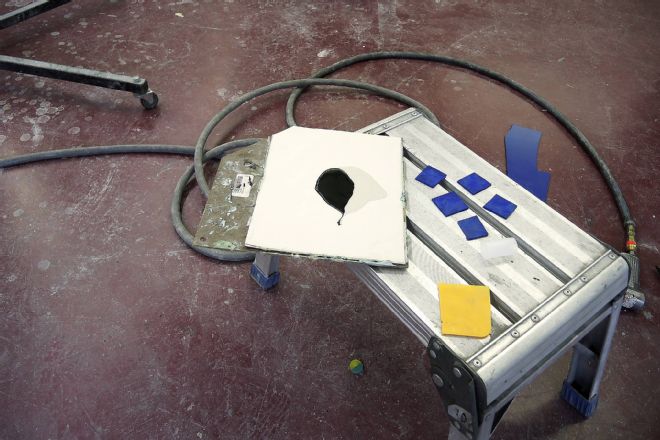
Cars from the late-1970s and -1980s are becoming more popular builds among enthusiasts, and that’s why we thought the time was right to take on a late second-gen Camaro as a project car. This era of manufacturing brought the integration of plastic and urethane into the construction of these cars, giving us a whole new set of challenges when repairing or refurbishing them today. Unlike cars from the 1960s, which were mostly constructed from steel, the 1970s brought a shift in focus toward weight reduction as one step in a host of measures taken to increase fuel economy. Replacing steel parts with urethanes and plastics was one step taken, and typically these materials first appeared as bumper-filler trim pieces, which evolved to take more and more real estate, as is the case with ZedSled, Car Craft’s 1978 Camaro project car. Its entire front fascia is made from urethane. These early plastic compounds didn’t weather the test of time so well, and that forces us enthusiasts to scour the junkyards and classifieds for acceptable used replacements, wait for the aftermarket to fill the void, or repair what is presently on the car. Here are some suggestions and tips on restoring and repairing 30-year-old OE parts that’ll get you back on the road fast.
Urethane Bumpers
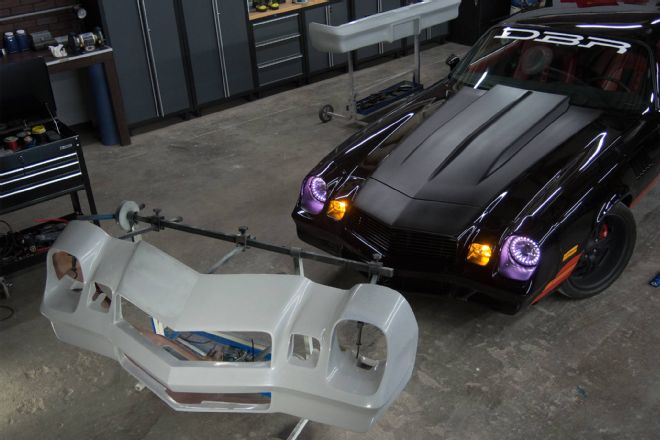
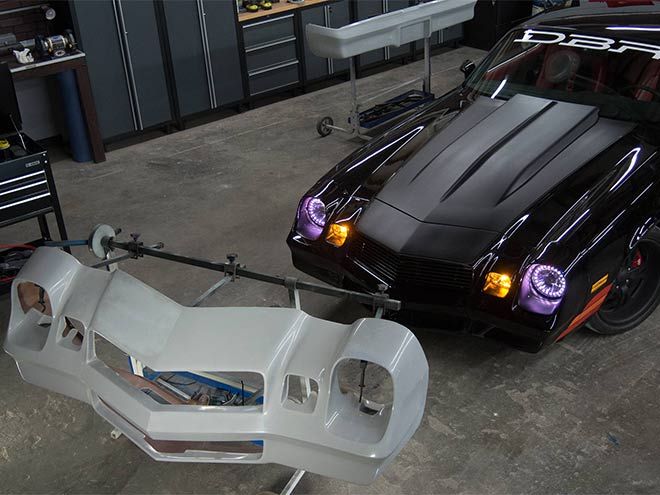
 Our replacement front fascia (fancy word for bumper cover) came from Molts Used Auto Parts in New Jersey, and though it was in much better shape than ZedSled’s original (rotten) bumper, it had license-plate mounting holes that we don’t need to use where we live, so we decided to fill them in for a cleaner appearance.
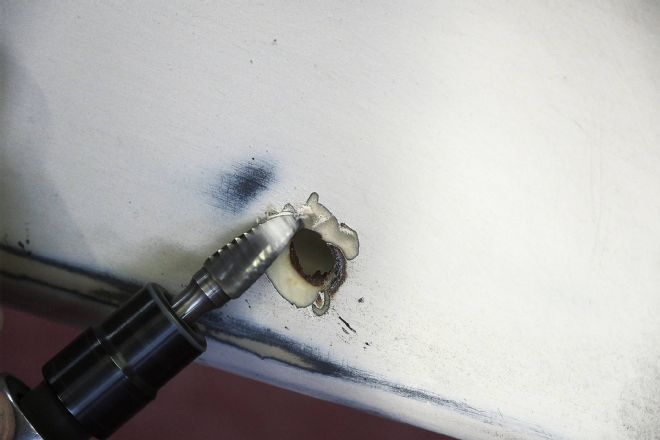 Any repair has to start with a clean surface, and most repair materials need some kind of mechanical bond, a textured surface to adhere to. This carbide burr both cleans and leaves grooves in the surface of the bumper, which the filler will grab on to.
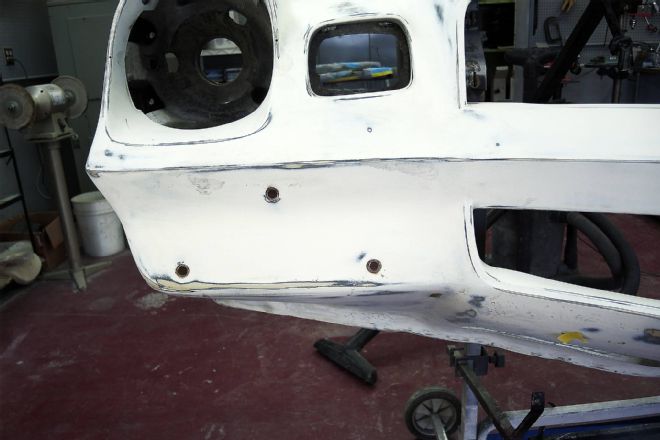
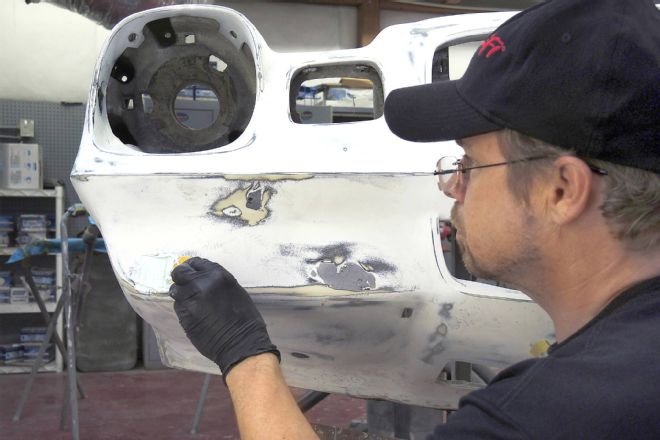
 There were several holes around the headlight openings (possibly where a set of headlight covers had been installed at some point. They are too large to cover with typical polyester filler, so we’re enlarging them and prepping the same way.
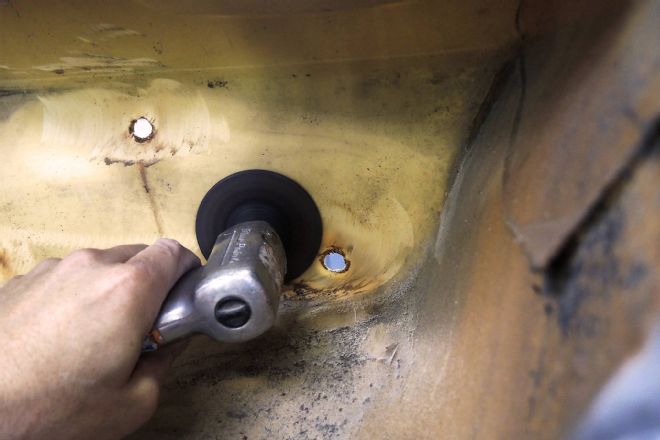 The back side of the fascia needs to be prepped, too, as it will take a backing plate to support the repair. Here, we’re using an 24-grit sanding disc.
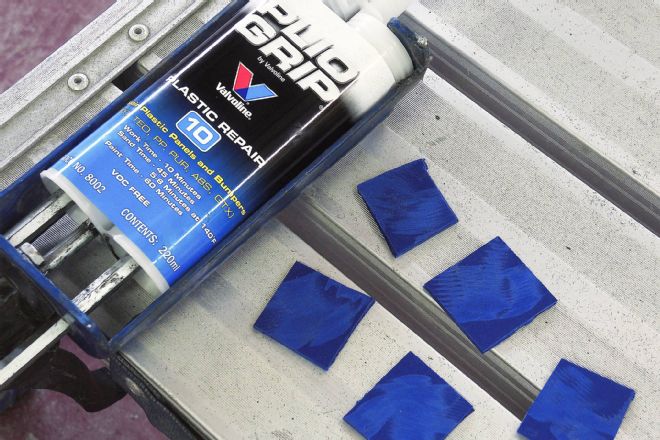 Valvoline’s Plio Grip plastic repair works with all types of plastic. You can find it at most autobody supply stores or through the mail from The Eastwood Company, and it will bond nicely to our bumper and serve as a permanent repair.
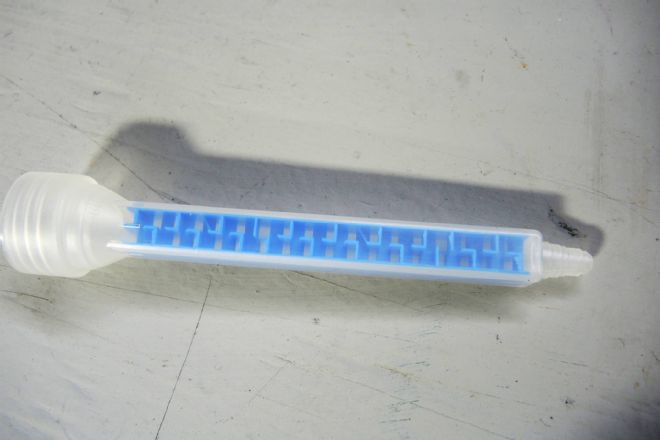 To apply this product, you need a double-barrel calking gun and one of these intermix tips, which blends both parts of this two-part adhesive. By the time it leaves the tip, it’s mixed in the perfect ratio.
 Another way to use this glue is to dispense a small amount onto a mixing board with the tip removed, making sure there are equal proportions. Use this method if your intermix tip gets clogged or you run out of tips.
 We’re using ABS sheet plastic for our backing panels, which is compatible with this adhesive. We roughed the surface up with 24-grit sandpaper, giving these backing pieces a maximum amount of surface area for the adhesive to stick to.
 With the back side hardened, we mixed more adhesive and applied it to the front side of the fascia to fill the holes.
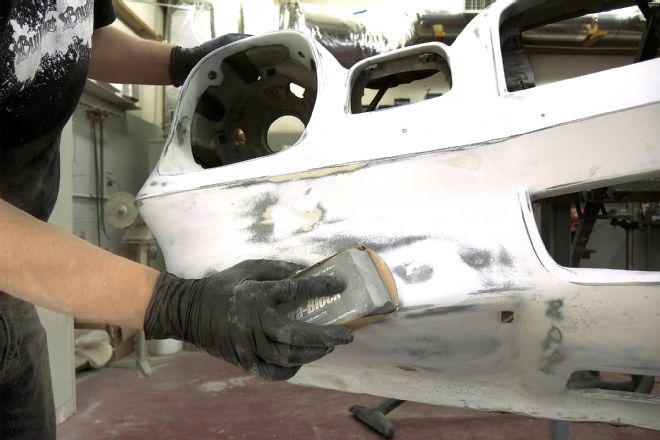
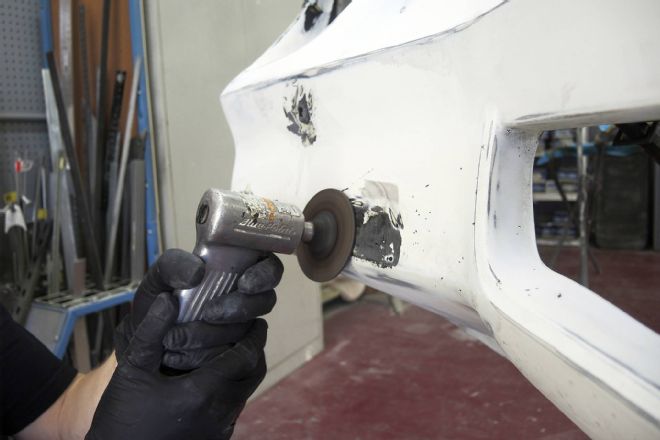 After giving it 30 minutes to cure, we leveled the adhesive flush with the bumper using an 100-grit sanding disc.
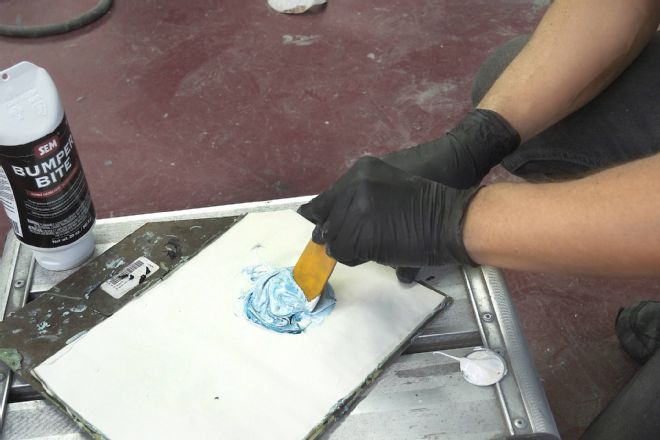 Bumper Bite is a polyester filler that works perfectly with the flimsy urethane parts like our front fascia. It remains highly flexible even when fully cured. It takes traditional cream hardener, just like all polyester fillers.
 We spread the filler past the repair areas, creating a larger area that can be block-sanded flat and will become invisible.
 This product feathers nicely and sands just like any other polyester body filler. We needed two applications to completely cover the holes for an invisible repair.
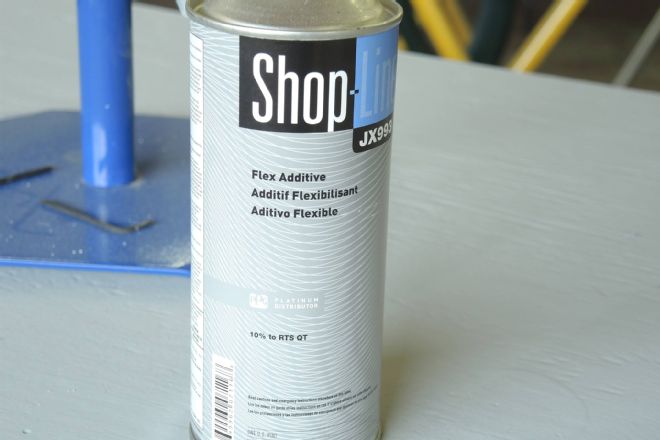
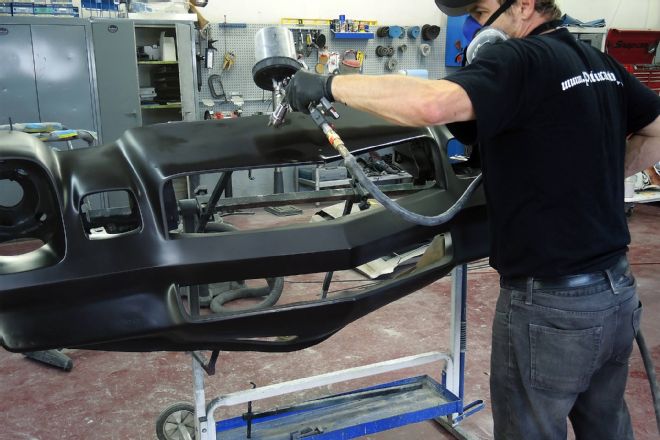 With the repair work done, we applied a 2K urethane primer to the bumper cover, using a 1.6 fluid tip in our spray gun. Because the bumper is so pliable, we need to add a flex agent to the primer. To work properly, it gets mixed in at 10 percent by volume. Most mixing cups have this measurement scale printed on them somewhere. We let the primer cure for a week before prepping it for the topcoat.
Interior Trim
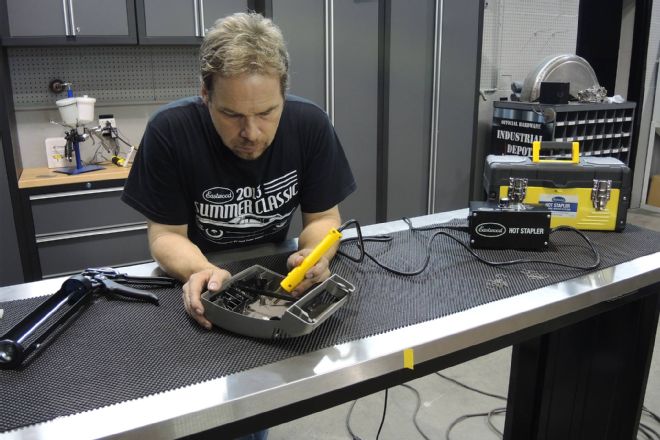 Interior trim is typically hard plastic, and as it gets old, it gets brittle. Eastwood’s Hot Stapler system is a great fix for broken tabs and mounts.
 These staples come in various shapes to match the repair and act as a splint when melted into the plastic or urethane. Here you can see the various shapes, as well as the way they can be mounted to the wand for easy access to many different repairs.
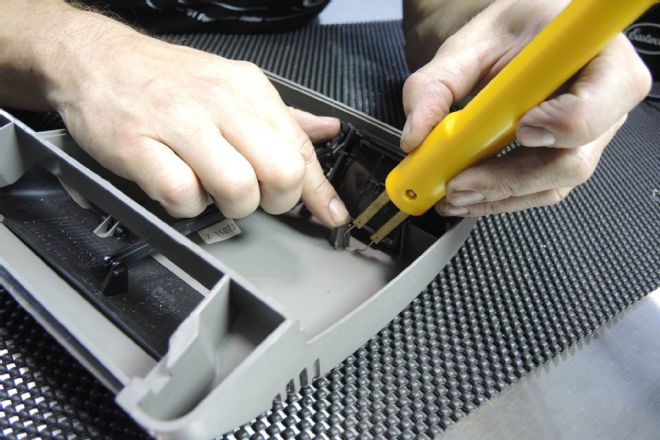
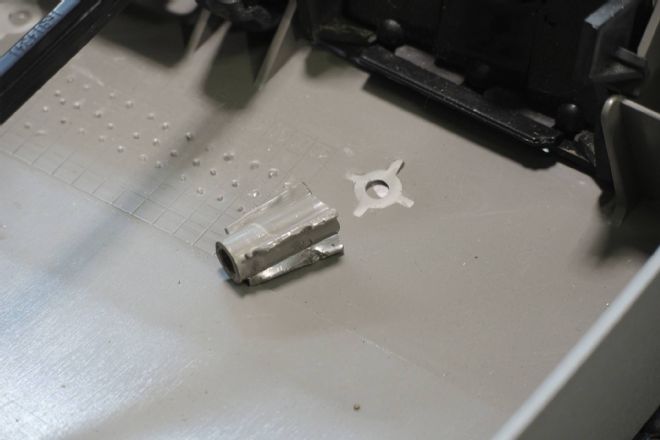 Our victim for this exercise is this screw pedestal that was broken off in disassembly.
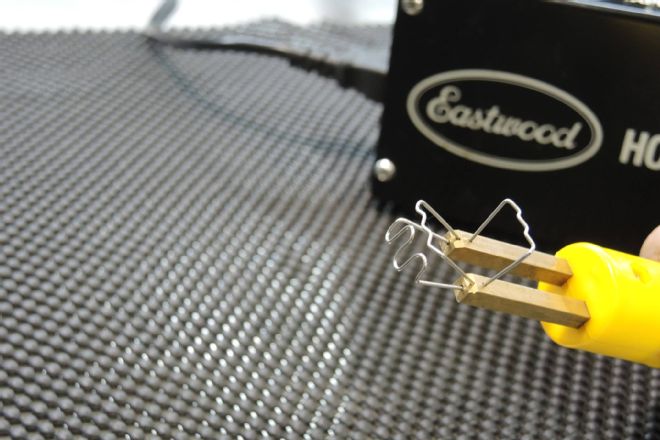
 Match the staple to the repair—here a “cold” test run checks for an accurate fit. The trigger on the wand activates the heat. Three heat settings are available; we’re using slow so we can take our time and not burn through the piece.
 Here you see exactly what happens. When the wand is activated, it heats the staple up enough to melt the plastic. Bury the staple in the plastic, release the trigger, and hold everything in place until the plastic cools enough to remain in position. The repair gets stronger as you add more staples.
 We cut the tails off the staples for a cleaner look and to keep from stabbing ourselves as we handle and reinstall this piece of trim. Be sure to wear safety glasses—the tails go flying when you snip them.
 This repair took about 20 minutes total, and it allowed us to save this part, which would be difficult or impossible to find in many cases. Considering that the Hot Stapler can be used to save irreplaceable parts, it’s worth the investment.
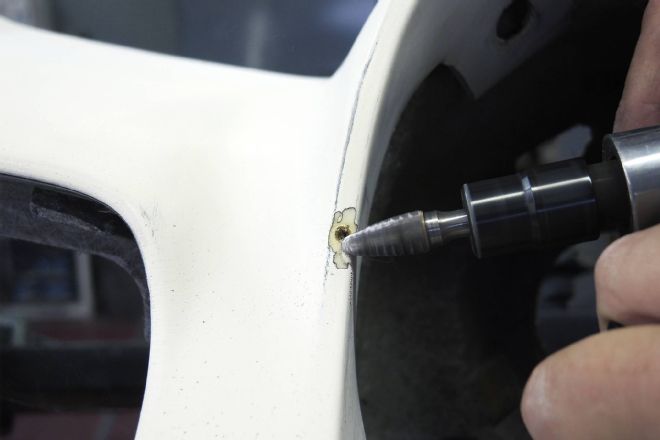
Bumper Tabs
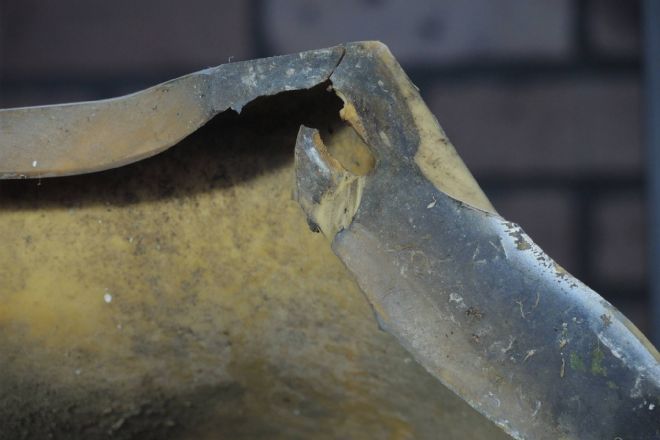 Mounting tabs on modern bumpers are critical for holding them on the car—curbs, speed bumps, light collisions, and even careless disassembly can tear them. Bumper covers are designed for aesthetics; they are not structural pieces, so they break off easily in light impacts.
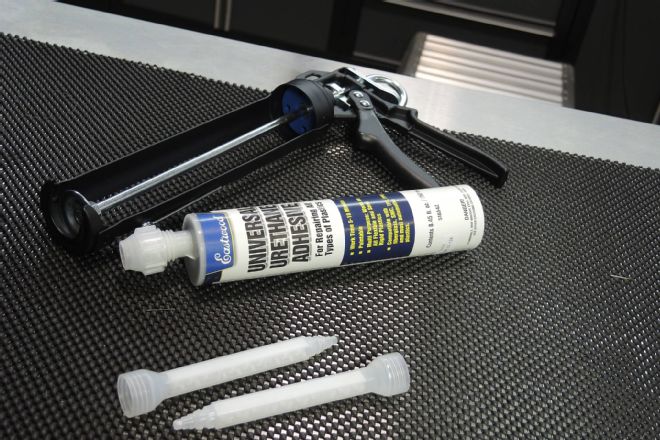 Eastwood sells a Universal Urethane Adhesive that works well for these types of repairs. It sets faster and is also compatible with most plastics and urethanes.
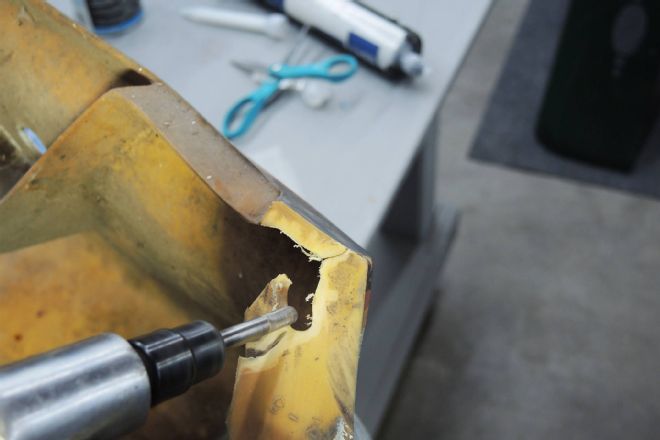 We cleaned the area with acetone, then used a carbide burr to cut a V shape around the edges of the break. This creates a foundation for the repair.
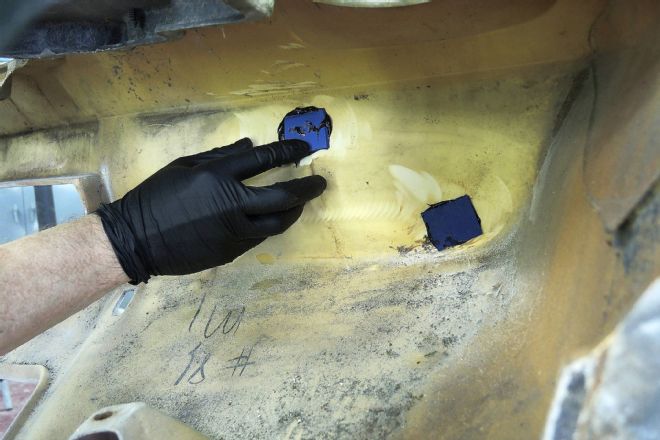
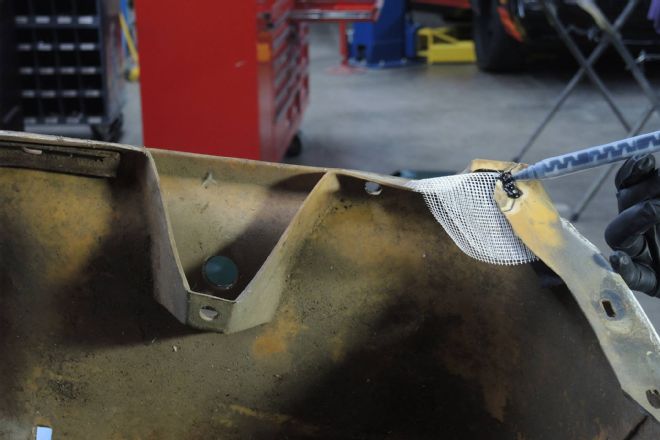
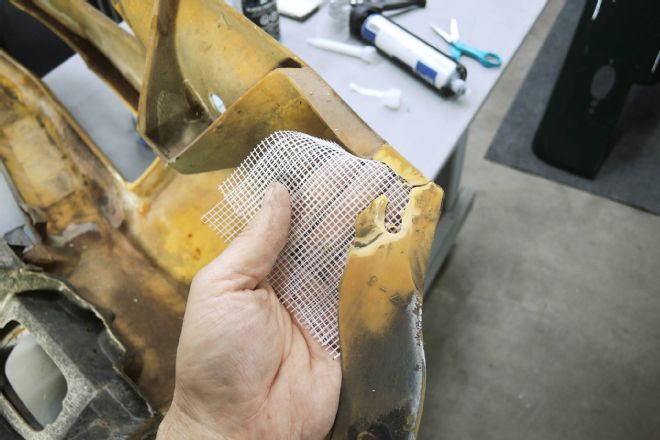 This mesh has an adhesive back. We applied it to both sides of the repair area, which will add strength to the adhesive and give it support while it cures.
 This is a two-part adhesive, with the glue and activator packaged in different compartments within the tube. With the intermix tip in place, we ran a 6-inch bead on our mixing board prior to applying it to the repair. This ensures the mix ratio is correct by the time you squeeze it onto your repair.
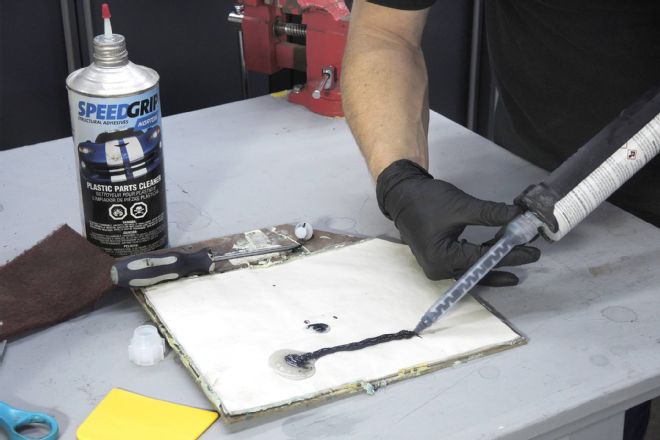
 Apply a liberal amount. Once it’s dry, you can grind or sand excess away. What’s most important is that the backing mesh is fully saturated.
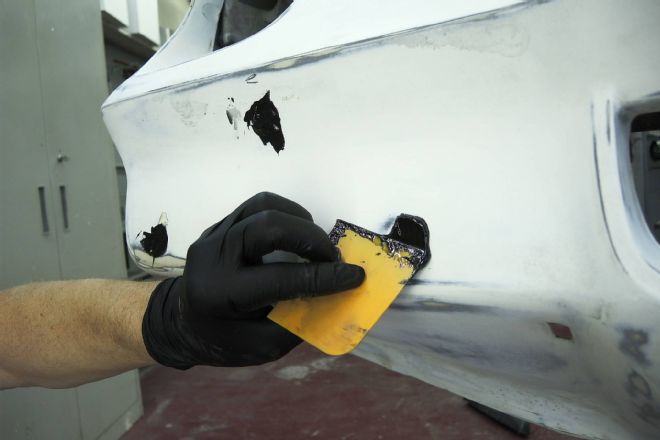
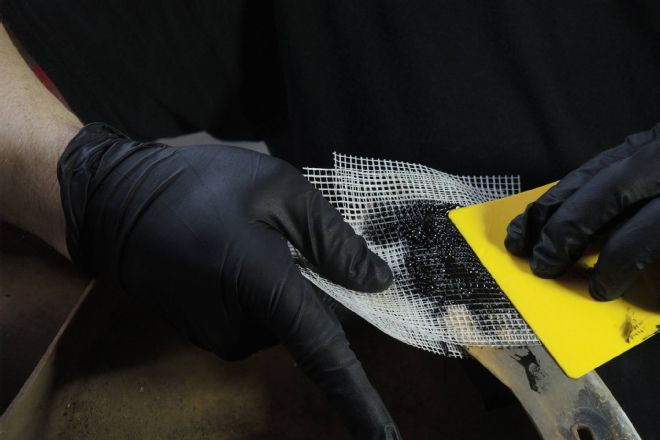 With a second layer of mesh on top, we use a spreader to work the adhesive into the repair and the mesh.
 The cap can be cleaned off and reinstalled onto the tube, and with the supplied threaded outer cap, you can seal the tube so it’s ready the next time you need it.
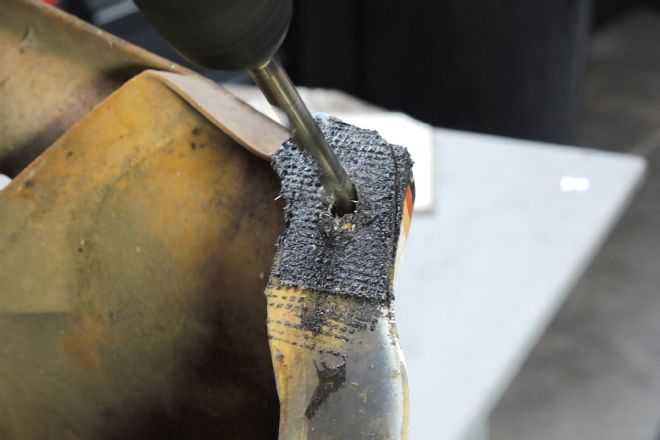
 Once the adhesive has cured for an hour, you can sand and blend the repair with 80-grit paper, then re-drill the opening and recreate the OE adjustment and fitment capability. Structural repairs are better left overnight. The ability to recycle broken parts is just good hot rodding, and while we wait for the aftermarket to come up with replacement and repair parts for some of the oddball cars we wrench on, it’s nice to know that with a little ingenuity we can get these cars on the road faster and cheaper.