When taking on the customizing of your classic truck, the possibilities are endless. It can start with a number of bolt-on upgrades, like brakes and suspension, and progress to more involved changes, including drivelines and electrical systems. Taking on alterations to the body requires a solid plan for what you are hoping to accomplish. Nothing will separate your truck from the rest like a series of well-planned modifications to fine-tune its overall look.
On a recent visit to One Off Rod & Custom in Middletown, Delaware, we came across a 1967 Chevy C10 pickup that was in for a total redo with a laundry list of custom updates in the works. One of the most subtle enhancements slated for the body was to shave its factory driprails to give the cab a more fluid look. In taking on the job there was a fair amount of preparation needed and team member Ski Ostrowski wasted no time in getting started. Since this truck was in for a major amount of work, the interior and windshield were already out. If you are going to take on the job to your existing truck it's a good idea to protect the interior surfaces and windshield from any potential damage from sparks and welding. The exterior surfaces surrounding the immediate areas to be worked on were then covered by 2-inch masking tape in layers. Then the inner door moldings and gaskets were removed and the areas were also protected with 2-inch masking tape.
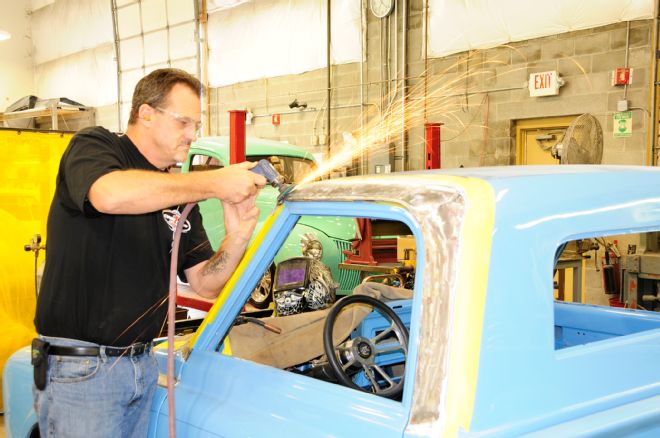
In order to effectively do the job, a number of tools were required, including an air saw, cutoff wheel, various circular grinders, as well as a MIG and TIG welder, and assorted grinding media and flap discs. Ski then followed by using a black Sharpie to lay down a guide line, allowing him an 1/8-inch lip inboard so as not cut into the roof skin. This allows him to grind down the surface later to his liking. With everything ready and while wearing safety glasses, he used an air saw to start at the bottom of the B-pillar area and move his way upwards towards the top middle of the roof area where he cut the first section of the drip rail off. He then proceeded carefully till arriving at the beginning of the A-pillar area which he cut-off in a straight manner. From this point since the saw blade is rigid, he made the curved transition with three individual cuts and then continued on to remove the drip rail above the windshield area. Then, a hammer and chisel were used to remove the remainder of the drip rail base from the cab.
With the driprail now removed, Ski proceeded by using a circular grinder topped with a flap disc to gradually grind down the remaining steel to a smooth surface at the roofskin. This takes time to get the area perfect. In order to roll the roof skin into place now that the drip rail was removed, he proceeded to first separate the front roof skin from the upper windshield frame using the air saw. He then followed by first marking then cutting an incision of 2-3 inches rearward of where the A-pillar meets the roof skin to follow the roof's new crown. Then a 1/16th-inch pie-cut was made to allow the corner to come into place. That completed, the areas were then clamped together with a number of C-clamp style Vise-Grips to secure the area to be tack welded to hold the corner in place. Once completed the remainder of the windshield area was tacked into place and then final MIG welding was completed. To finish off the area a circular grinder topped with a 50-grit disc was used.
With the job looking slick already, it was time to take it to the next level. Team member Luke Hayman started to tack all of the remaining seams together with a TIG welder, being sure to use an air-gun to cool the areas between the welds so as to not warp the steel from the heat. With all the welding completed he then proceeded to grind the areas to a smooth finish using a 4 ½-inch 50-grit flap disc. To add a stunning bit of detail to the area and separate the truck from the rest, he then proceeded to bend a section of ¼-inch steel rod to conform to the contour of the B-pillar into the roof till it met the A-pillar. The section was then tacked into place, finessed with a body hammer, and trimmed to fit at each end with a classic fadeaway added to the end of the A-pillar. To complete the area all final MIG welding was handled and the area was ground smooth to a show-like finish. The team at One Off Rod & Custom gave the C10 some seductively stylish newfound elegance proving that it's the subtle enhancements that many times complete the look.
1 Getting started our C10 had its interior and glass removed to protect it from any potential welding spatter or sparks. Preparation is the key to success when taking on a job like this.
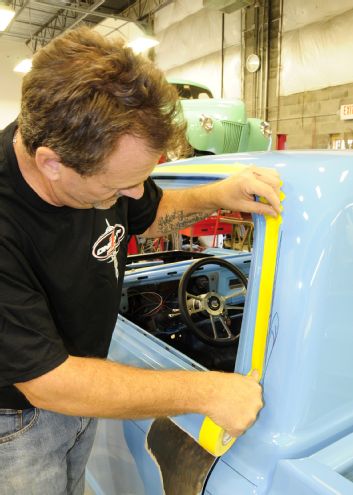
2 One Off Rod & Custom team member Ski Ostrowski used 2-inch masking tape to protect the existing paint working his way from the rear of the cab forward.
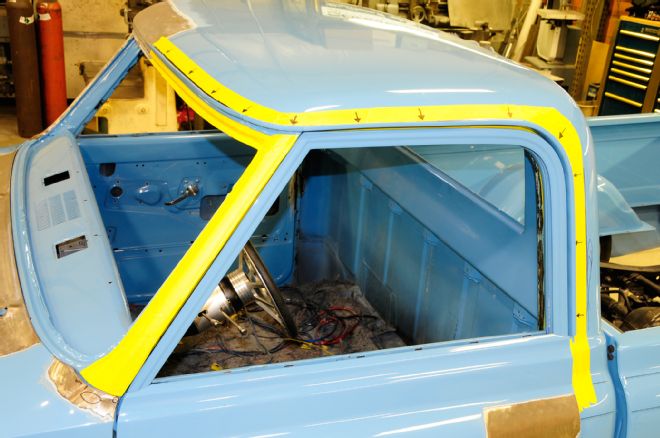
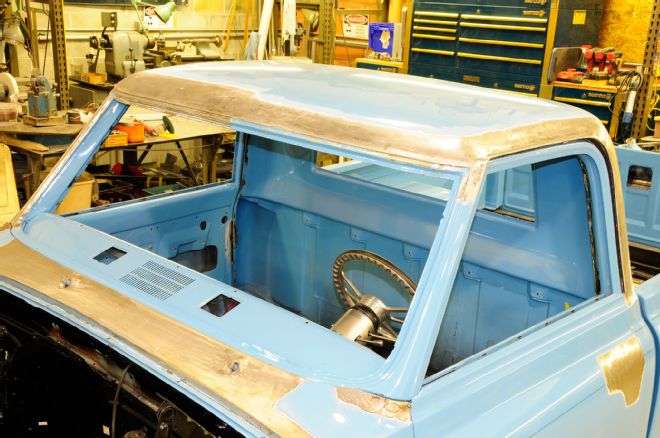
3 Here you can see the prepared area, which includes masking to the inner windshield frame, inner doorjambs, as well as the A-pillar. The markings illustrate the existing driprail set to be removed.
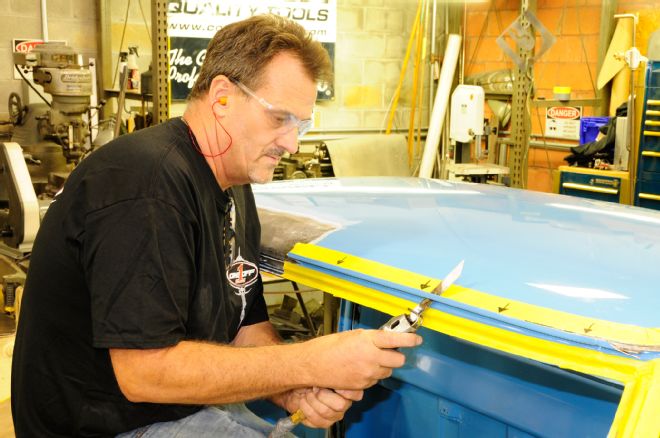
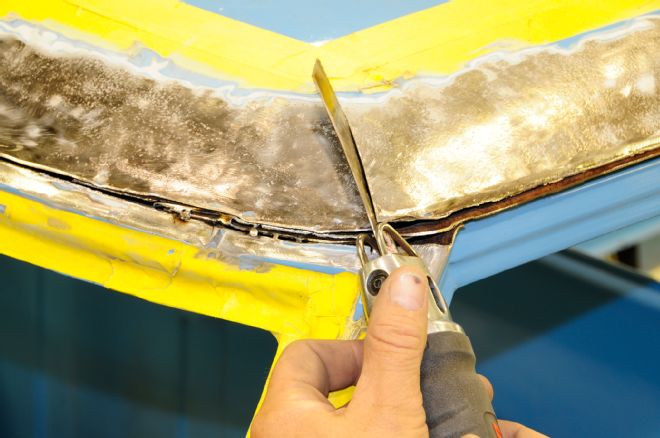
4 While wearing safety glasses an air saw equipped with a Sawzall blade was used to start the cutting. Removal begins at the lower B-pillar and works upward maintaining an 1/8-inch lip so as not to cut into the roof skin.
5 Working with great care, the cutting continued on to the front of the roof area while maintaining the 1/8-inch lip.
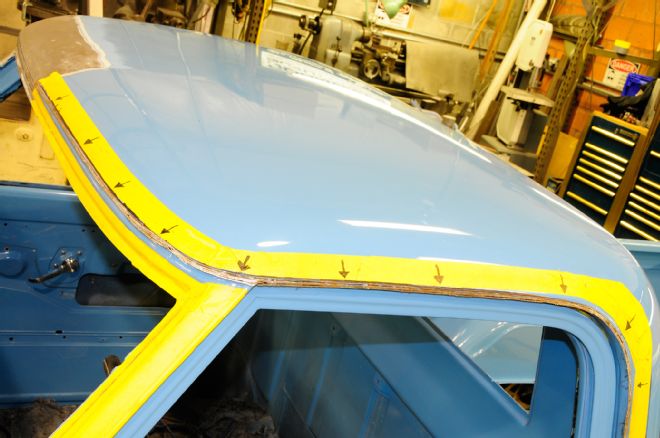
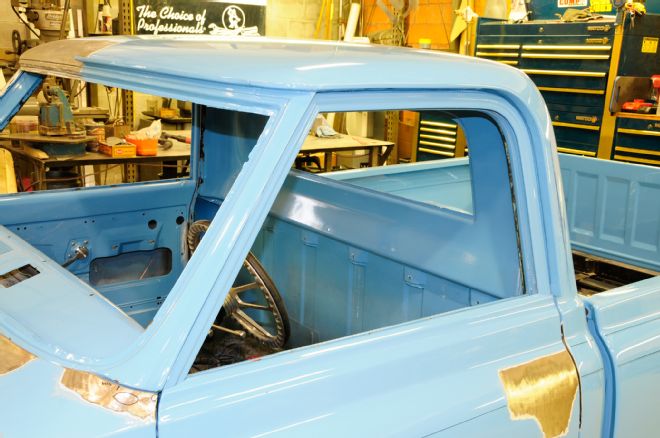
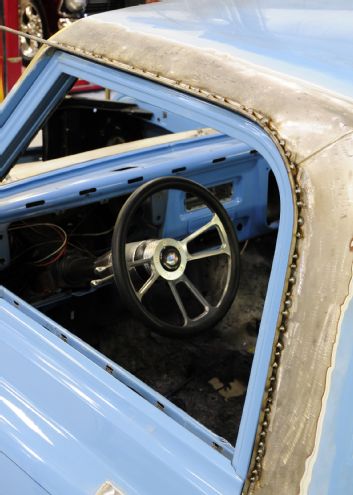
6 Here you can see the completed area where the roof rail has been removed.
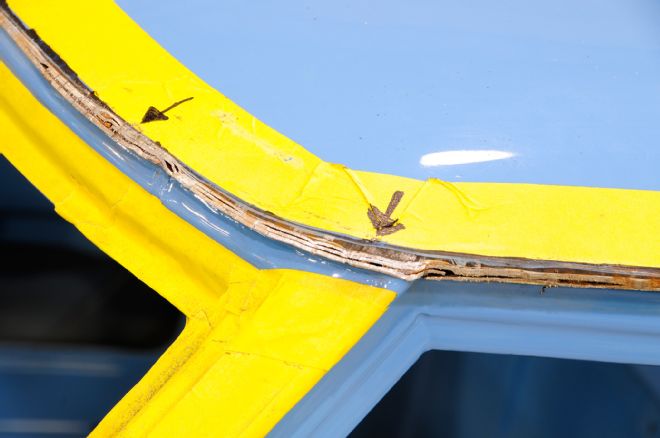
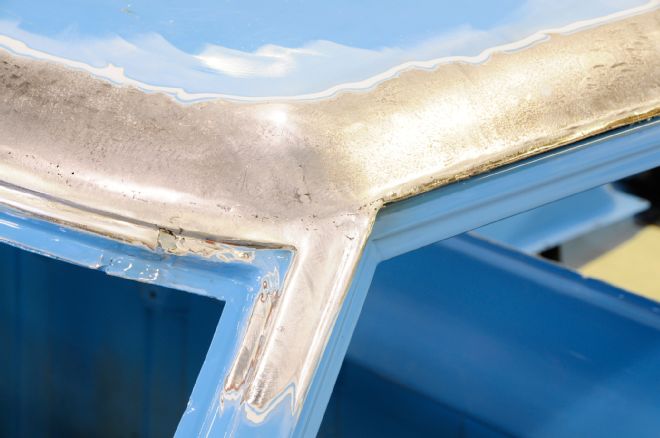
7 This closeup lets you see just how many layers of steel were involved in the construction of the roof and driprails. It also illustrates the amount of grinding still required.
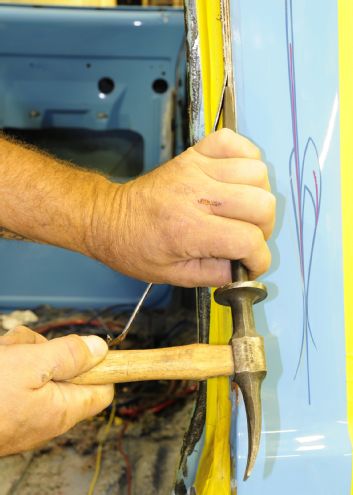
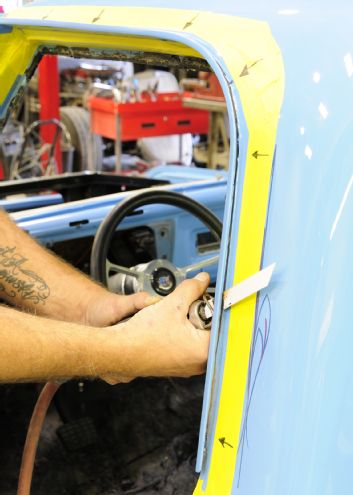
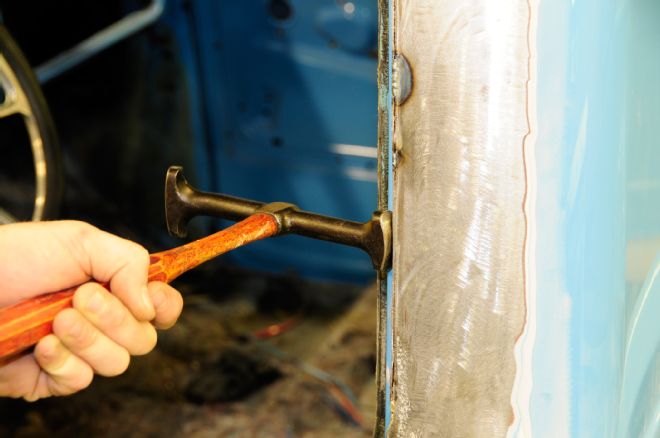
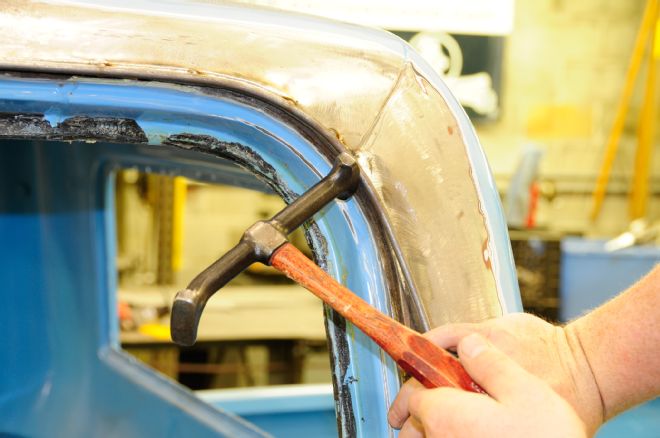
8 A body hammer and chisel was used to remove the remainder of the driprail base from the inner doorframe.
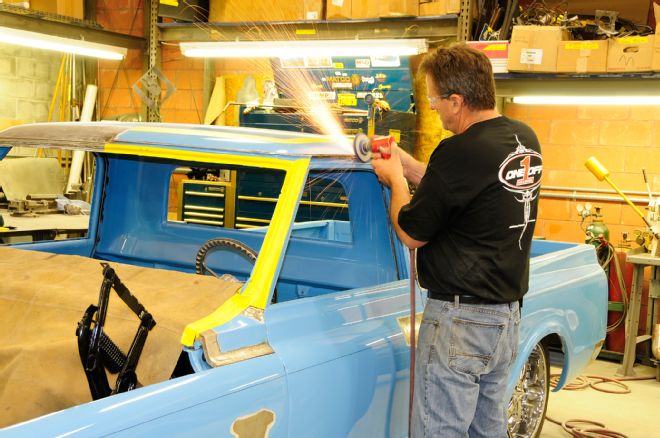
9 Using an air grinder topped with a 4-1/2-inch 50-grit flap disc Ski carefully began the process of grinding down the remainder of the driprail to meet the roof skin from bottom to top.
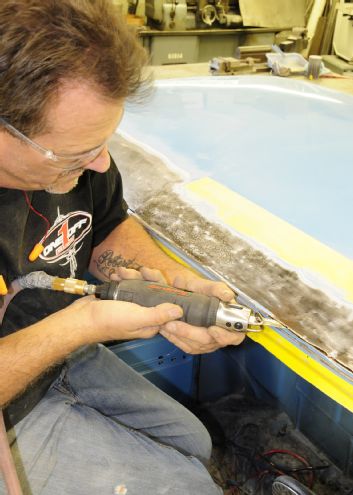
10 The air saw was then used to separate the front roof skin from the upper windshield frame, allowing it to transition and roll the skin into place with the driprail removed.
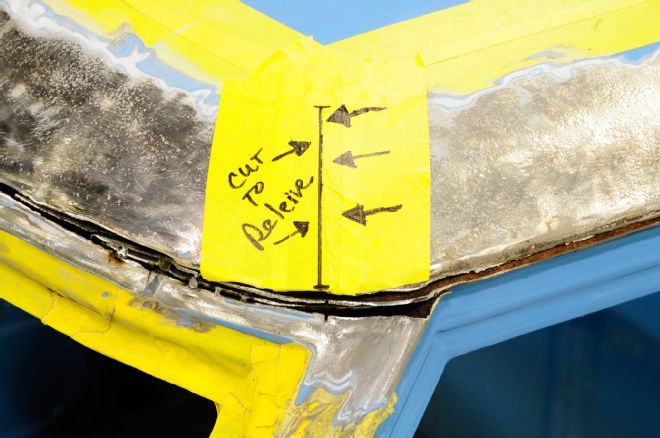
11 The roof skin by the top of the A-pillar required a relief cut of 2-3 inches, allowing it to follow the new front crown of the roofline.
12 Using the air saw the relief cut was made to the roof skin. A 1/16-inch pie-cut was then trimmed to allow the corner to fall into place.
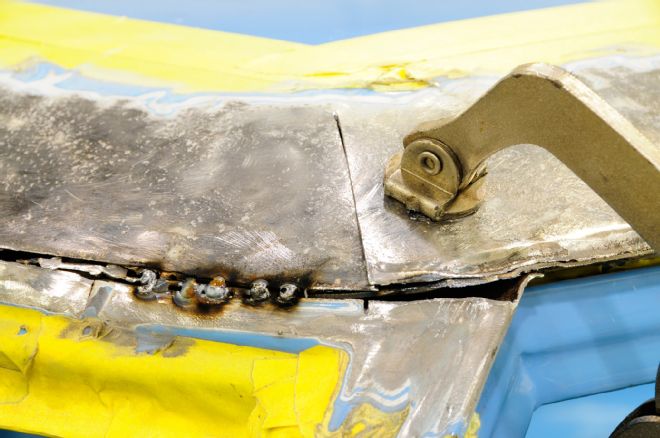
13 A large C-clamp–style Vise Grip was used to hold the skin in place while a few MIG tack welds were applied to secure the roof corner skin in place.
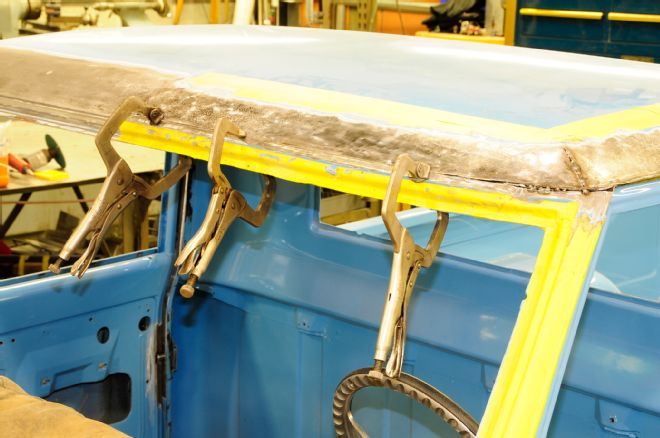
14 There were a number of C-clamp Vise Grips then used to hold the remainder of the front roof skin in place.
15 The MIG tack and final welding then followed across the remaining front portion of the roof skin.
16 Using an air-driven grinder topped with a 50-grit disc the welds were ground smooth to complete the front crown of the rook skin.
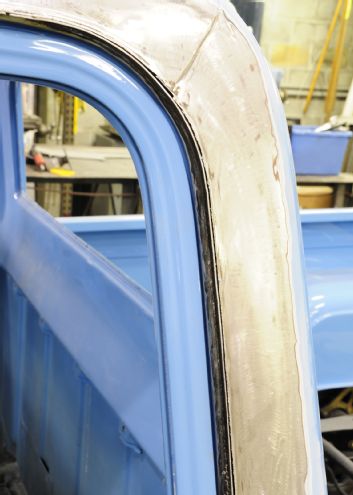
17 Here you can see just how slick the roof crown came out once the surgery was completed.
18 With the inner doorjamb and roof skin ground smooth and ready for welding, you can see the work needed to complete the job.

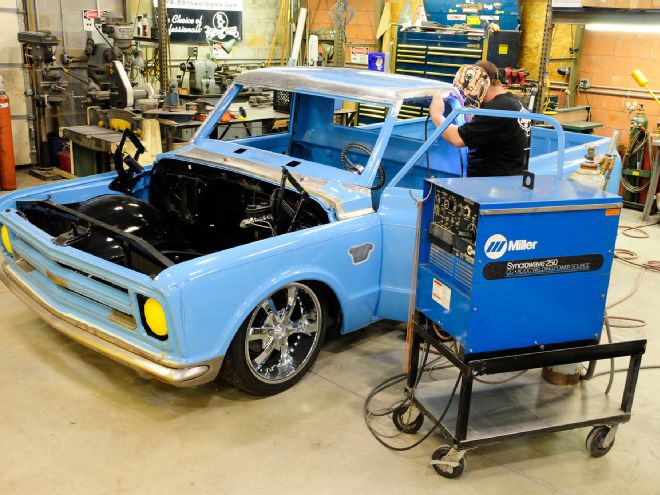
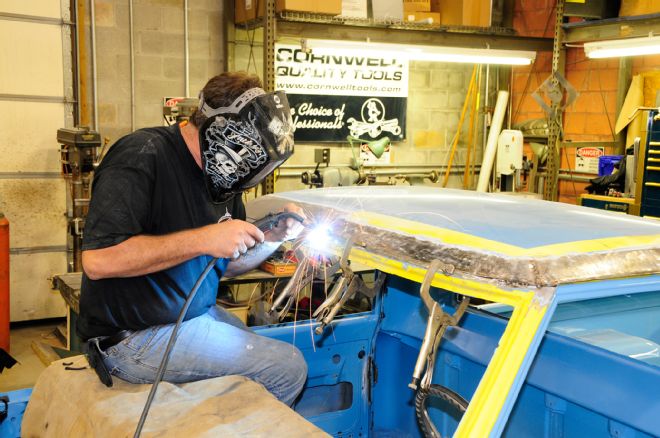
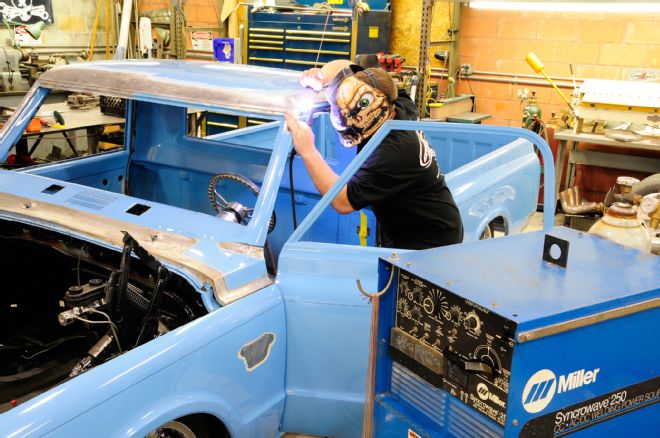
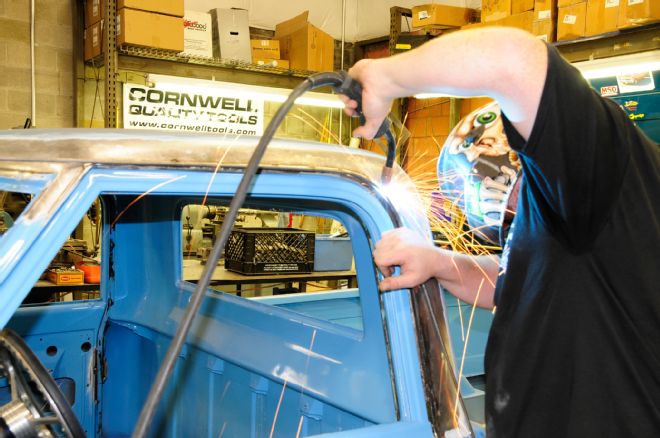
19 Team member Luke Hayman got started TIG welding the seams together using a Miller Synchrowave 250 TIG welder.
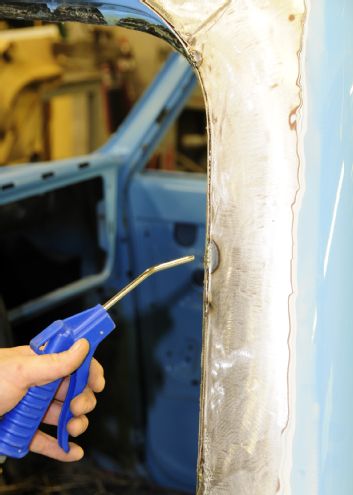
20 The welding is done in sections till completed and is cooled using an air gun between welds to avoid any warping of the panels from the heat dissipated.
21 To keep the panels in line a body hammer was used when needed to hammer the seams close together for final welding.
22 It takes a bit of time to complete the TIG welding due to cooling and Luke worked his way around the area in sections.
23 In this close-up you can see the completed TIG welding as it awaits the next step.
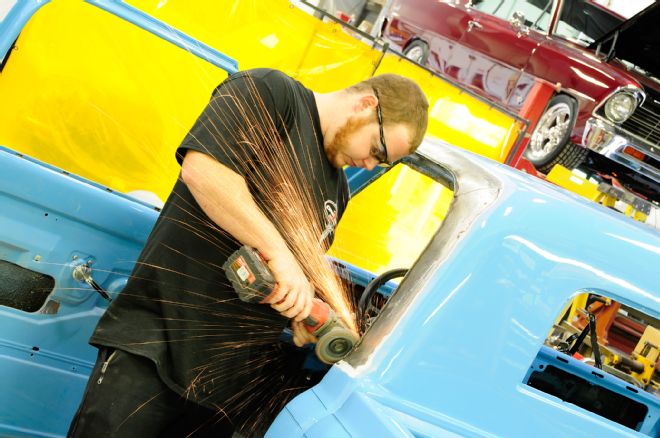
24 Using a cordless circular grinder topped with a 4-1/2-inch flap disc all areas were worked and the welds ground smooth.
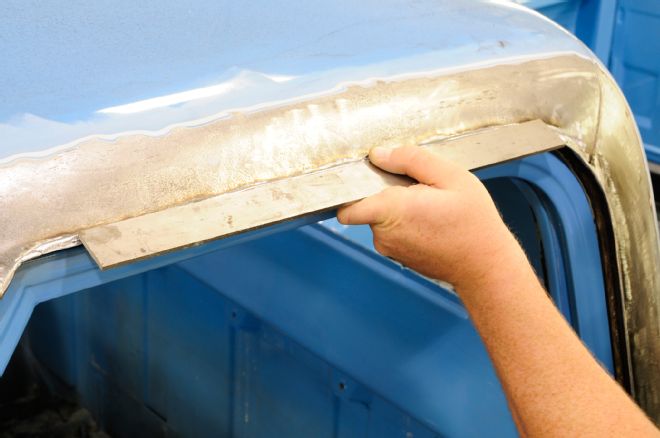

25-26 Once all grinding was completed a straight edge was used on both planes to confirm roof and B-pillar flatness.
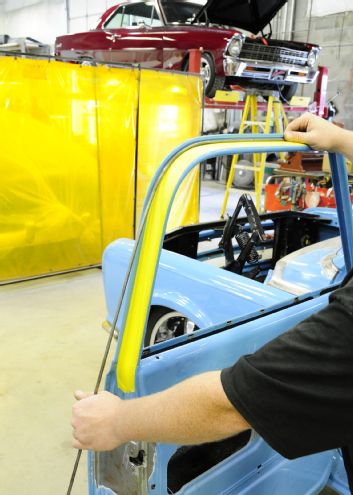
27 To add style and detail to the roofline a section of 1/4-inch steel rod was bent to conform to the contour of the area. Note that 2-inch masking tape was applied to protect the inner door area prior to commencing.
28 The rod was then carefully MIG-tacked into place.
29 Here you can see the initial layout of the rod tacked into place.
30 As the tack welding proceeded the rod was adjusted to the contour of the B-pillar using a body hammer until it followed the line of the door opening perfectly.
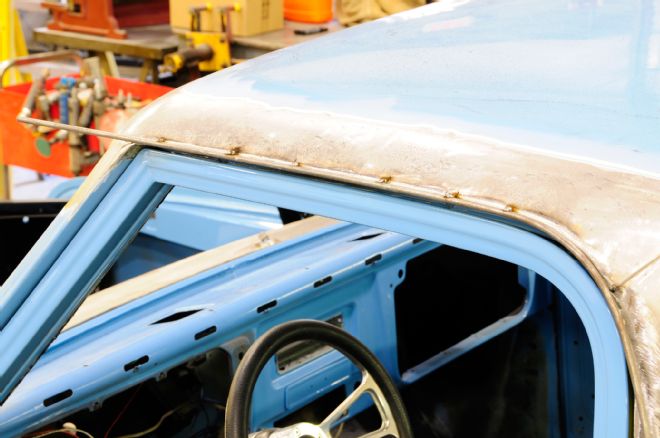
31 With the 1/4-inch steel rod fully tacked into place you can see the progress of how it will look once completed.
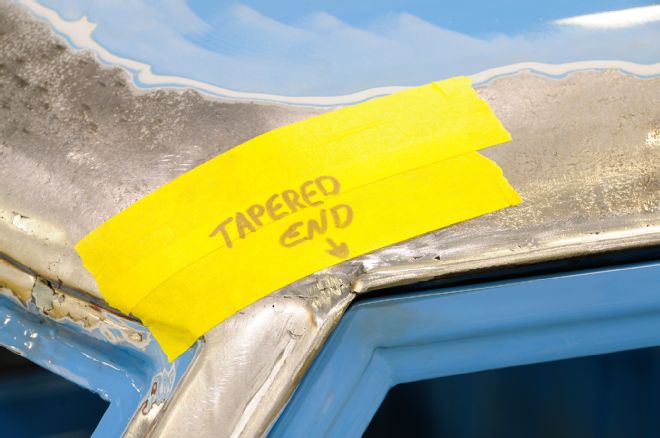
32 To complete the look, the final edge will be cut and tapered where it transitions into the A-pillar to make the transition seamless.

33 With the transition completed the final MIG welding continued followed by grinding the welds smooth using a circular grinder topped with a 50-grit disc.
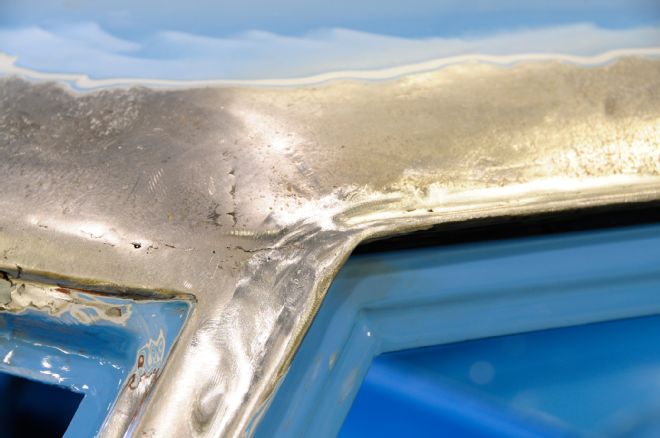
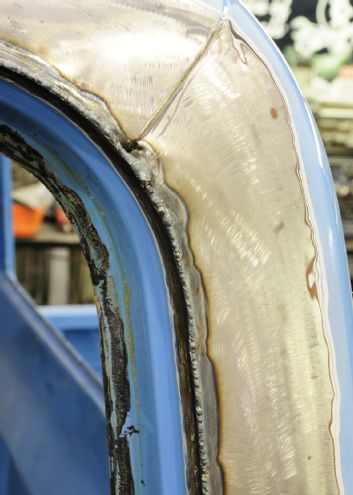
34 In this close-up you can see the graceful transition of the 1/4-inch steel rod to the upper base of the A-pillar.
35 The finished product not only removed the driprails, it gave the cab a newfound smoothness which will definitely make it a standout once it reaches final paint.