One of my favorite aspects of building a classic truck is final assembly. The big components are in place, the truck is starting to look like a truck again, and all those little detail pieces are falling into place. This is the time when you can take a step back at the end of the day and actually view some sort of progress, which for the past couple months may not have been the case. All those long, filthy nights, all that blood, sweat, and tears are all starting to pay off. It's also the time most of us get to open up all those new parts we've been scrimping and saving for. Those peanut butter and jelly sandwiches you've been living on for the past six months seem well worth it when it comes time to unwrap that new grille and you see it in place on your truck for the first time.
Tim Foss' E-Rod-powered C10 has been a pretty stable feature in the CT Tech Center over the past year or so as it's undergone its transformation from a stock pickup to a true hot rod hauler, all within the lines of the law. Having just recently passed the California Smog Test with flying colors thanks to the Chevrolet Performance Parts E-ROD drivetrain package, Tim's been really excited to finally get his truck out of the shop and out on the road. A modest man, Tim would have been happy to just have his truck back, but CT Tech Center manager Jason Scudellari and I knew we needed to see the old C10 off with a bit more vanity, given all the work that Jason's put into her.
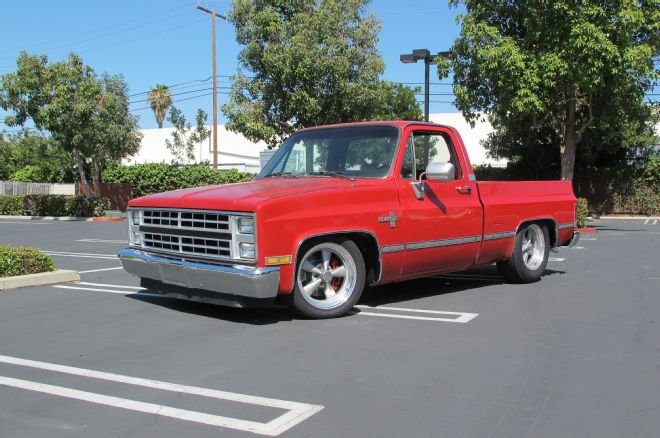
We needed to put a bow on the project, so to speak, and that involved a plethora of bright and shiny parts from LMC Truck. New side trim, lenses, and badging were in order, as was a new grille to replace the damaged original. While we were at it, Tim decided to swap out the old steelies and white-letter TAs with a set of Cragar aluminum S/S wheels shod in Toyo rubber, further enhancing the truck's hot rod aesthetic. When it was all said and done, I have to say that what rolled into the Tech Center as a beaten up, left for dead, '80s relic emerged a leaner, meaner, cleaner hot rod truck that actually wears its age fairly well. You can't say that about too many things from the '80s, now can you!?
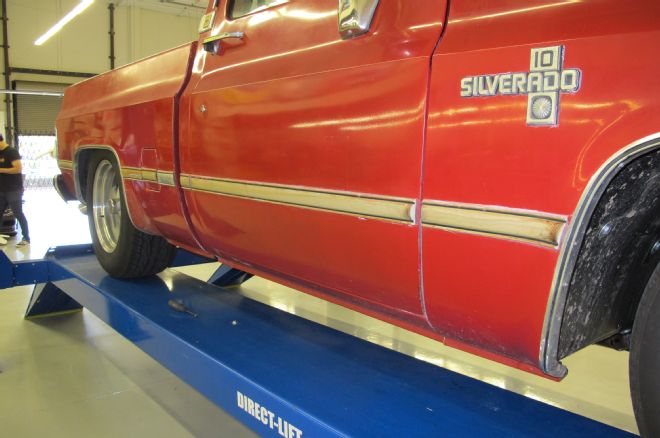
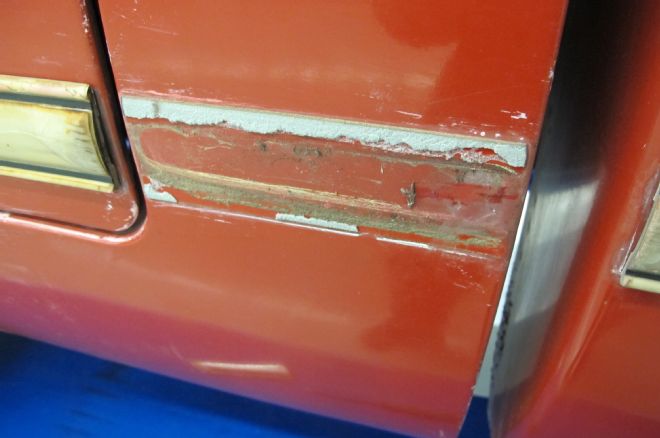
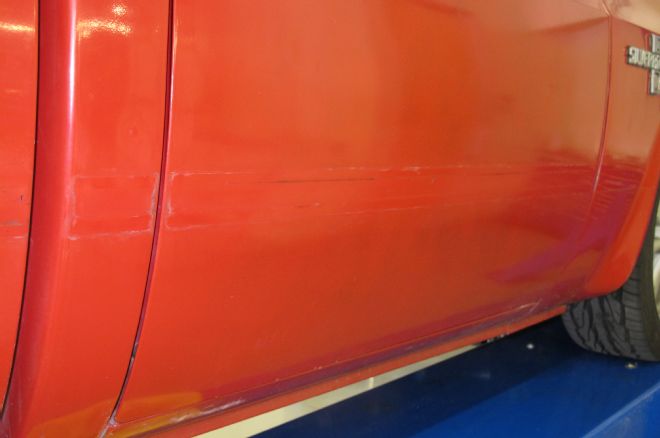
01 While the paint on Tim's truck is pretty decent, the original side trim had definitely seen better days. It's yellowed, faded, peeling, and otherwise unappealing.
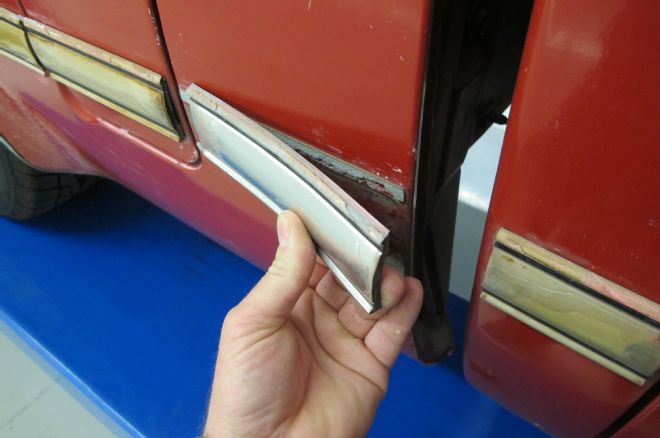
02 Thankfully, LMC Truck offers everything we need to get all the brightwork back up to snuff on the squarebody, including the pre-cut body side molding set (#39-7031) and wheel arch molding (#38-7018).
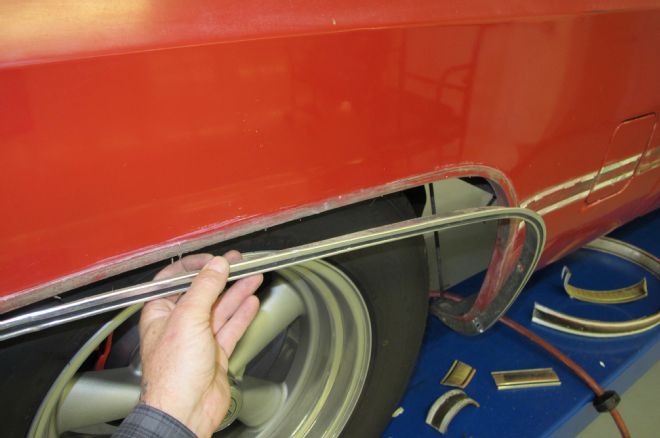
03 Removing the trim can be fairly easy...
04 ...but the mess that the factory adhesive leaves behind is another story altogether.
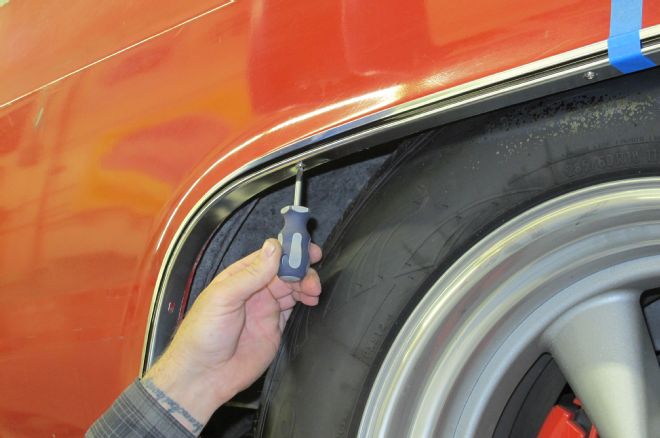
05 The wheel arch molding is affixed to each fender using a handful of sheetmetal screws, so they're relatively easy to remove. There can be a bit of cleanup involved here as well.
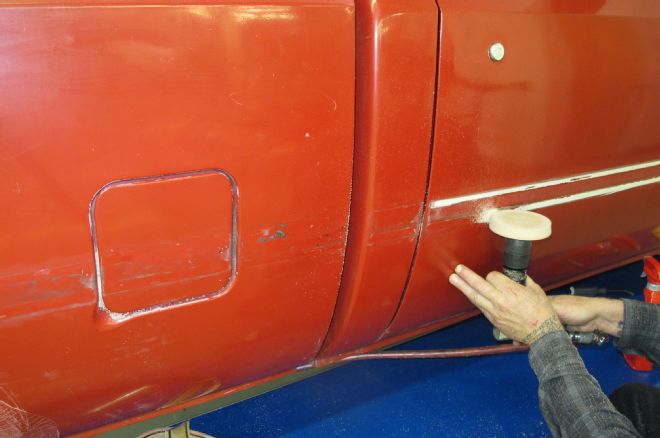
06 To remove the adhesive, dirt, and grime left behind from the stock molding, Jason used a 3M Adhesive Eraser Wheel mounted in an Eastwood pneumatic drill to carefully buff off the offending gunk.
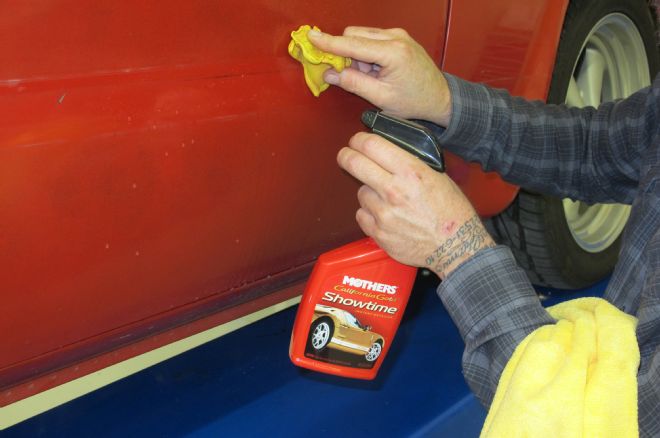
07-08 A follow up wipe down using Mothers California Gold Showtime removes any remaining imperfections.
09 Knocking out the easy stuff first, Jason attaches the wheel arch moldings via the provided screws from LMC.
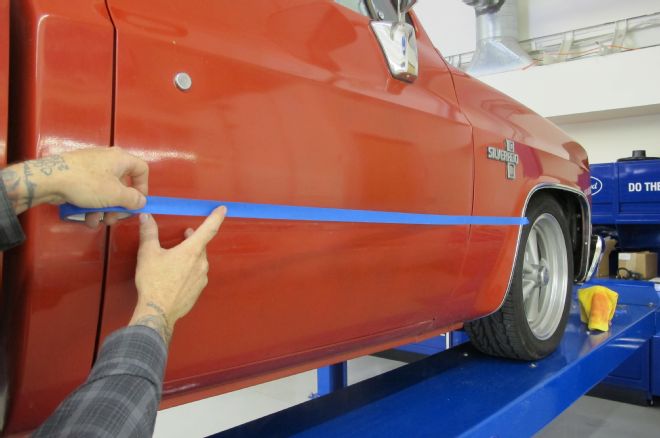
10 To easily relocate the new molding, Jason pulls a tape line from the front wheel well to the rear.
11 Then it's an easy matter of just aligning the trim piece with the bottom of the tape line. Peel, stick, and away we go!
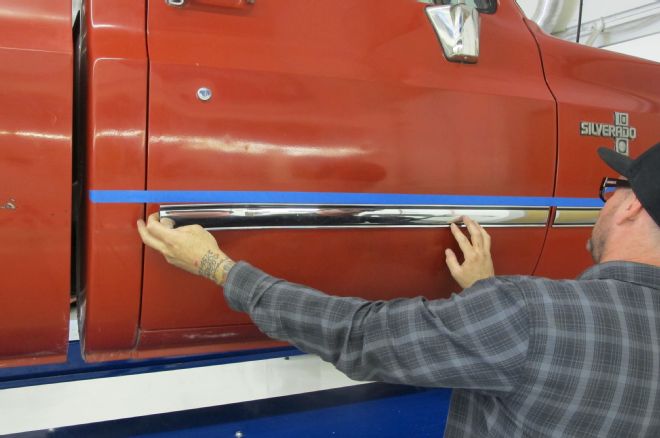
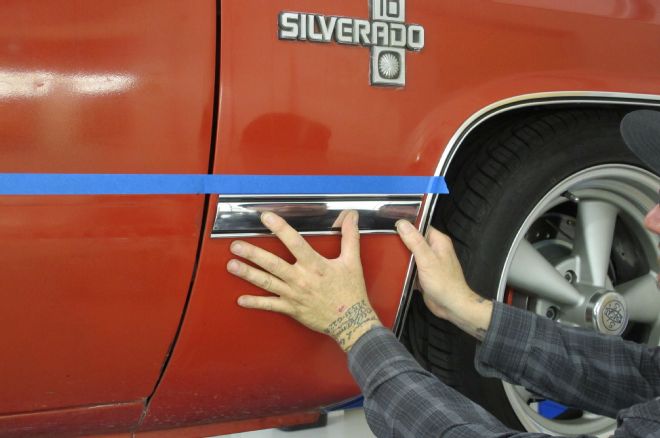
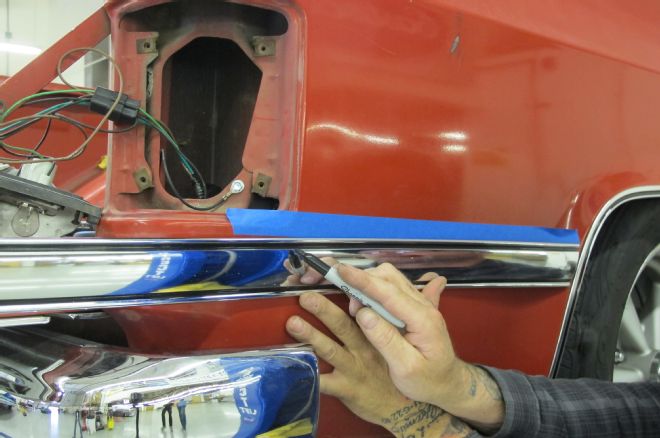
12 The trim is slightly flexible, so it's easy to locate the front corner perfectly and work backwards, pressing the trim in place as you go.
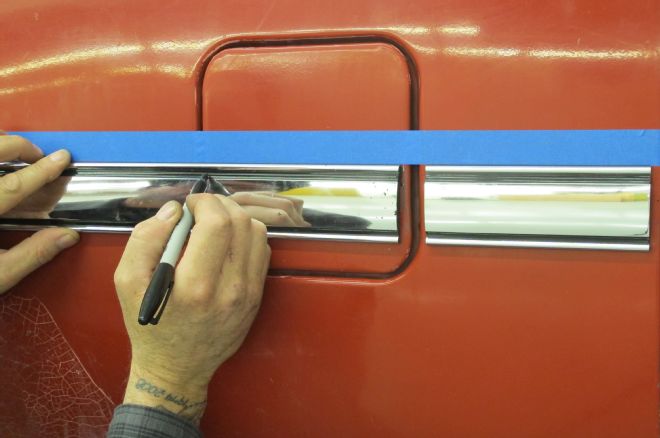
13 It's necessary to cut the trim where it transitions from the bedside to the gas filler door on those trucks equipped with the extra, auxiliary fuel tank.
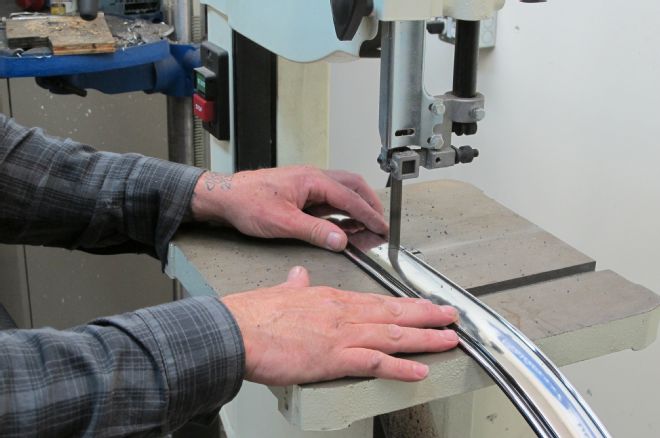
14 Cutting the trim on a bandsaw to size is easy.
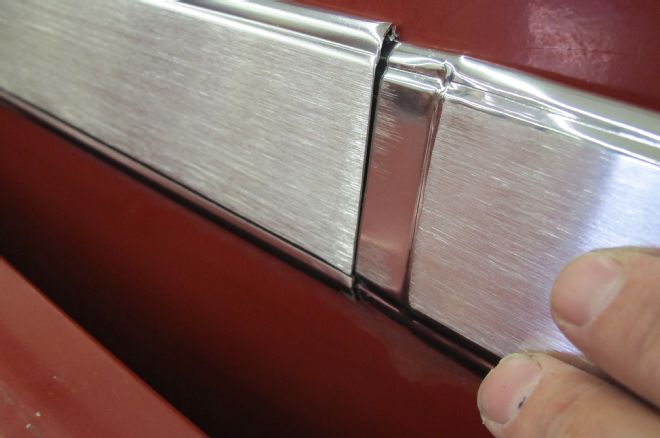
15-16 Where the straight trim meets the corner trim is the same story; just trim to fit.
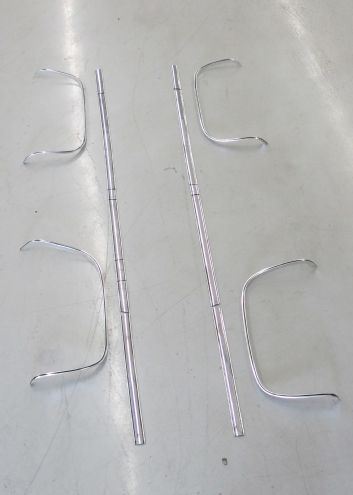
17-18 The corner trim (#38-7044 & #38-7045) uses two different tabs to hold it in place; a snap-in style and a bolt-in style.
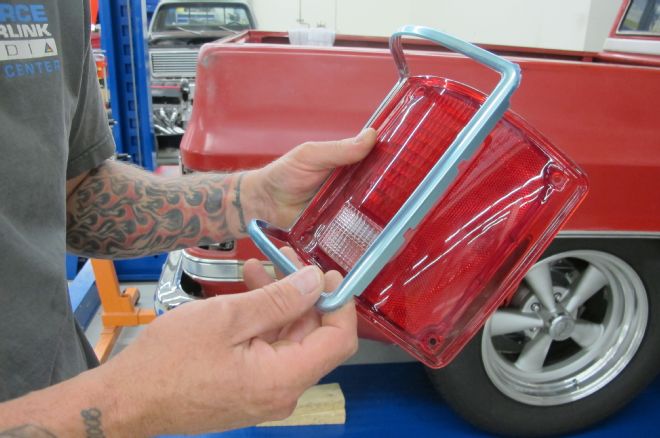
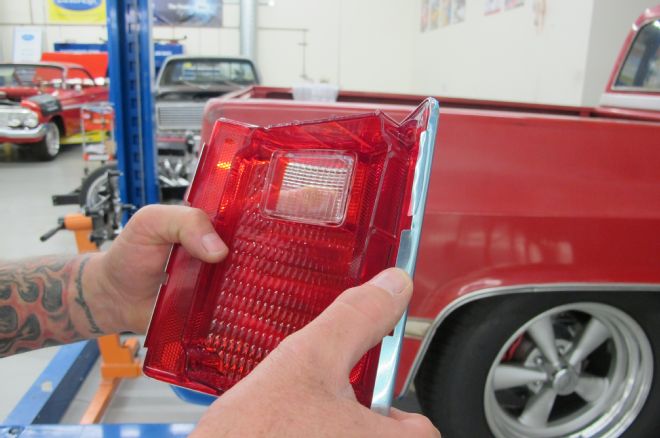
19-20 While we were hanging 'round the back of the truck, we though it a good time to install the new taillight lenses (#36-4282 & #36-4283) and trim (#36-4290), which installs by bending over the side tabs on the lens.
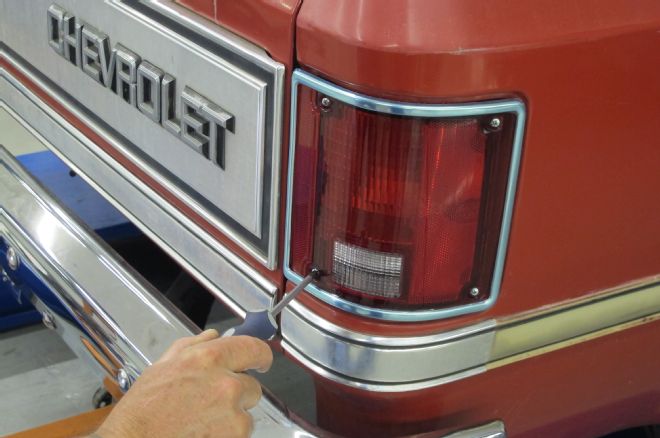
21 Four screws then secure the assembly. Note the old trim that is still installed in this photo.

22 The center panel on our tailgate is still in great shape, as is the lower molding so a quick clean-up is all that's required there.
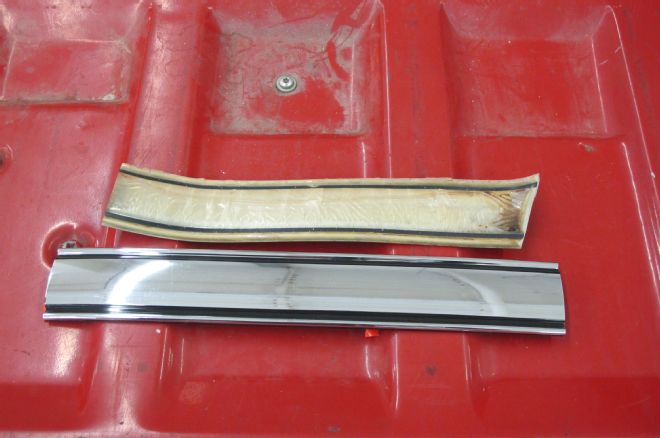
23 A side-by-side comparison showcases the difference between the fried original molding and the new LMC Truck item.
24 The cab moldings were also a bit worse for wear, so we opted to replace these as well (#38-7074).
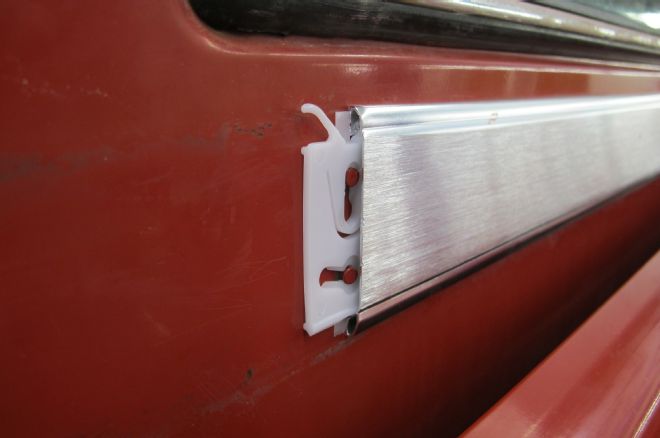
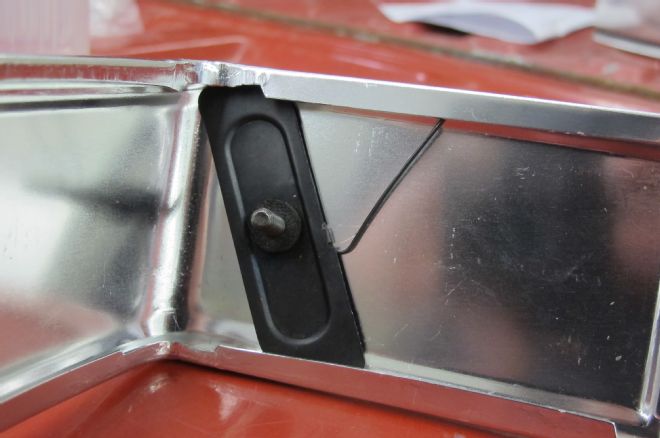
25-26 The center cab molding features a rather interesting clip design that attaches to the cab via two tabs. The molding then attaches to these plastic clips.
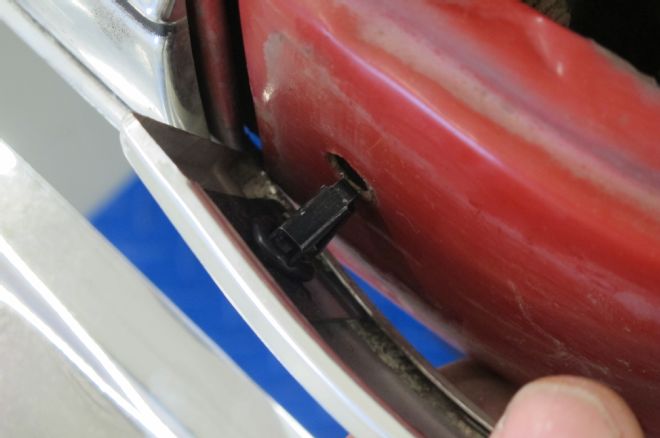
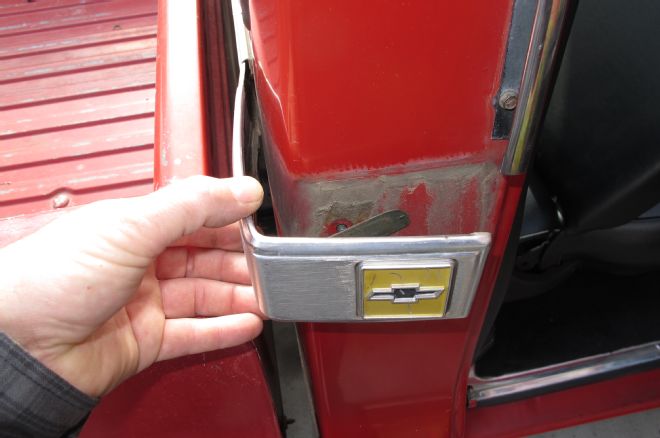
27-28 The cab corner molding slips under the center molding and is held in place with a more traditional clip design.
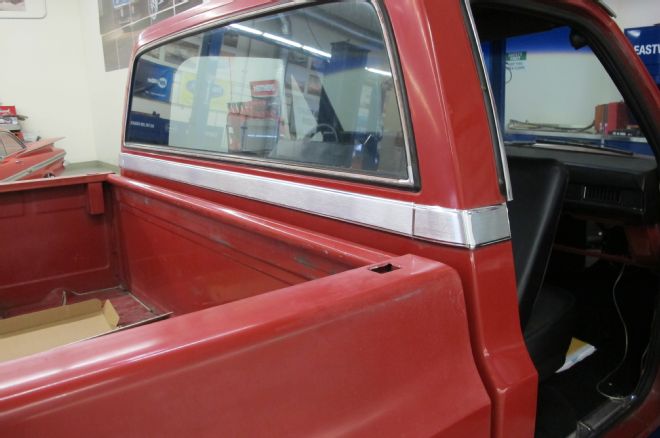
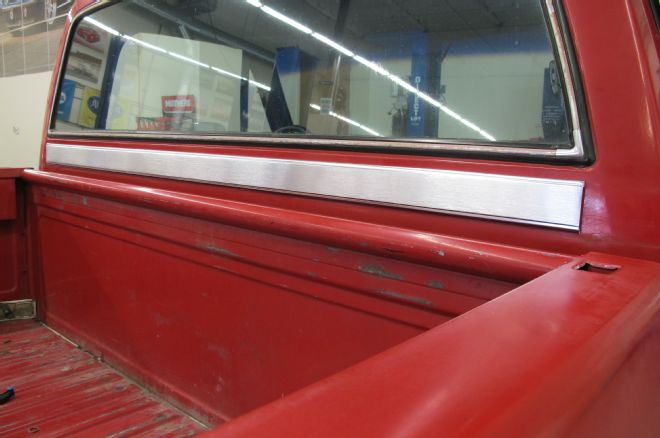
29 The end result is a clean beltline around the back of the cab.
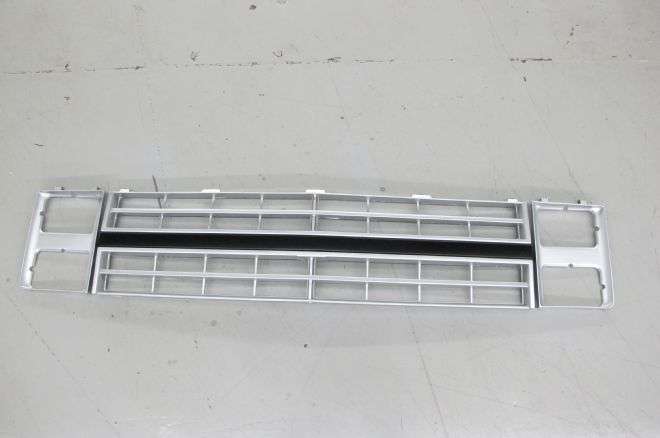
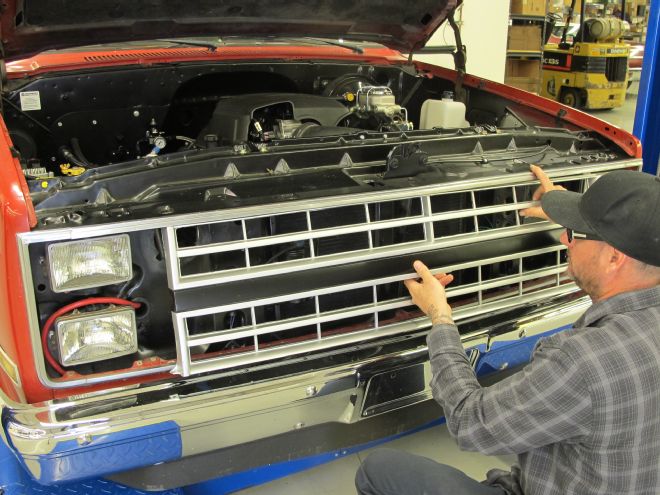
30 Jason ordered up a brand new grille (#38-3979) and headlight bezels (#36-4324 & 36-4325) to dress up the frontend of the squarebody, but kept the stock molding intact.
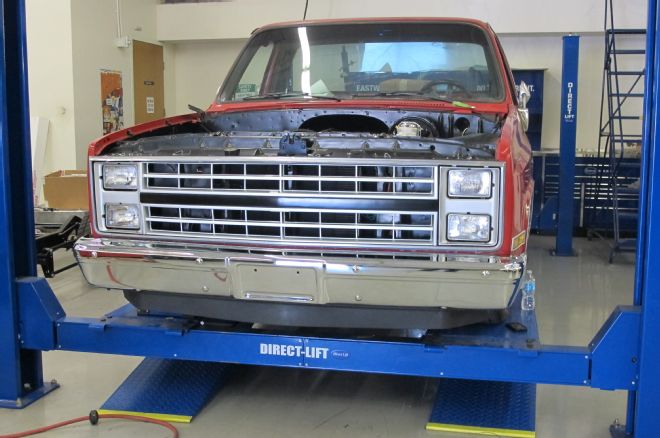
31 A new front bumper (#38-9867) combined with an add-on air deflector (#38-7403) give finish off the frontend's appointments.
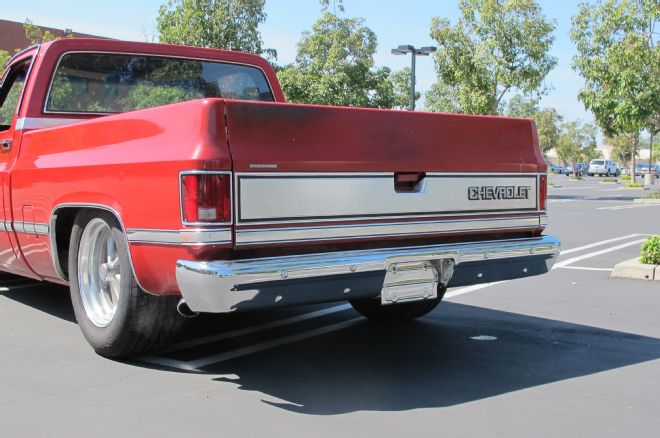
32 A new rear bumper (#38-9885) is the last item on our list of brightwork to be installed and will receive our new plates shortly.
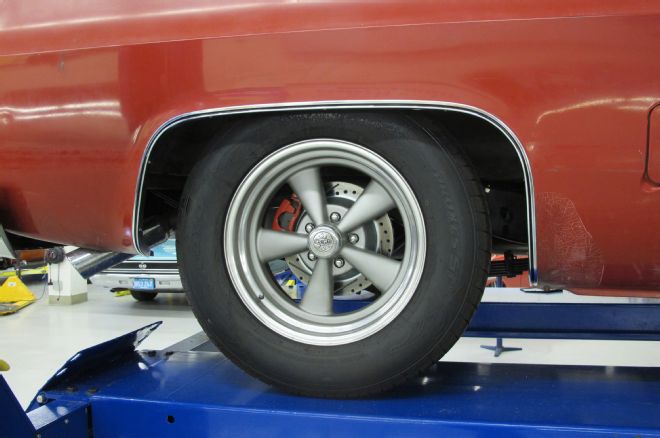
33-34 No transformation would be complete without the addition of proper rolling attire. In this case, a set of Cragar S/S wheels, 18x8s up front and 18x9.5s out back are mated with Toyo Proxes ST tires, 255/45RR18s and 285/60R18s respectively.
35 Back on the road, looking lean and mean! A great looking daily driver that any truck guy could be proud of.