Everything has a compromise, and the 1940 Ford—as handsome as it is—is no exception. Ford made tons of concessions when it designed the car, among them buyers who wore hats and who wanted heavy-looking cars. Ford gave them both by making the body taller and the windows relatively small.
Bulky-looking cars may have appealed to prewar America but we tend to like lean and sleek, if only by looks. History even proves it: We've lowered and chopped 1940 Fords—well pretty much everything really—for decades. But there's a flaw with those methods: they don't address the '40's actual bulkiness at the source. In fact, chopping an already-low top makes the body seem that much bulkier. Section the body to match the already-low top, we concluded, and the car will naturally take on a sleeker profile.
In simplest terms sectioning is merely chopping the body. Like a top when chopped, the body can come together in any number of ways: evenly, lower in the front or back, or, of the most common, too low.
Sectioning isn't the first method to come to mind though. Sectioning means feet-long cuts and welds in low-crown panels, and through often-complex body lines. Humans will take the path of least resistance even if it's not in their best interest, and in this case they'll chop rather than section.
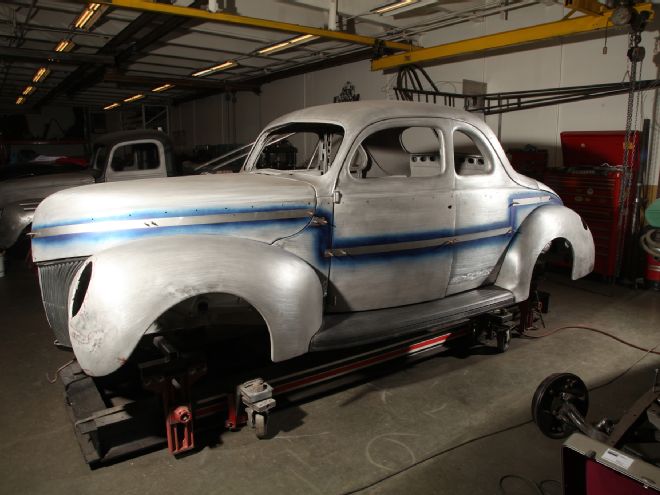
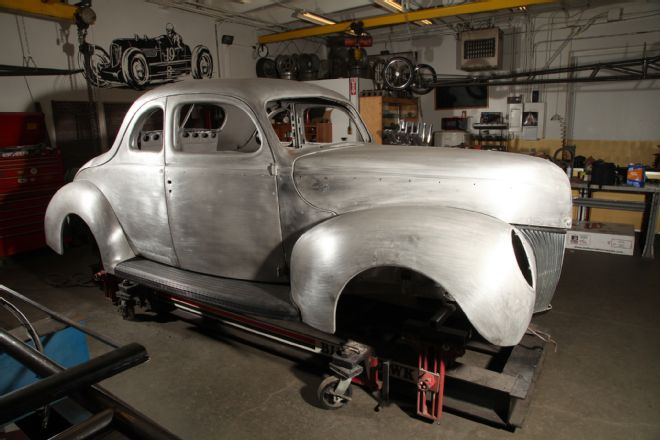
But we're here to tell you that sectioning a car—at least a 1938-40 Ford—isn't as insane as you'd think. A ton of work? You bet. In fact probably the kind of work that can kill a project dead in its tracks if not planned properly. But it doesn't have to be; at the end of the day it's just a bunch of cutting, some metal shaping, and welding—lots of welding. What follows is how to section a coupe body 1-3/4 inches. That's not a random number.
Remember compromises? That figure is about the maximum amount of sectioning that this particular body can endure without losing the transition between the trunk and fender and disrupting the hood's shape.
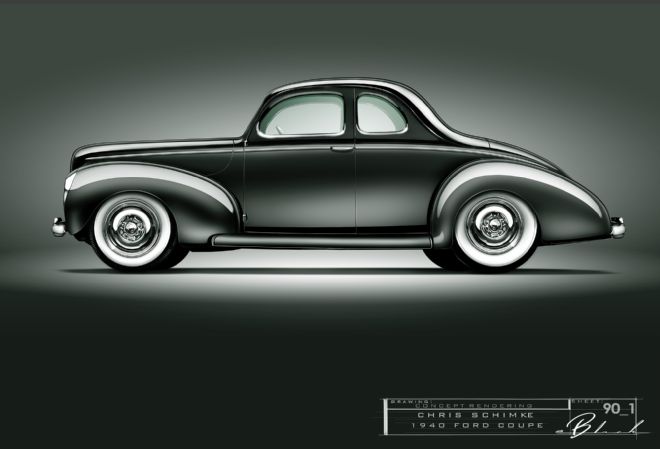
But just because 1-3/4 inches is the maximum doesn't make it the ideal figure. Before we dove in we wanted to know what the thing would look like when done. We asked Eric Black at E. Black Design Co. to design the car with certain modifications in mind.
Black isn't the guy to go to if you merely want to see your ideas on paper. There are plenty of people for that. Rather he proposes other modifications consistent with the vehicle's overall design and discourages the ones that aren't. In other words, he collaborates.
But what makes his collaborations especially good is his ability to render and modify the car to scale. That way you don't get an idea of what he wants it to look like; you see exactly what it'll look like. The images prove the job barely visible, in our opinion the best way to modify a car. You know the ones you can't see but can't help but make you want to look.
Any project requires planning to succeed but this one requires tons of planning. Laying out the actual cut lines the way Thun Field does it has a number of benefits. It reveals the way the car comes apart and ultimately goes back together. The ability to actually see how the metal will move in such a radical modification usually explains the various techniques required to make all of its pieces fit back together. And that makes it possible to alter the technique to suit your skills or even learn new skills before making the first cut. After seeing what it takes to properly reassemble a body you may well deem it not worth the effort, something nice to know before the body comes apart.
The cut lines shown here apply specifically to 1938-40 Ford coupes; however, the techniques remain the same for pretty much any car. And yeah, it's a pretty involved job but—call us crazy—not as difficult as chopping some cars, especially curvy-topped ones like 1938-40 Fords.
But plan carefully and work smarter and it's entirely possible to eliminate the compromise in a bulky body. We won't call it easy but we'll prove that it really is a lot simpler than you think.
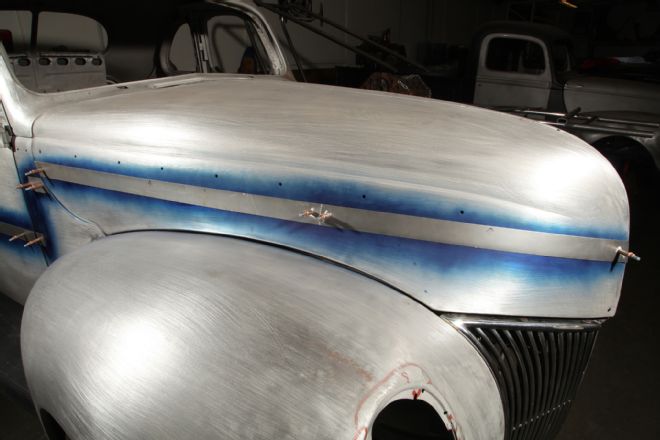
After replacing the floors and repairing the other damage Thun Field started with what's essentially a perfectly stock-dimensioned body. It shimmed the body on the frame, lined up the doors, and—impossibly enough—fit the hood.
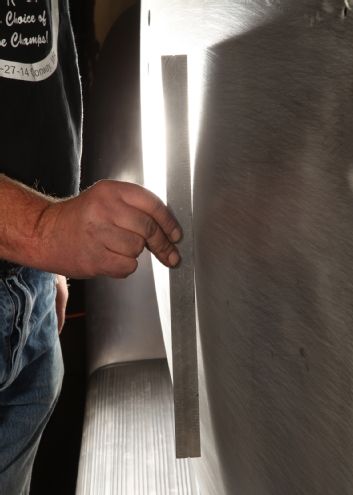
The upper body drops straight down so Woolery set a straightedge on the body vertically on the highest crown and scribed the centerline on the door. This way the cut edges have the best chance of naturally meeting in the right spot.
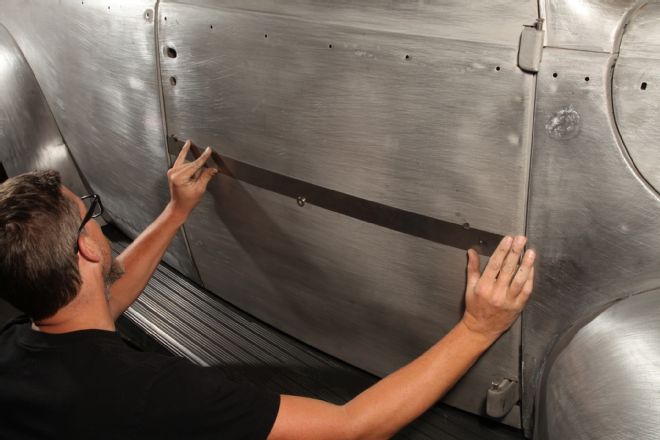
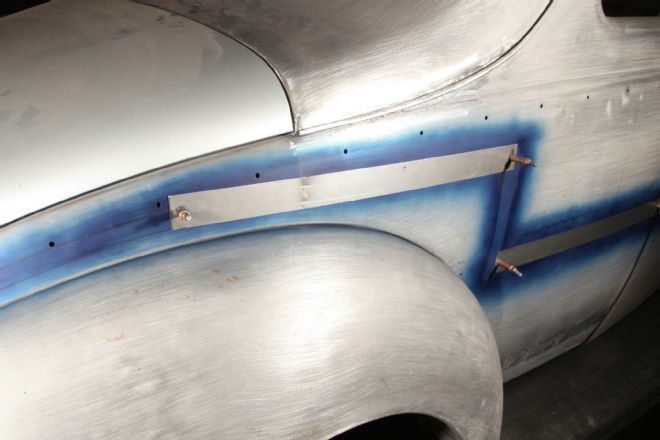
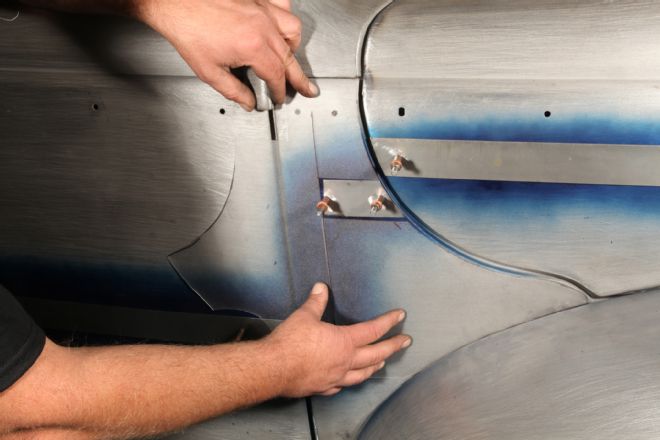
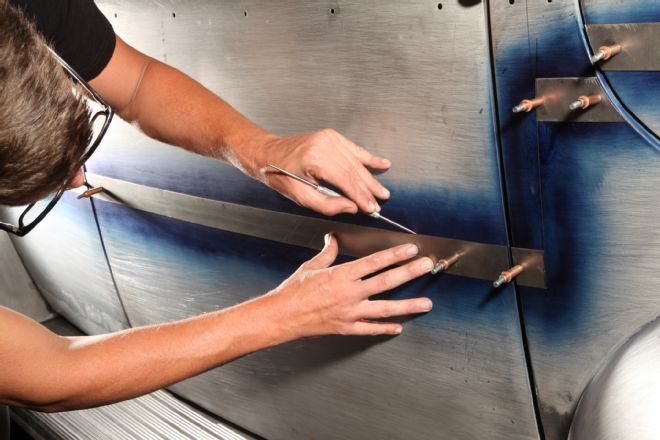
Higgins cut a strip 1-3/4-inch wide and the length of the door. He then aligned it with the centerline and held it in place with rare-earth magnets.
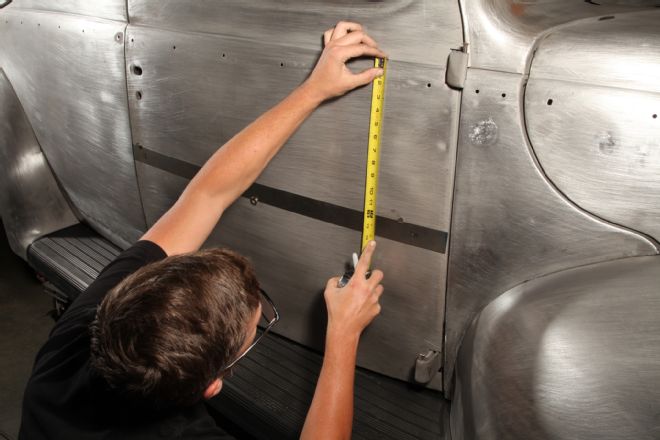
The key to a consistent cut is to apply every dimension evenly and perfectly to the opposite side. In this case Higgins measured off of the beltline and marked the figure on the other side.
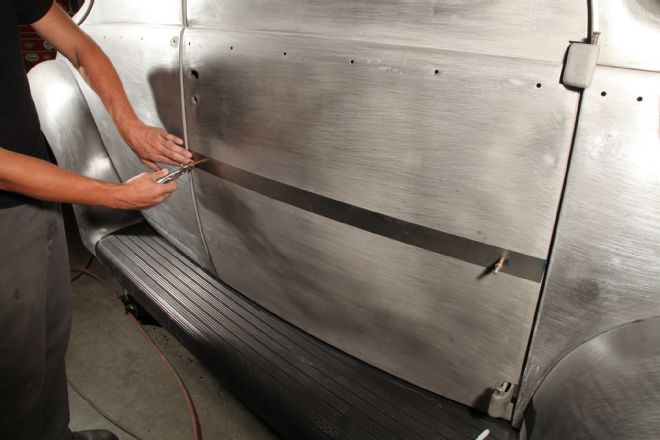
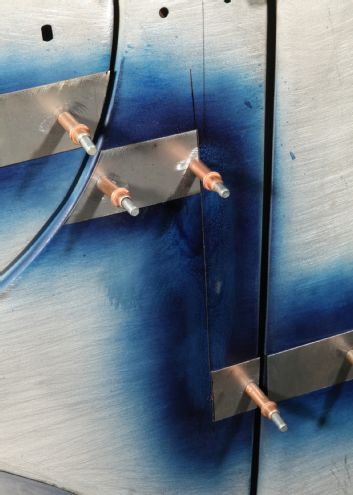
Finally he attached the strip to the door with temporary panel fasteners (in this case Cleco brand).
Sometimes the body's other shapes determine better cut lines. In this case cutting along the crown would interfere with the fender recess. They moved the cut line up. Higgins measured perpendicular but he discovered a better way, which we'll reveal later.
The rear template ends here because that's really the last place where the metal comes together naturally. From there the cut will continue as one slice but we'll explain that next in the next issue.
The same thing from the quarter panel also applies to the kick panel. Higgins found a better orientation for the cut rather than vertically. We'll explain where he cut through the cowl and firewall in the next issue.
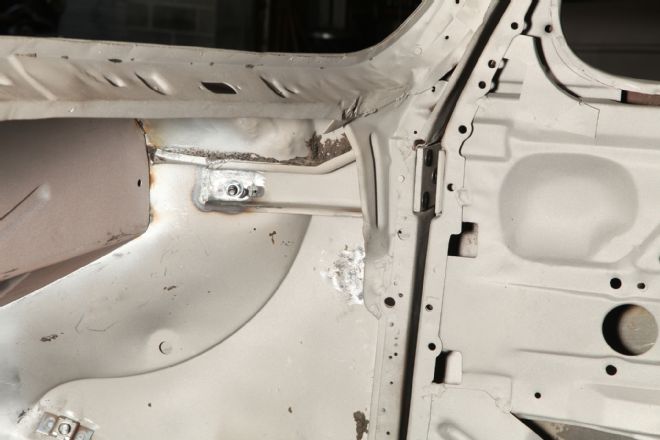
There's a reason he didn't go all the way up to the hood template: there's a cowl support inside at that point. Fitting requires dolly and hammer work and the support prevents it.
Here's a tip. Rather than go through the same measuring work on the other side, make a template. Woolery uses translucent diffusers from drop-ceiling lamps. You can mark directly over the area, no guessing involved.
The hood line has a pretty vertical wall along its length. The top will have to stretch and the bottom shrink to align the edges but as we'll show in one of the following issues it's not that big of a deal.
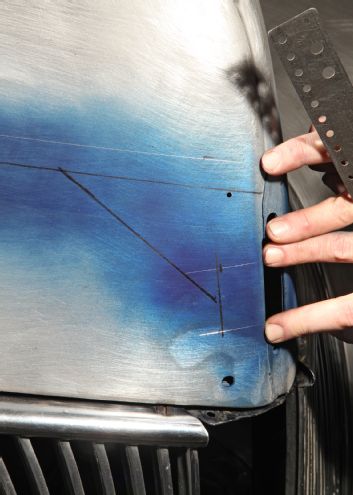
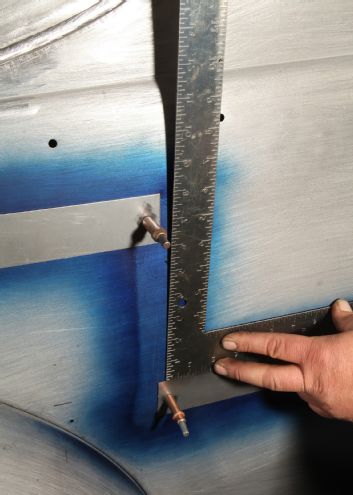
The straight line along the hood actually puts the cut line where the hood front pitches back a little. So Higgins moved the cut lines from the rolled where his right fingers are to the vertical area at his left fingers.
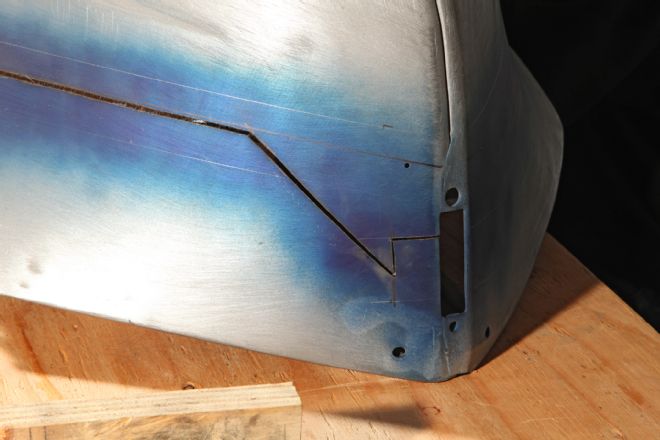
We're getting ahead of ourselves but this is how the cut looks. This is where Higgins learned that diagonal cuts actually make more sense. When the top drops into the base the base's upper edge overlaps it serving as a scribe line.
Satisfied with the lines Higgins stained the general areas with layout dye and scribed the lines on the body. A scriber works much better than a felt-tip pen as it's much more precise and good reassembly means tight fit up.