It's a problem almost as old as street racing itself. That is how to get enough legal tire out back to handle the power that was added up front. Back in the day, a lot of cars got jacked up so bigger meats could be crammed into over-stuffed wheelwells. It wasn't safe but it sort of worked. Thankfully, that ceased being cool about the same time disco finally ended, and guys started figuring out how to tub their street cars like the pros. Yes, tubs solved the problem of inadequate tire clearance, but the early work really messed with the ride and handling while cruising. Luckily, current car builders have solved those issues to a large degree, but what about the guy who wants a stock-looking restoration but with a bunch of power to play with?
It sort of brings us full circle, except that jacking up the car would get you laughed off the fairgrounds, and cutting up the car for tubs is often not an option anymore as it just destroys the factory appearance. In fact, MCR finds that they are way more often removing tubs than installing them.
MCR's solution? Mini-tubs. What they do is expand the inner wheelwell as much as the framerails will allow by sectioning the rear of the floor and the front of the trunk floor and splitting the factory wheeltub in two and filling the gap with new metal. Two to three inches of additional tire and wheel clearance can be had, and the stock rearend and suspension is retained. That's enough room for a significantly bigger tire, and the car still looks stock to anyone but an expert looking in the trunk.
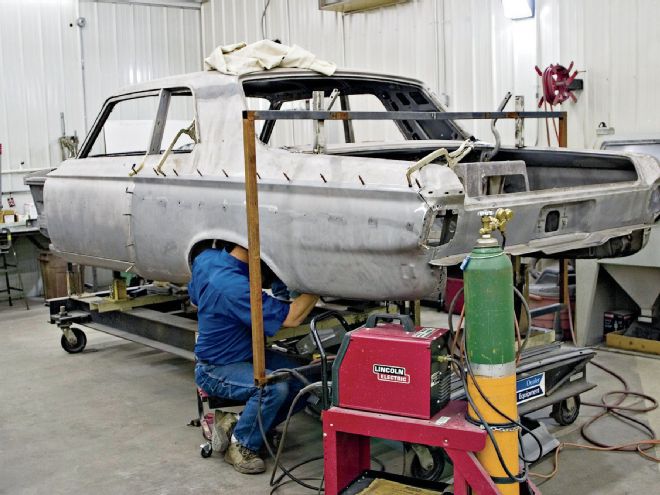
This particular car is a 1965 Plymouth Belvedere that MCR was restoring using parts from a donor car. Since the original quarters and tubs were being replaced anyway, mini-tubs were a natural since they were pretty much half way there to start with. And the job is just that much easier when the quarters are going to be removed anyway.
This should go without saying, but it is strongly recommended that you do only one side at a time so there is always a reference to help keep you out of trouble.
MCR's solution? Mini-tubs. What they do is expand the inner wheelwell as much as the framerails will allow...
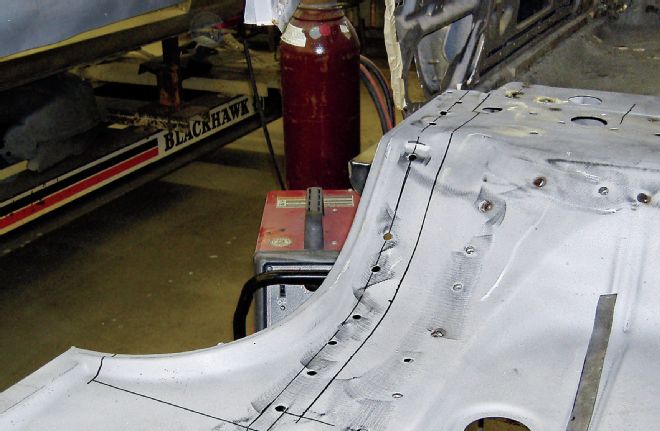
With the wheelwell removed, the exact location of the cuts are marked out. The inboard line is in line with the framerail itself. The outer line marks how much metal will be removed in order to move the lip on the edge of the floor so it is flush with the framerail.
The first cut is along the inside line. The sectioned piece is then moved inward so the floor lip is flush with the frame and then it is tacked in place.
Following the outside line, a cut is made through both overlapping pieces. This ensures that both parts will butt together perfectly.
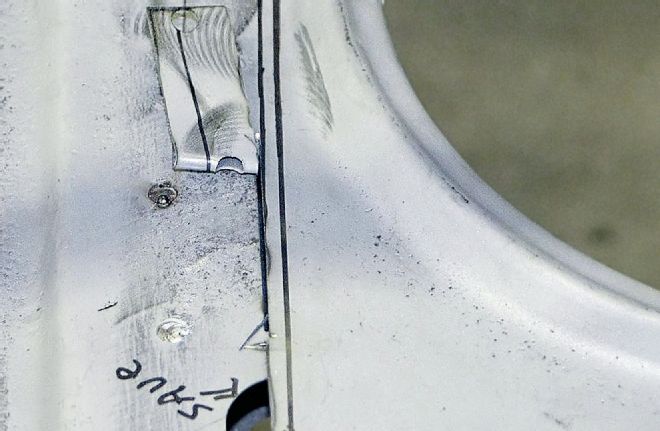
The excess metal is peeled back as the cut is made so the parts can be tacked in place as it goes.
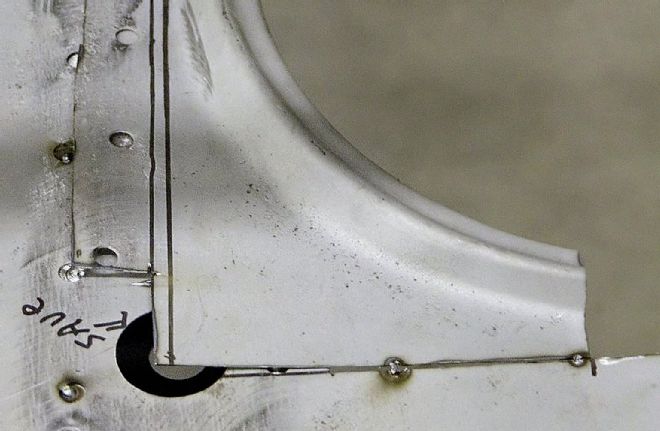
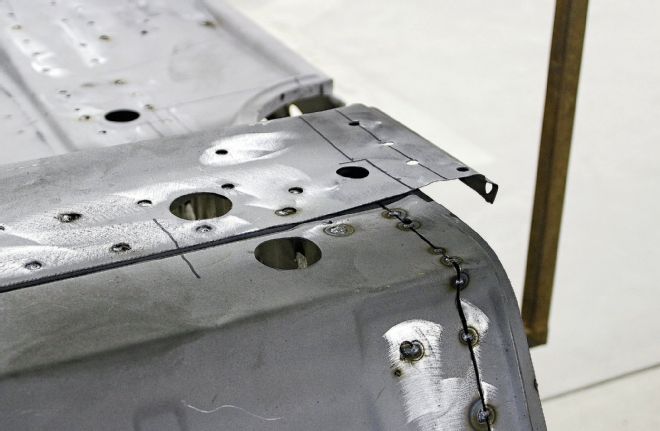
The parts are tacked every couple of inches for now. Final welding will not be done until the entire assembly has been completely mocked up. Note the corner cutout to preserve the factory stamped hole. Also, note that moving the floor edge inboard creates a gap on the leading edge that will need to be filled with new fabricated metal. Obviously, this will have to be done for both the trunk and passenger floors.
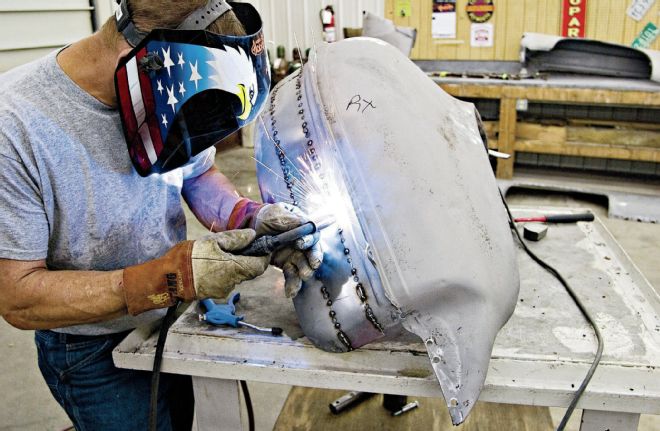
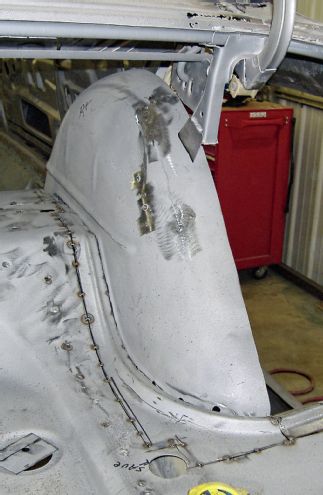
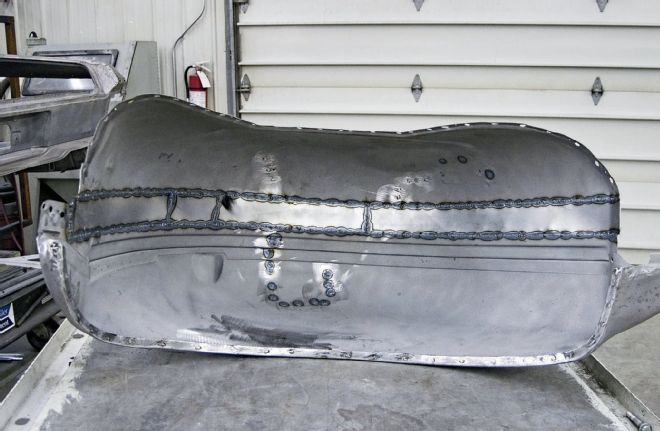
Next, the wheeltub is cut in half and mocked up to be certain that everything is fitting correctly.
In this case there is also an extra piece between the trunk and passenger areas that also needs to be sectioned.
From the outside of the car, it is clear that the goal is to get the inner edge of the tub to be flush with the frame to get as much tire and wheel clearance as possible.
Now the outer tub half can be mocked up to the fender lip. In this case the quarter-panel is mocked up with it.

With both halves in place, the gap is measured and a filler piece is cut and tacked into place. It's perfectly fine to use multiple pieces if that's easier. It just makes for more welding. It will need to be tacked in enough places to be sure it's solid, but the final welding is much easier on the bench. Total room gained: about 2.5 inches.
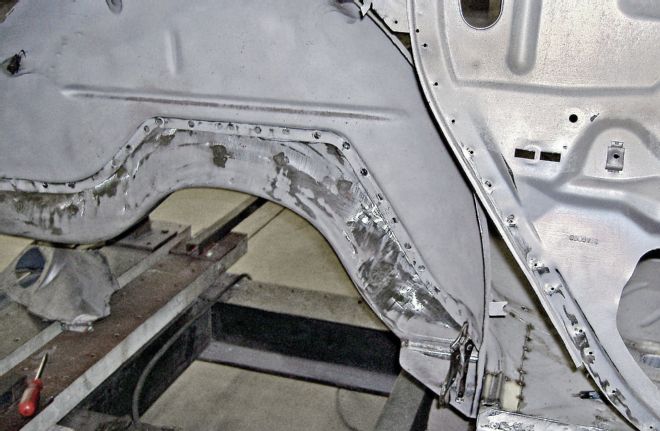
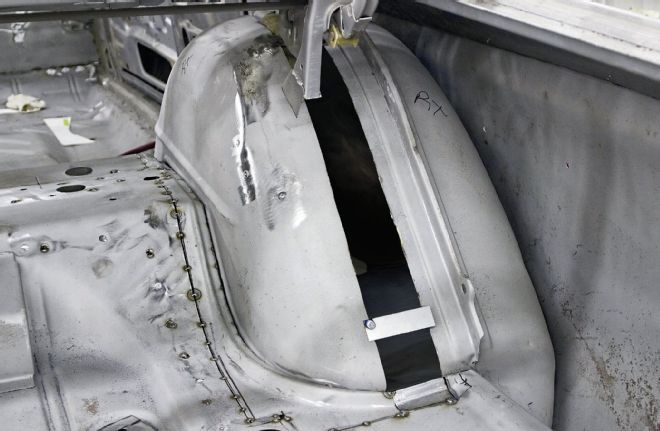
This is the final mock-up, including the filler piece where the tub meets the floor. Notice that the trunk lid hinge extension bracket has to be modified, because it used to attach to the side of the wheeltub, but now will be on top of it.
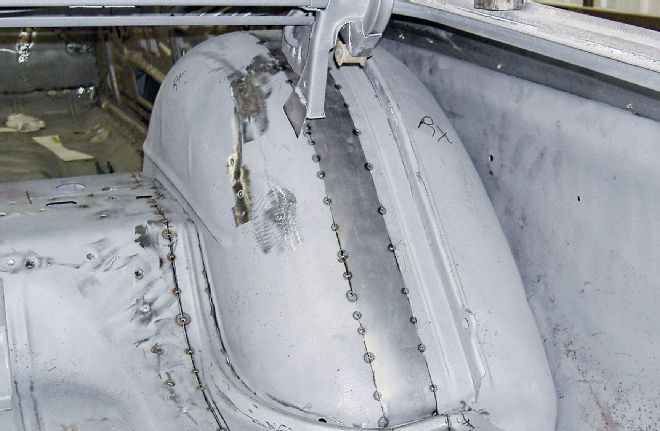
From the inside of the new mini-tub, the new sections can be clearly seen as well as the final welds (before grinding and smoothing).
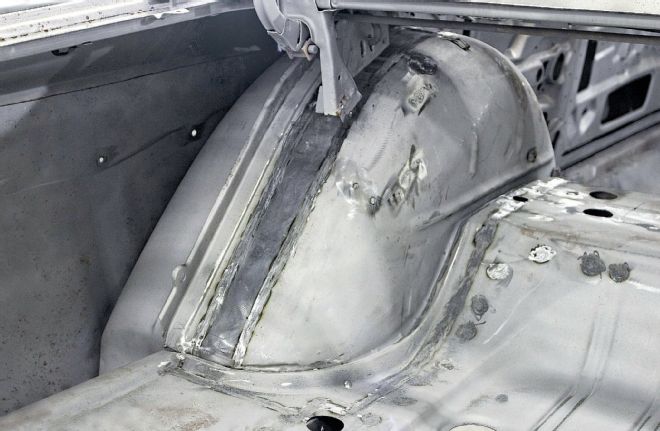
Here's the final result after the welding and grinding are complete. A little body and paintwork and this modification will be invisible to just about everyone!