During the '50s and '60s, very little plastic was used in American cars. Cast-metal parts, those made in a mold with molten metal, were common and inexpensive to manufacture. Plus they could be chrome plated. Large cast parts were heavy, but not nearly as heavy as stamped steel or cast iron. So many items like grilles, handles, and other miscellaneous parts were produced this way.
When cars of the '60s were new, manufacturers never expected them to still be around 50 years later. But as we all know, they are and in abundance. And after a half-century, most cast parts show the ravages of age. The most common problem is pitting. The surface first forms blisters, then these break open and form pits like little volcanoes.
With a little care and a lot of handwork, many of these cast parts can be saved and restored to perfection. Since the work is time consuming and rather labor intensive, only rare parts, or parts that aren't reproduced, are really worth the effort.
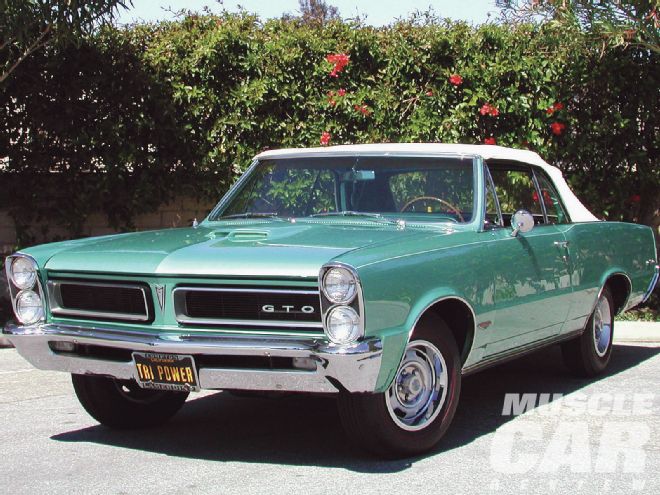
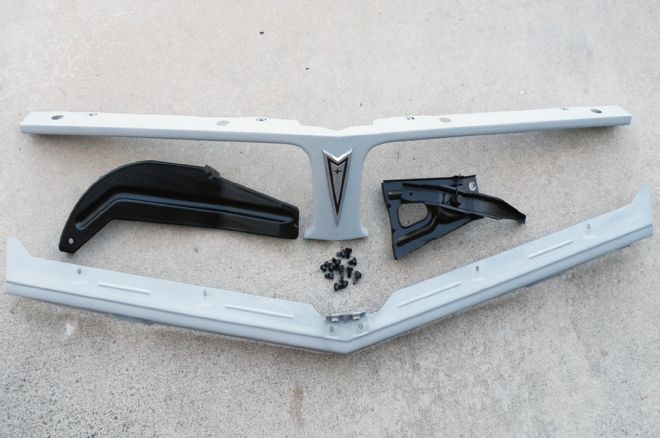
We're demonstrating the restoration techniques on 1965 Pontiac GTO/LeMans nose trim and grilles we bought several years ago. They're reasonably hard to find, and we got them as insurance against any front end damage to our vehicle. They had been sitting in a shed for more than 20 years after the rest of the vehicle had been totaled. There was a lot of rust on the stamped steel trim pieces, and a bazillion little volcanoes on the cast grille parts.
You don't need any specialty tools or equipment to restore these parts, just the desire. We used about 10 sheets of 220-grit 3M wet/dry paper, three sheets of 400-grit paper, Justice Brothers JB-80 to loosen rusted bolts, and two over-the-counter spray paint colors to approximately match the original colors.
After many hours of hand prep the finished product was worth all the effort. The restored grilles actually turned out better than the excellent originals on the car. Maybe it's time to swap them.
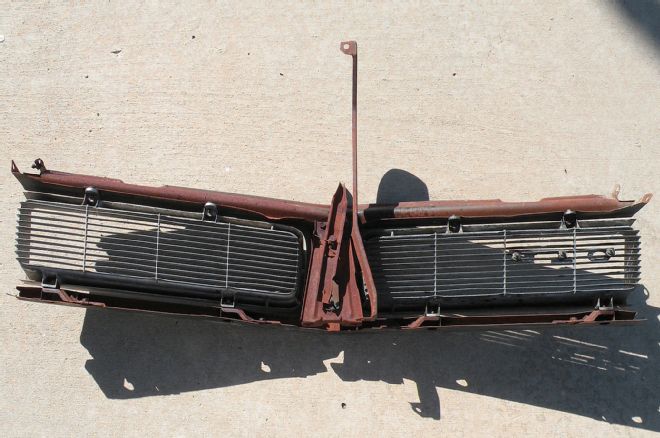
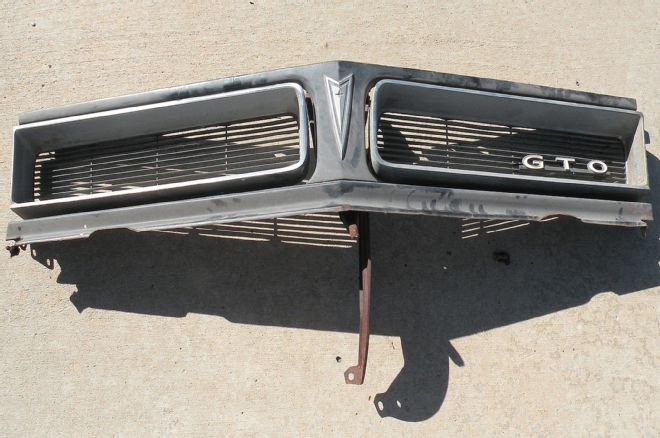
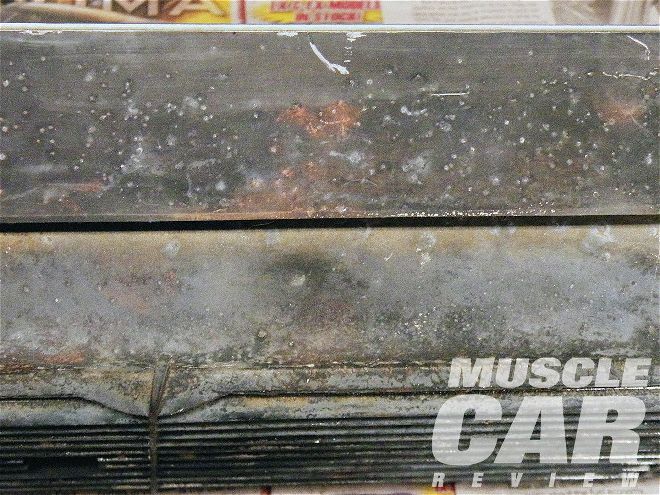
1 This is the back side of the front grille shown in the lead photos. The view isn't so pretty from this angle. All the stamped steel trim and the hood release mechanism are totally rusty and pitted. Thankfully, it's all salvageable metal.

2 We used a flat-mouth set of pliers to straighten any small bends in the metal trim. The thin metal worked easily, and all the imperfections were attended to.
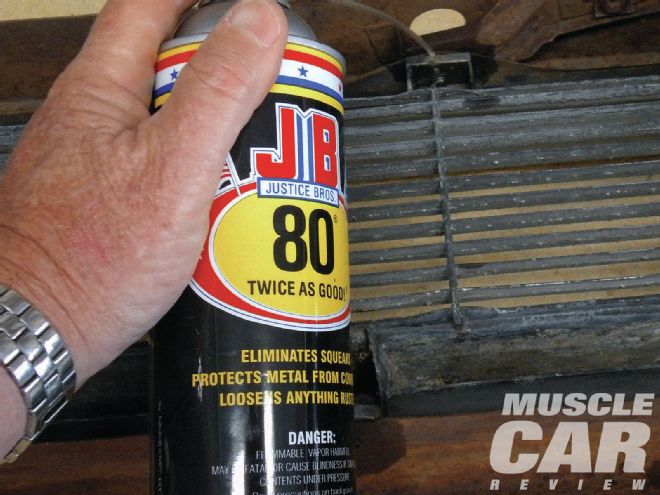
3 Justice Brothers JB-80 lubricant produces amazing results when it's time to remove rusted bolts. After a good squirt of the lubricant, we let the parts sit overnight.
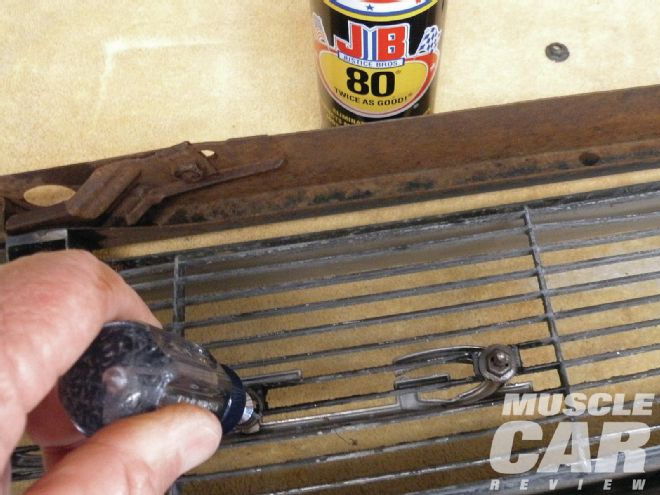
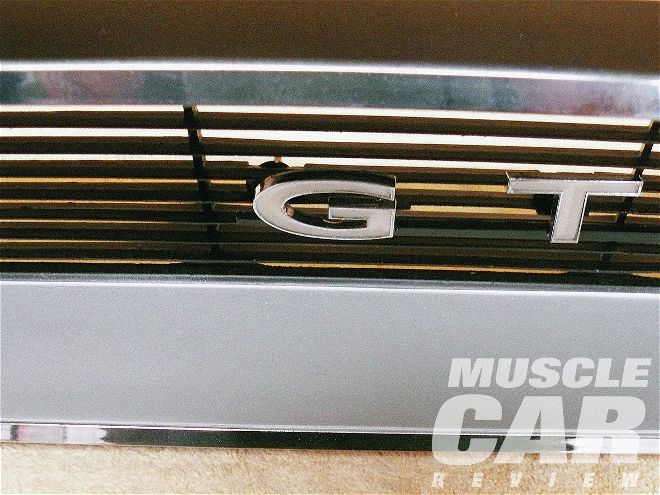
4 We removed the GTO emblem with a 3/8-inch nut driver. Each grille is held to the trim pieces with four bolts on each side of the grille divider.
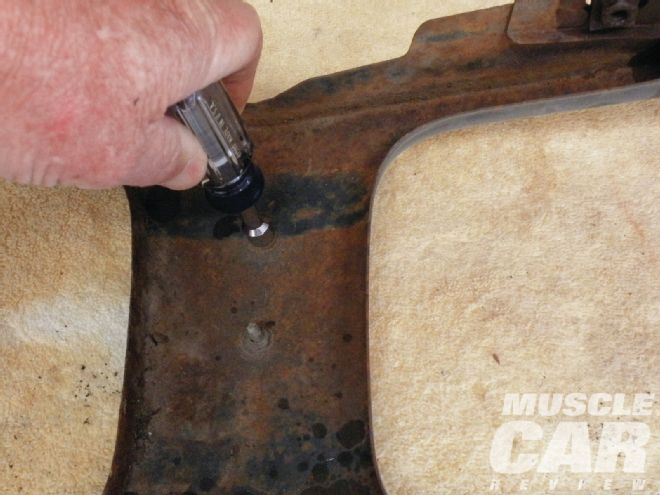
5 After soaking overnight, the grille bolts were easily removed. Here's the grille free from the trim parts. We gave it a thorough inspection, then washed it with a good pressure nozzle on a garden hose. It's necessary to remove any dirt and other debris to find all the problems, and also so none of the stuff blows into the fresh paint later.
6 We removed the Pontiac arrowhead logo from the trim centerpiece and took the hood release assembly apart. All the stamped metal parts were then dropped at our local sandblaster for rust removal.
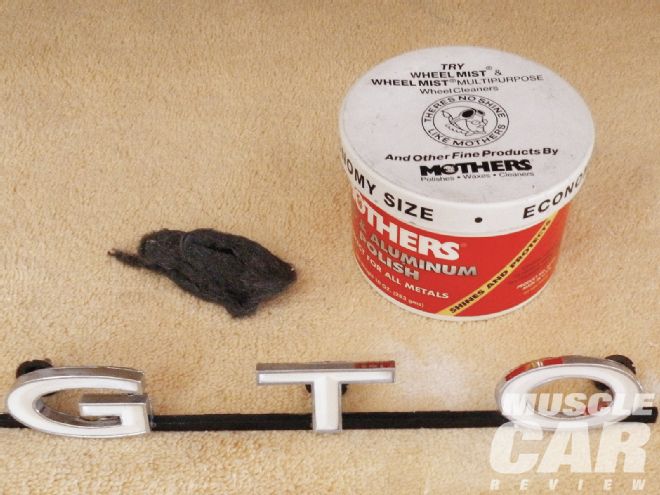
7 The original GTO emblem was in great shape. We used a little Mothers aluminum wheel polish and a small piece of 0000 steel wool to polish the chrome plating. It's ready to go back on the restored grille.
8 After they came back, the sandblasted parts were sprayed with self-etching automotive primer. The hood release assembly was painted with satin-finish black enamel, and the bolts were wire-wheeled and then painted satin black. The original emblem was reinstalled so we wouldn't lose it. If needed, the primered parts will be painted body color.
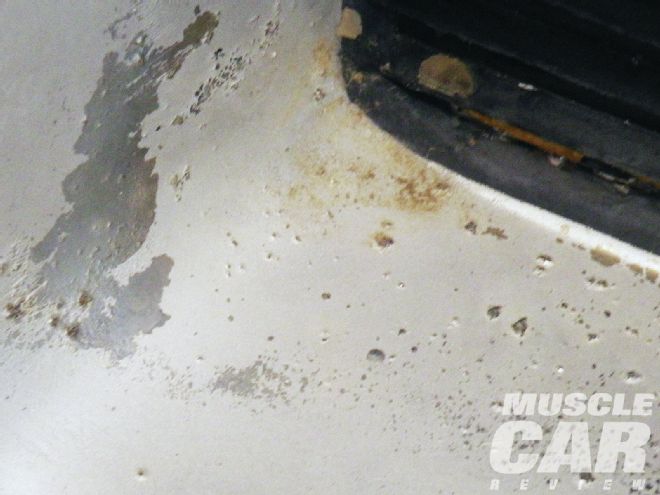
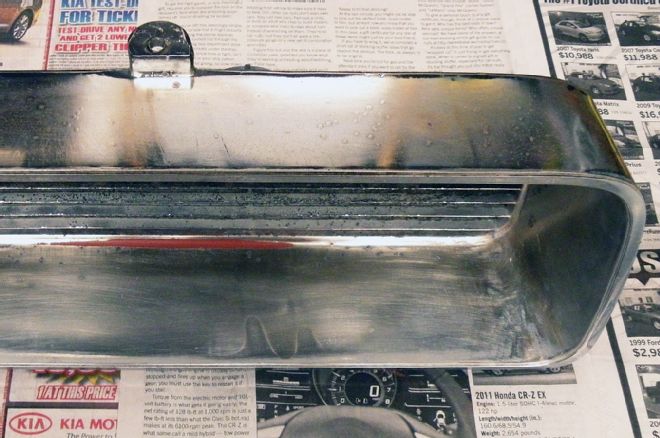
9 This is a close-up of some of those little volcanoes we mentioned. They covered the inside and outside of both grilles.
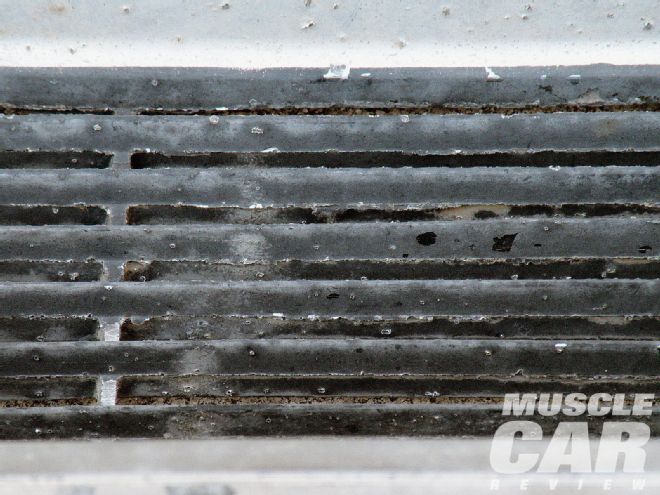
10 The ribs inside the grilles are full of pits. Thin pieces of cast metal are more susceptible to this kind of damage. This area will look a lot better when we finish with it.
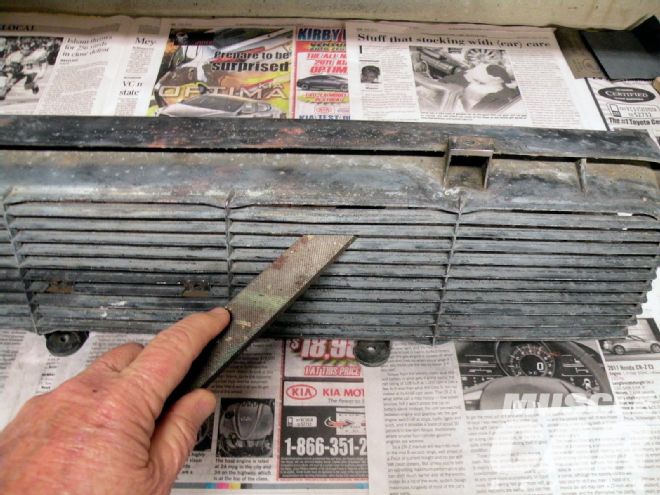
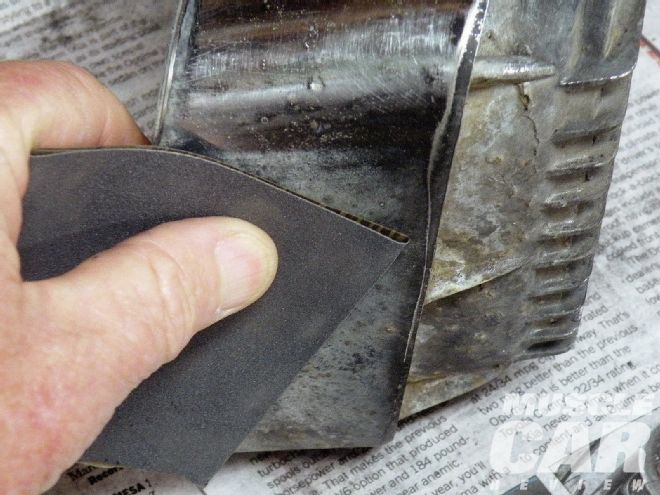
11 Using a medium-grit file that fits nicely between the ribs, we filed all the raised pitting flat. This took a long time, but the file technique worked great.
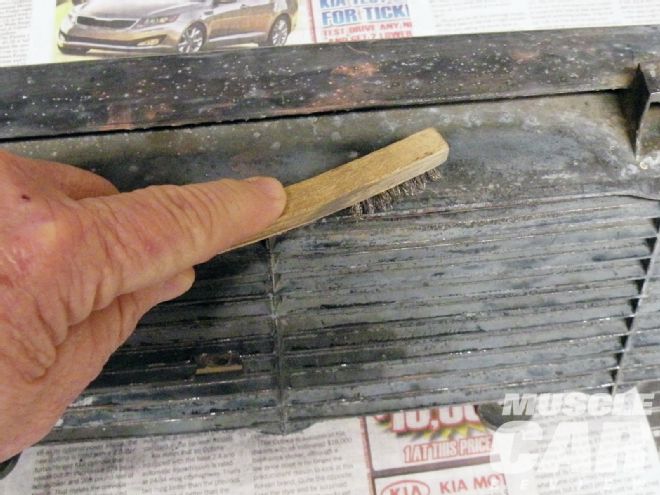
12 For some of the areas not readily visible, we used a small wire brush to clean the pits and dirt from the surface. We won't waste a lot of time on areas that you can't see once the parts are installed.
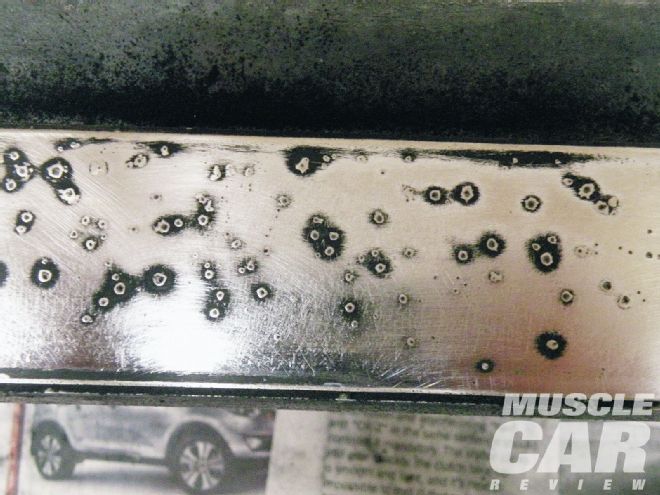
13 Here's how both grilles looked before we started sanding. You can see hundreds of small, medium, and crater-size blemishes. Tackling this doesn't take a lot of skill, but it does take a lot of time. We found 220-grit 3M wet/dry sandpaper works well. We divided the single sheet into thirds, as small pieces make sanding easier.
14 After we sanded through the original paint, you can see how the raised areas look before we tackled them. You must sand until the area is totally smooth and shiny. A small sanding block will be helpful.
15 We sanded until we reached bare metal, and then sanded every little volcano until it was smooth and on level with the overall surface. Some sand down easily; most need a bunch of work. Patience is required here.
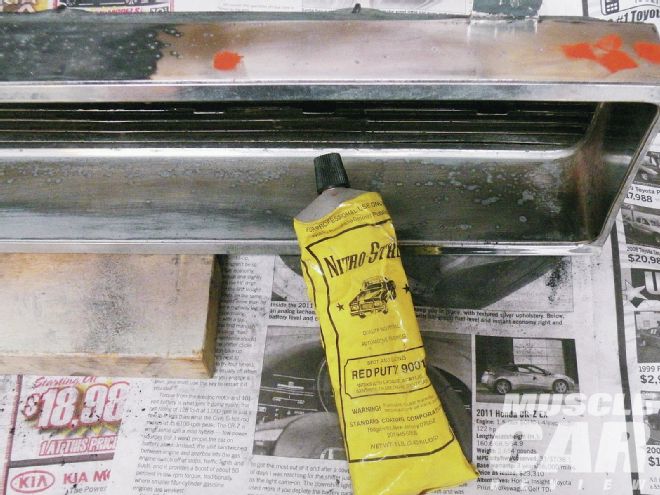
16 For areas that were more damaged than others, we filled the holes with Nitro-Stan red putty. This is an automotive repair product that gets rock-hard in a few hours but sands easily.
17 Here's how a properly sanded surface should look: completely smooth and shiny. If you rub your fingers across the surface and feel the slightest bump or hole, sand the bump, fill the hole. The light scratches from the paper will fill after a few light coats of primer.
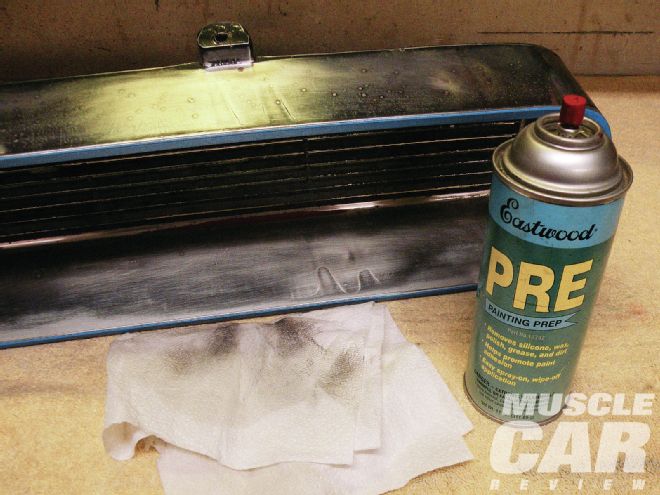
18 Notice the blue painter's tape along the leading chrome-plated edge of the grille. Apply tape to the chrome area and trim with an X-Acto knife with a fresh, sharp blade. It is easier to mask it off than to try and clean it after painting . We washed the metal surfaces with Eastwood Pre-Paint Prep to remove any residue. Lacquer thinner works great as well.
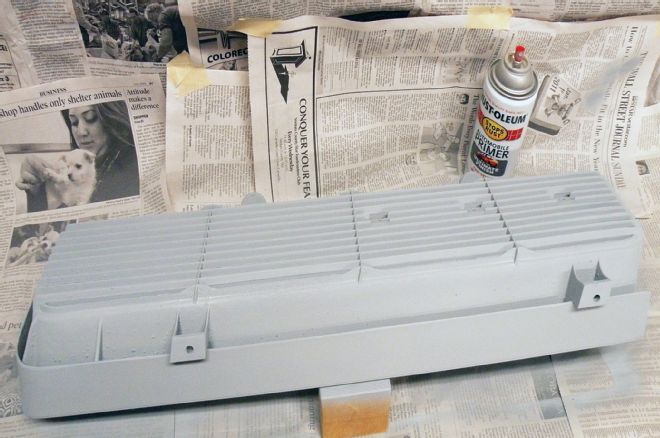
19 We painted the complete grille with Rust-Oleum automotive primer. It lays down evenly and is sandable. Several light coats work better than a couple of heavy, runny coats.
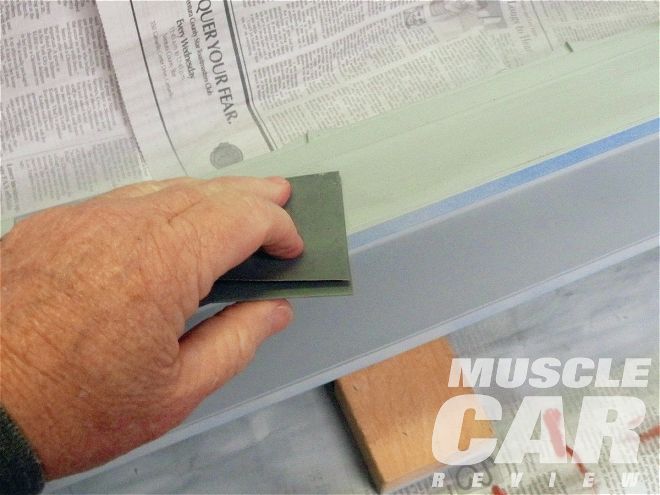
20 The flat primered surfaces were then examined for any small imperfections we might have missed. A little more sanding and primer fixed those. A light wet sanding with 400-grit paper will do nicely.
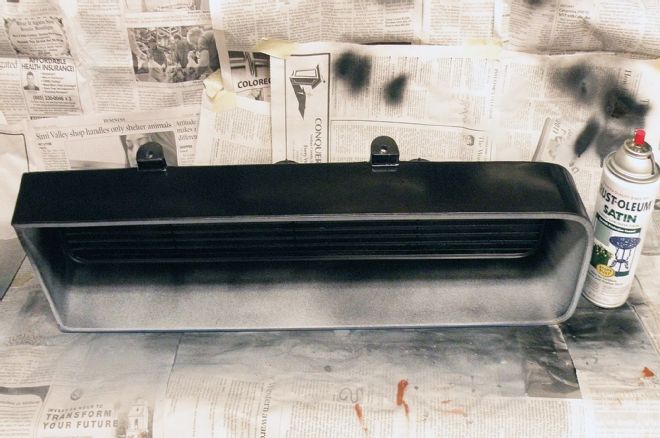
21 We painted the ribs and other areas that must be black first. The overspray on the inside will be lightly sanded later. Our Satin Black is Rust-Oleum No. 7777.
22 We then masked off every area of the grille except the large, flat inside edges using blue tape and newspaper. The recessed area of the now black ribs is a little difficult to mask, but again, with patience you can do it. All the black paint must be masked off in order to paint the flat aluminum.
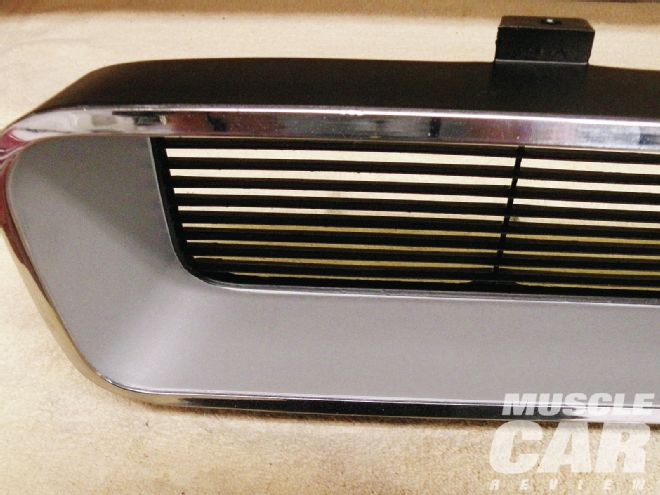
23 This close-up of the outside edge shows the black surround, the black ribs at the rear, the chrome front edge, and the flat aluminum interior. We were really happy with the final results and wouldn't hesitate to install these parts on a 100-point restoration. MCR