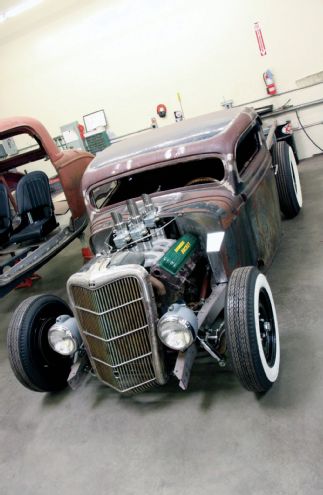
Rudy Rodriguez may be a name familiar to you if you're a fan of a particular style of rodded early pickup. In fact, in some circles we've even heard such a style referred to as "Rudy style." His "bobber truck" was completed in 2002, and was responsible for the trend of chopped, channeled, and bobbed early pickups that continues today.
Despite being asked several times, Rodriguez has always declined to build a similar truck for clients of his business, Fullerton Fabrication. Until recently that is, when Stuart Roch approached him about building something similar. This time there's an Olds Rocket engine instead of a Flathead, and a sectioned 1935 grille instead of a 1934 item, though the latter may change. The narrow and short wheelbase is similar though.
Keeping the short engine bay was essential to the "look," which entailed fabricating a complete custom firewall. Rodriguez wanted to be able to remove the distributor and valve covers with the engine in place, as well as provide enough room for headers, yet retain a traditional solid steering column, or at least the appearance of one. We spent a few days at his shop following how he achieved just that.
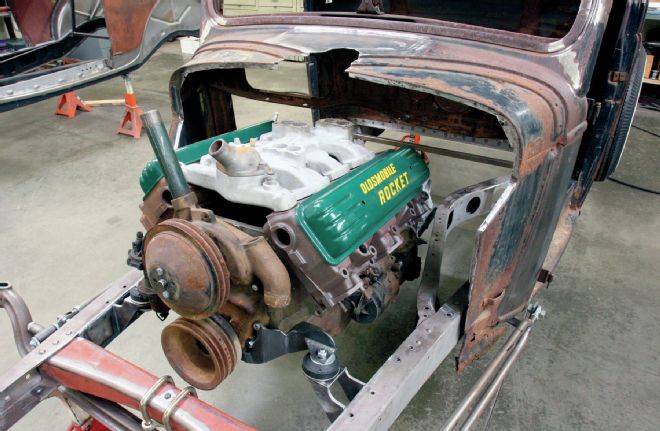
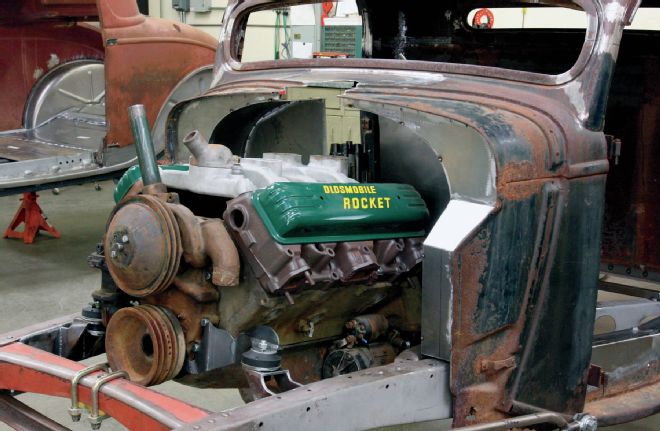
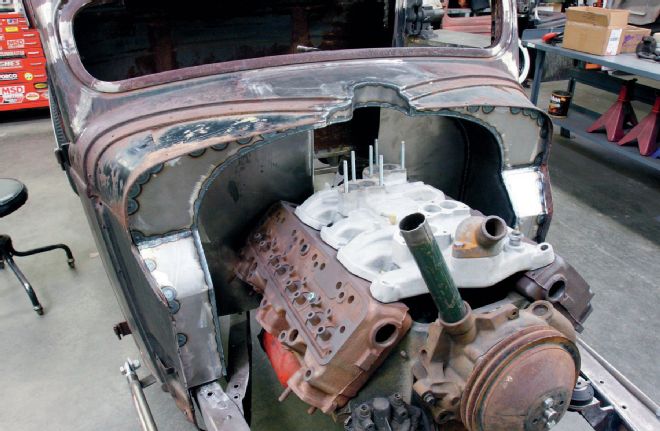
1. We caught up with this 1935 Ford truck project after Rudy Rodriquez had removed the stock firewall and mounted a dummy Olds Rocket engine and trans after boxing the front framerails.
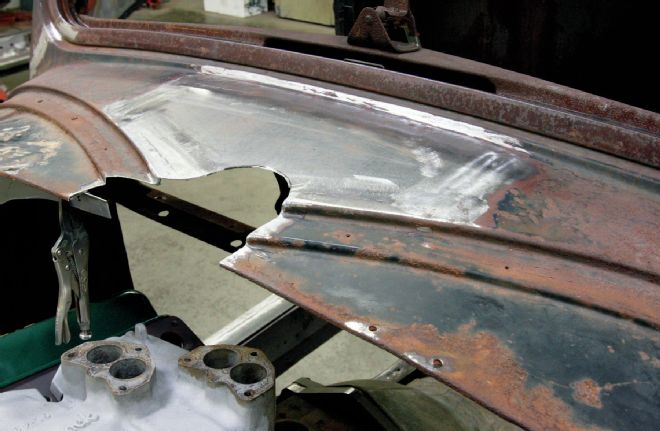
2. Rodriguez had already filled the cowl vent aperture, and removed the minimum of material to enable the quartet of carbs to be installed.
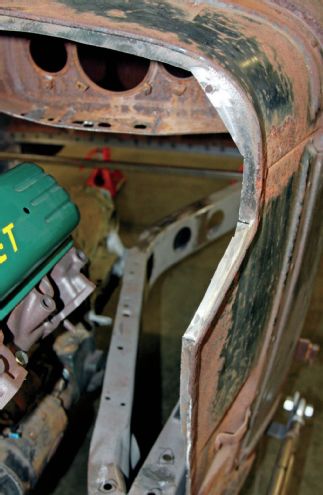
3. Though the stock firewall had been removed, a 1/2-inch strip of the original was left around the edges, to which the new sheetmetal will be welded.
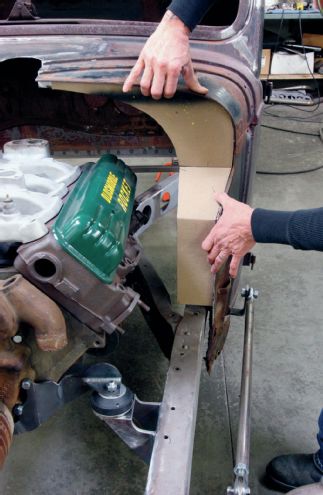
4. Cardboard templates were made, from which to form the new firewall. Many different shapes were tried, with this being the final design that will enable the valve covers to be removed in situ, if required.
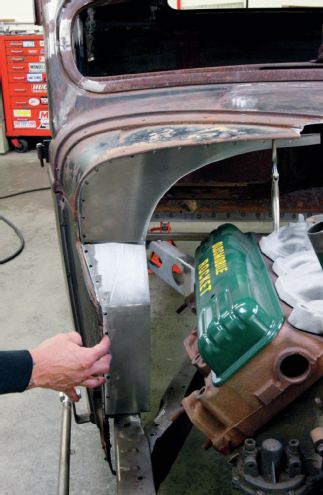
5. With the cardboard shapes transferred to 20-gauge sheet steel and bent to shape, Rodriguez holds them in place for a final check.
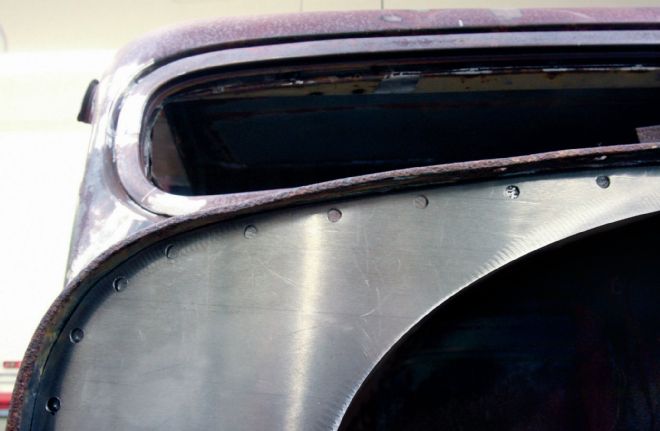
6. The edges were drilled to enable them to be plug-welded to the edge of the old firewall, the edges of the new panels fitting tight under the cowl lip.
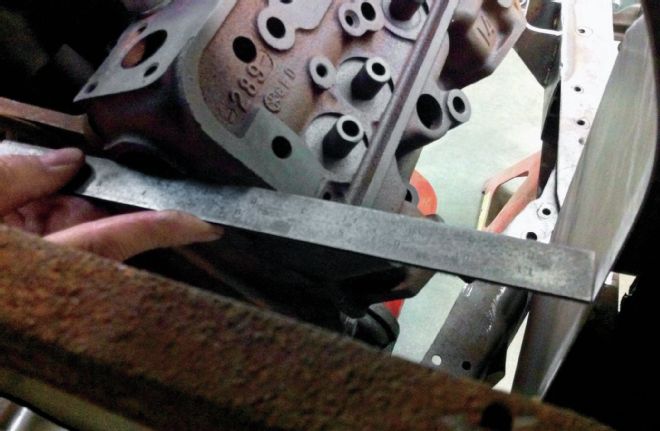
7. To ascertain the depth of the recessed section of the firewall, Rodriguez used a steel rule placed across the back of the passenger side cylinder head, which sits farthest back of the two. He allowed the width of the rule as clearance between the head and the firewall.
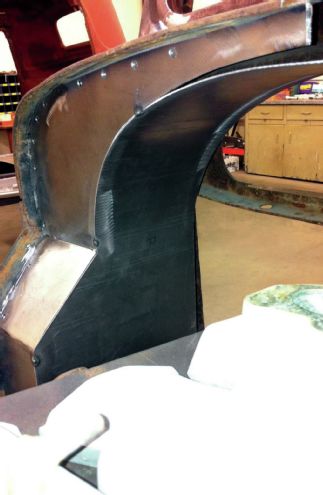
8. Again using cardboard templates, a new section of 20-gauge steel was trimmed and rolled to shape, then tacked in position once its depth was determined.
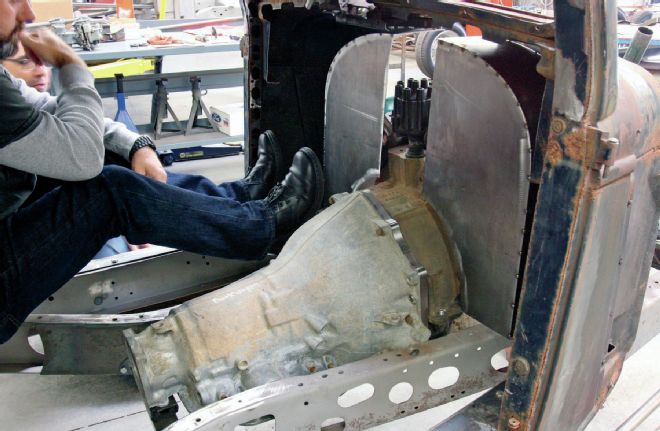
9. With two vertical sections also tacked in place (the missing centersection will require a further recess to clear the distributor), it was time to call the owner, Stuart Roch, in for a fitting. It was at this stage that the steering column and pedal positions were determined. Note also the dash has been removed for easier access.
10. Here's the same stage from the outside. Note that everything is just tack welded in place for now, in case changes need to be made.
11. The carburetor cutout in the cowl top was now boxed, again just tack welded.
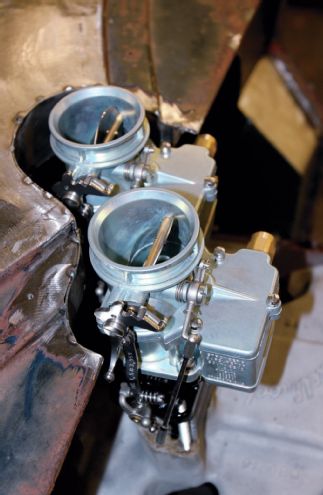
12. The rearmost pair of carbs were temporarily bolted in place for a final clearance check.
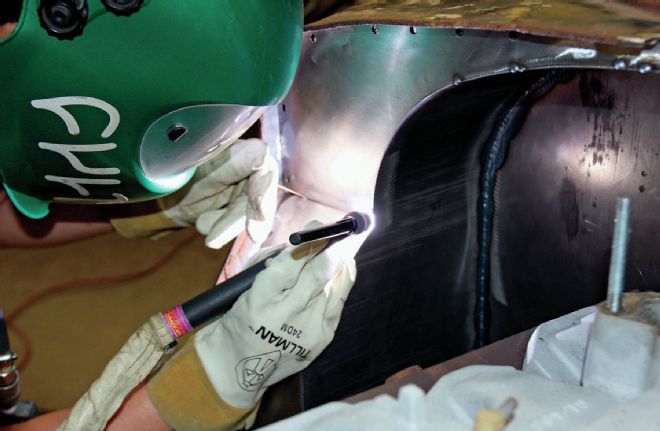
13. Once Rodriguez was happy with the various clearances and fit, the firewall was TIG welded in place. Here, his son, Jasper, tackles the welding.
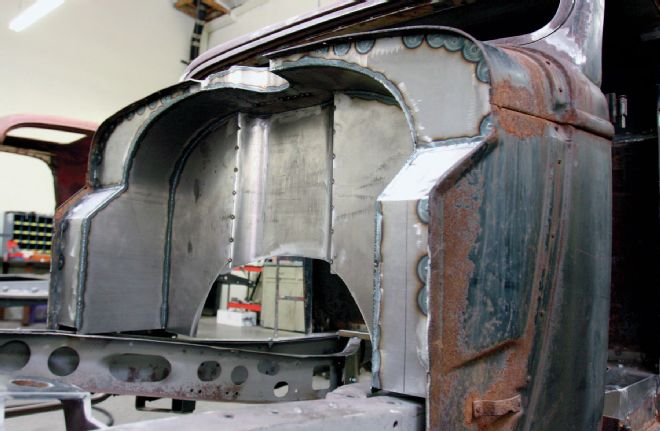
14. Finish-welded with just the centersection to add.

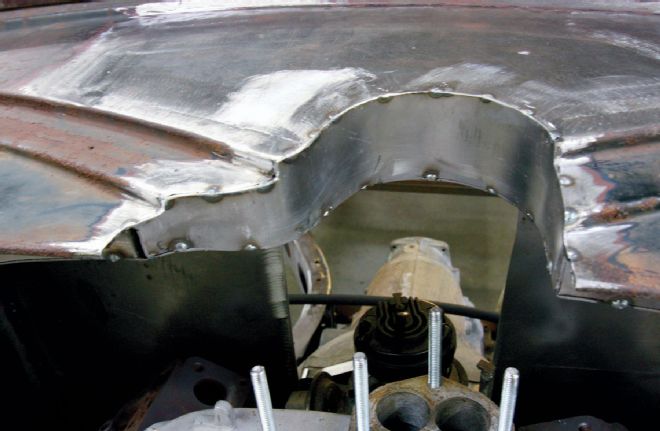
15. Rodriguez originally planned to reuse the center of this firewall for clearance around the distributor...
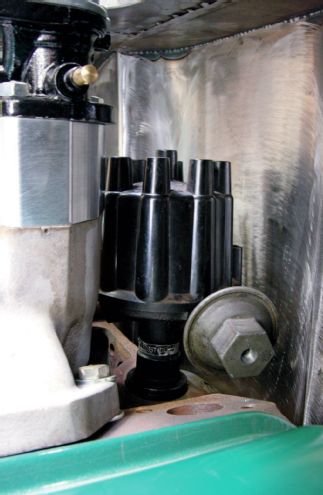
16.... but it needed to be deeper than the stocker, and it was easier to fabricate a new section from scratch. There's enough clearance to enable the distributor to be removed with the engine in situ.

17. The finished firewall from inside the car. All that remains now is to attach its lower edge to the floor, once the latter is fabricated.
18. Once the firewall was complete, the engine was removed to gain access to finish weld the centersection...
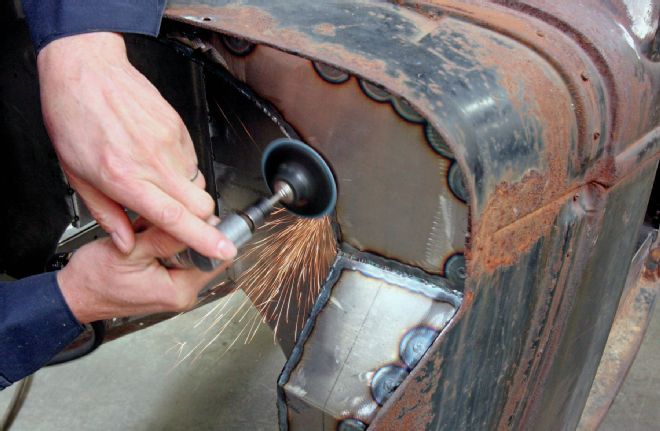
19. ...and to grind all welds smooth.
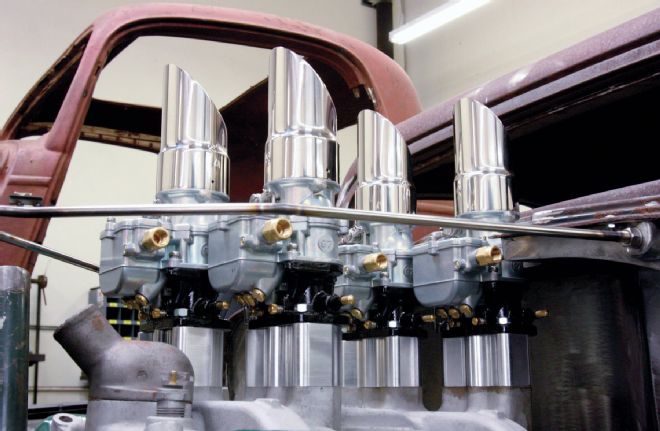
20. Up until now 2x2-inch steel box section had been used to space the carbs. These 2-inch aluminum spacers were obtained from Dashman's Hot Rod and Speed Parts, machined to follow the shape of the manifold bosses.
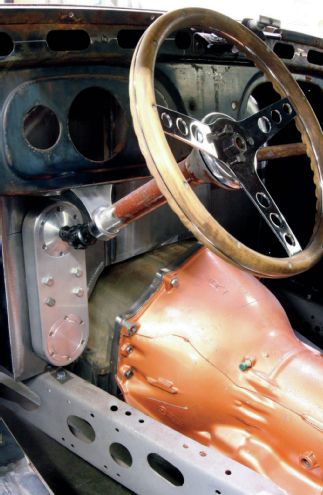
21. When Roch came to the shop for his “fitting”, he and Rodriguez had discussed the steering column routing. Their solution was to make use of a "Steer Clear" offset steering system by Wizard Fabrication, and a '40 Ford pickup steering box and column.
22. The top half of the column attaches to the Steer Clear using a U-joint, and to the lower edge of the dash (which had now been re-installed) via a modified aftermarket mount.
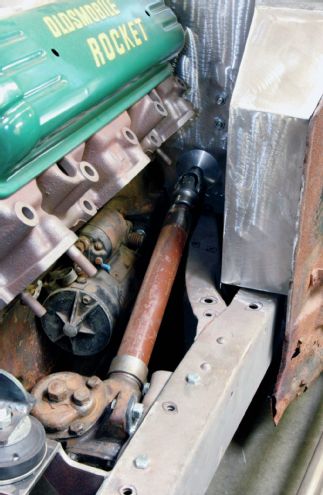
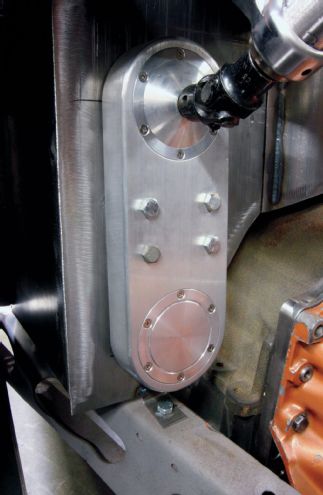
23. The lower half of the column exits the firewall via another U-joint, and is still attached to the steering box as per stock. The box itself was moved inboard slightly to align with the Steer Clear. You can see headers will now clear the steering column, which itself appears more stock than a double-D shaft and a U-joint at the box.
24. The completed firewall and steering installation, which allows for distributor removal, valve cover removal and header fitment, thanks to careful planning.