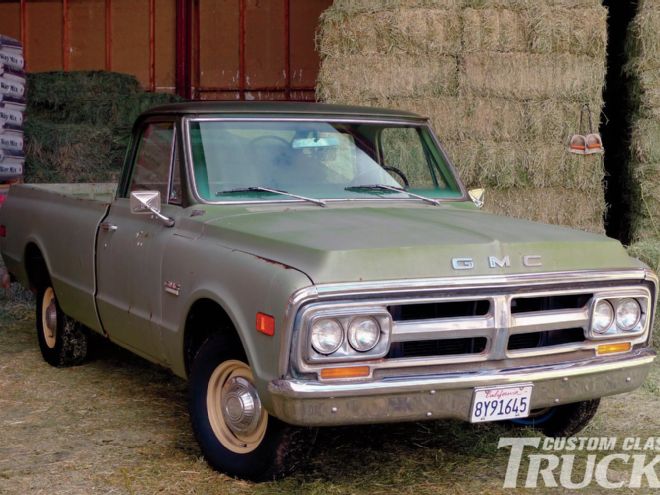
Are we just California crybabies? If you're a regular reader of CCT, you may recall last month's exciting cliffhanger in which my son-in-law was to be gifted a “farm-find” '71 GMC pickup that I thought still had a little life left in it. The plot took a twist as my dear ol' dad got involved. The ol' farm-find ended up with its 350 rebuilt and the entire remainder of its drivetrain, brakes, and dual exhaust system all fresh and new. Then new interior trim from Brothers Truck Parts was installed as well.
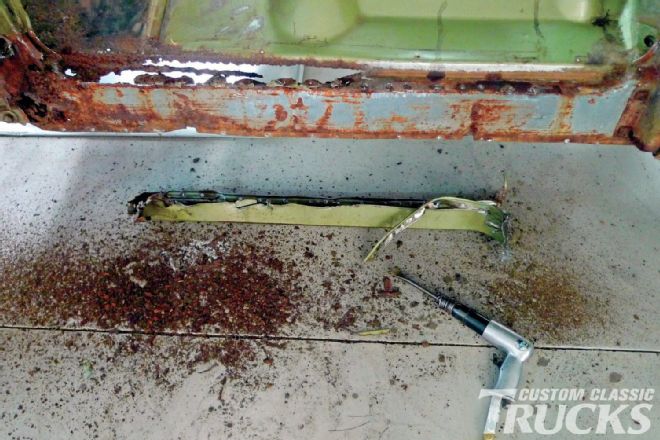
After all of that, dad insisted that Mrs. Rotten 'n' I deal with the obvious rust. That threw a wrench in the works—at least as far as gettin' the job done quickly. At first, as the work got underway, things progressed fairly well. That was until we made a particularly grisly discovery beneath the truck's new floor mat, and later on beneath the driver side outer rocker panel.
Truth be told, our little “patchwork pickup” project has snowballed into a big, scary undertaking. Until the first rusty outer rocker panel lay still on the garage floor, we had no way to accurately assess the degree of decomposition. Because much of what must be replaced is structural, we've since decided to approach the reconstructive repairs one side at a time, as not to lose reference to the cab's original mounting location.
Although things are gettin' ugly, we're still optimistic that the cab's mounting braces might be solid and salvageable. If so, we should be able to finish this job without removing the cab from the frame. If not, we know Brothers has us covered, from patch panels, to floorpans, to even a new complete cab, which at this point is something we'll keep in the back of our minds as we continue to work as planned with what we've already gathered.
We are fully aware that those in the Midwest and other regions where salted roads and snow take a much heavier toll on precious sheetmetal may be heartily laughing right now. With that being acknowledged, it's time to cut out the cryin' and cut out some rust!
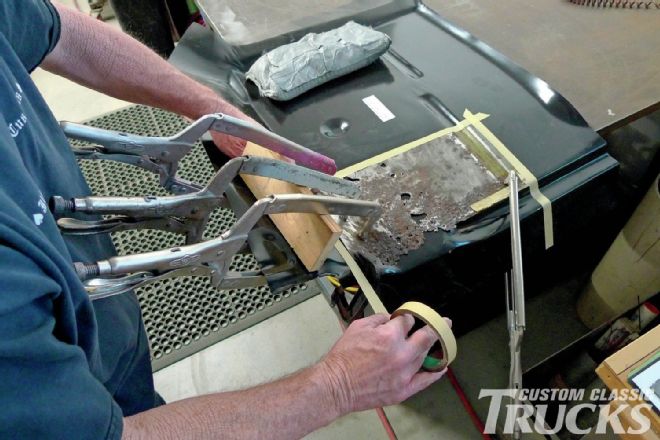
 1. After sizing up the new sections of sheetmetal, masking tape guidelines are laid down and the ol’ Central Pneumatic 3-inch extended-reach cutoff tool comes into play once again. For long, straight cuts this tool provides better control than smaller die grinders, and by this time it’s proven itself and owes us nothing.
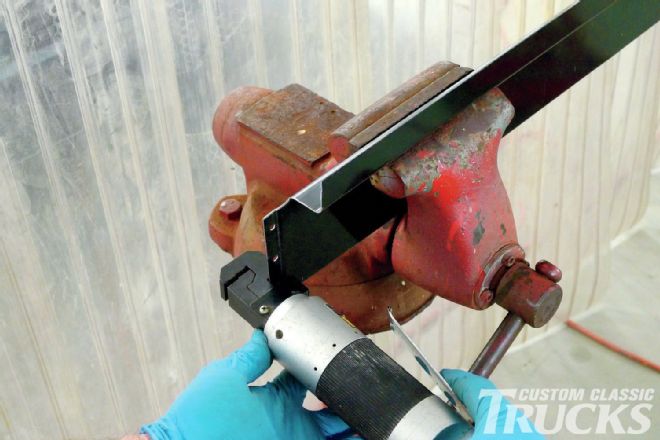 2. We’ve elected to use only about two thirds of the length of inner rocker panel. Its vertical seam will be hidden so here an overlapping flange will be acceptable and strong. This Central Pneumatic flanging tool was purchased from Harbor Freight many years ago. On the B-side it features a convenient-for-spot-welding ¼-inch hole punch.
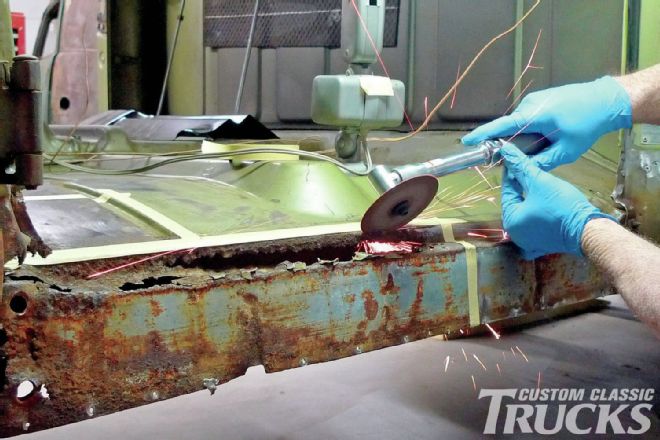
 3. After reaming the spot welds where the old floor was attached to the cab’s mounting brace, I was able to cut out the bad section in one piece. That section of old, rusty metal was then usable as a pattern of sorts for cutting the new piece, at least close to the desired shape and size.
 4. Taking this in baby steps, the replacement section was cut ¾-inch larger all the way around; then clamped into position, overlapping so that accurate scribes could be made on the bottom side. When the excess is trimmed away we’ll be expecting a tight flush fit for butt-welding.
 5. The lowermost sections of our inner cowl panels are affected as well. These patches proved to be a little tricky to trim. When held in position, there’s no access to the backside for scribing. One easy alternative would have been to trim the new patch first, then cut the rusty section to match—if I’d thought of it then.
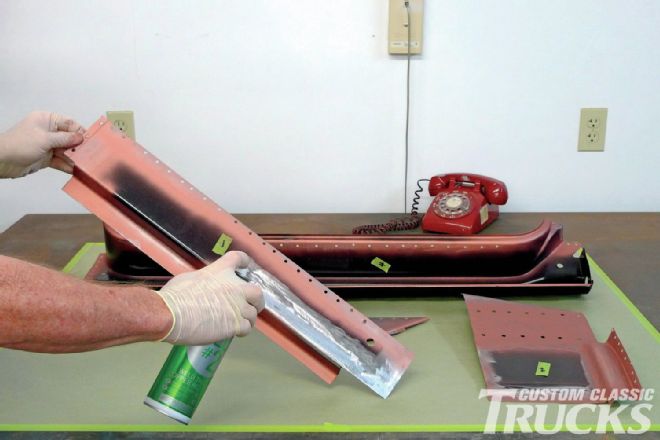
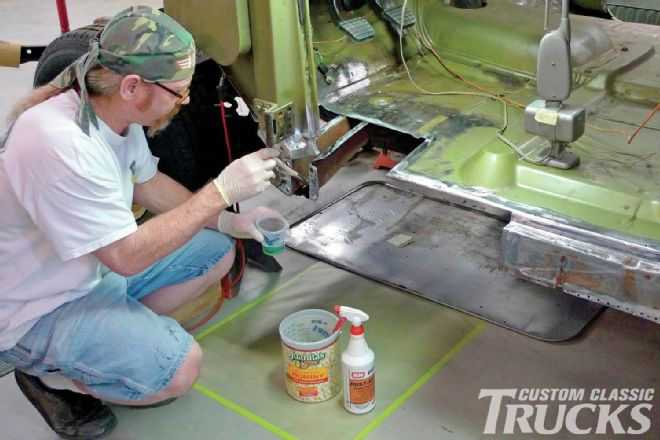 6. Today we can take advantage of chemical technology. Rust Mort, Rust Seal, and Rust Bullet were all on the shelf and they all do about the same job of converting rust into a sort of paintable primer. This precautionary measure will help to keep rust under arrest in areas that will not remain accessible.
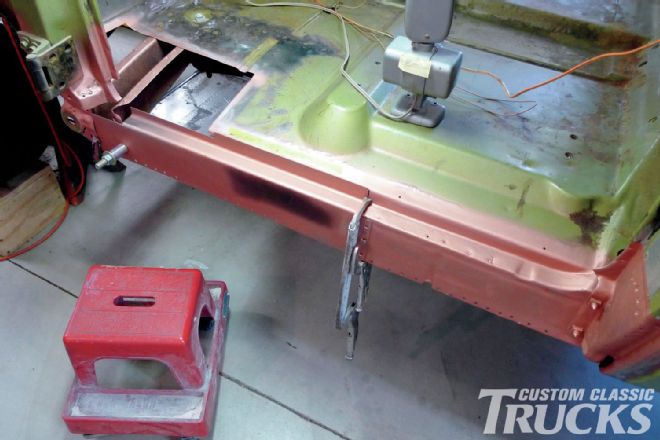
 7. At this point our patch panels are trimmed and ready, but before any welding takes place, a coat of U-Pol Weld #2 weld-through, copper-rich primer is applied where bare metal will meet bare metal. This step, followed by thoughtful seam sealing afterward will go a long way to ensure that our work will last.
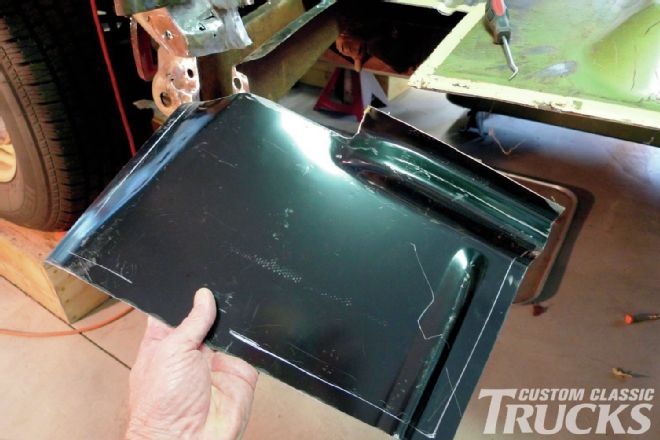
 8. For this side only we’d opted to use Brothers inner rocker panel rather than redundant sections from the larger floorpans, which could have bridged the same gaps. This will be the first piece of our puzzle to be tack-welded into position. A little later on, the tall upper edge will be dressed down to match with a 9-inch disc-equipped body grinder.
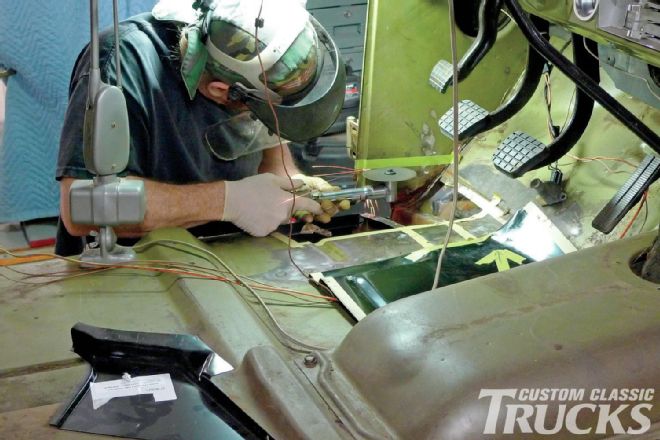
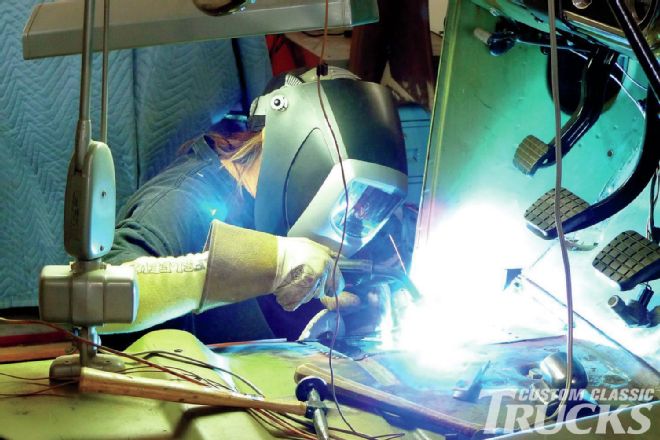
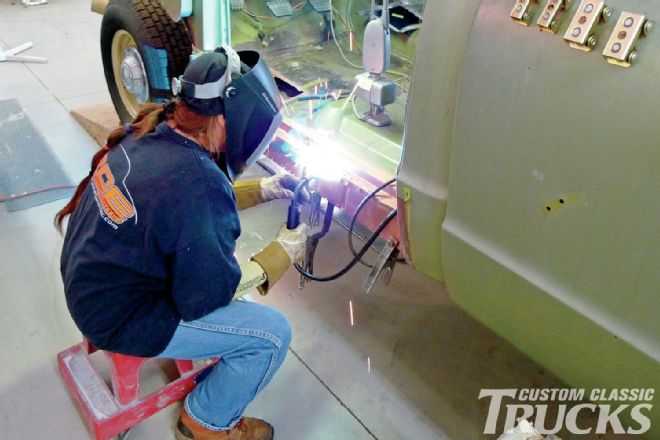 9. So here I must confess that my eyesight isn’t very good, and as a direct result, the same could be said for my welding ability. Fortunately Mrs. Rotten is here to cover that base for me. She’s a good fabricator, her bodywork is nice, and I think she’s kind of fun to watch.
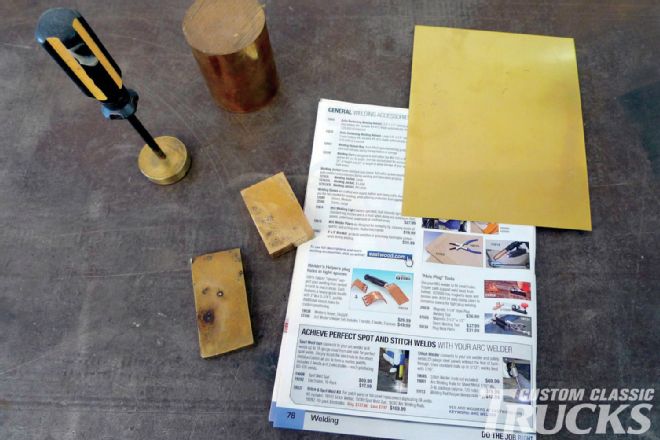 10. Although we’ve spent time preparing our cut-to-fit floorpan, it ain’t perfect all the way around. Different shapes and sizes of brass and/or copper scraps can be helpful as a backup for MIG-welding where there might be a gap. There are some handy tools available for that purpose, Eastwood has ’em—and we probably should too.
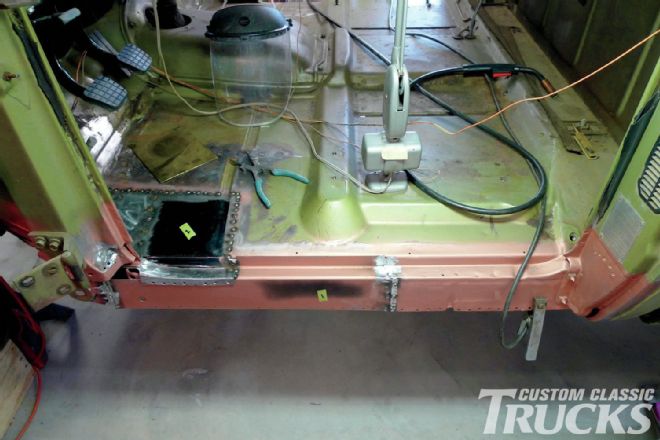
 11. For the time being, the new metal will be tack-welded only. There is a definite fitment order for the replacement panels: first the inner rocker panel, then the floorpan section, next the lower portion of the inner cowl panel, and lastly the outer rocker panel. Following this order should help us produce a factory-like appearance.
 12. With 1/4-inch holes previously punched, we’ll be able to replicate the factory’s spot welds where the floorpan joint overlaps the new front section of inner rocker panel. Even though it will be covered later on, we’d like our work to resemble what was done on the assembly line in ’71.
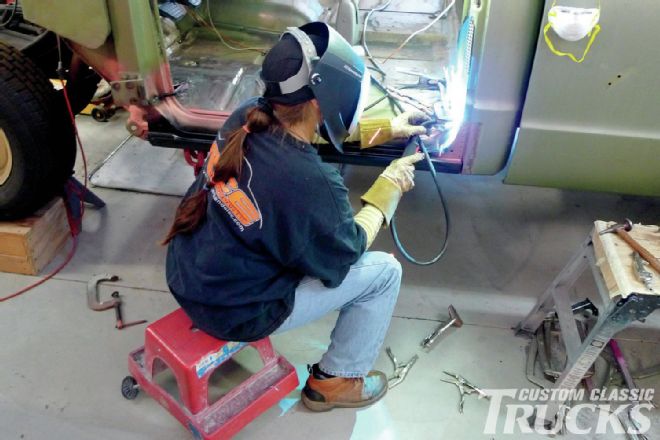 13. With the lower edge of our new outer rocker panel clamped in place, Mrs. Rotten begins tack-welding the punched holes at the upper seams. Afterward we realized that sheetmetal screws, or better yet, TEK screws, might have been wiser for the temporary attachment of our outer rocker panel—at least ’til we’ve checked the door gaps.
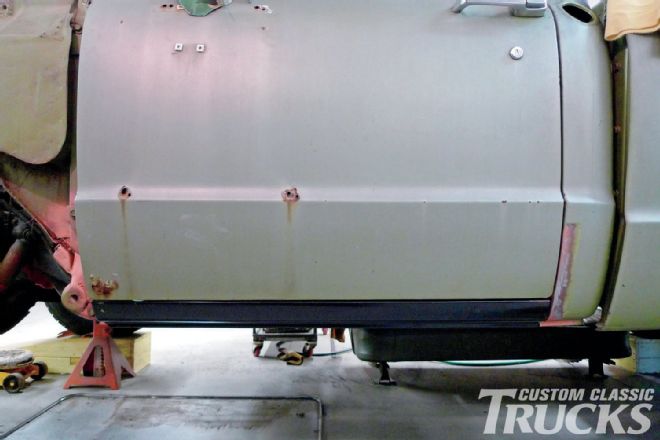 14. Now with the door on and adjusted we can clearly see that the new outer rocker panel, as well as the other patch panels involved fit remarkably well. Truth be told, however, we were not satisfied with the outer rocker panel’s alignment at first. In fact, I had to cut the tack-welds loose at the rear to get it right. Next time we’ll use TEK screws.