
The Combo
For decades Morgantown, Kentucky’s Gary Smrtic and his extended family have owned a whole stable full of Chrysler, Dodge, and Plymouth hot rods. His current daily driver is an 1980 Plymouth Arrow pickup with a swapped-in small-block Mopar 360 equipped with a relatively mild Comp Cams 268H High Energy cam. A Mopar A904 automatic trans transfers the power back to an 8¾-inch Chrysler rearend with big four-piston calipers and 11-inch rotors. That left the truck with dissimilar front and rear wheel bolt patterns—Arrow six-lug up front, standard Chrysler five-lug at the rear—so Gary swapped out the front hubs and rotors for Toyota truck parts that (even though it’s expressed metrically) have the same bolt-circle as the Chrysler rearend.
To control the brakes, Smrtic says he originally “took the stock vacuum booster and master cylinder off and installed a Mopar plastic-reservoir, manual-brake, master cylinder from a late-model pickup.” With no power assist, “it stopped fine, but with a great deal of pedal effort. As I want my 17 year-old granddaughter to use this truck to get her feet wet drag racing, I needed something that stops a little easier for her. We put the factory booster back on with a new stock replacement Arrow master cylinder, then added a Speedway adjustable proportioning valve.”
The Problem
 The power-brakes wouldn’t make more than 600 psi at the calipers—less than half what it should have been capable of unproportioned.
After his latest changes, Smrtic experienced a constant low brake pedal. “It stops OK,” claimed Smrtic in his rescue request, “but the low pedal just doesn’t feel right, and it does have a habit of pulling to the right on occasion at first hit. We’ve bled the brakes several times, but it didn’t help. Adjusting the proportioning valve made no difference.”
The Diagnosis
We sent Smrtic to Lindsey Automotive, a full-service auto repair shop in Bowling Green, Kentucky. Owner Terry Lindsey has been around for years, and has also been professionally drag racing for years—so he’s familiar with standard stock maintenance issues, traditional hot rods, and race cars alike. When Lindsey test-drove the truck, he diagnosed three significant problems:
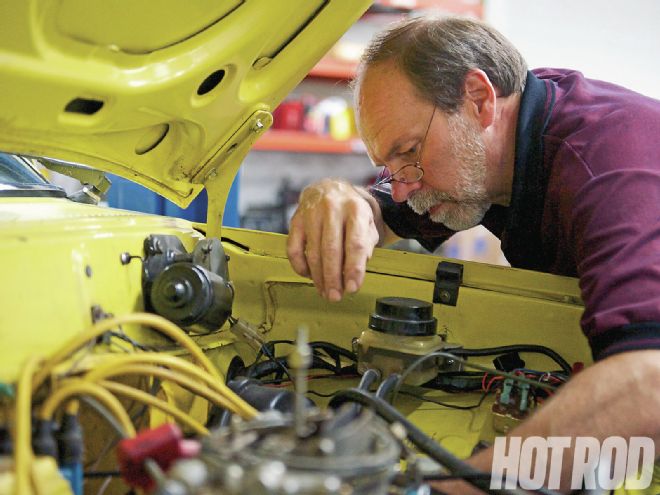 Lindsey Automotive owner Terry Lindsey diagnosed and fixed the problem using a logical, step-by-step approach.
The brake pedal had excessive free-travel before the linkage made contact with the booster and master cylinder. “The pedal would also go to the floor. The brakes would hold enough to stop safely as long as you did not have to make a quick panic stop. The brakes would not lock-up under that condition.”
Applying the brakes with the trans in Drive resulted in the brake pedal pulsing slightly up and down in unison with changes in engine rpm. “Upon investigation I discovered there was no vacuum check-valve installed between the carburetor and brake-booster.” When engine rpm changes, engine vacuum also changes. With no check-valve, changes in engine vacuum correspondingly cause vacuum fluctuations in the brake booster.
The engine “seemed to run a little sluggish when accelerating from idle like there was a problem with the timing or distributor advance controls.” Although there was no outright bog or hesitation, the engine revved-up slowly, “like it just didn’t have good power. There was something lacking.” A mistuned engine can adversely affect proper functioning of a brake system’s vacuum booster.
Next, Lindsey put the truck up on the lift to inspect the rest of the brake system. Removing the front and rear wheels revealed that “the rotors and calipers were installed correctly. There were no brake-fluid leaks detected. The fluid in the master-cylinder reservoir was at the proper level.” But as-received, the brake system made less than 600 psi.
The Fix: Static Timing
With the distributor vacuum-advance hose disconnected and plugged, Lindsey observed the initial timing as read at the harmonic balancer was actually retarded, reading 2 degrees after top dead center (ATDC). But with the vacuum-advance hose connected to a manifold vacuum port as it had been when Lindsey received the truck, the initial timing was at 12 degrees before top dead center (BTDC). Normally the base timing should be set with the distributor vacuum-advance hose temporarily disconnected and plugged; whoever had set the initial timing had overlooked this. Lindsey reset the base timing to 10 degrees BTDC (vacuum hose temporarily disconnected), increasing engine vacuum from the originally observed 9–10 inches to a satisfactory 15 inches.
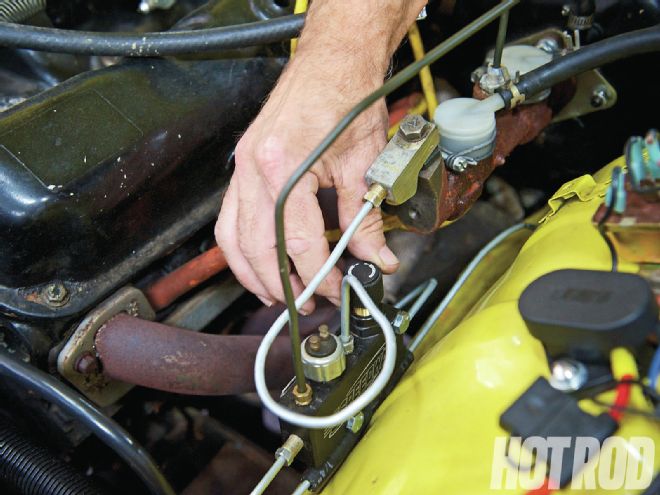
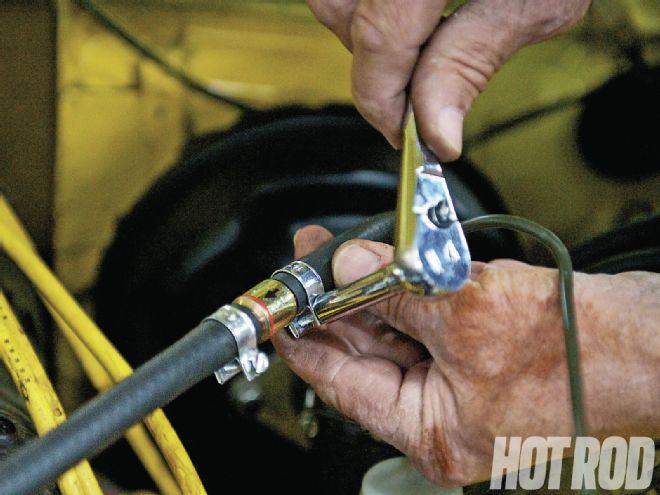 The fix: dialing-in the ignition timing, adding a missing inline vacuum check valve (shown), and properly adjusting the brake pedal linkage.
The Fix: Check-Valve
Power brake boosters need a check-valve to maintain constant vacuum. On most domestic cars we’re familiar with, the check-valve is that little round plastic part pressed into the booster cavity, with a nipple on one end that connects to a vacuum hose routed to an engine manifold vacuum port. But the stock Arrow power booster uses an inline check-valve installed in the hose itself that was missing from this installation. Although Chrysler no longer sells the valve, it’s still available from Mitsubishi, which originally built the “captive-import” Plymouth Arrow and Dodge Ram 50 for Chrysler. (Depending on the market, pure Mitsubishi-badged versions of the truck are called the Forte, Mighty Max, or L200.) Adding the valve cured the pedal-pulse problem.
The Fix: Pedal Travel
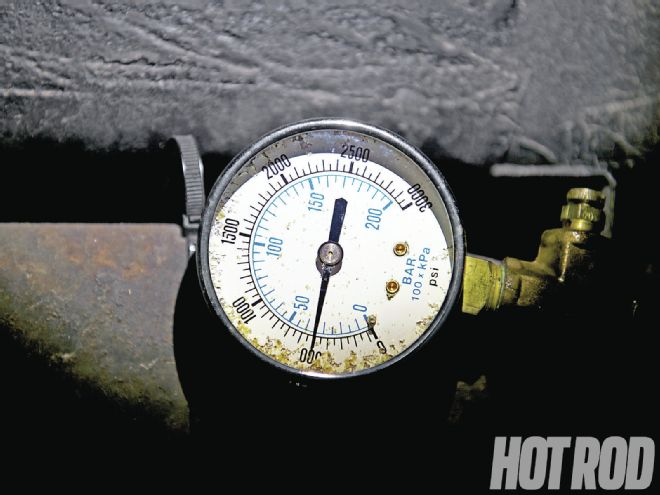
 For diagnostic purposes, the caliper bleeder screws were removed and replaced by adapters to allow monitoring the brake pressure at each caliper. Initially, both the front and rear pressure were observed to be way low: just 500–600 psi.
With these basic glitches corrected, Lindsey tackled the low brake pedal. Arrows equipped with power brakes have two pushrods: One connects the pedal to the booster; the other links the booster to the master cylinder. Fortunately, both are adjustable.
As received, the pedal could be depressed about 1½ inches before the pedal pushrod actuated the booster. Lindsey first lengthened the pedal-to-booster pushrod to eliminate free-play at the pedal, then removed the master cylinder and lengthened the forward pushrod coming out the front of the booster to remove some observed remaining lag between booster actuation and master-cylinder pushrod movement. Collectively, this solved the pedal-height issue and ensured the master-cylinder pistons achieved their full stroke to help increase line pressure.
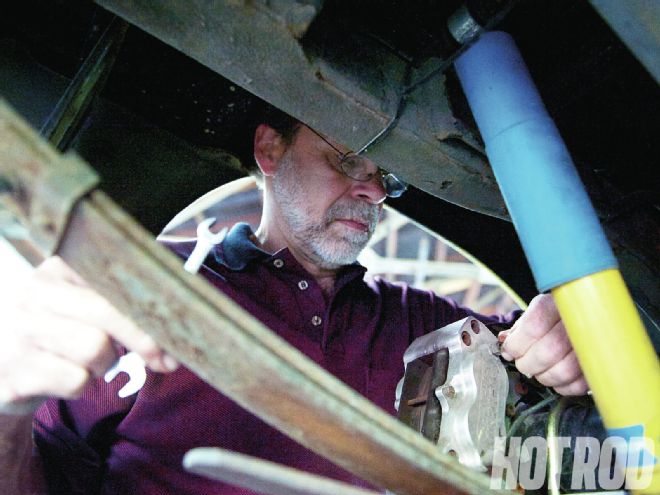
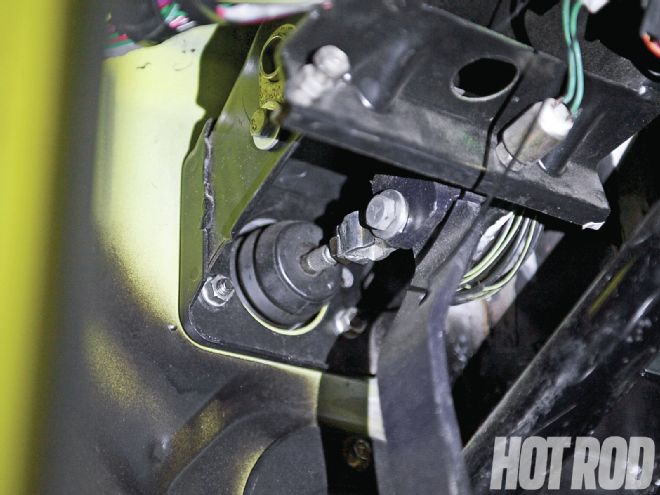 The power booster and master cylinder should actuate as soon as force is applied to the pedal. In other words, pedal free-play should be zero or near-zero. Lindsey lengthened the stock adjustable pushrod between the pedal and booster (arrow) to achieve this condition.
The Fix: Prop-Valve
With the proportioning remaining unaltered from Smrtic’s original setting, after these fixes the front brake pressure jumped to 1,500 psi, with 800 psi at the rear. With the system finally generating some serious pressure, Lindsey saw the rear brakes now had a tendency to lock up before the front binders. This wasn’t a surprise. The huge aftermarket rear brakes had calipers with four 1¾-inch pistons mounted on 11½-inch rotors, compared to the much smaller fronts with four 2-inch pistons on 9½-inch rotors. A quick prop-valve adjustment dropped rear pressure to 500 psi, restoring proper front-to-rear brake bias even with the mismatched brake sizes.
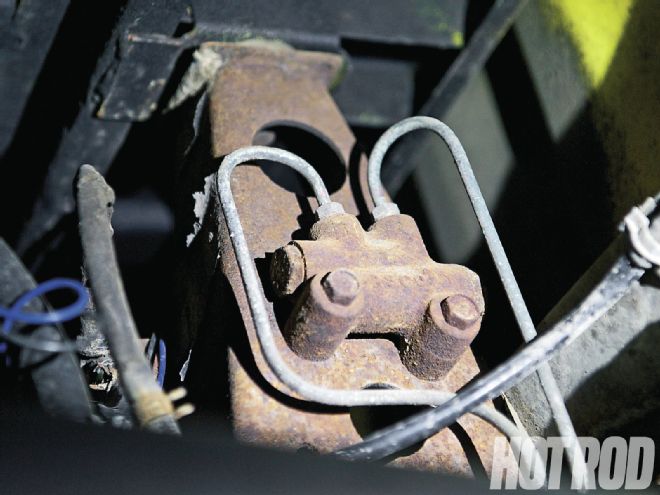 The add-on, adjustable proportioning valve had been plumbed in downstream from the master-cylinder, but upstream from the stock nonadjustable prop-valve located above the framerail behind the cab on the left-hand side. The stocker was still fully functional and hadn’t been gutted or bypassed. It remained so throughout the repair process.
Results
 The last tweak: Under full-lock, high-speed stops, Lindsey observed some “tire chirping at the rear.” The Aerospace brakes on the 8¾ Mopar rearend were larger than the factory-style brakes up front and were locking up slightly early. This was easily tuned out by adjusting the proportioning valve.
The truck stops quickly in a straight line, with no evidence of the occasional pull to the right mentioned by Smrtic in his initial rescue request. If anything, the brakes are now super-sensitive, but that’s just the way the Smrtic clan wants it.“I like the brakes to be right on the edge because it keeps me on the edge when I’m driving it,” explains granddaughter Shaedy Scott, gushing, “Grandpa, this truck is so much fun to drive!” Chimes in a happy “Grandpa” Smrtic, “I’m ecstatic! The brakes just flat work. It’s become a daily driver again—and the car runs stronger in the engine department. I can’t say enough about Mr. Lindsey.”
 With the brakes sorted out, owner Gary Smrtic’s confident that the truck’s a safe daily-driver for granddaughter Shaedy Scott (age 17).
Pressure Tests
Values are at idle with the auto trans in “Drive.” Condition Engine Vacuum Front Rear As-received 9 in-Hg 600 psi 500 psi Repaired 15 in-Hg 1,150 psi 800 psi Adjust prop-valve 15 in-Hg 1,500 psi 500 psi
Lessons Learned
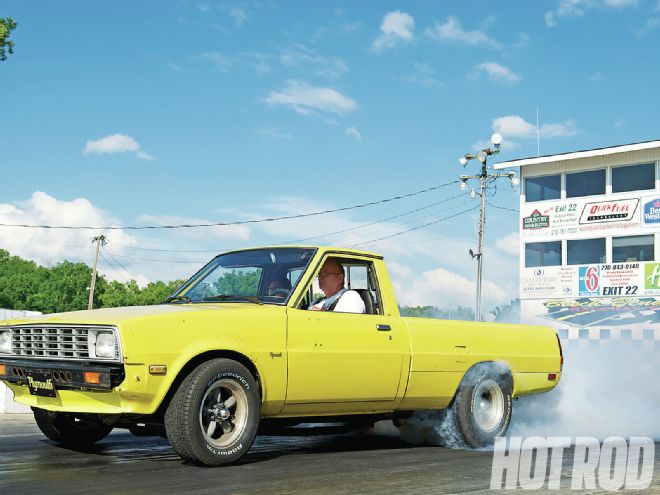 Smrtic’s brakes are no longer broke. Next stop: Beech Bend dragstrip, where the now-perfected binders restrain the truck while it burns-out.
Check the basics first. With a streetable cam, low vacuum is a sure indication of misadjusted timing, a poorly tuned carburetor, a vacuum leak, or (worst-case) an internal engine issue. Don’t overlook the little details, like a missing check-valve in this instance. The entire brake system must work together as a team. Be prepared to make the proper adjustments when mixing and matching nonstock parts.
The biggest problem was the play in the pedal and the booster. The master-cylinder pistons just weren’t getting pushed all the way through their full travel. The other issues just covered up the fundamental problem.” — Terry Lindsey, Lindsey Automotive
Need Junk Fixed?
If your car has a gremlin that just won’t quit, you could be chosen for Hot Rod to the Rescue. Email us at [email protected] and put “Rescue” in the subject line. Include a description of your problem, your location, and a daytime phone number.