Just like death and taxes are the only two sure things in life, rust and hidden damage are the only two sure things in vintage project cars. No one wants to admit it, and it's a bummer, but we all have to address them at some point in the build. We're at that point now with the Max Effort 1967 Cougar project car.
Luckily Max was originally a Southern California car, black plates and all, so our rust damage should be very limited, right? That's how the theory goes, anyway. Unfortunately, throughout our build progress on Max we uncovered patches of rust in all the usual places for muscle cars: floorboards, cowl vent, trunk floor, rear windshield, door edges, and quarter-panels by the wheels, for example. We were pretty sure there was more in hiding. We knocked out the floorboards with the help of Yannick Sire at Sire Custom Performance, but to flush out all of the body damage we sent Max to Pacific Coast Powder Coating (PCPC) for a full media blast followed by epoxy powdercoat to seal it. (See "Getting Blasted!" Mar. 2014.) The best thing about media blasting is that it uncovers the true condition of sheetmetal. That's also the worst thing about media blasting.
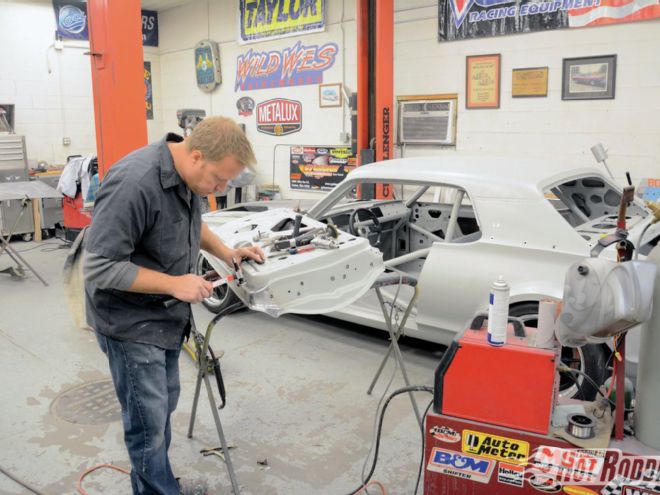
While still a very solid body, PCPC did uncover several spots of rust that needed a true bodyman's touch. We're decent at creating patches for less noticed areas, or grafting in premade patches, but it takes experience, proper equipment, and honestly a bit of artistry to create truly excellent custom body patch panels. Thankfully we found exactly the right guy to help us make Max look like it has never known rust. We've teamed up with renowned custom painter Wes Adkins at Wild Wes Paintworks in Dover, Ohio, to handle the paint and body on project Max Effort, and we'll be bringing the whole process to you in our annual paint and body special, as well as breaking down the good bits into individual tech articles here in PHR, and with exclusives on PopularHotRodding.com. To kick it off, Wild Wes is going to show us exactly how to handle creating and installing patch panels for two very common problem areas: the quarter-panel and the front corner of the door. The key point to success here is making a piece that fits effortlessly. It takes patience and lots of reshaping, but you can learn to do it.
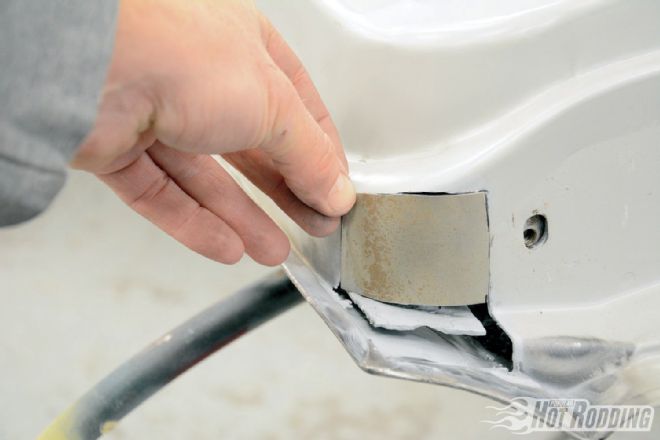
 1. Every patch begins with completely removing the rust, so cut out an area slightly larger than the visible damage. Also, try to create a simple geometric shape that is easier to reproduce in new metal rather than something more organic. This is also the right time to paint the inner structure if any bare metal is present.
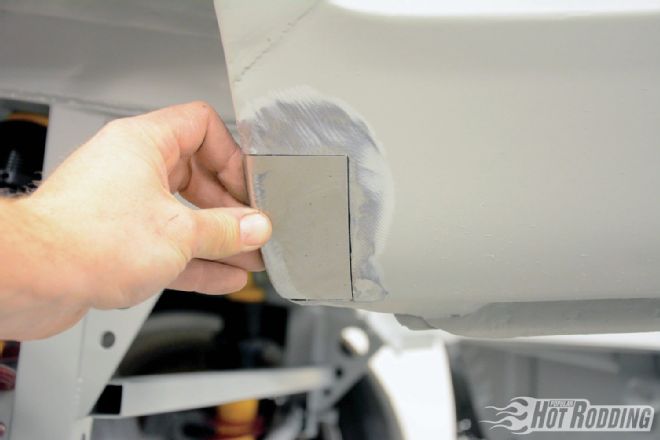
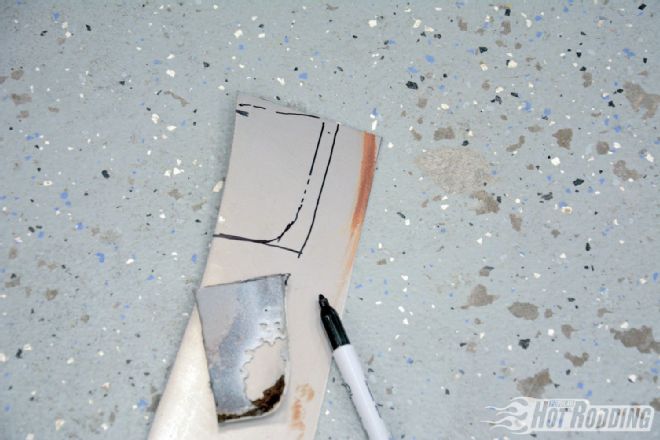 2. Since the shape is fairly simple, Wes Adkins used the piece he cut out to transfer directly onto a fresh sheet of metal. The dotted line on the inside is the actual quarter-panel line, the outer will be a tab that wraps around to the inside of the wheelwell.
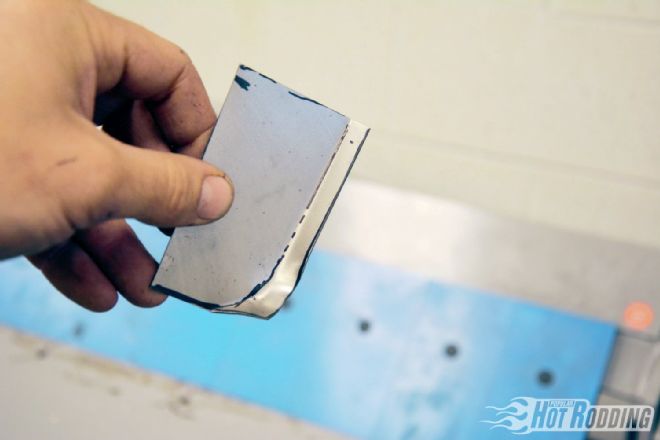
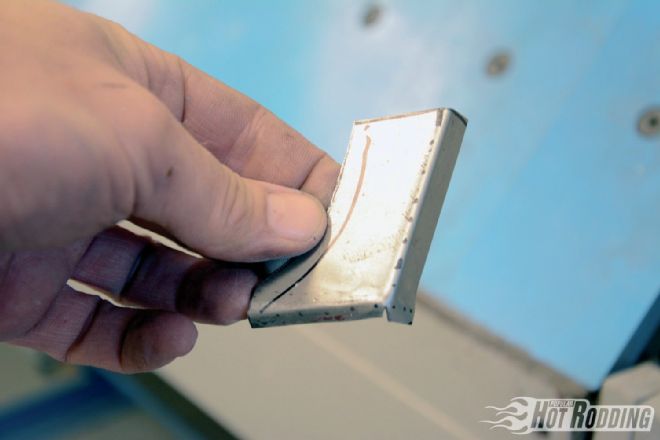
 7. The result is a tab with a smooth radius without distortion that looks like a stamped part.
 3. The ideal way to make crisp bends, especially in small pieces, is with a sheetmetal brake since it will clamp the part into place. Adkins prefers Woodward Fabrication since they are professional bodyshop level, but still quite affordable through Summit Racing. This is their BOSS-16 50-inch Box and Pan Brake.
 8. After a few trial fitments and adjustments, Adkins had a patch for Max’s quarter-panel that precisely matched what was removed.
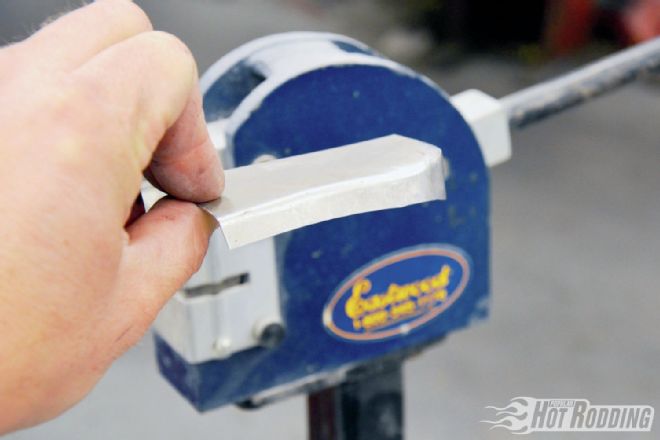
 4. Sheetmetal brakes can’t make curves, so for organic shapes like that a hammer and dolly are necessary. For small pieces like this, Adkins prefers to clamp a dolly with a handle, like this Fairmont heel dolly from Eastwood, into a table vice.
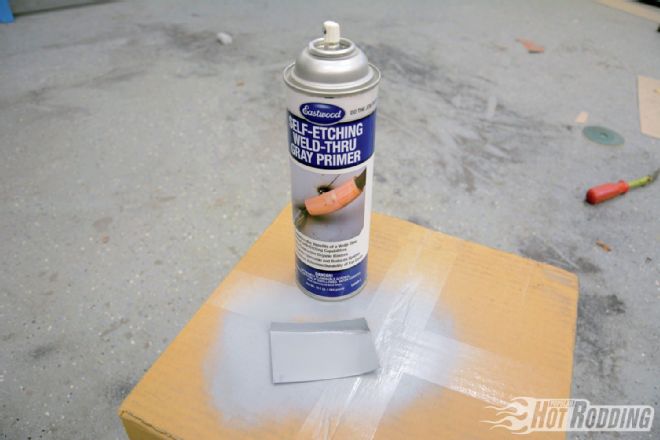 9. To protect the inside of the patch without creating a contaminated surface that could affect the weld, Adkins sprayed it with Eastwood Self-Etching Weld-Through Primer. Self-etching primer is also ideal for applying directly to bare steel with little preparation.
 5. With a Fairmont body hammer (never use a standard hammer for this), Adkins roughs in the arc of the curve using the front edge of the dolly with light but direct strikes from the body hammer.
 10. When welding on a patch panel, it’s always best to begin with small tacks at all corners to keep the heat low and help confine distortion.
 6. Asking metal to curve like this always creates an excess of material that will leave distortion in the form of lumps or ripples. To remove them, Adkins uses an Eastwood shrinker. The jaws of a shrinker actually grab and squeeze in the sheetmetal to eliminate the excess.
11. With the patch tacked solidly, Adkins uses a Fairmont body hammer from Eastwood to tap in final adjustments to the shape. Body hammers are far more effective at such shaping than a standard hammer.
6. Asking metal to curve like this always creates an excess of material that will leave distortion in the form of lumps or ripples. To remove them, Adkins uses an Eastwood shrinker. The jaws of a shrinker actually grab and squeeze in the sheetmetal to eliminate the excess.
11. With the patch tacked solidly, Adkins uses a Fairmont body hammer from Eastwood to tap in final adjustments to the shape. Body hammers are far more effective at such shaping than a standard hammer.
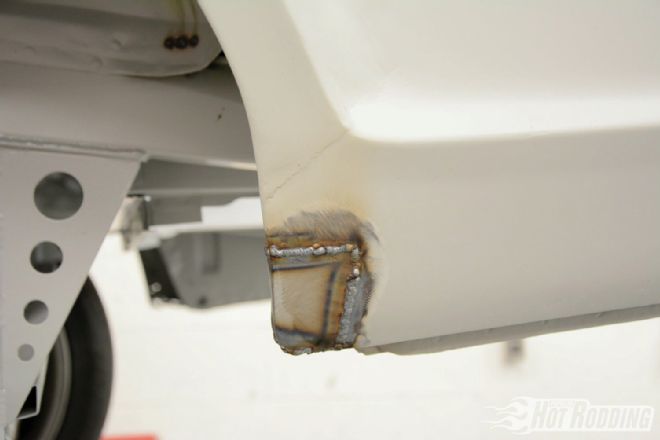 12. Satisfied with the shape, Adkins MIG welds the piece in solid.
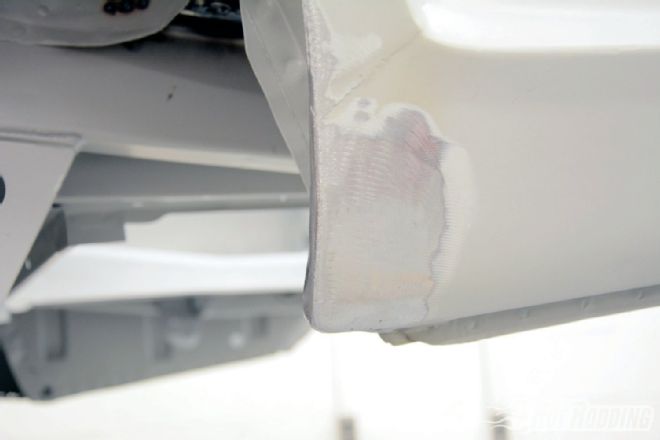 13. After attacking the welds with an abrasive wheel to smooth them out, the finished patch blends seamlessly into the quarter-panel and will require very little, if any, body filler to level.
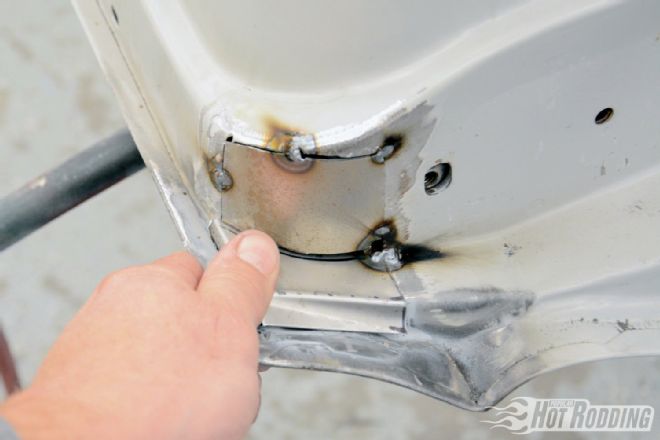
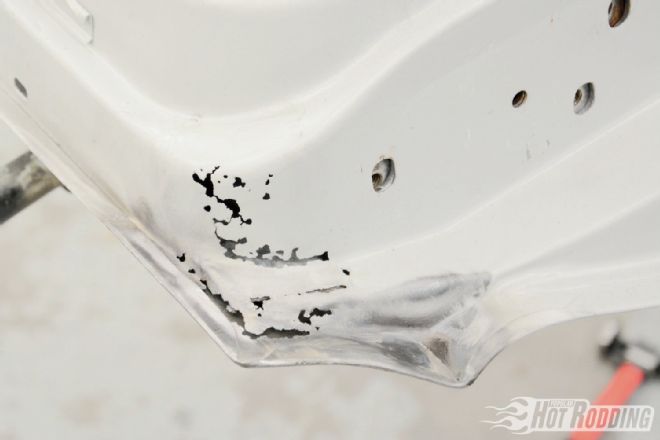 14. Here’s a perfect example of the type of hidden rust media blasting will uncover. While we knew there was a spot of rust in the outer skin door, this rusted area had started inside the doorframe and was completely hidden until blasting.
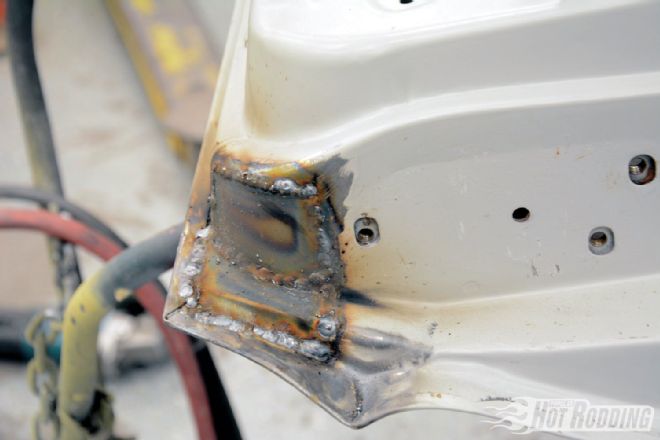
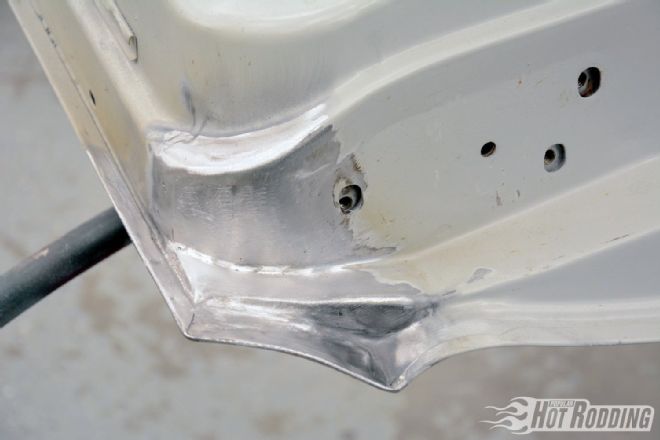 22. After grinding down the welds we have an extremely impressive patch that’s absolutely indistinguishable from the original metal. Thanks to careful welding and grinding, the original tabs for the doorskin are still visible and unaltered. As far as quality of patchwork goes, this is as good as it gets!
 15. To patch this rust, Adkins will create two separate patches. The first is a simple curve that will take care of the inner damage.
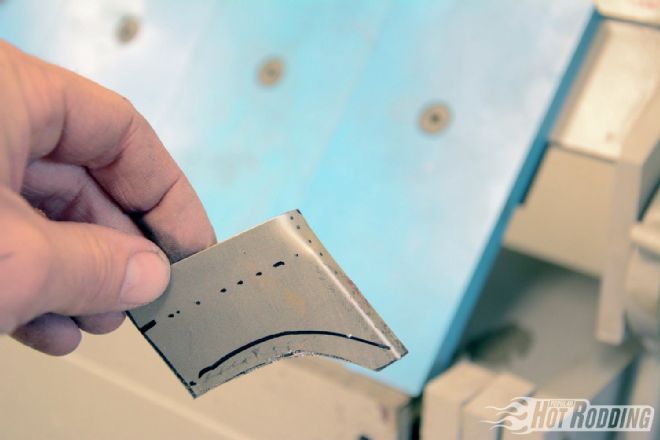 16. The second piece is a bit more complex since it needs multiple bends to match the factory stamping. After making a poster board template, Adkins cut this piece for the rough shape. The dotted lines are bends that need to be made, the curve represents where the piece will under lap the first patch.
 17. Adkins again uses the Woodward sheetmetal brake for these tiny tabs, but to make this right angle a slit is cut on the first bend to allow the second to fold up without distortion where the two meet.
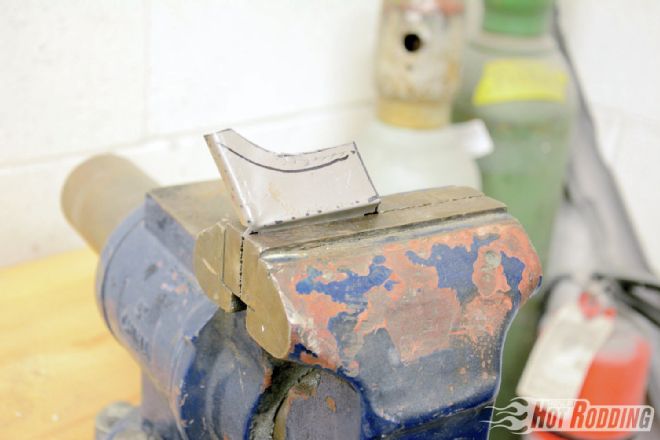 18. With multiple bends in a very small area, sometimes the only option is hand-forming with the help of a good vice and a body hammer. This stair-step type bend will mimic the factory stamping.
 19. With the basic bends in place, Adkins trial fit and trimmed the tabs by hand with metal shears until they were the right height. “Trial fit, trim, and reshape” is the mantra here, but patience pays off big in the form of a patch that will slide right into place and require less work to blend.
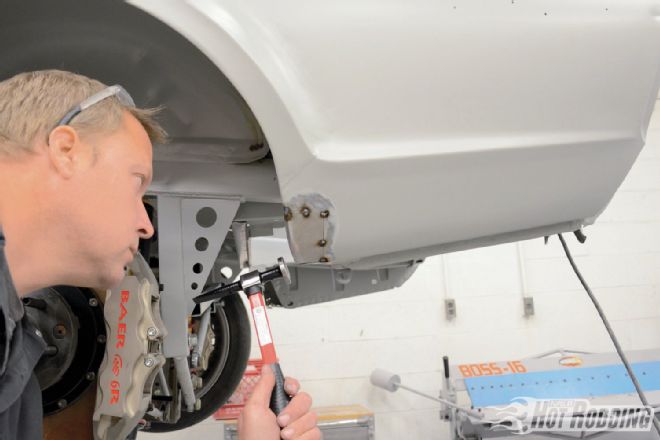
 20. With the shape very close to what he needs, Adkins tacks in the patch around the edges, then used the pick side of a different Fairmont body hammer to tap the metal into the ideal shape and create a flush fit to the original steel on all sides.
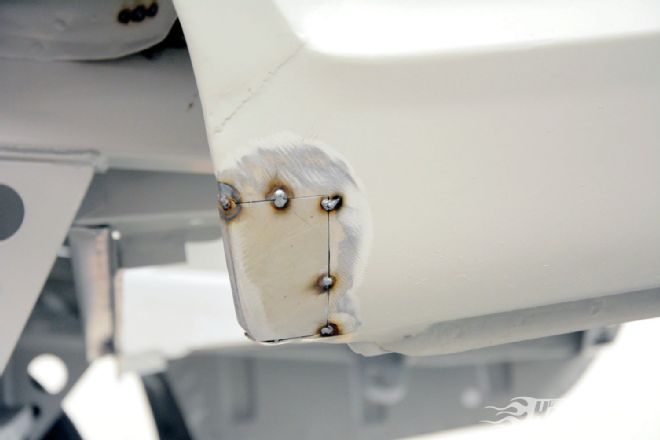
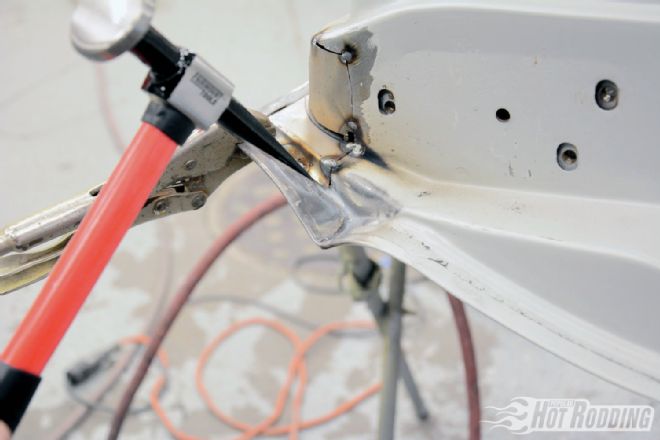
 21. After tacking the patches in on all sides, Adkins fully welded them, being cautious to stay away from the doorskin tabs.